


1.先去spring官网下载spring4.0.0的dist包 http://www.springsource.org/download/community

dist包只是spring框架的核心jar包 还需下载其相应的依赖jar包 在上面的下载页面 找到3.0.1.RELEASE 下载
| spring-framework-3.0.1.RELEASE-dependencies.zip | (sha1) |

2.在javaee--eclipse环境下新建一个dynamic web project,名为spring_first
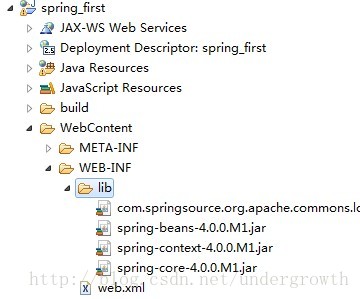
进入到上一步下载解压的spring-framework-4.0.0.M1的目录中 进入libs文件夹 找到spring-context-support-4.0.0.M1.jar和spring-core-4.0.0.M1.jar和spring-beans-4.0.0.M1.jar三个jar包 将之拷贝到spring_first\WebContent\WEB-INF\lib目录下
同时 在上一步下载的依赖包中 即spring-framework-3.0.1.RELEASE-dependencies\org.apache.commons\com.springsource.org.apache.commons.logging\1.1.1\com.springsource.org.apache.commons.logging-1.1.1.jar 找到commons-logging的jar包 同样添加到spring_first\WebContent\WEB-INF\lib目录下
添加完以上四个jar包后 效果如下
3.编写spring的配置文件 可以参看spring官网提供的手册 在spring-framework-4.0.0.M1\docs\spring-framework-reference\htmlsingle目录中打开index.html
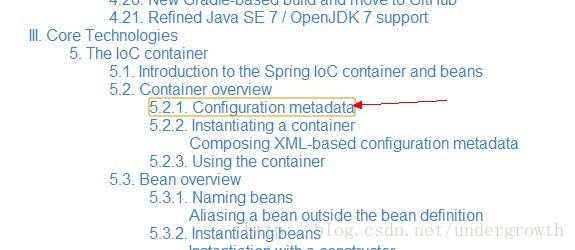
点击上面的5.2.1 配置元数据 就会看到如下配置信息
- <?xml version="1.0" encoding="UTF-8"?>
- <beans xmlns="http://www.springframework.org/schema/beans"
- xmlns:xsi="http://www.w3.org/2001/XMLSchema-instance"
- xsi:schemaLocation="http://www.springframework.org/schema/beans
- http://www.springframework.org/schema/beans/spring-beans.xsd">
- <bean id="..." class="...">
- <!-- collaborators and configuration for this bean go here -->
- </bean>
- <bean id="..." class="...">
- <!-- collaborators and configuration for this bean go here -->
- </bean>
- <!-- more bean definitions go here -->
- </beans>
在spring_first的src目录下新建一个first.xml的文件 添加如下配置信息
- <?xml version="1.0" encoding="UTF-8"?>
- <beans xmlns="http://www.springframework.org/schema/beans"
- xmlns:xsi="http://www.w3.org/2001/XMLSchema-instance"
- xsi:schemaLocation="http://www.springframework.org/schema/beans
- http://www.springframework.org/schema/beans/spring-beans.xsd">
- <bean id="firstSpring" class="com.undergrowth.FirstSpring">
- </bean>
- </beans>
4.编写com.undergrowth.FirstSpring类
FirstSpring.java
- package com.undergrowth;
- import java.util.Date;
- public class FirstSpring {
- public void first()
- {
- System.out.println("第一个spring程序"+new Date().toLocaleString());
- }
- }
5.编写测试代码 在src目录下新建一个junit test case

在Junit.java的文件中加入测试代码 如下
- package com.junit;
- import static org.junit.Assert.*;
- import org.junit.BeforeClass;
- import org.junit.Test;
- import org.springframework.context.ApplicationContext;
- import org.springframework.context.support.ClassPathXmlApplicationContext;
- import com.undergrowth.FirstSpring;
- public class Junit {
- @BeforeClass
- public static void setUpBeforeClass() throws Exception {
- }
- @Test
- public void test() {
- ApplicationContext ct=new ClassPathXmlApplicationContext("first.xml");
- FirstSpring sf=(FirstSpring) ct.getBean("firstSpring");
- sf.first();
- }
- }
运行test方法 结果报错 如下
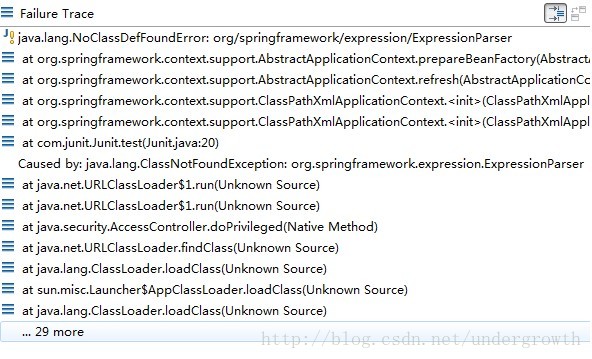
表达式解析类无法找到 去spring-framework-4.0.0.M1\libs中找到spring-expression-4.0.0.M1.jar 添加到lib中
再次运行 没有错误了 打印出结果了

以上即是spring4.0.0的环境配置


 3204
3204


 被折叠的 条评论
为什么被折叠?
被折叠的 条评论
为什么被折叠?
 到【灌水乐园】发言


