


版本:unity 5.4.1 语言:C#
第九章是海水,整整用了70多页,但是并没有什么用,还是要自己去看代码揣摩其中的含义。
既然讲到海水,我就想认真的学一下,看看书上的实现过程,再网上找找海水的文章做一下汇总,一片的篇幅肯定是装不下的。我对水的实现是非常执着的,起因的话要说到Minecraft的Shadows Mod,这里就不展开了。
没有学到Shader是致命的硬伤,我在我的能力范围内能写多少是多少,对自己也是个挑战。
今天讲讲海水网格的实现,如果读过之前文章读者肯定知道使用代码如何生成网格,不清楚的同学可以去Minecraft核心渲染机制的简单实现那篇博客上看看,原理是一样的。
首先看看效果图吧:
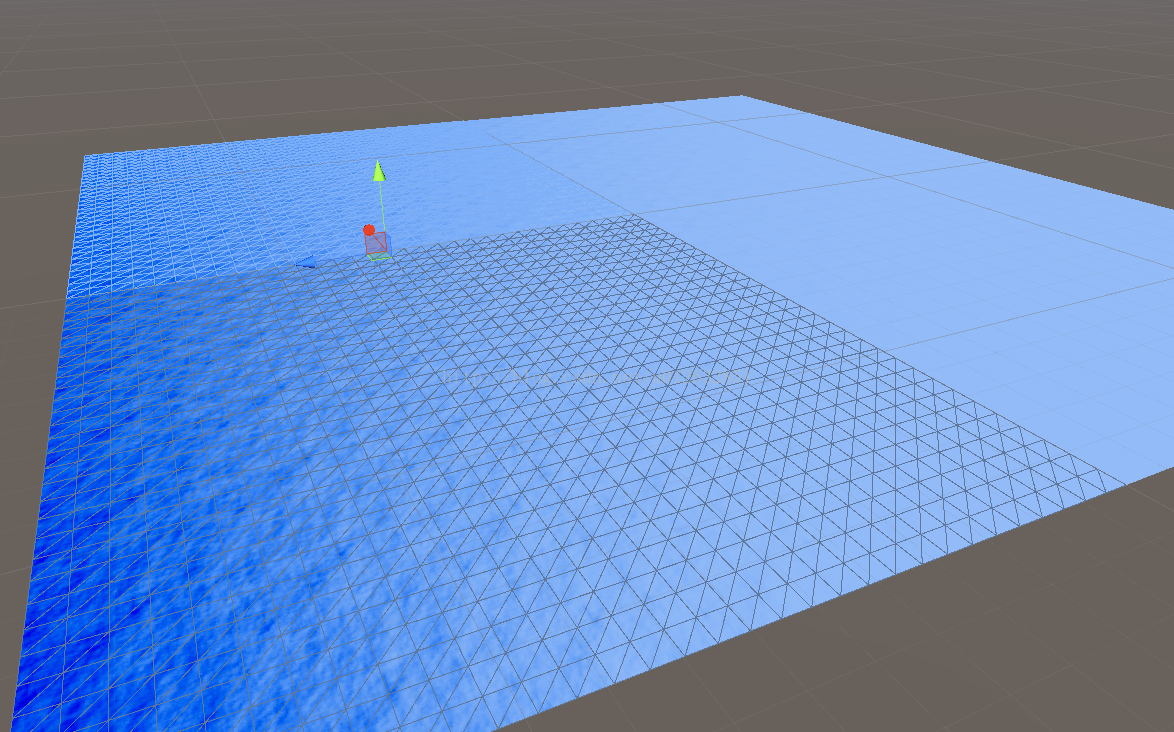
生成了4片,每一片中有32*32的网格数量。
下面来看看代码,顺便一提书上实现了LOD,简单的来说就是如果你形成的海洋比较大的话,远处的海水面并不需要那么多网格,就减少远处网格的数量,在这边是个很好的案例:
public class Ocean : MonoBehaviour {

    // 一片区域网格横纵数量
    public int width = 32;
    public int height = 32;

    // 区域的数量和大小
    public int tiles = 2;
    public Vector3 size = new Vector3(150f, 1f, 150f);

    // 材质
    public Material material;

    // 组成网格横纵的线条数量
    int g_height;
    int g_width;

    // 网格相关
    Vector3[] vertices; //顶点
    Vector3[] normals;  //法线
    Vector4[] tangents; //三角
    Mesh baseMesh;

    // LOD,越在靠后List的Mesh,网格越少
    int maxLOD = 4;
    List<List<Mesh>> tiles_LOD;

    // Use this for initialization
    void Start ()
    {
        // 计算线条数量
        g_height = height + 1;
        g_width = width + 1;

        // LOD,Mesh所在的List的LOD List编号越小,Mesh的网格越多
        tiles_LOD = new List<List<Mesh>>();
        for(int LOD = 0; LOD < maxLOD; LOD++)
        {
            tiles_LOD.Add(new List<Mesh>());
        }

        for(int y = 0; y < tiles; ++y)
        {
            for(int x = 0; x < tiles; ++x)
            {
                Debug.Log("创建了一片水");
                float cy = y - Mathf.Floor(tiles * 0.5f);
                float cx = x - Mathf.Floor(tiles * 0.5f);

                // 创建一片水
                GameObject tile = new GameObject("WaterTile");

                // 坐标以当前节点为中心
                tile.transform.parent = transform;
                tile.transform.localPosition = new Vector3(cx * size.x, 0f, cy * size.z);

                // 添加Mesh渲染组件
                tile.AddComponent<MeshFilter>();
                tile.AddComponent<MeshRenderer>().material = material;

                tile.layer = LayerMask.NameToLayer("Water");
                tiles_LOD[0].Add(tile.GetComponent<MeshFilter>().mesh);
            }
        }
        GenerateHeightmap();
    }

    // 初始化Mesh信息
    void GenerateHeightmap()
    {
        Mesh mesh = new Mesh();

        int y = 0;
        int x = 0;

        // 创建顶点和uv坐标
        Vector3[] vertices = new Vector3[g_height * g_width];
        Vector4[] tangents = new Vector4[g_height * g_width];
        Vector2[] uv = new Vector2[g_height * g_width];

        // uv和顶点坐标的缩放值(如果要创建width*height的网格)
        Vector2 uvScale = new Vector2(1.0f / (g_width - 1f), 1.0f / (g_height - 1f));
        Vector3 sizeScale = new Vector3(size.x / (g_width - 1f), size.y, size.z / (g_height - 1f));

        // 顶点和uv坐标一个一个排列过去,在之前MC创建方块的时候没用使用这样的方法,是每个面就对应四个顶点,很多顶点都重复了
        for(y = 0; y < g_height; ++y)
        {
            for(x = 0; x < g_width; ++x)
            {
                vertices[y * g_width + x] = Vector3.Scale(new Vector3(x, 0f, y), sizeScale);
                uv[y * g_width + x] = Vector2.Scale(new Vector2(x, y), uvScale);
            }
        }
        mesh.vertices = vertices;
        mesh.uv = uv;

        // 设置切线,暂时不清楚为什么要这么设置
        for(y = 0; y < g_height; ++y)
        {
            for(x = 0; x < g_width; ++x)
            {
                tangents[y * g_width + x] = new Vector4(1f, 0f, 0f, -1f);
            }
        }
        mesh.tangents = tangents;
        baseMesh = mesh;

        // 生成LOD对应的网格,数组越靠后,网格越大、数量越少
        for (int LOD = 0; LOD < maxLOD; ++LOD)
        {
            Vector3[] verticesLOD = new Vector3[(int)(height / System.Math.Pow(2, LOD) + 1) * (int)(width / System.Math.Pow(2, LOD) + 1)];
            Vector2[] uvLOD = new Vector2[(int)(height / System.Math.Pow(2, LOD) + 1) * (int)(width / System.Math.Pow(2, LOD) + 1)];
            int idx = 0;

            for(y = 0; y < g_height; y += (int)System.Math.Pow(2,LOD))
            {
                for(x = 0; x < g_width; x += (int)System.Math.Pow(2, LOD))
                {
                    verticesLOD[idx] = vertices[g_width * y + x];
                    uvLOD[idx++] = uv[g_width * y + x];
                }
            }

            // tiles_LOD中的网格都替换成为LOD优化过的网格
            for(int k = 0; k < tiles_LOD[LOD].Count; ++k)
            {
                Mesh meshLOD = tiles_LOD[LOD][k];
                meshLOD.vertices = verticesLOD;
                meshLOD.uv = uvLOD;
            }
        }

        // 三角顶点信息,一个方块对应两个三角、对应六个顶点
        for(int LOD = 0; LOD < maxLOD; ++LOD)
        {
            int index = 0;
            int width_LOD = (int)(width / System.Math.Pow(2, LOD) + 1);
            int[] triangles = new int[(int)(height / System.Math.Pow(2, LOD) * width / System.Math.Pow(2, LOD)) * 6];
            for(y = 0; y < (int)(height / System.Math.Pow(2, LOD)); ++y)
            {
                for(x = 0; x < (int)(width / System.Math.Pow(2, LOD)); ++x)
                {
                    // 这边逆时针绘制了,按照以前的测试要顺时针才能看见,可能跟切线法线有关
                    triangles[index++] = (y * width_LOD) + x;
                    triangles[index++] = ((y + 1) * width_LOD) + x;
                    triangles[index++] = (y * width_LOD) + x + 1;

                    triangles[index++] = ((y + 1) * width_LOD) + x;
                    triangles[index++] = ((y + 1) * width_LOD) + x + 1;
                    triangles[index++] = (y * width_LOD) + x + 1;
                }
            }

            // 三角替换
            for (int k = 0; k < tiles_LOD[LOD].Count; ++k)
            {
                Mesh meshLOD = tiles_LOD[LOD][k];
                meshLOD.triangles = triangles;
            }
        }
    }
}
了解网格的创建的话并不是很难的代码,不过这边还是有两个疑问待解决:
1.之前的博客中确实顺时针画三角面才能看到顶点,但这边是逆时针
2.切线为什么要设置为Vector4(1, 0, 0, -1),网上我看到有设置为Vector4(1, 0, 0, -1),不明白,百度里这类的教程太少了。
昨天我没有看代码,因为我看到了弗洛伊德算法、傅立叶变化,然后去研究了,结果傅立叶变化搞了一下午,但是看其中的算法还是一头雾水。
这边推荐一下我昨天看的文章:如果看了此文你还不懂傅里叶变换,那就过来掐死我吧【完整版】


 1171
1171


 被折叠的 条评论
为什么被折叠?
被折叠的 条评论
为什么被折叠?
 到【灌水乐园】发言


