


OK,上篇博客我们介绍了Spring中一些常见的配置,上篇博客中介绍到的都是非常常见的注解,但是在Spring框架中,常见的注解除了上篇博客提到的之外,还有许多其他的注解,只不过这些注解相对于上文提到过的注解使用频率稍微低一些,当然这个使用频率只是相对而言。OK,那么接下来我们就再来了解Spring中的几个注解。
Spring Aware
一般情况下,我们在使用Spring框架时,Bean和Spring容器之间的耦合度是非常低的,我们甚至可以把Spring容器替换成其他的容器,这样当然非常方便。但是有的时候我们可能需要Spring框架提供的其他资源,而这种需求其实也是非常常见的,那么这个时候我们就需要使用Spring Aware了,当然,如果我们在项目中使用了Spring Aware,这也就提高了Bean和Spring框架的耦合度。
Aware本身是一个接口,Spring中提供了许多实现了这个接口的类,这些类都实现了不同的功能,如下:
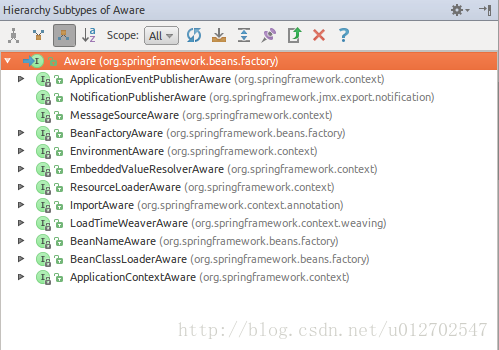
OK,这里我选择其中三个来给小伙伴们演示一下。
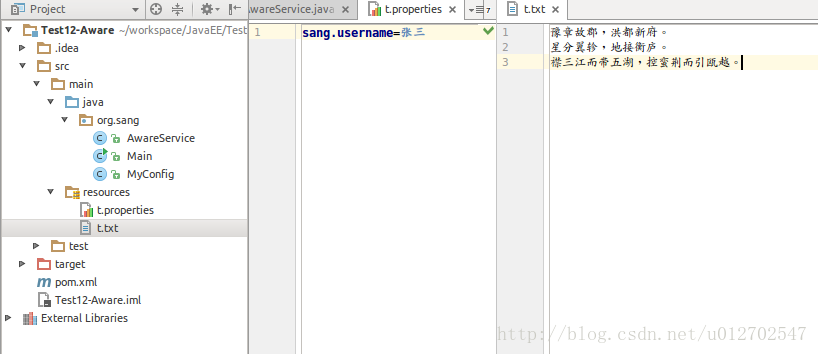
1.在项目中新建两个资源文件,t.properties和t.txt,内容随意,我以我自己的为例:
2.创建一个可以获取系统信息的Bean
@Service
@PropertySource(value = "t.properties", encoding = "UTF-8")
public class AwareService implements BeanNameAware, BeanFactoryAware, ResourceLoaderAware, EnvironmentAware {
    private String beanName;
    private ResourceLoader loader;
    private Environment environment;

    public void setBeanName(String s) {
        this.beanName = s;
    }

    public void setResourceLoader(ResourceLoader resourceLoader) {
        this.loader = resourceLoader;
    }

    public void output() {
        System.out.println("Bean的名称为:" + beanName);
        Resource resource = loader.getResource("t.txt");
        try {
            System.out.println(IOUtils.toString(resource.getInputStream(), "UTF-8"));
        } catch (IOException e) {
            e.printStackTrace();
        }
        System.out.println(environment.getProperty("sang.username"));
    }

    public void setBeanFactory(BeanFactory beanFactory) throws BeansException {
        //获取Bean的生成工厂
    }

    public void setEnvironment(Environment environment) {
        this.environment = environment;
    }
}
大家注意,实现每一个接口都是为了不同的目的,BeanNameAware可以帮助我们获得Bean的名称,BeanFactoryAware可以帮助我们获取当前Bean factory,ResourceLoaderAware可以帮助我们获取资源加载器,可以帮助我们获取外部资源文件。实现了这里的每一个接口,每一个接口都对应了相应的方法需要实现,在相应的方法中我们就可以获取运行的结果。
3.配置类
@Configuration
@ComponentScan("org.sang")
public class MyConfig {
}
4.运行
public class Main {
public static void main(String[] args) {
AnnotationConfigApplicationContext context = new AnnotationConfigApplicationContext(MyConfig.class);
AwareService bean = context.getBean(AwareService.class);
bean.output();
context.close();
}
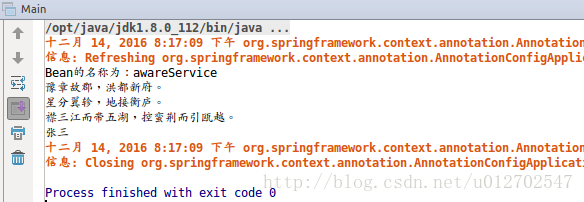
}运行结果:
本案例下载地址:
Spring 多线程
多线程也是我们开发中一个避不掉的问题,涉及到多线程时我们大多数情况下都会使用到线程池,Spring对此也提供了很好的支持,接下来我们就来看看在Spring中使用线程池有哪些方便的地方。
1.创建配置类,创建线程池
@Configuration
@ComponentScan("org.sang")
@EnableAsync//开启异步任务支持
public class TaskExecutorConfig implements AsyncConfigurer {
    //返回一个线程池
    public Executor getAsyncExecutor() {
        //创建并配置线程池
        ThreadPoolTaskExecutor taskExecutor = new ThreadPoolTaskExecutor();
        taskExecutor.setCorePoolSize(2);
        taskExecutor.setMaxPoolSize(5);
        taskExecutor.setQueueCapacity(25);
        taskExecutor.initialize();
        return taskExecutor;
    }

    public AsyncUncaughtExceptionHandler getAsyncUncaughtExceptionHandler() {
        return null;
    }
}这里的配置类实现了AsyncConfigurer接口,并重写了getAsyncExecutor()方法,该方法返回一个TreadPoolTaskExecutor类,该类中包含了线程池类,关于这个类的配置我这里不再赘述,这和Java的线程池基本没什么区别。
2.创建任务执行类
@Service
public class AsyncTaskService {
    @Async
    public void executeAsyncTask(int i) {
        System.out.println("异步任务1:" + i+";Thread.currentThread().getName():"+Thread.currentThread().getName());
    }

    @Async
    public void executeAsyncTask2(int i) {
        System.out.println("异步任务2:" + i+";Thread.currentThread().getName():"+Thread.currentThread().getName());
    }
}
我们使用@Async注解表明该方法是一个异步方法,如果这个注解添加在类上,则表明这个类的所有方法都是异步方法。
3.运行
public class Main {
public static void main(String[] args) {
AnnotationConfigApplicationContext context = new AnnotationConfigApplicationContext(TaskExecutorConfig.class);
AsyncTaskService bean = context.getBean(AsyncTaskService.class);
System.out.println(Thread.currentThread().getName());
for (int i = 0; i < 10; i++) {
bean.executeAsyncTask(i);
bean.executeAsyncTask2(i);
}
context.close();
}
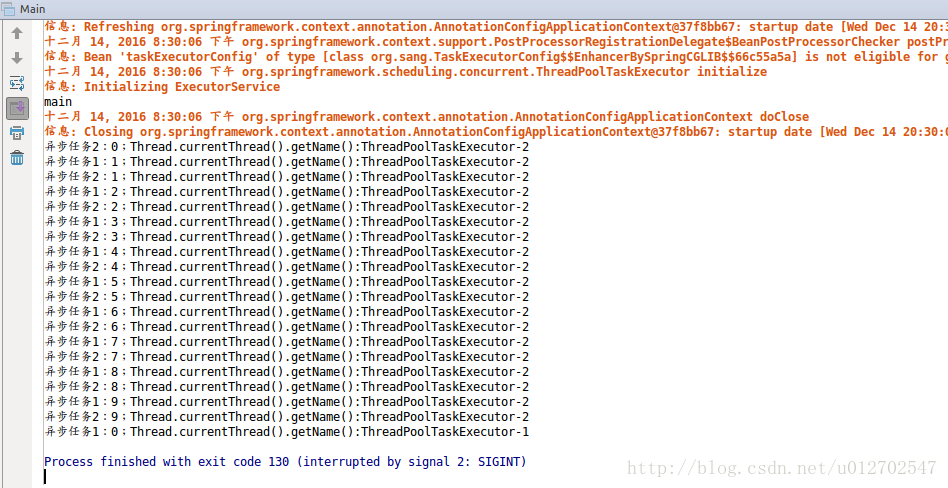
}运行结果:
本案例下载地址:
Spring 计划任务
Spring中对计划任务的支持也是非常NB,使用起来也非常方便,包括定时执行延迟指定等,使用起来都是非常方便,我们来看看。
1.创建计划任务执行类
@Service
public class ScheduledTaskService {
    private static final SimpleDateFormat FORMAT = new SimpleDateFormat("HH:mm:ss");

    @Scheduled(fixedRate = 5000)
    public void reportCurrentTime() {
        System.out.println("每隔5秒执行一次:" + FORMAT.format(new Date()));
    }

    @Scheduled(fixedDelay = 10000)
    public void delayExecuteTask() {
        System.out.println("延迟10s之后,每隔10s执行一次");
    }

    /**
     * CronTrigger配置格式:
     格式: [秒] [分] [小时] [日] [月] [周] [年]
     序号 说明 是否必填 允许填写的值 允许的通配符
     1   秒    是      0-59 ,         - * /
     2    分    是      0-59 ,        - * /
     3    小时  是      0-23 ,       - * /
     4    日    是      1-31 ,      - * ? / L W
     5    月    是    1-12 or JAN-DEC , - * /
     6    周     是     1-7 or SUN-SAT , - * ? / L #
     7    年     否     empty 或 1970-2099 , - * /

     通配符说明:
     * 表示所有值. 例如:在分的字段上设置 "*",表示每一分钟都会触发。
     ? 表示不指定值。使用的场景为不需要关心当前设置这个字段的值。例如:要在每月的10号触发一个操作,但不关心是周几,所以需要周位置的那个字段设置为"?" 具体设置为 0 0 0 10 * ?
     - 表示区间。例如在小时上设置 "10-12",表示 10,11,12点都会触发。
     , 表示指定多个值,例如在周字段上设置 "MON,WED,FRI" 表示周一,周三和周五触发
     / 用于递增触发。如在秒上面设置"5/15" 表示从5秒开始,每增15秒触发(5,20,35,50)。 在月字段上设置'1/3'所示每月1号开始,每隔三天触发一次。
     L 表示最后的意思。在日字段设置上,表示当月的最后一天(依据当前月份,如果是二月还会依据是否是润年[leap]), 在周字段上表示星期六,相当于"7"或"SAT"。如果在"L"前加上数字,则表示该数据的最后一个。例如在周字段上设置"6L"这样的格式,则表示“本 月最后一个星期五"
     W 表示离指定日期的最近那个工作日(周一至周五). 例如在日字段上设置"15W",表示离每月15号最近的那个工作日触发。如果15号正好是周六,则找最近的周五(14号)触发, 如果15号是周未,则找最近的下周一(16号)触发.如果15号正好在工作日(周一至周五),则就在该天触发。如果指定格式为 "1W",它则表示每月1号往后最近的工作日触发。如果1号正是周六,则将在3号下周一触发。(注,"W"前只能设置具体的数字,不允许区间"-").
     小提示
     'L'和 'W'可以一组合使用。如果在日字段上设置"LW",则表示在本月的最后一个工作日触发(一般指发工资 )
     # 序号(表示每月的第几个周几),例如在周字段上设置"6#3"表示在每月的第三个周六.注意如果指定"#5",正好第五周没有周六,则不会触发该配置(用 在母亲节和父亲节再合适不过了)
     小提示
     周字段的设置,若使用英文字母是不区分大小写的 MON 与mon相同.

     常用示例:
     0 0 12 * * ? 每天12点触发
     0 15 10 ? * * 每天10点15分触发
     0 15 10 * * ? 每天10点15分触发
     0 15 10 * * ? * 每天10点15分触发
     0 15 10 * * ? 2005 2005年每天10点15分触发
     0 * 14 * * ? 每天下午的 2点到2点59分每分触发
     0 0/5 14 * * ? 每天下午的 2点到2点59分(整点开始,每隔5分触发)
     0 0/5 14,18 * * ? 每天下午的 2点到2点59分(整点开始,每隔5分触发) 每天下午的 18点到18点59分(整点开始,每隔5分触发)
     0 0-5 14 * * ? 每天下午的 2点到2点05分每分触发
     0 10,44 14 ? 3 WED 3月分每周三下午的 2点10分和2点44分触发
     0 15 10 ? * MON-FRI 从周一到周五每天上午的10点15分触发
     0 15 10 15 * ? 每月15号上午10点15分触发
     0 15 10 L * ? 每月最后一天的10点15分触发
     0 15 10 ? * 6L 每月最后一周的星期五的10点15分触发
     0 15 10 ? * 6L 2002-2005 从2002年到2005年每月最后一周的星期五的10点15分触发
     0 15 10 ? * 6#3 每月的第三周的星期五开始触发
     0 0 12 1/5 * ? 每月的第一个中午开始每隔5天触发一次
     0 11 11 11 11 ? 每年的11月11号 11点11分触发

     参考网址:http://blog.csdn.net/irencewh/article/details/45332295(出处没找到)
     */
    @Scheduled(cron = "0 51 20 * * ?")
    public void fixTimeExecution() {
        System.out.println("在指定时间:"+FORMAT.format(new Date())+"执行");
    }
}
2.配置类
@Configuration
@ComponentScan("org.sang")
@EnableScheduling//开启对计划任务的支持
public class MyConfig {
}
3.运行
public class Main {
    private static final SimpleDateFormat FORMAT = new SimpleDateFormat("HH:mm:ss");

    public static void main(String[] args) {
        AnnotationConfigApplicationContext context = new AnnotationConfigApplicationContext(MyConfig.class);
        ScheduledTaskService bean = context.getBean(ScheduledTaskService.class);
        System.out.println("当前时间:"+FORMAT.format(new Date()));
    }
}
运行结果:

本案例下载地址
Spring 条件注解@Conditional
@Conditional注解有点类似于@Profile注解,只不过比起@Profile更灵活。使用@Conditional注解我们可以根据条件更加灵活的创建Bean。我们来看一个案例。假设我想获取一个查看当前目录的命令,在Windows下该命令为dir,在Linux下该命令为ls,当程序运行在Windows下时返回dir,当程序运行在Linux下时返回ls。我们来看看这个怎么实现。
1.判定Windows的条件
public class WindowsCondition implements Condition {
    public boolean matches(ConditionContext conditionContext, AnnotatedTypeMetadata annotatedTypeMetadata) {
        return conditionContext.getEnvironment().getProperty("os.name").contains("Windows");
    }
}
2.判定Linux条件
public class LinuxCondition implements Condition {
    public boolean matches(ConditionContext conditionContext, AnnotatedTypeMetadata annotatedTypeMetadata) {
        return conditionContext.getEnvironment().getProperty("os.name").contains("Linux");
    }
}
3.Bean 接口
public interface ListService {
    public String showListCmd();
}
4.Windows下的Bean
public class WindowsListService implements ListService{
    public String showListCmd() {
        return "dir";
    }
}
5.Linux下的Bean
public class LinuxListService implements ListService {
    public String showListCmd() {
        return "ls";
    }
}
6.配置类
@Configuration
public class MyConfig {
@Bean
@Conditional(WindowsCondition.class)
public ListService windowListService() {
return new WindowsListService();
}
@Bean
@Conditional(LinuxCondition.class)
public ListService linuxListService() {
return new LinuxListService();
}
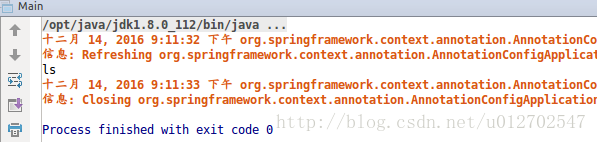
}根据@Conditional注解,当条件满足WindowsCondition时返回WindowListService的实例,当条件满足LinuxConditional时返回LinuxListService的实例。
7.运行
public class Main {
    public static void main(String[] args) {
        AnnotationConfigApplicationContext context = new AnnotationConfigApplicationContext(MyConfig.class);
        ListService bean = context.getBean(ListService.class);
        System.out.println(bean.showListCmd());
        context.close();
    }
}
运行结果(我的程序跑在Ubuntu下,所以返回ls):
本案例下载地址:
Spring 组合注解与元注解
一言以蔽之,元注解是一种使用在别的注解上的注解,被注解的注解称为组合注解,我们以配置类中常用的@Configuration和@ComponentScan这两个为例,把这两个整合成一个注解,看看怎么做。
1.自定义组合注解
@Target(ElementType.TYPE)
@Retention(RetentionPolicy.RUNTIME)
@Documented
@Configuration
@ComponentScan
public @interface WiselyConfiguration {
    String[] value();
}
在这里@Configuration和@ComponentScan都将作为WiselyConfiguration的注解,所以它们两个是元注解,而WiselyConfiguration则是组合注解。
2.创建服务Bean
@Service
public class DemoBean {
    public void output() {
        System.out.println("襟三江而带五湖,控蛮荆而引瓯越");
    }
}
3.创建配置类
@WiselyConfiguration("org.sang")
public class MyConfig {
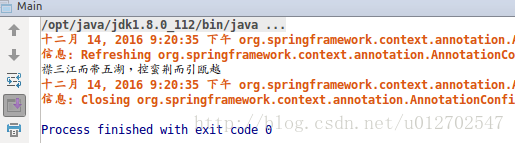
}配置中只需要一个@WiselyConfiguration注解即可,它可以代替原有的@Configuration和@ComponentScan。
4.运行
public class Main {
    public static void main(String[] args) {
        AnnotationConfigApplicationContext context = new AnnotationConfigApplicationContext(MyConfig.class);
        DemoBean bean = context.getBean(DemoBean.class);
        bean.output();
        context.close();
    }
}
运行结果:
本案例下载地址:
Spring 中的测试问题
不管单元测试还是集成测试,都是我们开发中常见的测试方式,Spring框架对测试也提供了很好的支持,而且Spring对测试的支持不依赖于某一个测试框架,我们可以使用Junit来测试,也可以使用TestNG来进行测试。
OK,这里我们来看一个简单的集成测试。
1.添加依赖
    <dependencies>
        <dependency>
            <groupId>org.springframework</groupId>
            <artifactId>spring-context</artifactId>
            <version>4.3.3.RELEASE</version>
        </dependency>
        <dependency>
            <groupId>org.springframework</groupId>
            <artifactId>spring-test</artifactId>
            <version>4.3.3.RELEASE</version>
        </dependency>
        <dependency>
            <groupId>junit</groupId>
            <artifactId>junit</artifactId>
            <version>4.12</version>
        </dependency>
    </dependencies>
2.创建Bean
public class TestBean {
    private String content;

    public TestBean(String content) {
        super();
        this.content = content;
    }

    public String getContent() {
        return content;
    }

    public void setContent(String content) {
        this.content = content;
    }
}
3.配置类
@Configuration
public class TestConfig {
    @Bean
    @Profile("dev")
    public TestBean devTestBean() {
        return new TestBean("dev");
    }
    @Bean
    @Profile("prod")
    public TestBean prodTestBean() {
        return new TestBean("prod");
    }
}
注意这里我们使用了上篇博客介绍的@Profile注解。
4.测试代码
我使用IntelliJ IDEA作为开发工具,我的测试类写在下面这个位置:
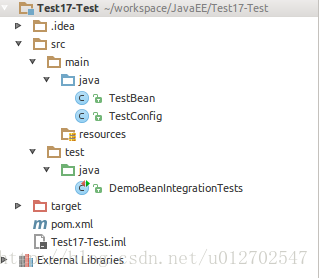
代码如下:
@RunWith(SpringJUnit4ClassRunner.class)
@ContextConfiguration(classes = {TestConfig.class})
@ActiveProfiles("dev")
public class DemoBeanIntegrationTests {
    @Autowired
    private TestBean testBean;
    @Test
    public void prodBeanShouldInject() {
        String content = testBean.getContent();
        Assert.assertEquals("dev",content);
    }

}
运行结果如下:
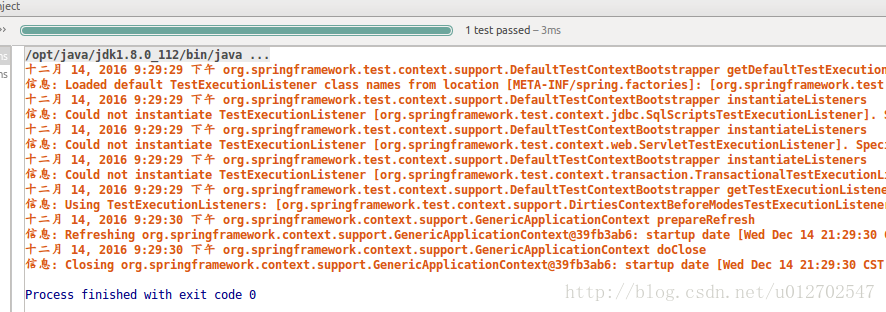
这个表示运行没问题。
本案例下载地址:
以上。
参考资料:
《JavaEE开发的颠覆者 Spring Boot实战》第三章


 8万+
8万+


 被折叠的 条评论
为什么被折叠?
被折叠的 条评论
为什么被折叠?
 到【灌水乐园】发言


