


文章出处:http://blog.csdn.net/xiaoxsen/article/details/73888758
最近一直在赶项目,博客有段时间没更新文章了,今天来看一下Android 7.0的拨号流程分析,先看看拨号的主界面:
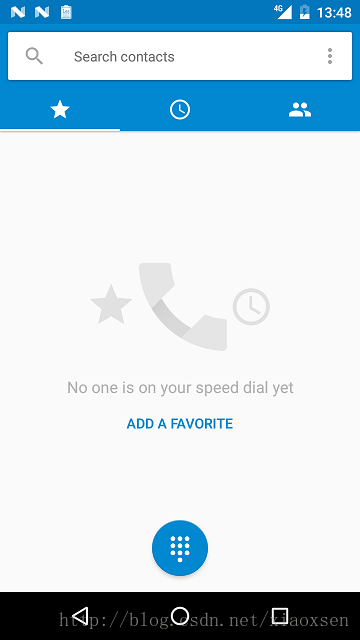
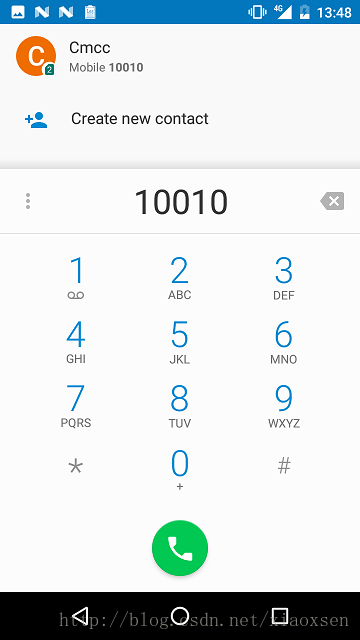
拨号主界面为DialtactsActivity,当用户点击拨号键盘按钮(DialtactsActivity的floating_action_button),弹出拨号盘,输入完电话号码,再点击拨号按钮,此时打电话的流程开始,因此打电话流程的入口就在DialpadFragment.Java(packages\apps\dialer\src\com\android\dialer\dialpad)的onClick()方法
public void onClick(View view) {
   switch (view.getId()) {
      case R.id.dialpad_floating_action_button:
      mHaptic.vibrate();//按键震动
      handleDialButtonPressed();//处理拨号
      ...
}
在handleDialButtonPressed()方法里,会先判断用户是否已输入号码,假如号码为空,则调用handleDialButtonClickWithEmptyDigits()方法显示上一次拨打过的号码。然后第一次获取到要拨打的number,在这里可以对number做一些判断或者自定义处理。
if (isDigitsEmpty()) { // No number entered.
    handleDialButtonClickWithEmptyDigits();
} else {
    inal String number = mDigits.getText().toString();
    ......
    DialerUtils.startActivityWithErrorToast(getActivity(), intent);
}
继续往下走看startActivityWithErrorToast()方法,内部判断了一些是否有拨号权限的判断后,最后调用TelecomManagerCompat的placeCall()方法
 public static void placeCall(@Nullable Activity activity,
            @Nullable TelecomManager telecomManager, @Nullable Intent intent) {
        if (activity == null || telecomManager == null || intent == null) {
            return;
        }
        if (CompatUtils.isMarshmallowCompatible()) {
            telecomManager.placeCall(intent.getData(), intent.getExtras());
            return;
        }
        activity.startActivityForResult(intent, 0);
    }
该方法里做了一些判空操作,当我们的版本大于等于6.0时就调用telecomManager.placeCall()方法,否则就直接通过startActivity去执行intent。因为我们这里分析7.0的流程,所以继续看telecomManager的placeCall()方法。
public void placeCall(Uri address, Bundle extras) {
        ITelecomService service = getTelecomService();
        ......
            try {
                service.placeCall(address, extras == null ? new Bundle() : extras,
                        mContext.getOpPackageName());
            } catch (RemoteException e) {
                Log.e(TAG, "Error calling ITelecomService#placeCall", e);
            }
        }
    }
继续调用ITelecomService的placeCall()方法处理流程,这个是aidl调用。TelecomServiceImpl里的mBinderImpl变量是ITelecomService的具体实现类,所以我们继续查看mBinderImpl中的placeCall()方法。
@Override
public void placeCall(Uri handle, Bundle extras, String callingPackage) {
    mUserCallIntentProcessorFactory.create(mContext, userHandle)
        .processIntent(intent, callingPackage, hasCallAppOp && hasCallPermission);
}
工厂模式创建了一个UserCallIntentProcessor对象,UserCallIntentProcessor类从字面上看应该就是专门用来处理用例的呼叫intent的,并调用其processIntent方法去处理拨号流程,接着查看processIntent()方法。
public void processIntent(Intent intent, String callingPackageName,
            boolean canCallNonEmergency) {
        String action = intent.getAction();
        if (Intent.ACTION_CALL.equals(action) ||
                Intent.ACTION_CALL_PRIVILEGED.equals(action) ||
                Intent.ACTION_CALL_EMERGENCY.equals(action)) {
            processOutgoingCallIntent(intent, callingPackageName, canCallNonEmergency);
        }
    }
继续看processOutgoingCallIntent方法,该方法主要还是判断当前状态以及输入值得合法性,后面直接调用sendBroadcastReceiver
private void processOutgoingCallIntent(Intent intent, String callingPackageName,boolean canCallNonEmergency) {
      ......
      sendBroadcastToReceiver(intent);
    }
发送广播给PrimaryCallReceiver
private boolean sendBroadcastToReceiver(Intent intent) {
        intent.putExtra(CallIntentProcessor.KEY_IS_INCOMING_CALL, false);
        intent.setFlags(Intent.FLAG_RECEIVER_FOREGROUND);
        intent.setClass(mContext, PrimaryCallReceiver.class);
        Log.d(this, "Sending broadcast as user to CallReceiver");
        mContext.sendBroadcastAsUser(intent, UserHandle.SYSTEM);
        return true;
}
PrimaryCallReceiver类接收到了广播会调用onReceive方法。
@Override
public void onReceive(Context context, Intent intent) {
    getTelecomSystem().getCallIntentProcessor().processIntent(intent)
}
从该方法可以看出,通过调用getTelecomSystem方法返回一个TelecomSystem对象,然后调用了getCallIntentProcessor()返回CallIntentProcessor对象,然后调用processIntent方法来处理我们发出的广播。
public void processIntent(Intent intent) {
    final boolean isUnknownCall = intent.getBooleanExtra(KEY_IS_UNKNOWN_CALL, false);
    if (isUnknownCall) {
        processUnknownCallIntent(mCallsManager, intent);
    } else {
        processOutgoingCallIntent(mContext, mCallsManager, intent);
    }
}
通过isUnknowCall来判断是不是未知的呼叫。
static void processOutgoingCallIntent(
            Context context,
            CallsManager callsManager,
            Intent intent) {
            ......
            Call call = callsManager
            .startOutgoingCall(handle, phoneAccountHandle, clientExtras, initiatingUser);
            NewOutgoingCallIntentBroadcaster broadcaster = new NewOutgoingCallIntentBroadcaster(
                    context, callsManager, call, intent, new PhoneNumberUtilsAdapterImpl(),
                    isPrivilegedDialer);
            final int result = broadcaster.processIntent();
            ......
        }
}
CallIntentProcessor.java的processOutgoingCallIntent()方法里,调用CallsManager.java的startOutgoingCall()方法创建一个Call实例,这就是Call对象的来源,最后传递给NewOutgoingCallIntentBroadcaster,调用processIntent()。我们先来看看startOutgoingCall()方法的
Call startOutgoingCall(Uri handle, PhoneAccountHandle phoneAccountHandle, Bundle extras,
            UserHandle initiatingUser) {
        boolean isReusedCall = true;
        Call call = reuseOutgoingCall(handle);
        // 创建一个call对象
        if (call == null) {
            call = new Call(getNextCallId(), mContext,
                    this,
                    mLock,
                    mConnectionServiceRepository,
                    mContactsAsyncHelper,
                    mCallerInfoAsyncQueryFactory,
                    handle,
                    null /* gatewayInfo */,
                    null /* connectionManagerPhoneAccount */,
                    null /* phoneAccountHandle */,
                    Call.CALL_DIRECTION_OUTGOING /* callDirection */,
                    false /* forceAttachToExistingConnection */,
                    false /* isConference */
            )
        }
        ......
        List<PhoneAccountHandle> accounts = constructPossiblePhoneAccounts(handle, initiatingUser);       // 获取当前激活的卡列表
        if (phoneAccountHandle != null) {
            if (!accounts.contains(phoneAccountHandle)) {
                phoneAccountHandle = null;
            }
        }
        // 获取当前应该使用哪张卡呼出
         if (phoneAccountHandle == null && accounts.size() > 0 &&         !call.isEmergencyCall()) {
            if(accounts.size() > 1) {
                  // 双激活卡下取通话主卡账户,没有通话主卡则为空
                    PhoneAccountHandle defaultPhoneAccountHandle = mPhoneAccountRegistrar.getOutgoingPhoneAccountForScheme(handle.getScheme(),
                                initiatingUser);
                if (defaultPhoneAccountHandle != null && accounts.contains(defaultPhoneAccountHandle)) {
                    phoneAccountHandle = defaultPhoneAccountHandle;
                }
            } else {
                // Use the only PhoneAccount that is available
                // 单激活卡直接取该卡账户)
                   phoneAccountHandle = accounts.get(0);
            }
        }
        // 设置当前通话账户
        call.setTargetPhoneAccount(phoneAccountHandle);
         boolean isPotentialInCallMMICode = isPotentialInCallMMICode(handle);
        // 检查当前是否允许呼出该电话,比如当前已有一通电话在正在呼出,
        // 这时候不允许再呼出一路通话(紧急号码除外)
        if (!isPotentialInCallMMICode && (!isReusedCall &&
                !makeRoomForOutgoingCall(call, call.isEmergencyCall()))) {
            // just cancel at this point.
            Log.i(this, "No remaining room for outgoing call: %s", call);
            if (mCalls.contains(call)) {
                // This call can already exist if it is a reused call,
                // See {@link #reuseOutgoingCall}.
                call.disconnect();
            }
            return null;
        }
       // 是否需要弹出双卡选择框(双卡下没有指定账户呼出非紧急号码且当前无通话主卡)
        boolean needsAccountSelection = phoneAccountHandle == null && accounts.size() > 1 && !call.isEmergencyCall();
        if (needsAccountSelection) {
          // 设置当前call状态为等待账户选择
            // This is the state where the user is expected to select an account
            call.setState(CallState.SELECT_PHONE_ACCOUNT, "needs account selection");
            // Create our own instance to modify (since extras may be Bundle.EMPTY)
            extras = new Bundle(extras);
            extras.putParcelableList(android.telecom.Call.AVAILABLE_PHONE_ACCOUNTS, accounts);
        } else {
           // 设置当前call状态为正在连接
            call.setState(CallState.CONNECTING, phoneAccountHandle == null ? "no-handle" : phoneAccountHandle.toString());
        }
        setIntentExtrasAndStartTime(call, extras);
        if((isPotentialMMICode(handle)||isPotentialInCallMMICode)&& !needsAccountSelection){
            call.addListener(this);
         } else if (!mCalls.contains(call)) {
              addCall(call);
            // 添加当前call到call列表
          }
        return call;
}
接着看看addCall方法,调用CallsManagerListener的onCallAdded方法,里面会遍历所有的观察者,并通知回调。
private void addCall(Call call) {
    ......
    listener.onCallAdded(call);
    ......
    }
CallsManager的构造方法添加所有观察者,其中mInCallController是InCallController对象,InCallController里面封装了与inCallUI相关的方法。
CallsManager(......)
{   ........
    mListeners.add(mInCallWakeLockController);
    mListeners.add(statusBarNotifier);
    mListeners.add(mCallLogManager);
    mListeners.add(mPhoneStateBroadcaster);
    mListeners.add(mInCallController);
    mListeners.add(mCallAudioManager);
    mListeners.add(missedCallNotifier);
    mListeners.add(mHeadsetMediaButton);
    mListeners.add(mProximitySensorManager);
    ......
}
当我们网callManager中添加call时会回调InCallController的onCallAdded()方法:
@Override
public void onCallAdded(Call call) {
    ......
    if (!isBoundToServices()) {
        bindToServices(call);//正常拨号都走这里
    } else {
        ......
        inCallService.addCall(parcelableCall);//多方通话走这里
        ......
    }
    ......
}
我们这里分析正常拨号,继续查看bindToServices()
@VisibleForTesting
public void bindToServices(Call call) {

    dialerInCall = new InCallServiceBindingConnection(defaultDialerComponent);
}
InCallServiceBindingConnection中onServiceConnected会调用onConnected()方法,在
onConnected()中又会调用IncallService的addCall(),然后IncallService的addCall()方法会调用Phone的internalAddCall()方法;
final void internalAddCall(ParcelableCall parcelableCall) {
    ......
    fireCallAdded(call);

}
private void fireCallAdded(Call call) {
        for (Listener listener : mListeners) {
            listener.onCallAdded(this, call);
        }
}
IncallService中实现了Phone的Listener接口,所以调用IncallService的mPhoneListener对象的onCallAdded()方法,该方法又继续调用IncallService的抽象方法onCallAdded(),IncallServiceImp继承IncallService,实现onCallAdded()方法,具体实现如下:
@Override
public void onCallAdded(Call call) {
    ......
    InCallPresenter.getInstance().onCallAdded(call);
    ......
}
在InCallPresenter的onCallAdded方法中调用了CallList的onCallAdded方法
public void onCallAdded(final android.telecom.Call telecomCall) {

        if (call.getState() == Call.State.INCOMING ||
                call.getState() == Call.State.CALL_WAITING) {
            onIncoming(call, call.getCannedSmsResponses());
        } else {
            onUpdate(call);
        }
    }
onIncoming()和onUpdate()分别调用CallList.Listener的onIncomingCall()和onCallListChange()方法 IncallPresenter.java和AnswerPresenter继承CallList.Listener接口重写onCallListChange()和onIncomingCall();两个方法都会调用startOrFinishUi()来开启去电和来电的Ui,这样通话界面就会显示出来。继续回到NewOutgoingCallIntentBroadcaster的processIntent()方法看看如何往底层走。
 public int processIntent() {
    ......
    if (isVoicemailNumber) {
        ......
        //如果是语音信箱号码走这里
        mCallsManager.placeOutgoingCall(mCall, handle, null, speakerphoneOn,VideoProfile.STATE_AUDIO_ONLY);
        ......
    }
    ......
    if (Intent.ACTION_CALL.equals(action)) {
        //如果是紧急号码
        if (isPotentialEmergencyNumber) {
        //不是系统电话应用则运行系统系统拨号盘,取消当前拨号,三方应用不能走这里
            if (!mIsDefaultOrSystemPhoneApp) {
                    ......
                    launchSystemDialer(intent.getData());
                    return DisconnectCause.OUTGOING_CANCELED;
                } else {
                    callImmediately = true;
                }
                    ......
            }
    } else if (Intent.ACTION_CALL_EMERGENCY.equals(action)) {
            //如果不是紧急号码则取消拨号
            if (!isPotentialEmergencyNumber) {
                return DisconnectCause.OUTGOING_CANCELED;
            }
            callImmediately = true;
    ......
    if (callImmediately) {
            ......
            mCallsManager.placeOutgoingCall(mCall, Uri.fromParts(scheme, number, null), null,speakerphoneOn, videoState);
            ......
    }
        //普通电话走这里
        broadcastIntent(intent, number, !callImmediately, targetUser);
        return DisconnectCause.NOT_DISCONNECTED;
}
broadcastIntent()方法发送一个Intent.ACTION_NEW_OUTGOING_CALL广播,注意传入callImmediately参数,当callImmediately为false的时候才会生成一个NewOutgoingCallBroadcastIntentReceiver实例来接收该广播,也就是非紧急号码,非语音信箱号码就走这里,然后NewOutgoingCallBroadcastIntentReceiver类中还是调用到CallsManager的placeOutgoingCall()方法。继续追踪CallsManager的placeOutgoingCall方法:
public void placeOutgoingCall(Call call, Uri handle, GatewayInfo gatewayInfo,boolean speakerphoneOn, int videoState) {
    .....
    //如果指定了通话账号,或者紧急号码时调用startCreateConnection
    call.startCreateConnection(mPhoneAccountRegistrar);
    //否则断开连接
    .....
}
在startCreateConnection方法里,主要new了一个专门处理连接的CreateConnectionProcessor对象,然后调用process方法。
void startCreateConnection(PhoneAccountRegistrar phoneAccountRegistrar) {
        ......
    mCreateConnectionProcessor = new CreateConnectionProcessor(this, mRepository, this, phoneAccountRegistrar, mContext);
        mCreateConnectionProcessor.process();
    ......
}
process方法逻辑也比较简单,主要就是判断call对象中phoneAccount是否为空,然后调用attemptNextPhoneAccount()方法。
void process() {
        ......
        adjustAttemptsForConnectionManager();
        adjustAttemptsForEmergency();
        mAttemptRecordIterator = mAttemptRecords.iterator();
        attemptNextPhoneAccount();
}
attempNextPhoneAccount方法首先检查是否有BIND_TELECOM_CONNECTION_
SERVICE的权限,紧接着就是通过mRepository.getService方法获取一个ConnectionServiceWrapper类。
 private void attemptNextPhoneAccount() {
        ......
        // 获取ConnectionServiceWrapper对象
          mService = mRepository.getService(phoneAccount.getComponentName(),
                    phoneAccount.getUserHandle());
        .......
        mService.createConnection(mCall, this);
        .......

}
接着看ConnectionServiceWrapper的createConnection方法
public void createConnection(final Call call, final CreateConnectionResponse response) {
        BindCallback callback = new BindCallback() {
            @Override
            public void onSuccess() {
                ......
                mServiceInterface.createConnection(
                                call.getConnectionManagerPhoneAccount(),
                                callId,
                                new ConnectionRequest(
                                        call.getTargetPhoneAccount(),
                                        call.getHandle(),
                                        extras,
                                        call.getVideoState(),
                                        callId),
                                call.shouldAttachToExistingConnection(),
                                call.isUnknown());
                ......
            }
            @Override
            public void onFailure() {
                response.handleCreateConnectionFailure(new DisconnectCause(DisconnectCause.ERROR));
            }
        };
        mBinder.bind(callback, call);
}
mBinder是Binder2对象,Binder2是ConnectionServiceWrapper的父类ServiceBinder内部类,所以此处调用的是的ServiceBinder的内部类的Binder2类的bind()方法,先new一个ServiceConnection对象,然后绑定一个远程服务端服务。如果绑定成功的话,在ServiceBinder的内部类ServiceBinderConnection的onServiceConnected()方法就被调用。
在这里做了两件事:
1).通过setBinder()方法,回调ConnectionServiceWrapper的setServiceInterface()方法,通过mServiceInterface = IConnectionService.Stub.asInterface(binder);
这行代码获取一个远程服务端的对象mServiceInterface 。
2)、再通过调用handleSuccessfulConnection()方法回调callback 的onSuccess()方法,也就又回到ConnectionServiceWrapper的createConnection()方法里。调用ConnectionService.java里mBinder的createConnection()方法然后通过message传递调用createConnection()方法。
  private void createConnection(
            final PhoneAccountHandle callManagerAccount,
            final String callId,
            final ConnectionRequest request,
            boolean isIncoming,
            boolean isUnknown) {

        Connection connection = isUnknown ? onCreateUnknownConnection(callManagerAccount, request)
                : isIncoming ? onCreateIncomingConnection(callManagerAccount, request)
                : onCreateOutgoingConnection(callManagerAccount, request);
    }
createConnection()方法通过判断是来电还是去电分别创建不同的connection,去电则调用onCreateOutgoingConnection(),TelephonyConnectionService是ConnectionService的实例,所以进入TelephonyConnectionService.java的onCreateOutgoingConnection()方法。
@Override
public Connection onCreateOutgoingConnection(
            PhoneAccountHandle connectionManagerPhoneAccount,
            final ConnectionRequest request) {
        //这里做了很多判断,返回失败的连接(比如拨打号码为空,未指定sim卡,设置为仅4G等)
        ......
        final TelephonyConnection connection =
                createConnectionFor(phone, null, true /* isOutgoing */, request.getAccountHandle(),
                        request.getTelecomCallId(), request.getAddress());
        ......
        //如果上面的都不是则执行这里
        placeOutgoingConnection(connection, phone, request);
}
继续跟踪placeOutgoingConnection()方法处理拨号流程
private void placeOutgoingConnection(
            TelephonyConnection connection, Phone phone, ConnectionRequest request) {
       ......
       originalConnection =
                    phone.dial(number, null, request.getVideoState(), request.getExtras());
       ......

    }
调用Phone的dial()方法后就进入了Telephony Framework层了。Android 7.0中把GSMPhone和CDMAPhone全部集成到GsmCdmaPhone中,继续看GsmCdmaPhone中dial()
 @Override
    public Connection dial(String dialString, UUSInfo uusInfo, int videoState, Bundle intentExtras)
            throws CallStateException {
                .......
                    //ImsPhone是专门处理VoLTE的一个类
                    if (videoState == VideoProfile.STATE_AUDIO_ONLY) {
                        if (DBG) Rlog.d(LOG_TAG, "Trying IMS PS call");//
                        return imsPhone.dial(dialString, uusInfo, videoState, intentExtras);
                    } else {
                        if (SystemProperties.get("persist.mtk_vilte_support").equals("1")) {
                            //支持VoLTe  Ims ps video call
                            return imsPhone.dial(dialString, uusInfo, videoState, intentExtras);
                        } else {
                            //cs video call
                            return dialInternal(dialString, uusInfo, videoState, intentExtras);
                            /// @}
                        }
                .......
        if (isPhoneTypeGsm()) {
            /// M: CC: For 3G VT only @{
            //return dialInternal(dialString, null, VideoProfile.STATE_AUDIO_ONLY, intentExtras);
            return dialInternal(dialString, null, videoState, intentExtras);
            /// @}
        } else {
            return dialInternal(dialString, null, videoState, intentExtras);
        }
    }
VOLTE通话这里我们先不讨论,继续看dialInternal()
 @Override
    protected Connection dialInternal(String dialString, UUSInfo uusInfo, int videoState,Bundle intentExtras)throws CallStateException {
            ........
            return mCT.dial(newDialString);
            ........
    }
mCT是GsmCdmaCallTracker对象,我们接着看GsmCdmaCallTracker中的dial()
  public synchronized Connection dial(String dialString, int clirMode, UUSInfo uusInfo,Bundle intentExtras)throws CallStateException {
        .......
        //mCi的类型为CommandsInterface,在创建phone的时候作为参数,实际上执行的是RIL.dial()
        mCi.dial(mPendingMO.getAddress(), clirMode, obtainCompleteMessage());
        updatePhoneState();//更新phone状态
        mPhone.notifyPreciseCallStateChanged();//发起phone状态变化通知
        return mPendingMO;
    }
其中mCi就是RIL的实例,mCi是CommandsInterface类型,在GsmCdmaPhone的构建中获取的
public static void makeDefaultPhone(Context context) {
        synchronized (sLockProxyPhones) {
        ......
        sCommandsInterfaces[i] = new RIL(context, networkModes[i],
                            cdmaSubscription, i);
        ......
         phone = new GsmCdmaPhone(context,
                                sCommandsInterfaces[i], sPhoneNotifier, i,
                                PhoneConstants.PHONE_TYPE_CDMA_LTE,
                                TelephonyComponentFactory.getInstance());
        ......
    }
所以我们继续查看RIL中dial(),
 public void
    dial(String address, int clirMode, UUSInfo uusInfo, Message result) {

           //创建了一个RILRequest对象rr,这里的result为之前发送的EVENT_OPERATION_COMPLETE
           RILRequest rr = RILRequest.obtain(RIL_REQUEST_DIAL, result);
           ......
           //将rr发送给RILC,此时的rr内部为RIL_REQUEST_DIAL
           //RILC层处理完成后会调用RILJ的processSolicited方法
           send(rr);
           ......

    }
RILJ从名字可以看出他是RILC在java层的实现,负责了Framework层与RIL层的交互,上层发送rr到底层处理,而底层通过RILJ将处理结果上报。RILJ的processSolicited(),此方法负责接收并处理RILC层回传上来的消息。
在RIL层中的数据交互使用基于Socket网络连接的方式,当然这种socket并不是网络socket而是localSocket。消息数据按其处理方式的不同可以分为两类:
1)Solicited消息。这类消息如dial拨号,answer接听电话等主动操作请求。Solicited请求类的RIL消息,根据其动作行为,可再细分为SolicitedRequest和Solicited Response。正常情况下这两类消息成对出现,请求和应答一一对应。
2)UnSolicited消息。这类消息为底层主动上报的消息,如来电,接受短信等等。此消息由于是底层Modem主动上报,因此没有Request只有Response。
 private void
    send(RILRequest rr) {
        Message msg;

        if (mSocket == null) {
            rr.onError(RADIO_NOT_AVAILABLE, null);
            rr.release();
            return;
        }

        msg = mSender.obtainMessage(EVENT_SEND, rr);
        acquireWakeLock(rr, FOR_WAKELOCK);
        msg.sendToTarget();
    }
mSender发送EVENT_SEND消息,在RIL.java中的handleMessage()方法中处理
 switch (msg.what) {
                case EVENT_SEND:
                case EVENT_SEND_ACK:
                        ........
                        LocalSocket s;
                        s = mSocket;
                        s.getOutputStream().write(dataLength);
                        s.getOutputStream().write(data);
                        .......
                }
RIL的构造函数会初始化RILReceiver对象,RILReceiver对象实现了Runnable,在run方法中创建连接:
@Override
public void run() {
            ......
            try {for (;;) {
                LocalSocket s = null;
                LocalSocketAddress l;
                ......
                s = new LocalSocket();//创建Socket
                l = new LocalSocketAddress(rilSocket,
                            LocalSocketAddress.Namespace.RESERVED);
                s.connect(l);连接socket
            }
            .......
            try {
                    InputStream is = mSocket.getInputStream();
                    for (;;) {
                        Parcel p;
                        length = readRilMessage(is, buffer);
                        if (length < 0) {
                            // End-of-stream reached
                            break;
                        }
                        p = Parcel.obtain();//包装返回的数据
                        p.unmarshall(buffer, 0, length);
                        p.setDataPosition(0);
                        //处理请求并返回
                        processResponse(p);
                        p.recycle();
    }
上层下发了一个rr,底层处理接受并处理之后还会回发一个Respose以表明处理结果,其处理结果根据上面的介绍,将在processSolicited()中进行处理:
void processUnsolicited (Parcel p, int type) {
    ......
    case RIL_REQUEST_DIAL: ret =  responseVoid(p); break;
    rr.mResult.sendToTarget();//发送Handler消息通知,此消息将在//GsmCdmaCallTracker中处理,这个message是EVENT_OPERATION_COMPLETE。
    ......
}
所以调用sendToTarget方法,就会把消息发送给GsmCdmaCallTracker,然后在GsmCdmaCallTracker.java的handleMessage方法中有对EVENT_OPERATION_COMPLETE的逻辑处理:然后调用operationComplete()方法;
private void operationComplete() {
        ........
        mLastRelevantPoll = obtainMessage(EVENT_POLL_CALLS_RESULT);
        mCi.getCurrentCalls(mLastRelevantPoll);
        ........
    }
进入mCi.getCurrentCalls(mLastRelevantPoll);首先获取一个RILRequest对象,再send给RILC。底层查询Call_list状态列表,RILC处理完后,仍然返回到RILJ,同样在processSolicited()中处理,由此可见processSolicited()基本负责了对RILC层返回消息的处理。同样进入GsmCdmaCallTracker中的handleMessage()的Case EVENT_POLL_CALLS_RESULT
@Override
public void handleMessage(Message msg) {
        AsyncResult ar;
        switch (msg.what) {
            case EVENT_POLL_CALLS_RESULT:
                if (msg == mLastRelevantPoll) {
                    ......
                    handlePollCalls((AsyncResult)msg.obj);
                }
            break;
进入handlePollCalls()更新手机状态。然后RILC会上报RIL_UNSOL_RESPONSE_CALL_STATE_CHANGED消息给RILJ,调用RIL的processUnsolicited();
protected synchronized void handlePollCalls(AsyncResult ar) {
    .......
    updatePhoneState();
    .......
    if (hasNonHangupStateChanged || newRinging != null || hasAnyCallDisconnected) {
        mPhone.notifyPreciseCallStateChanged();
    }
    .......
}
最后更新phone状态,注册了该phone电话状态监听的对象将会收到通知,然后RILC会上报RIL_UNSOL_RESPONSE_CALL_STATE_CHANGED消息给RILJ,调用RIL的processUnsolicited()
private void processUnsolicited (Parcel p) {
    ...
    try {switch(response) {
    ...
    case RIL_UNSOL_RESPONSE_CALL_STATE_CHANGED:
    ret =  responseVoid(p); break;
    ...
    }
    switch(response) {
    ...
    case RIL_UNSOL_RESPONSE_CALL_STATE_CHANGED:
         if (RILJ_LOGD)
         unsljLog(response);//打印log日志
         //发出通知(RegistrantList消息处理机制)
         mCallStateRegistrants.notifyRegistrants(new
         AsyncResult(null, null, null));
    ...
    }
}
GsmCdmaCallTracker.java向RIL注册了一个EVENT_CALL_STATE_CHANGE类型的Handler消息。 然后handleMessage处理。调用了pollCallsWhenSafe();
 @Override
 public void handleMessage(Message msg) {
    .......
    case EVENT_CALL_STATE_CHANGE:
      pollCallsWhenSafe();
            break;
    .......
pollCallsWhenSafe在CallTracker中实现。
protected void pollCallsWhenSafe() {
        ...
        if (checkNoOperationsPending()) {
        //注意mLastRelevantPoll对象的消息类型,后面会用到
            mLastRelevantPoll = obtainMessage(EVENT_POLL_CALLS_RESULT);
            mCi.getCurrentCalls(mLastRelevantPoll);
        }
}
又是RILJ请求查询Call List状态列表,查完还是交给 CdmaCallTracker去处理。这时候Call的状态还是DIALING。
等Call的状态变成ACTIVE后,底层又会上报RIL_UNSOL_RESPONSE_CALL_STATE_CHANGED消息给RILJ,然后RILJ又请求查询查询Call List状态列表,GsmCdmaCallTracker又处理,不过这次是modem主动上报的,到这里,电话已接通。
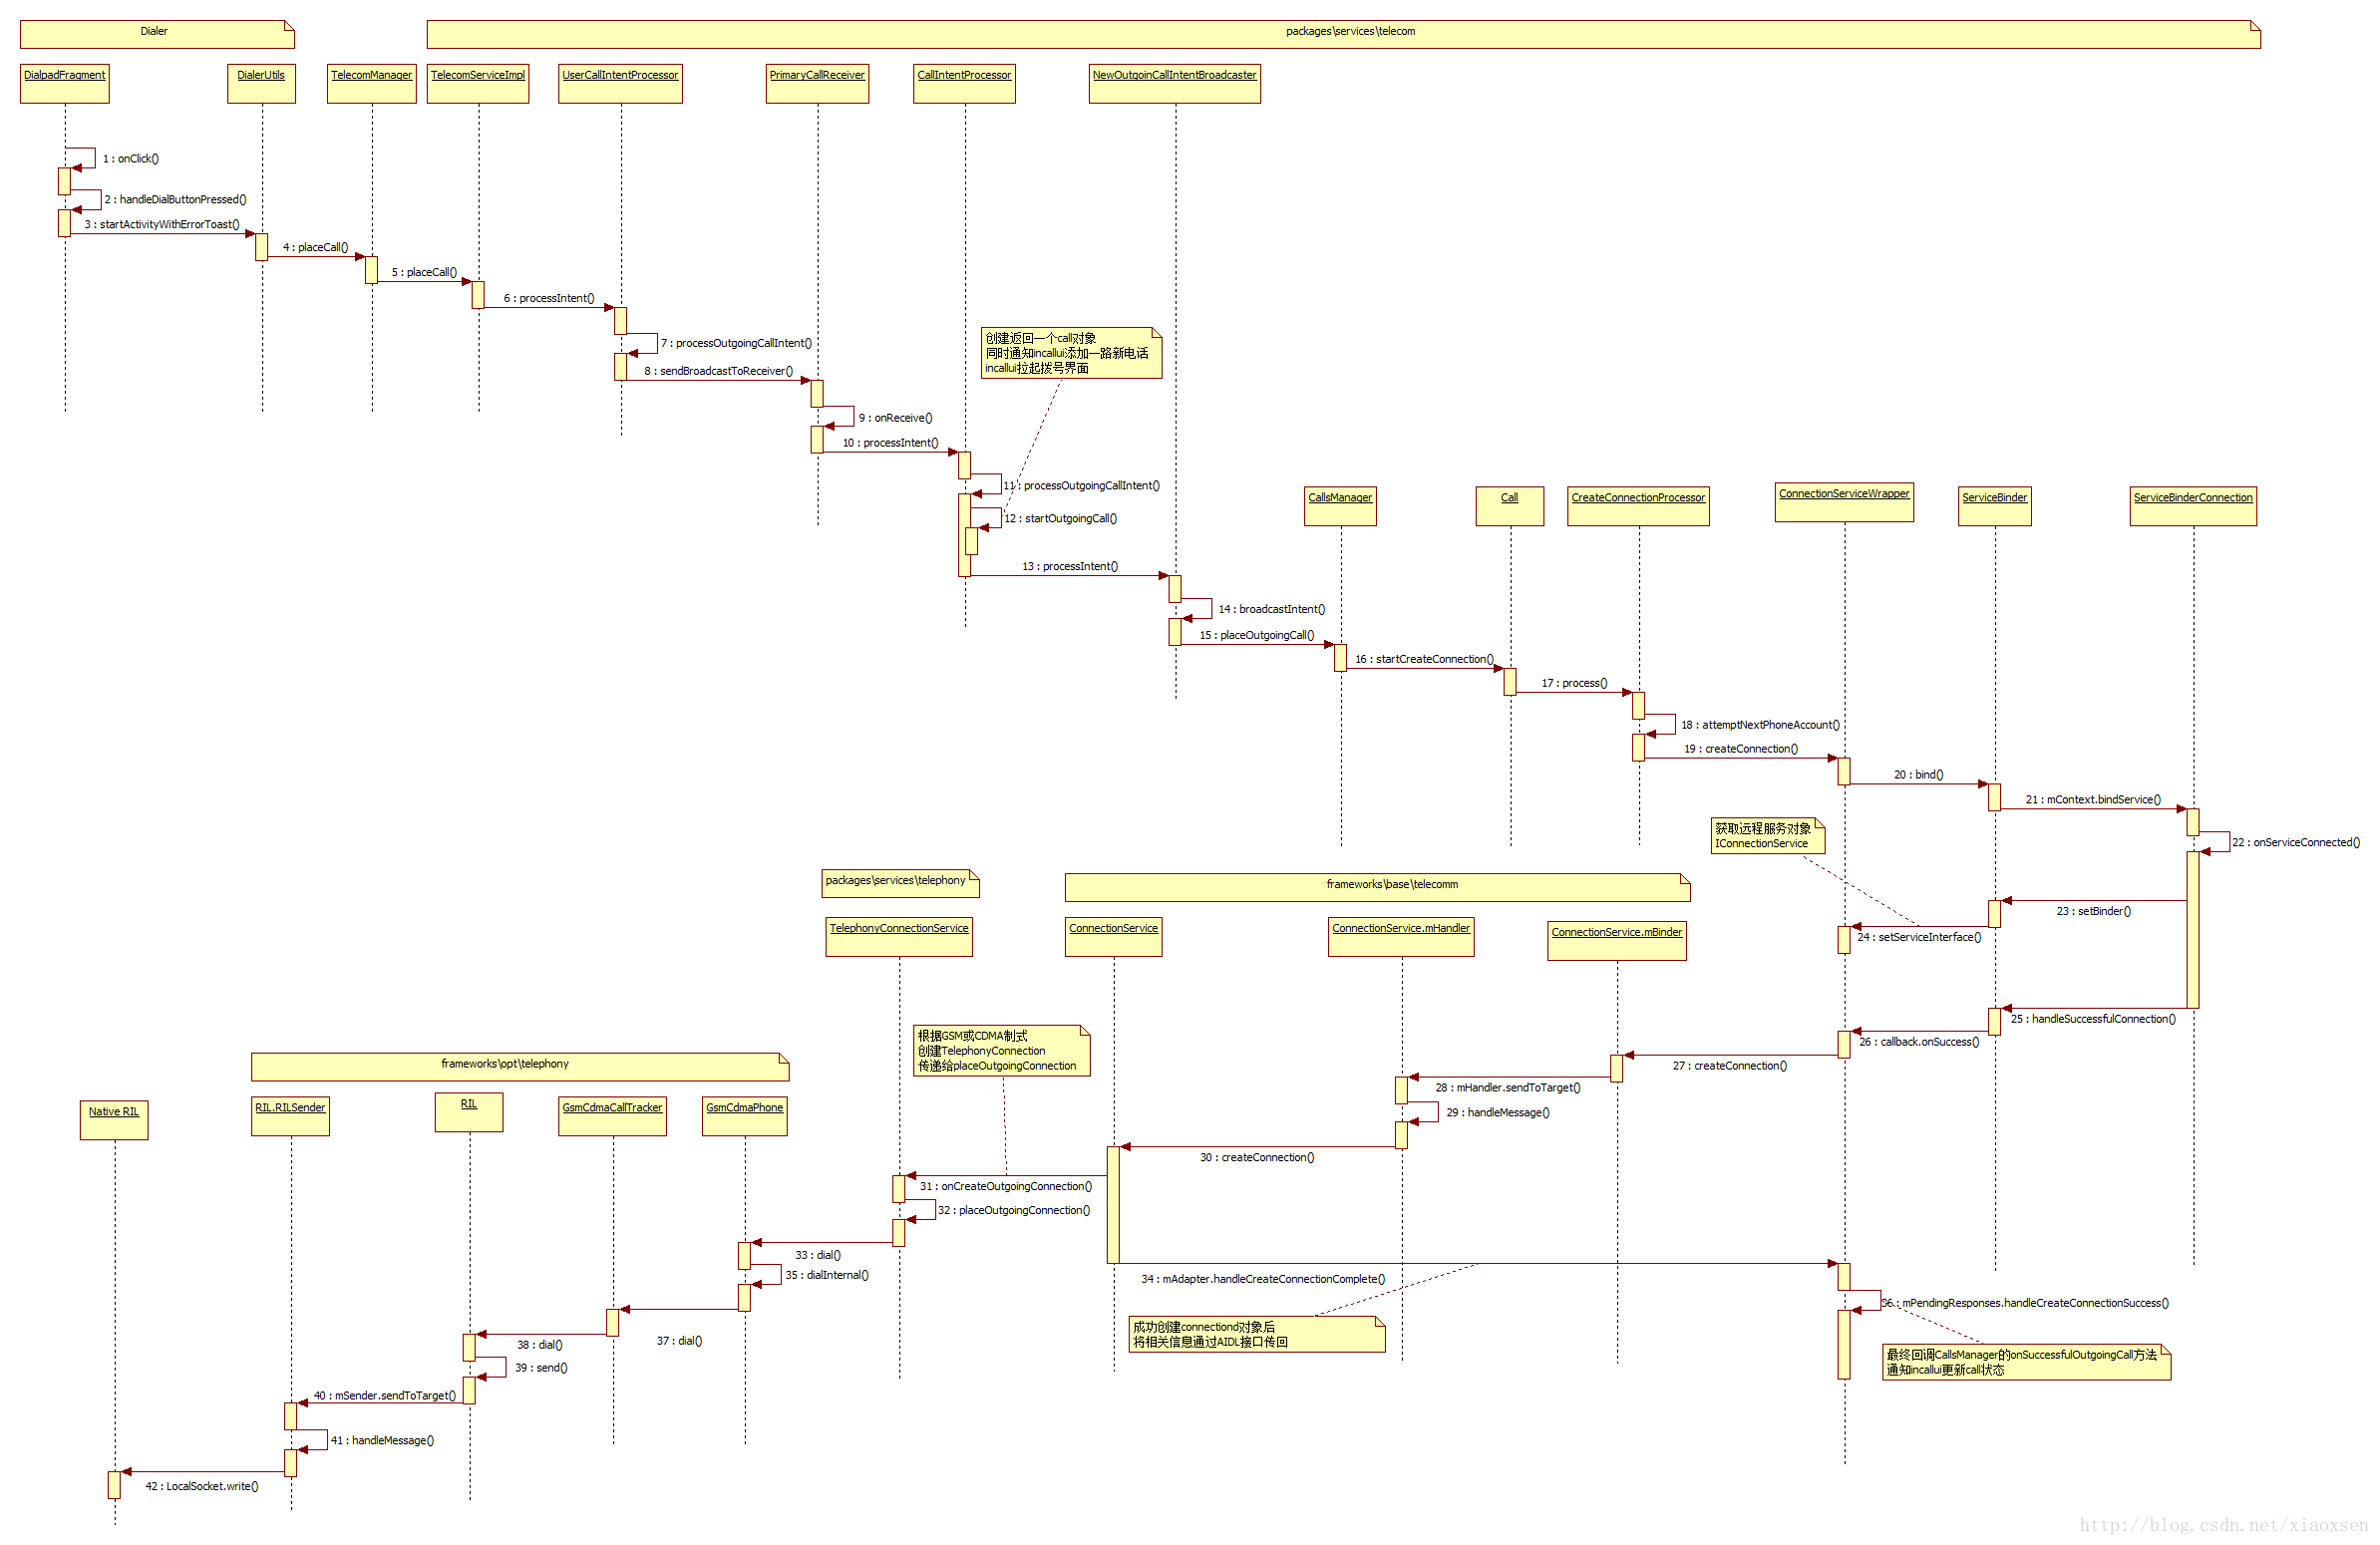
时序图如下(右击选择新标签打开):


 1206
1206


 被折叠的 条评论
为什么被折叠?
被折叠的 条评论
为什么被折叠?
 到【灌水乐园】发言


