


两种方式:Message或AIDL
使用Messenger跨进程通信
与AIDL方式区别:
当你需要进行IPC时,使用 Messenger 要比用AIDL实现接口要容易些,因为 Messenger 会把所有调用服务的请求放入一个队列。而纯粹的AIDL接口会把这些请求同时发送给服务,这样服务就必须要能够多线程运行。
步骤:
服务实现一个Handler ,用于客户端每次调用时接收回调。
此Handler用于创建一个Messenger对象(它是一个对Handler的引用)。
此Messenger对象创建一个IBinder,服务在onBind()中把它返回给客户端。
客户端用IBinder将Messenger(引用服务的Handler)实例化,客户端用它向服务发送消息对象Message。
服务接收Handler中的每个消息Message——确切的说,是在handleMessage()方法中接收。
public class MessengerService extends Service {
/** 发送给服务的用于显示信息的指令*/
static final int MSG_SAY_HELLO = 1;
/**
* 从客户端接收消息的Handler
*/
class IncomingHandler extends Handler {
@Override
public void handleMessage(Message msg) {
switch (msg.what) {
case MSG_SAY_HELLO:
Toast.makeText(getApplicationContext(), "hello!", Toast.LENGTH_SHORT).show();
break;
default:
super.handleMessage(msg);
}
}
}
/**
* 向客户端公布的用于向IncomingHandler发送信息的Messager
*/
final Messenger mMessenger = new Messenger(new IncomingHandler());
/**
* 当绑定到服务时,我们向Messager返回接口,
* 用于向服务发送消息
*/
@Override
public IBinder onBind(Intent intent) {
Toast.makeText(getApplicationContext(), "binding", Toast.LENGTH_SHORT).show();
return mMessenger.getBinder();
}
}
客户端要做的全部工作就是根据服务返回的IBinder创建一个 Messenger ,并用send() 方法发送一个消息。例如,以下是一个activity示例,它绑定到上述服务,并向服务发送 MSG_SAY_HELLO消息:
public class ActivityMessenger extends Activity {
/** 用于和服务通信的Messenger*/
Messenger mService = null;
/** 标识我们是否已绑定服务的标志 */
boolean mBound;
/**
* 与服务的主接口进行交互的类
*/
private ServiceConnection mConnection = new ServiceConnection() {
public void onServiceConnected(ComponentName className, IBinder service) {
// 与服务建立联接后将会调用本方法,
// 给出用于和服务交互的对象。
// 我们将用一个Messenger来与服务进行通信,
// 因此这里我们获取到一个原始IBinder对象的客户端实例?。
mService = new Messenger(service);
mBound = true;
}
public void onServiceDisconnected(ComponentName className) {
// 当与服务的联接被意外中断时——也就是说服务的?进程崩溃了,
// 将会调用本方法。
mService = null;
mBound = false;
}
};
public void sayHello(View v) {
if (!mBound) return;
// 创建并向服务发送一个消息,用到了已约定的'what'值?
Message msg = Message.obtain(null, MessengerService.MSG_SAY_HELLO, 0, 0);
try {
mService.send(msg);
} catch (RemoteException e) {
e.printStackTrace();
}
}
@Override
protected void onCreate(Bundle savedInstanceState) {
super.onCreate(savedInstanceState);
setContentView(R.layout.main);
}
@Override
protected void onStart() {
super.onStart();
// Bind to the service
bindService(new Intent(this, MessengerService.class), mConnection,
Context.BIND_AUTO_CREATE);
}
@Override
protected void onStop() {
super.onStop();
// Unbind from the service
if (mBound) {
unbindService(mConnection);
mBound = false;
}
}
}
请注意,上述例子中没有给出服务是如何响应客户端的。如果你需要服务进行响应,那你还需要在客户端创建一个 Messenger。然后,当客户端接收到 onServiceConnected() 回调后,它再发送一个消息Message 给服务,消息的send() 方法中的replyTo 参数里包含了客户端的Messenger。
为了实现跨进程通信(IPC,即 interprocess communication),Android 提供了 AIDLService。
AIDL Service 与传统技术中 Corba、Java 技术中 RMI(远程方法调用)功能类似。
Android 的远程 Service 调用过程,同样是先定义一个远程调用接口,然后为该接口提供一个实现类。
与绑定本地 Service 的方式类似,客户端访问 Service 时,Service 将其代理对象 IBinder 通过 onBind() 方法返回给客户端。因此 AIDL 远程接口的实现类就是那个 IBinder 实现类。
注意:远程 Service 的 onBind() 方法只是将 IBinder 对象的代理(绑定本地 Service 的话是将 IBinder 对象本身)传给客户端的 ServiceConnection 的 onServiceConnected() 方法的第二个参数。
客户端获取远程 Service 的 IBinder 对象的代理之后,即可通过该 IBinder 对象去回调远程 Service 的属性或方法。
步骤
1.创建 AIDL 文件
术语解释:
AIDL :全称 Android Interface Definition Language ,即安卓接口定义语言,用于定义远程接口。
AIDL 的语法与 Java 接口相似,但存在如下差异:
AIDL 定义接口的源代码必须以 .aidl 结尾。
AIDL 接口中用到的数据类型,除了基本类型、String、List、Map、CharSequence 之外,其他类型全部都需要导包。
定义 AIDL 接口后,还需要 Service 端、客户端都使用 Android SDK 目录?下的 platform-tools/aidl.exe 工具为该接口提供实现。如果开发者使用 ADT 工具进行开发,实现工作则会自动完成。
(1)先定义一个aidl文件,在里面定义我们需要的功能声明,有点类似定义接口的语法。
我使用的是Android studio,点击工程的根目录右键选择 “NEW”--> “AIDL” --> “AIDL File”,编辑aidl文件的名称,点击“OK”,软件自动帮你创建aidl文件,aidl文件放在跟Java同级目录下的aidl文件夹下,路径跟工程的包名一致。
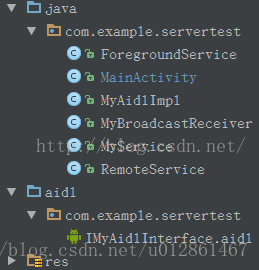
IMyAidlInterface.aidl 文件里面的内容:
package com.example.servertest;
interface IMyAidlInterface {
int plus(int a, int b);
String toUpperCase(String str);
}
自己声明了两个方法,一个是加法操作,另一个是字符串字母转大写。
定义好aidl文件之后,点击make,软件会自动生成aidl对应的java接口文件,不用去修改它和编辑它。

2.将接口暴露给客户端
定义好 AIDL 接口之后,在定义 Service 实现类时其 onBind() 方法所返回的 IBinder 对象应该是 ADT 所生成的对应的 Xxx.Stub 内部类的实例。
Service 类开发完成之后,还需在 AndroidManifest.xml 文件中配置,在 <application.../> 元素下增加配置代码,示例如下——
<!-- 定义一个Service组件 -->
<service android:name=".AidlService">
<intent-filter>
<action android:name="org.crazyit.aidl.action.AIDL_SERVICE" />
</intent-filter>
</service>
(2)创建一个远程服务 RemoteService,在服务里面实现定义好的接口(就是由aidl文件自动生成的接口文件)
private IMyAidlInterface.Stub mBinder = new IMyAidlInterface.Stub() {
@Override
public int plus(int a, int b) throws RemoteException {
return a+b;
}
@Override
public String toUpperCase(String str) throws RemoteException {
return str.toUpperCase();
}
};
这个 mBinder 对象就作为Service 的onBind方法返回的IBinder对象。也就是我们在 onServiceConnected 方法参数中获取的IBinder对象,有了这个对象,Activity就可以跟远程服务通讯了。Stub 是Binder的子类。
3.客户端访问 AIDL Service
开发客户端的第一步是将 Service 端的 AIDL 接口文件复制到客户端应用中,之后 ADT 工具会为 AIDL 接口生成相应的实现。
客户端绑定远程 Service 的步骤:
1. 创建 ServiceConnection 对象。
2. 以 ServiceConnection 对象作为参数,调用 Context 的 bindService() 方法绑定远程 Service 即可。
注:由于绑定远程 Service 的 ServiceConnection 只能获取 IBinder 对象的代理,因此在 ServiceConnection 的 onServiceConnection() 方法中需要通过类似如下代码进行处理:
catService = ICat.Stub.asInterface(service);
类似 RMI 要求远程调用的参数和返回值都必须实现 Serializable 接口的序列化机制,Android 要求调用远程 Service 的参数和返回值都必须实现 Parcelable 接口。
实现 Parcelable 接口不仅要求实现该接口里定义的方法,而且要求在实现类中定义一个名为 CREATOR、类型为 Parcelable.Creator 的静态 Field。此外,还要求使用 AIDL 代码来定义这些自定义类型。
除了由用户自行开发、启动的 Service 之外,Android 系统本身提供了大量的系统 Service,开发者只要在程序中调用 Context 的如下方法即可获取这些系统 Service:
getSystemService(String name) :根据 Service 名称来获取系统 Service。
一旦获取了这些 Service,就可以在程序中进行相应的操作了。
(3)Activity 绑定远程服务
Intent intent = new Intent(MainActivity.this,RemoteService.class);
bindService(intent,serviceConnection,BIND_AUTO_CREATE);
创建实现 ServiceConnection 接口的对象
serviceConnection = new ServiceConnection() {
@Override
public void onServiceConnected(ComponentName componentName, IBinder iBinder) {
//AIDL 跨进程通讯
iMyAidlService = IMyAidlInterface.Stub.asInterface(iBinder);
try {
int result = iMyAidlService.plus(3, 5);
String upperStr = iMyAidlService.toUpperCase("hello world");
Log.d("iMyAidlService", "result is " + result);
Log.d("iMyAidlService", "upperStr is " + upperStr);
} catch (RemoteException e) {
e.printStackTrace();
}
}
@Override
public void onServiceDisconnected(ComponentName componentName) {
}
};
通过IMyAidlInterface.Stub.asInterface(iBinder); 可以获取远程服务的Binder对象。有了这个Binder对象就可以调用远程服务的方法了。
跨应用进程调用
怎样在另外一个应用里调用这个服务呢?
在清单文件里为服务添加 intent-filter 标签,增加该服务可以处理的action,这里自定义了一个action。
把aidl文件拷贝到另外一个应用程序里,包括aidl所在的包目录结构。
在另外的应用Activity里使用隐式 Intent 绑定远程服务
Intent intent = new Intent("com.example.servicetest.MyAIDLService");
bindService(intent, serviceConnection, BIND_AUTO_CREATE);
serviceConnection 创建跟上面一样。


 582
582


 被折叠的 条评论
为什么被折叠?
被折叠的 条评论
为什么被折叠?
 到【灌水乐园】发言


