


项目需求:
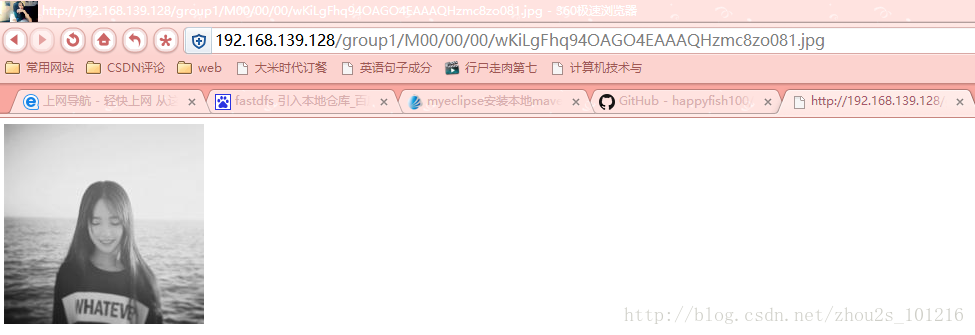
后台的商品管理需要上传商品图片,选用FastDFS来存储图片,搭建Nginx提供http服务。在大多数的业务场景中需要为FastDFS存储的文件提供http下载服务,tracker和storage都有内置的http服务但是性能不满足要求,于是使用Nginx提供http服务。FastDFS作者余庆在后来的版本中增加了基于当前主流web服务器的扩展模块(包括nginx/apache),其用意在于利用web服务器直接对本机storage数据文件提供http服务,以提高文件下载的性能。所以在搭建Nginx的时候,需要加上一个扩展模块。
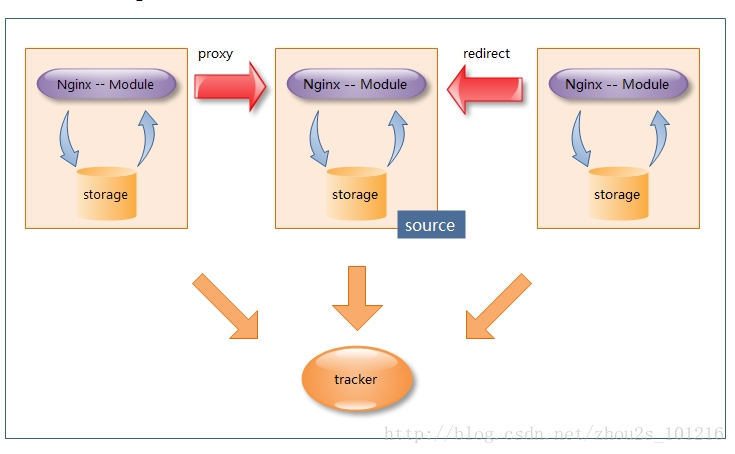
在每一台storage服务器主机上部署Nginx及FastDFS扩展模块,由Nginx模块对storage存储的文件提供http下载服务, 仅当当前storage节点找不到文件时会向源storage主机发起redirect或proxy动作。
流程实现:
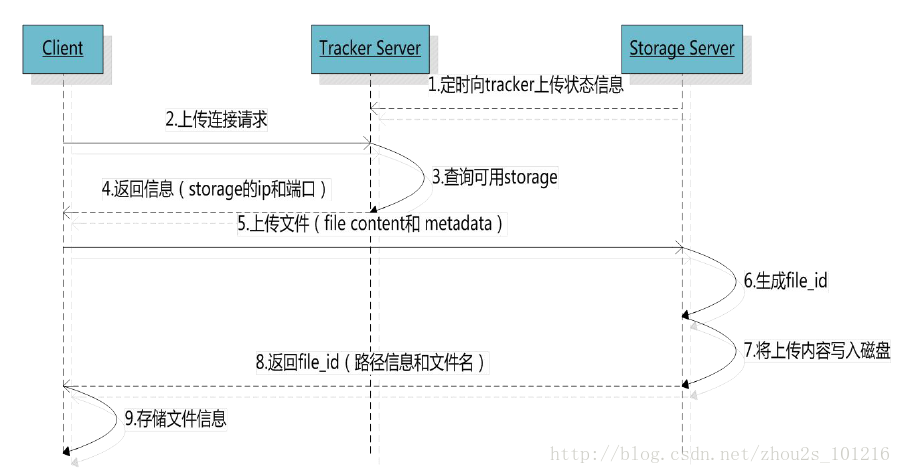
关于FastDFS和Nginx在本文就不详细介绍了。看图片文件上传的流程。
先做一个Junit测试,这就是一个基本的上传流程。之前有个小提示,需要将fastdfs的jar引入到本地的仓库,再从web的pom中引入jar。将jar解压,引入maven项目到eclipse。执行maven install命令,在web项目的pom文件中引入
<dependency>
	<groupId>org.csource</groupId>
    	<artifactId>fastdfs-client-java</artifactId>
  	<version>1.25</version>
</dependency>
代码实现:
package com.taotao.fastdfs;

import org.csource.fastdfs.ClientGlobal;
import org.csource.fastdfs.StorageClient;
import org.csource.fastdfs.StorageServer;
import org.csource.fastdfs.TrackerClient;
import org.csource.fastdfs.TrackerServer;
import org.junit.Test;

public class FastdfsTest {

	@Test
	public void testUpload() throws Exception{

//		1、把FastDFS提供的jar包添加到工程中
//		2、初始化全局配置。加载一个配置文件。
		ClientGlobal.init("E:\\mytaotao\\taotao-manager\\taotao-manager-web\\src\\main\\resources\\properties\\client.conf");
//		3、创建一个TrackerClient对象。
		TrackerClient trackerClient =new TrackerClient();

//		4、创建一个TrackerServer对象。
		TrackerServer trackerServer=trackerClient.getConnection();
//		5、声明一个StorageServer对象,null。
		StorageServer storageServer=null;
//		6、获得StorageClient对象。
		StorageClient storageClient=new StorageClient(trackerServer,storageServer);

//		7、直接调用StorageClient对象方法上传文件即可。
	    String[] strings=	storageClient.upload_file("E:\\mytaotao\\touxiang.jpg", "jpg", null);
	    for(String string:strings)
	    {
	    	System.out.println(string);
	    }
	}
在项目中写一个配置文件,指定trackerserver的IP和端口,在初始化全局配置中需要使用。
Client.conf
tracker_server=192.168.25.133:22122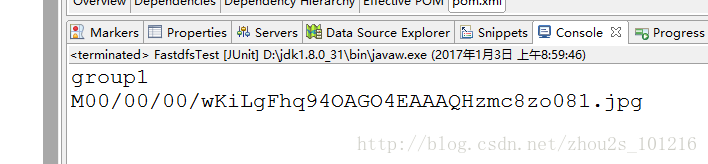
可以对上传进行一个封装,SpringMVC 用的是的MultipartFile来进行文件上传,getBytes获取图片的二进制表示方法,通过文件名称也能判断是什么类型的文件。在构造方法里面初始化tracker和storage的server和client。
package com.taotao.common.utils;

import org.csource.fastdfs.ClientGlobal;
import org.csource.fastdfs.StorageClient1;
import org.csource.fastdfs.StorageServer;
import org.csource.fastdfs.TrackerClient;
import org.csource.fastdfs.TrackerServer;

public class FastDFSClient {
    private TrackerClient trackerClient = null;
    private TrackerServer trackerServer = null;
    private StorageServer storageServer = null;
    //使用StorageClient1进行上传
    private StorageClient1 storageClient1 = null;

    public FastDFSClient(String conf) throws Exception {

    	if(conf.contains("classpath:")){
    		//获取本地的路径的。
    		System.out.println(this.getClass().getResource("/").getPath());
    		conf=conf.replace("classpath:", this.getClass().getResource("/").getPath());
    	}

        ClientGlobal.init(conf);

        trackerClient = new TrackerClient();
        trackerServer = trackerClient.getConnection();
        storageServer = null;
        storageClient1 = new StorageClient1(trackerServer, storageServer);
    }

    public String uploadFile(byte[] file_buff, String file_ext_name) throws Exception {

        String result = storageClient1.upload_file1(file_buff, file_ext_name, null);

        return result;
    }

    public String uploadFile(String local_filename, String file_ext_name) throws Exception {

        String result = storageClient1.upload_file1(local_filename, file_ext_name, null);

        return result;
    }
}
总结:
这个功能实现的还是挺简单的,面对新的内容,需要不断的深入。否则还是一个小白。


 2069
2069


 被折叠的 条评论
为什么被折叠?
被折叠的 条评论
为什么被折叠?
 到【灌水乐园】发言


