


原文转自:http://blog.csdn.net/u010962810/article/details/10191101
在学习了iOS7新出的Text Kit的基础知识后,开始着手编写基于Text Kit的电子书阅读器程序。
首先是搭建程序的基本结构:RootView(导航视图)——BookListView(书本目录表视图)——ReadingView(阅读视图)——URLInteractionView(网页浏览视图)。
其中ReadingView是核心视图,几乎所有的阅读都在该页面中展开。
目前有很多电子书阅读器应用,大多数都有非常棒的翻页效果功能,而且,如果文本非常的长,用户只能通过滚动条来浏览电子书,这样的用户体验不好。所以我打算做成带翻页效果的阅读界面。
明显,翻页效果基于电子书分页,所以首先要进行电子书分页。
其实在iOS提供的sdk中就提供了UIPageViewController这个类来提供动态的翻页效果,但是在配置datasource时,必须静态配置好每一页的数据和总页数等,这种做法略显不够灵。而且我对该类的使用也不够熟悉,加上我想自己尝试去写出翻页效果的实现,最后我放弃了使用UIPageViewController。
(一)电子书分页
开始的分页方案是先计算文本总长度,然后设定一个每页字符数的标准,从而计算出总页数以及得出每页显示的文字及其范围。但是每页字符数的标准很难定下来,于是参考网上的文章进行了改进:http://mobile.51cto.com/iphone-227245.htm
该网页提供的参考代码如下:
- // Implement viewDidLoad to do additional setup after loading the view, typically from a nib.
- - (void)viewDidLoad {
- [super viewDidLoad];
- //
- totalPages = 0;
- currentPage = 0;
- //
- textLabel.numberOfLines = 0;
- //
- if (!text) {
- // 从文件里加载文本串
- [self loadString];
- // 计算文本串的大小尺寸
- CGSize totalTextSize = [text sizeWithFont:[UIFont systemFontOfSize:FONT_SIZE_MAX]
- constrainedToSize:CGSizeMake(textLabel.frame.size.width, CGFLOAT_MAX)
- lineBreakMode:UILineBreakModeWordWrap];
- // 如果一页就能显示完,直接显示所有文本串即可。
- if (totalTextSize.height < textLabel.frame.size.height) {
- texttextLabel.text = text;
- }
- else {
- // 计算理想状态下的页面数量和每页所显示的字符数量,只是拿来作为参考值用而已!
- NSUInteger textLength = [text length];
- referTotalPages = (int)totalTextSize.height/(int)textLabel.frame.size.height+1;
- referCharatersPerPage = textLength/referTotalPages;
- // 申请最终保存页面NSRange信息的数组缓冲区
- int maxPages = referTotalPages;
- rangeOfPages = (NSRange *)malloc(referTotalPages*sizeof(NSRange));
- memset(rangeOfPages, 0x0, referTotalPages*sizeof(NSRange));
- // 页面索引
- int page = 0;
- for (NSUInteger location = 0; location < textLength; ) {
- // 先计算临界点(尺寸刚刚超过UILabel尺寸时的文本串)
- NSRange range = NSMakeRange(location, referCharatersPerPage);
- // reach end of text ?
- NSString *pageText;
- CGSize pageTextSize;
- while (range.location + range.length < textLength) {
- pageText = [text substringWithRange:range];
- pageTextSize = [pageText sizeWithFont:[UIFont systemFontOfSize:FONT_SIZE_MAX]
- constrainedToSize:CGSizeMake(textLabel.frame.size.width, CGFLOAT_MAX)
- lineBreakMode:UILineBreakModeWordWrap];
- if (pageTextSize.height > textLabel.frame.size.height) {
- break;
- }
- else {
- range.length += referCharatersPerPage;
- }
- }
- if (range.location + range.length >= textLength) {
- range.length = textLength - range.location;
- }
- // 然后一个个缩短字符串的长度,当缩短后的字符串尺寸小于textLabel的尺寸时即为满足
- while (range.length > 0) {
- pageText = [text substringWithRange:range];
- pageTextSize = [pageText sizeWithFont:[UIFont systemFontOfSize:FONT_SIZE_MAX]
- constrainedToSize:CGSizeMake(textLabel.frame.size.width, CGFLOAT_MAX)
- lineBreakMode:UILineBreakModeWordWrap];
- if (pageTextSize.height <= textLabel.frame.size.height) {
- range.length = [pageText length];
- break;
- }
- else {
- range.length -= 2;
- }
- }
- // 得到一个页面的显示范围
- if (page >= maxPages) {
- maxPages += 10;
- rangeOfPages = (NSRange *)realloc(rangeOfPages, maxPages*sizeof(NSRange));
- }
- rangeOfPages[page++] = range;
- // 更新游标
- location += range.length;
- }
- // 获取最终页面数量
- totalPages = page;
- // 更新UILabel内容
- textLabel.text = [text substringWithRange:rangeOfPages[currentPage]];
- }
- }
- // 显示当前页面进度信息,格式为:"8/100"
- pageInfoLabel.text = [NSString stringWithFormat:@"%d/%d", currentPage+1, totalPages];
- }
- // 上一页
- - (IBAction)actionPrevious:(id)sender {
- if (currentPage > 0) {
- currentPage--;
- NSRange range = rangeOfPages[currentPage];
- NSString *pageText = [text substringWithRange:range];
- textLabel.text = pageText;
- //
- pageInfoLabel.text = [NSString stringWithFormat:@"%d/%d", currentPage+1, totalPages];
- }
- }
- // 下一页
- - (IBAction)actionNext:(id)sender {
- if (currentPage < totalPages-1) {
- currentPage++;
- NSRange range = rangeOfPages[currentPage];
- NSString *pageText = [text substringWithRange:range];
- textLabel.text = pageText;
- //
- pageInfoLabel.text = [NSString stringWithFormat:@"%d/%d", currentPage+1, totalPages];
- }
- }
- // 计算文本串的大小尺寸
- CGSize totalTextSize = [text sizeWithFont:[UIFont systemFontOfSize:FONT_SIZE_MAX]
- constrainedToSize:CGSizeMake(textLabel.frame.size.width, CGFLOAT_MAX)
- lineBreakMode:UILineBreakModeWordWrap];
- // 计算理想状态下的页面数量和每页所显示的字符数量,只是拿来作为参考值用而已!
- NSUInteger textLength = [text length];
- referTotalPages = (int)totalTextSize.height/(int)textLabel.frame.size.height+1;
- referCharatersPerPage = textLength/referTotalPages;
在下面翻页时只需直接在referCharatersPerPage中取得文本范围并加载就可以了。
的确,这样的分页效果非常好,每一页的文字都刚好布满整个textview,页与页之间的连贯性非常好,而且在翻页时获取指定页的文本范围非常的简单。但是非常糟糕的是这种分页算法的效率可谓奇低,例如对一篇最后分成4页的文本要几秒,对一篇分成200多页的文本可能要几分钟。另外,为了存储rangeOfPages,需要申请预定的内存空间,这又进一步增大了程序的开销。
尽管如此,该算法的思想还是可取的。
下面是我的分页的代码:
- /* 判断是否需要分页和进行分页 */
- -(BOOL)paging
- {
- /* 获取文本内容的string值 */
- NSString *text = [bookItem.content string];
- /* 获取Settings中设定好的字体(主要是获取字体大小) */
- static const CGFloat textScaleFactor = 1.; // 设置文字比例
- NSString *textStyle = [curPageView.textView tkd_textStyle]; // 设置文字样式
- preferredFont_ = [UIFont tkd_preferredFontWithTextStyle:textStyle
- scale:textScaleFactor]; //设置prferredFont(包括样式和大小)
- NSLog(@"paging: %@", preferredFont_.fontDescriptor.fontAttributes); // 在控制台中输出字体的属性字典
- /* 设定每页的页面尺寸 */
- NSUInteger width = (int)self.view.bounds.size.width - 20.0; // 页面的宽度
- NSUInteger height = (int)self.view.bounds.size.height - 40.0; // 页面的高度
- /* 计算文本串的总大小尺寸 Deprecated in iOS 7.0 */
- CGSize totalTextSize = [text sizeWithFont:preferredFont_
- constrainedToSize:CGSizeMake(width, CGFLOAT_MAX)
- lineBreakMode:NSLineBreakByWordWrapping];
- NSLog(@"totalTextSize:w = %f,h = %f", totalTextSize.width, totalTextSize.height);
- /* 开始分页 */
- if (totalTextSize.height < height) {
- /* 如果一页就能显示完,直接显示所有文本 */
- totalPages_ = 1; // 设定总页数为1
- charsPerPage_ = [text length]; // 设定每页的字符数
- textLength_ = [text length]; // 设定文本总长度
- return NO; // 不用分页
- }
- else {
- /* 计算理想状态下的页面数量和每页所显示的字符数量,用来作为参考值用 */
- textLength_ = [text length]; // 文本的总长度
- NSUInteger referTotalPages = (int)totalTextSize.height / (int)height + 1; // 理想状态下的总页数
- NSUInteger referCharactersPerPage = textLength_ / referTotalPages; // 理想状态下每页的字符数
- // 输出理想状态下的参数信息
- NSLog(@"textLength = %d", textLength_);
- NSLog(@"referTotalPages = %d", referTotalPages);
- NSLog(@"referCharactersPerPage = %d", referCharactersPerPage);
- /* 根据referCharactersPerPage和text view的高度开始动态调整每页的字符数 */
- // 如果referCharactersPerPage过大,则直接调整至下限值,减少调整的时间
- if (referCharactersPerPage > 600) {
- referCharactersPerPage = 600;
- }
- // 获取理想状态下的每页文本的范围和pageText及其尺寸
- NSRange range = NSMakeRange(referCharactersPerPage, referCharactersPerPage); // 一般第一页字符数较少,所以取第二页的文本范围作为调整的参考标准
- NSString *pageText = [text substringWithRange:range]; // 获取该范围内的文本
- NSLog(@"%@", pageText);
- CGSize pageTextSize = [pageText sizeWithFont:preferredFont_
- constrainedToSize:CGSizeMake(width, CGFLOAT_MAX)
- lineBreakMode:NSLineBreakByWordWrapping]; // 获取pageText的尺寸
- // 若pageText超出text view的显示范围,则调整referCharactersPerPage
- NSLog(@"height = %d", height);
- while (pageTextSize.height > height) {
- NSLog(@"pageTextSize.height = %f", pageTextSize.height);
- referCharactersPerPage -= 2; // 每页字符数减2
- range = NSMakeRange(0, referCharactersPerPage); // 重置每页字符的范围
- pageText = [text substringWithRange:range]; // 重置pageText
- pageTextSize = [pageText sizeWithFont:preferredFont_
- constrainedToSize:CGSizeMake(width, CGFLOAT_MAX)
- lineBreakMode:NSLineBreakByWordWrapping]; // 获取pageText的尺寸
- }
- // 根据调整后的referCharactersPerPage设定好charsPerPage_
- charsPerPage_ = referCharactersPerPage;
- NSLog(@"cpp: %d", charsPerPage_);
- // 计算totalPages_
- totalPages_ = (int)text.length / charsPerPage_ + 1;
- NSLog(@"ttp: %d", totalPages_);
- // 计算最后一页的字符数,防止范围溢出
- charsOfLastPage_ = textLength_ - (totalPages_ - 1) * charsPerPage_;
- NSLog(@"colp: %d", charsOfLastPage_);
- // 分页完成
- return YES;
- }
- }
为了提高分页算法的效率,我做了一些小改进:
- // 如果referCharactersPerPage过大,则直接调整至下限值,减少调整的时间
- if (referCharactersPerPage > 600) {
- referCharactersPerPage = 600;
- }
- referCharactersPerPage -= 2; // 每页字符数减2
对比之前的算法,由于不需要预先申请存储页面范围的内存空间,所以系统开销减小。更重要的是分页所需的时间大大减小。
使用也是非常简便,而且不需预先申请空间保存各页面的范围:
- // set text in curPageView
- if (currentPage_ == totalPages_ - 1) {
- [curPageView.textView.textStorage setAttributedString:[[bookItem.content attributedSubstringFromRange:NSMakeRange(currentPage_ * charsPerPage_, charsOfLastPage_)] mutableCopy]];
- }
- else {
- [curPageView.textView.textStorage setAttributedString:[[bookItem.content attributedSubstringFromRange:NSMakeRange(currentPage_ * charsPerPage_, charsPerPage_)] mutableCopy]];
- }
- curPageView.textView.font = preferredFont_;
- NSMakeRange(currentPage_ * charsPerPage_, charsOfLastPage_)]
另一方面可以设定一个私有变量preferredFont_便于在用户调整字体大小时重置text view中的字体。
不足之处:
1.对于近80000字符数的文本的加载可能也需要3秒左右时间加载,明显不够快,在此我的进一步改进的设想是将首次加载文本时时计算好的charsPerPage和对应的电子书名保存起来,在下次加载时直接从保存好的数据中加载charsPerPage,这样非首次加载文本就可以免去分页计算的时间。但是我还没想好用哪种方法保存数据,有待改进。
2.最大的不足是由于限定了每页的字符数,所以难免会出现每页的显示会出现参差不齐,例如每页显示的文本高度不同,页与页之间的连贯性不够好,等等。
3.sizeWithFont:constrainedToSize:lineBreakMode:方法已经被iOS 7.0建议Deprecated。
- /* 计算文本串的总大小尺寸 Deprecated in iOS 7.0 */
- CGSize totalTextSize = [text sizeWithFont:preferredFont_
- constrainedToSize:CGSizeMake(width, CGFLOAT_MAX)
- lineBreakMode:NSLineBreakByWordWrapping];
可以用iOS7新出的方法来代替:
- - (CGRect)boundingRectWithSize:(CGSize)size options:(NSStringDrawingOptions)options attributes:(NSDictionary *)attributes context:(NSStringDrawingContext *)context NS_AVAILABLE_IOS(7_0);
即通过计算字体高度和字符行距之和来得出文本的大小尺寸。这一点要改进。
(二)字体调整
若用户在Settings中调整字体时,text view中的字体要作出相应的变化。
其实也非常简单,首先在消息中心注册消息接受者:
- [[NSNotificationCenter defaultCenter] addObserver:self selector:@selector(preferredContentSizeChanged:) name:UIContentSizeCategoryDidChangeNotification object:nil]; // 当不同类别的字体大小发生变化时发送消息给self
- // 当消息中心收到用户在settings中调整字体大小的消息
- -(void)preferredContentSizeChanged:(NSNotification *)noti
- {
- static const CGFloat textScaleFactor = 1.; // 设置文字显示比例
- NSString *textStyle = [curPageView.textView tkd_textStyle]; // 设置文字样式
- preferredFont_ = [UIFont tkd_preferredFontWithTextStyle:textStyle
- scale:textScaleFactor]; // 设置preferredFont_(包括样式和大小)
- NSLog(@"%@", preferredFont_.fontDescriptor.fontAttributes);
- curPageView.textView.font = preferredFont_; // 设置text view中的字体
- }
由于preferredFont_是私有变量,可以在整个.m文件中实现,所以在以上的实现方法中可以设定preferredFont_为调整后的字体。
- addPageView.textView.font = preferredFont_;
(三)翻页效果
为了制造翻页效果,所以我将PageView和ReadingViewController独立开来,ReadingViewController在self.view中加入PageView来实现多个页面视图的加载。
首先看看PageView的接口部分:
- #import <UIKit/UIKit.h>
- @class TextStorage;
- @interface PageView : UIView
- @property (strong, nonatomic) UITextView *textView;
- @property (nonatomic, strong) TextStorage *textStorage;
- @end
然后是实现部分的初始化方法:
- - (id)initWithFrame:(CGRect)frame
- {
- self = [super initWithFrame:frame];
- if (self) {
- CGRect textViewRect = CGRectInset(self.frame, 10.0, 20.0);
- // NSTextContainer
- NSTextContainer *container = [[NSTextContainer alloc] initWithSize:CGSizeMake(textViewRect.size.width, CGFLOAT_MAX)]; // new in iOS 7.0
- container.widthTracksTextView = YES; // Controls whether the receiveradjusts the width of its bounding rectangle when its text view is resized
- // NSLayoutManager
- NSLayoutManager *layoutManager = [[NSLayoutManager alloc] init]; // new in iOS 7.0
- [layoutManager addTextContainer:container];
- // NSTextStorage subclass
- self.textStorage = [[TextStorage alloc] init]; // new in iOS 7.0
- [self.textStorage addLayoutManager:layoutManager];
- // set TextStorage
- [textStorage beginEditing];
- /* New letterpress text style added to iOS 7 */
- /*
- NSDictionary *attrsDic = @{NSTextEffectAttributeName: NSTextEffectLetterpressStyle};
- UIKIT_EXTERN NSString *const NSTextEffectAttributeName NS_AVAILABLE_IOS(7_0); // NSString, default nil: no text effect
- NSMutableAttributedString *mutableAttrString = [[NSMutableAttributedString alloc] initWithString:@"Letterpress" attributes:attrsDic];
- NSAttributedString *appendAttrString = [[NSAttributedString alloc] initWithString:@" Append:Letterpress"];
- [mutableAttrString appendAttributedString:appendAttrString];
- [_textStorage setAttributedString:mutableAttrString];
- */
- /* Dynamic Coloring Text */
- textStorage.tokens = @{@"Alice" : @{NSForegroundColorAttributeName: [UIColor redColor] },
- @"Rabbit" : @{NSForegroundColorAttributeName: [UIColor greenColor]},
- DefaultTokenName: @{NSForegroundColorAttributeName: [UIColor blackColor]}
- };
- [textStorage endEditing];
- // UITextView
- UITextView *newTextView = [[UITextView alloc] initWithFrame:textViewRect textContainer:container];
- newTextView.autoresizingMask = UIViewAutoresizingFlexibleHeight | UIViewAutoresizingFlexibleWidth;
- newTextView.keyboardDismissMode = UIScrollViewKeyboardDismissModeOnDrag;
- newTextView.dataDetectorTypes = UIDataDetectorTypeAll;
- newTextView.backgroundColor = [UIColor whiteColor];
- newTextView.hidden = NO;
- newTextView.editable = NO;
- newTextView.pagingEnabled = YES;
- newTextView.scrollEnabled = YES;
- newTextView.userInteractionEnabled = YES;
- newTextView.selectable = YES;
- self.textView = newTextView;
- [self addSubview:self.textView];
- }
- return self;
- }
PageView用于存放textView,textView用于显示分页后每页的文本。是阅读的主要部分。
再看看ReadingViewController的viewDidLoad方法部分代码:
- // 各页面视图初始化
- curPageView = [[PageView alloc] initWithFrame:self.view.bounds];
- addPageView = [[PageView alloc] initWithFrame:self.view.bounds];
- backPageView = [[PageView alloc] initWithFrame:self.view.bounds];
- // 设置各页面视图的委托
- curPageView.textView.delegate = self;
- addPageView.textView.delegate = self;
- backPageView.textView.delegate = self;
- // 设置初始值
- currentPage_ = 0;
- totalPages_ = 0;
- charsPerPage_ = 0;
- textLength_ = 0;
- curoffset_ = 0.;
- alertDelegate_ = -1;
- minoffset_ = self.view.bounds.size.width / 5;
- // 判断是否需要分页并设置currPage的内容
- if ([self paging] == NO) {
- // 如果不需要分页,直接在当前页的textView中加载书的内容
- [curPageView.textView.textStorage setAttributedString:bookItem.content];
- }
- else {
- // 如果需要分页
- [curPageView.textView.textStorage setAttributedString:[[bookItem.content attributedSubstringFromRange:NSMakeRange(0, charsPerPage_)] mutableCopy]];
- }
- [self.view addSubview:curPageView];
- curPageView.clipsToBounds = YES; curPageView.textView.font = preferredFont_;
- curPageView.textView.keyboardDismissMode = UIScrollViewKeyboardDismissModeOnDrag;
- curPageView.textView.dataDetectorTypes = UIDataDetectorTypeAll;
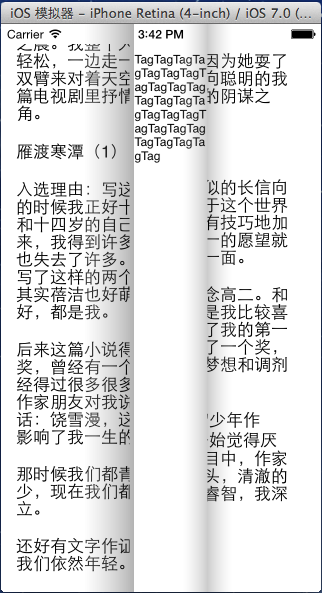
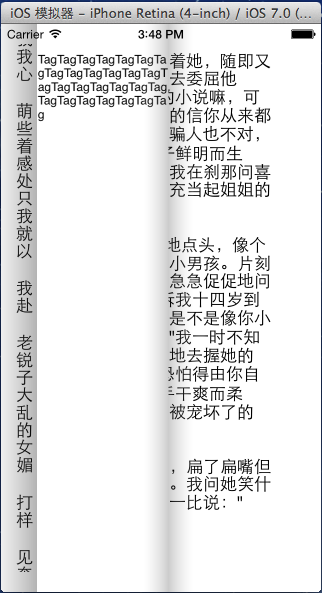
- backPageView.textView.text = @"TagTagTagTagTagTagTagTagTagTagTagTagTagTagTagTagTagTagTagTagTagTagTagTagTagTagTag";
- backPageView.clipsToBounds = YES;
为了翻页效果根据用户的手势触点动态变化,需要在以下方法中实现:
- -(void)touchesBegan:(NSSet *)touches withEvent:(UIEvent *)event
- -(void)touchesMoved:(NSSet *)touches withEvent:(UIEvent *)event
- -(void)touchesEnded:(NSSet *)touches withEvent:(UIEvent *)event
- -(void)touchesBegan:(NSSet *)touches withEvent:(UIEvent *)event
- {
- //记录手势起点的x值
- UITouch *touch = [touches anyObject];
- startX_ = [touch locationInView:self.view].x;
- }
接着是触摸移动:
- -(void)touchesMoved:(NSSet *)touches withEvent:(UIEvent *)event
- {
- //将视图中已经存在的渐变或页边阴影去掉
- if (shadow) {
- [shadow removeFromSuperlayer];
- }
- if (margin) {
- [margin removeFromSuperlayer];
- }
- //获取当前手势触点的x值
- UITouch *touch = [touches anyObject];
- float x = [touch locationInView:self.view].x;
- if (x - startX_ >= 0) {
- curoffset_ = x - startX_;
- }
- else {
- curoffset_ = startX_ - x;
- }
- // 设定翻转页面的矩形范围
- CGRect rect = self.view.bounds;
- if (x >= 160) {
- rect.size.width = (320 / x - 1) * 160;
- rect.origin.x = x - rect.size.width;
- }
- else {
- rect.size.width = 320 - x;
- rect.origin.x = x - rect.size.width;
- }
- int tempX = rect.origin.x; //保存翻转页面起点的x值
- backPageView.frame = rect;
- //rect用于设定翻页时左边页面的范围
- rect = self.view.bounds;
- rect.size.width = x;
- // 判断手势并设定页面,制造翻页效果
- if (x - startX_ > 0) {//向右划的手势,上一页
- next_ = NO;
- if (currentPage_ == 0) {
- return; // 如果是第一页则不接受手势
- }
- else {
- addPageView.frame = rect;
- [addPageView.textView.textStorage setAttributedString:[[bookItem.content attributedSubstringFromRange:NSMakeRange((currentPage_ - 1) * charsPerPage_, charsPerPage_)] mutableCopy]];
- addPageView.textView.font = preferredFont_;
- addPageView.clipsToBounds = YES;
- [self.view insertSubview:addPageView aboveSubview:curPageView];
- [self.view insertSubview:backPageView aboveSubview:addPageView];
- }
- }
- else {//向左划的手势,下一页
- next_ = YES;
- if (currentPage_ == totalPages_ - 1) {
- return; // 如果到达最后一页则不接受手势
- }
- else {
- curPageView.frame = rect;
- if (currentPage_ == totalPages_ - 2) {
- [addPageView.textView.textStorage setAttributedString:[[bookItem.content attributedSubstringFromRange:NSMakeRange((currentPage_ + 1) * charsPerPage_, charsOfLastPage_)] mutableCopy]];
- }
- else {
- [addPageView.textView.textStorage setAttributedString:[[bookItem.content attributedSubstringFromRange:NSMakeRange((currentPage_ + 1) * charsPerPage_, charsPerPage_)] mutableCopy]];
- }
- addPageView.textView.font = preferredFont_;
- [self.view insertSubview:addPageView belowSubview:curPageView];
- [self.view insertSubview:backPageView aboveSubview:curPageView];
- }
- }
- //设定翻页时backPage视图两边的渐变阴影效果
- shadow = [[CAGradientLayer alloc] init];
- shadow.colors = [NSArray arrayWithObjects:
- (id)[UIColor colorWithRed:1.0 green:1.0 blue:1.0 alpha:0.1].CGColor,
- (id)[UIColor colorWithRed:0.0 green:0.0 blue:0.0 alpha:0.2].CGColor,
- (id)[UIColor colorWithRed:1.0 green:1.0 blue:1.0 alpha:0.1].CGColor,
- nil];
- rect = self.view.bounds;
- rect.size.width = 50;
- rect.origin.x = x - 25;
- shadow.frame = rect;
- shadow.startPoint = CGPointMake(0.0, 0.5);
- shadow.endPoint = CGPointMake(1.0, 0.5);
- [self.view.layer addSublayer:shadow];
- margin = [[CAGradientLayer alloc] init];
- margin.colors = [NSArray arrayWithObjects:
- (id)[UIColor colorWithRed:1.0 green:1.0 blue:1.0 alpha:0.2].CGColor,
- (id)[UIColor colorWithRed:0.0 green:0.0 blue:0.0 alpha:0.3].CGColor,
- nil];
- margin.frame = CGRectMake(tempX - 35, 0, 50, self.view.bounds.size.height);
- margin.startPoint = CGPointMake(0.0, 0.5);
- margin.endPoint = CGPointMake(1.0, 0.5);
- [self.view.layer addSublayer:margin];
- }
- // 设定翻转页面的矩形范围
- CGRect rect = self.view.bounds;
- if (x >= 160) {
- rect.size.width = (320 / x - 1) * 160;
- rect.origin.x = x - rect.size.width;
- }
- else {
- rect.size.width = 320 - x;
- rect.origin.x = x - rect.size.width;
- }
- int tempX = rect.origin.x; //保存翻转页面起点的x值
- backPageView.frame = rect;
- //rect用于设定翻页时左边页面的范围
- rect = self.view.bounds;
- rect.size.width = x;
这样一来,翻转页面的宽度在160到320之间非线性缓慢增大至160,在0到160之间线性增大320(超出视图左边的部分我们看不见)。
为了制造页面翻转的效果,要添加两个CAGradientLayer:shadow和margin。如下:
- //设定翻页时backPage视图两边的渐变阴影效果
- shadow = [[CAGradientLayer alloc] init];
- shadow.colors = [NSArray arrayWithObjects:
- (id)[UIColor colorWithRed:1.0 green:1.0 blue:1.0 alpha:0.1].CGColor,
- (id)[UIColor colorWithRed:0.0 green:0.0 blue:0.0 alpha:0.2].CGColor,
- (id)[UIColor colorWithRed:1.0 green:1.0 blue:1.0 alpha:0.1].CGColor,
- nil];
- rect = self.view.bounds;
- rect.size.width = 50;
- rect.origin.x = x - 25;
- shadow.frame = rect;
- shadow.startPoint = CGPointMake(0.0, 0.5);
- shadow.endPoint = CGPointMake(1.0, 0.5);
- [self.view.layer addSublayer:shadow];
- margin = [[CAGradientLayer alloc] init];
- margin.colors = [NSArray arrayWithObjects:
- (id)[UIColor colorWithRed:1.0 green:1.0 blue:1.0 alpha:0.2].CGColor,
- (id)[UIColor colorWithRed:0.0 green:0.0 blue:0.0 alpha:0.3].CGColor,
- nil];
- margin.frame = CGRectMake(tempX - 35, 0, 50, self.view.bounds.size.height);
- margin.startPoint = CGPointMake(0.0, 0.5);
- margin.endPoint = CGPointMake(1.0, 0.5);
- [self.view.layer addSublayer:margin];
shadow用于展示阴影效果(Tag页面右边缘),margin用于展示页边效果(Tag页面左边缘):
为了防止触摸移动过程中的layer停留在页面中,首先要移除视图中的layer:
- //将视图中已经存在的渐变或页边阴影去掉
- if (shadow) {
- [shadow removeFromSuperlayer];
- }
- if (margin) {
- [margin removeFromSuperlayer];
- }
如果是翻向下一页,那么视图及layer的叠放次序(由下至上)为:
self.view,addPageView,curPageView,backPageView(Tag标识页面),margin,shadow。
如果是翻向上一页,那么视图及layer的叠放次序(由下至上)为:
self.view,curPageView,addPageView,backPageView,margin,shadow。
注意一定要设置好各个视图的clipToBounds属性为YES,防止遮住下层视图:
- curPageView.clipsToBounds = YES;
- backPageView.clipsToBounds = YES;
- addPageView.clipsToBounds = YES;
- -(void)touchesEnded:(NSSet *)touches withEvent:(UIEvent *)event
- {
- // 如果是第一页并且翻向上一页
- if (currentPage_ == 0) {
- if (next_ == NO) {
- return;
- }
- }
- // 如果是最后一页并且翻向下一页
- if (currentPage_ == totalPages_ - 1) {
- if (next_ == YES) {
- UIAlertView *av = [[UIAlertView alloc] initWithTitle:@"注意" message:@"已经到达最后一页" delegate:nil cancelButtonTitle:@"确定" otherButtonTitles:nil, nil];
- [av show];
- return;
- }
- }
- if (curoffset_ < minoffset_) {
- curPageView.frame = self.view.bounds;
- curPageView.textView.frame = CGRectInset(self.view.bounds, 10.0, 20.0);
- [curPageView.textView.textStorage setAttributedString:[[bookItem.content attributedSubstringFromRange:NSMakeRange(currentPage_ * charsPerPage_, charsPerPage_)] mutableCopy]];
- curPageView.textView.font = preferredFont_;
- [addPageView removeFromSuperview];
- [backPageView removeFromSuperview];
- //移除阴影效果
- [shadow removeFromSuperlayer];
- [margin removeFromSuperlayer];
- return;
- }
- if (next_ == YES) { // 下一页
- currentPage_++;
- NSLog(@"%d / %d", currentPage_ + 1, totalPages_);
- // show reading progress
- showProgressItem.title = [NSString stringWithFormat:@"%d / %d", currentPage_ + 1, totalPages_];
- [curPageView.textView.textStorage setAttributedString:addPageView.textView.textStorage];
- curPageView.frame = self.view.bounds;
- curPageView.textView.frame = CGRectInset(self.view.bounds, 10.0, 20.0);
- }
- else { // 上一页
- currentPage_--;
- NSLog(@"%d / %d", currentPage_ + 1, totalPages_);
- // show reading progress
- showProgressItem.title = [NSString stringWithFormat:@"%d / %d", currentPage_ + 1, totalPages_];
- [curPageView.textView.textStorage setAttributedString:addPageView.textView.textStorage];
- curPageView.frame = self.view.bounds;
- curPageView.textView.frame = CGRectInset(self.view.bounds, 10.0, 20.0);
- }
- [addPageView removeFromSuperview];
- [backPageView removeFromSuperview];
- //移除阴影效果
- [shadow removeFromSuperlayer];
- [margin removeFromSuperlayer];
- }
触摸结束后首先判断触摸的移动距离是否超过最小移动距离:self.view.frame.width / 5,,如果没有达到则不接受手势,否则翻页成功并加载下一页的内容在curPageView中,移除addPageView和所有layer。
在这里要注意一个问题:由于UITextView无法响应UITouch对象的触摸事件,只有UIView可以响应UITocuh对象的触摸,所以以上基于touchesBegan:,touchesMoved:和touchesEnded:来制造翻页效果的方法只能适用于普通的UIView,UIImageView,UILabel等,而不能用于UITextView,也就是说如果text view铺满整个curPageView,那么将无法响应touch事件的方法,而且为了美观起见,我设定text view的区域范围为:
- CGRect textViewRect = CGRectInset(self.frame, 10.0, 20.0);
另外为了扩大touch响应的范围,我又在视图的左右边缘加入了两个标签:
- // Add a label in left
- rect = self.view.bounds;
- rect.size.width /= 4;
- rect.size.height -= 100.0;
- rect.origin.y = 60.0;
- left_label_ = [[UILabel alloc] initWithFrame:rect];
- left_label_.userInteractionEnabled = YES;
- left_label_.hidden = NO;
- [curPageView addSubview:left_label_];
- UITapGestureRecognizer *tapInLeftLabel = [[UITapGestureRecognizer alloc] initWithTarget:self action:@selector(hideBars:)];
- [left_label_ addGestureRecognizer:tapInLeftLabel];
- // Add a label in right
- rect = self.view.bounds;
- rect.size.width /= 4;
- rect.size.height -= 100.0;
- rect.origin.y = 60.0;
- rect.origin.x = self.view.bounds.size.width * .75;
- right_label_ = [[UILabel alloc] initWithFrame:rect];
- right_label_.userInteractionEnabled = YES;
- right_label_.hidden = NO;
- [curPageView addSubview:right_label_];
- UITapGestureRecognizer *tapInRightLabel = [[UITapGestureRecognizer alloc] initWithTarget:self action:@selector(hideBars:)];
- [right_label_ addGestureRecognizer:tapInRightLabel];
记住设置标签的userInteractionEnabled属性为YES就可以了。
标签的action的作用是若工具条出现,轻击标签就可以让工具条隐藏。
另外,若对文字进行编辑则隐藏这两个标签。这样一来既便于用户翻页,又可以保证用户对text view进行操作,如在当前text view进行滚动(如果文字长度超出了text view的高度,需要滚动视图查看)或者选中文字等。
对于制造翻页效果,简单来说就是在self.view中按特定的叠加关系添加几个视图和layer,并根据touch的x值来设置视图的位置,从而制造翻页的效果。
(四)页面跳转,书签
为了实现快速的页面跳转,可以唤出带输入框的对话框:
- // Turn bar button item: 快速跳转到指定页
- -(void)turnTo:(id)sender
- {
- alertDelegate_ = 0;
- UIAlertView *av = [[UIAlertView alloc] initWithTitle:@"请输入您想要浏览的页数" message:nil delegate:self cancelButtonTitle:@"确定" otherButtonTitles:@"取消", nil];
- av.alertViewStyle= UIAlertViewStylePlainTextInput; // 设定对话框带有UTTextField类型的文本输入框
- UITextField *tf = [av textFieldAtIndex:0]; // 获取输入框
- tf.keyboardType = UIKeyboardTypeNumberPad; // 设定键盘类型为数字键盘
- tf.keyboardAppearance = UIKeyboardAppearanceLight; // 设定键盘外观
- [av show];
- }
- #pragma mark -
- #pragma mark Alert view delegate
- -(void)alertView:(UIAlertView *)alertView clickedButtonAtIndex:(NSInteger)buttonIndex
- {
- if (buttonIndex == 0) {
- if (alertDelegate_ == 0) { // 快速页面跳转时输入页数
- UITextField *tf = [alertView textFieldAtIndex:0];
- currentPage_ = [tf.text integerValue];
- NSLog(@"%d", currentPage_);
- if (currentPage_ <= 0 || currentPage_ > totalPages_) {
- alertDelegate_ = -2;
- UIAlertView *warn = [[UIAlertView alloc] initWithTitle:@"警告" message:@"您输入的页数错误" delegate:nil cancelButtonTitle:@"确定" otherButtonTitles:nil, nil];
- [warn show];
- return;
- }
- // 在工具条的showProgressItem中显示当前阅读进度
- showProgressItem.title = [NSString stringWithFormat:@"%d / %d", currentPage_, totalPages_];
- currentPage_--;
- // set text in curPageView
- if (currentPage_ == totalPages_ - 1) {
- [curPageView.textView.textStorage setAttributedString:[[bookItem.content attributedSubstringFromRange:NSMakeRange(currentPage_ * charsPerPage_, charsOfLastPage_)] mutableCopy]];
- }
- else {
- [curPageView.textView.textStorage setAttributedString:[[bookItem.content attributedSubstringFromRange:NSMakeRange(currentPage_ * charsPerPage_, charsPerPage_)] mutableCopy]];
- }
- curPageView.textView.font = preferredFont_;
- }
- else if (alertDelegate_ == 1) { // 新建书签时输入书签名
- UITextField *tf = [alertView textFieldAtIndex:0];
- NSString *name = tf.text;
- NSString *page = [NSString stringWithFormat:@"%d", currentPage_ + 1];
- // add book mark
- NSDictionary *dic = @{@"name": name,
- @"page": page
- };
- [bookmarks addObject:dic];
- // save bookmarks data
- NSLog(@"%@", [NSString stringWithFormat:@"%@ - 第%@页", name, page]);
- [bookmarksView reloadData];
- }
- else { // 其它情况不返回任何数据
- return;
- };
- }
- }
- rect = self.view.bounds;
- rect.origin.y = 20.0;
- rect.size.height -= 60.0;
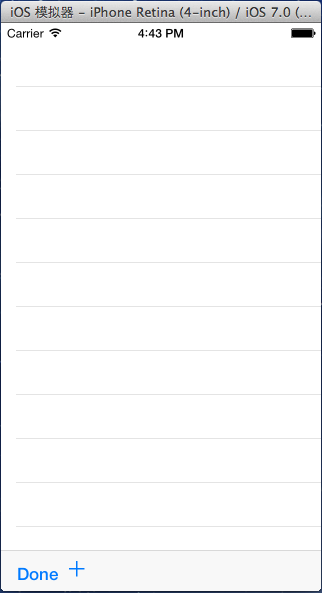
- bookmarksView = [[UITableView alloc] initWithFrame:rect style:UITableViewStylePlain];
- bookmarksView.dataSource = self; // 设置表格视图的数据源
- bookmarksView.delegate = self; // 设置表格视图的委托
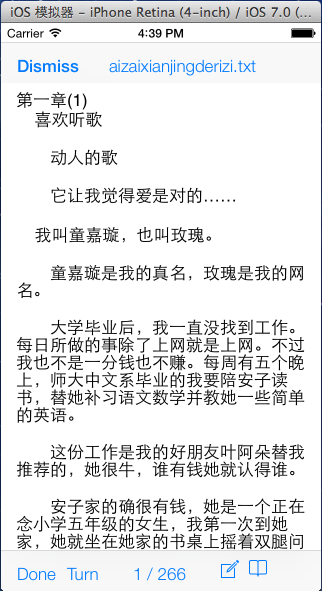
(五)ReadingViewController的几个工具条和标签
界面:
代码:
- // Add tool bar on top
- CGRect rect = self.view.bounds;
- rect.origin.y = 20.0;
- rect.size.height = 40.0;
- topToolbar = [[UIToolbar alloc] initWithFrame:rect];
- topToolbar.hidden = NO;
- // Add bar button items to top tool bar
- dismissItem = [[UIBarButtonItem alloc] initWithTitle:@"Dismiss" style:UIBarButtonItemStyleDone target:self action:@selector(dismissCurrentView:)];
- topLeftFixedSpace = [[UIBarButtonItem alloc] initWithBarButtonSystemItem:UIBarButtonSystemItemFixedSpace target:nil action:nil];
- topLeftFixedSpace.width = 20.0;
- titleItem = [[UIBarButtonItem alloc] initWithTitle:bookItem.name style:UIBarButtonItemStylePlain target:nil action:nil];
- topItems = @[dismissItem, topLeftFixedSpace, titleItem];
- topToolbar.items = topItems;
- [curPageView addSubview:topToolbar];
- // Add tap recognizer to text view
- UITapGestureRecognizer *tapInTextView = [[UITapGestureRecognizer alloc] initWithTarget:self action:@selector(hideBars:)];
- [curPageView.textView addGestureRecognizer:tapInTextView];
- // Add a label at bottom
- rect = self.view.bounds;
- rect.origin.y = rect.size.height - 30.0;
- rect.size.height = 30.0;
- bottom_label = [[UILabel alloc] initWithFrame:rect];
- bottom_label.userInteractionEnabled = YES;
- UITapGestureRecognizer *tapRecognizer = [[UITapGestureRecognizer alloc] initWithTarget:self action:@selector(showBars:)];
- [bottom_label addGestureRecognizer:tapRecognizer];
- [curPageView addSubview:bottom_label];
- // Add a tool bar at bottom
- rect = self.view.bounds;
- rect.origin.y = rect.size.height - 40.0;
- rect.size.height = 40.0;
- bottomToolbar = [[UIToolbar alloc] initWithFrame:rect];
- bottomToolbar.hidden = NO;
- [curPageView addSubview:bottomToolbar];
- // Add bar button items to bottom tool bar
- doneItem = [[UIBarButtonItem alloc] initWithTitle:@"Done" style:UIBarButtonItemStylePlain target:self action:@selector(hideBars:)];
- turnItem = [[UIBarButtonItem alloc] initWithTitle:@"Turn" style:UIBarButtonItemStylePlain target:self action:@selector(turnTo:)];
- leftFixedSpace = [[UIBarButtonItem alloc] initWithBarButtonSystemItem:UIBarButtonSystemItemFixedSpace target:nil action:nil];
- leftFixedSpace.width = 24.0;
- NSString *progress = [NSString stringWithFormat:@"%d / %d", currentPage_ + 1, totalPages_];
- showProgressItem = [[UIBarButtonItem alloc] initWithTitle:progress style:UIBarButtonItemStylePlain target:nil action:nil];
- rightFixedSpace = [[UIBarButtonItem alloc] initWithBarButtonSystemItem:UIBarButtonSystemItemFixedSpace target:nil action:nil];
- rightFixedSpace.width = 24.0;
- editItem = [[UIBarButtonItem alloc] initWithBarButtonSystemItem:UIBarButtonSystemItemCompose target:self action:@selector(setEdit:)];
- bookmarkItem = [[UIBarButtonItem alloc] initWithBarButtonSystemItem:UIBarButtonSystemItemBookmarks target:self action:@selector(showBookMarks:)];
- bottomItems = @[doneItem, turnItem, leftFixedSpace, showProgressItem, rightFixedSpace, editItem, bookmarkItem];
- bottomToolbar.items = bottomItems;
- // load bookmarks from storing data
- bookmarks = [[NSMutableArray alloc] init]; //
- rect = self.view.bounds;
- rect.origin.y = 20.0;
- rect.size.height -= 60.0;
- bookmarksView = [[UITableView alloc] initWithFrame:rect style:UITableViewStylePlain];
- bookmarksView.dataSource = self;
- bookmarksView.delegate = self;
- rect = self.view.bounds;
- rect.origin.y = rect.size.height - 40.0;
- rect.size.height = 40.0;
- bookmarkToolbar = [[UIToolbar alloc] initWithFrame:rect];
- dismissBookMarkItem = [[UIBarButtonItem alloc] initWithBarButtonSystemItem:UIBarButtonSystemItemDone target:self action:@selector(dismissBookMark:)];
- addBookMarkItem = [[UIBarButtonItem alloc] initWithBarButtonSystemItem:UIBarButtonSystemItemAdd target:self action:@selector(addBookMark:)];
- bookmarkItems = @[dismissBookMarkItem, addBookMarkItem];
- bookmarkToolbar.items = bookmarkItems;
- [bookmarksView registerNib:[UINib nibWithNibName:@"TableViewCell" bundle:[NSBundle mainBundle]] forCellReuseIdentifier:@"Cell"];
(六)响应网络链接
主要就是实现UITextViewDelegate中的方法:
- #pragma mark -
- #pragma mark Text view delegate
- // 当用户在textView中点击特定的链接内容时,程序是否需要作出响应
- -(BOOL)textView:(UITextView *)textView shouldInteractWithURL:(NSURL *)URL inRange:(NSRange)characterRange
- {
- NSString *urlstr = [URL absoluteString];
- // 响应以下前缀或域名的网址链接
- if ([[URL host] isEqual:@"www.apple.com"] || [urlstr hasPrefix:@"http://"] || [urlstr hasPrefix:@"https://"] || [urlstr hasPrefix:@"www."]) {
- AppDelegate *appDelegate = [[UIApplication sharedApplication] delegate]; // appDelegate用于调用全局变量urlvc
- [self presentViewController:appDelegate.uiVC animated:YES completion:^ {
- [appDelegate.uiVC.uiView.webView loadRequest:[NSURLRequest requestWithURL:URL]]; // urlView中的webView开始加载链接的网页内容
- }];
- return NO;
- }
- return YES; // 若返回YES,则打开系统中的浏览器转到链接内容
- }


 2301
2301

 被折叠的 条评论
为什么被折叠?
被折叠的 条评论
为什么被折叠?
 到【灌水乐园】发言


