


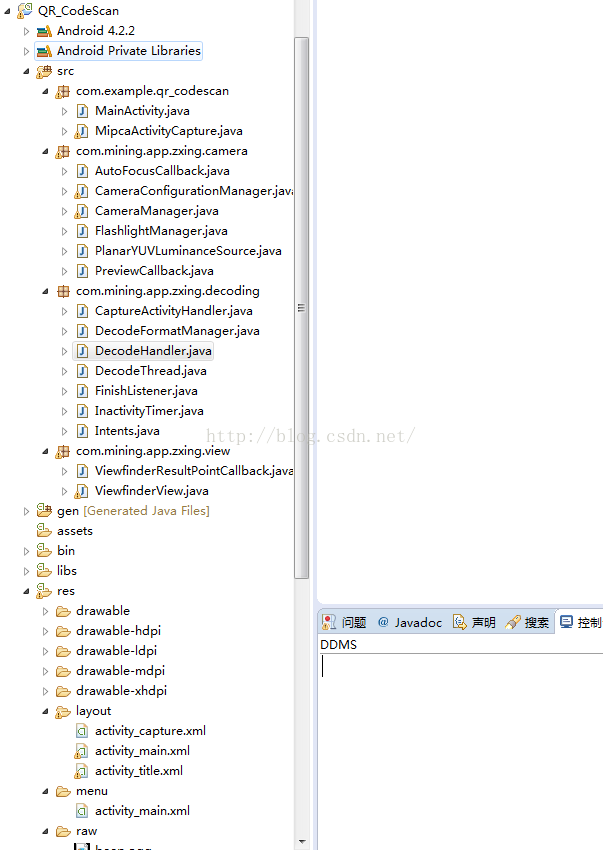
(1) 首先我们从扫描二维码Activity MipcaActivityCapture.Java 类入手该类主要是调用相机预览拍照内容,处理扫描后的结果,扫码成功震动,及扫描音效等。
首先我们看关键模块,相机拍摄预览用到为View控件SurfaceView 改控件提供了一个专用绘图面,嵌入在视图层次结构中。你可以控制整个表面的格式,它的大小;SurfaceView负责屏幕上正确的位置显示。
SurfaceView提供了 SurfaceHolder接口来设置控件的表面大小和格式编辑表面像素等,SurfaceHolder提供了Android.view.SurfaceHolder.Callback 接口来处理SurfaceView显示,渲染,销毁等回调监听,下面看关键代码
- @Override
- protected void onResume() {
- super.onResume();
- /**
- * 提供一个专用的绘图面,嵌入在视图层次结构中。你可以控制这个表面的格式,它的大小;
- * SurfaceView负责将面在屏幕上正确的位置显示。
- *
- * 表面是Z序是窗口举行SurfaceView落后;SurfaceView打出了一个洞在它的窗口,让其表面显示。
- * 视图层次结构将负责正确的合成与表面的任何兄弟SurfaceView通常会出现在它的上面
- * 。这可以用来放置覆盖如表面上的按钮,但注意,这可能会对性能产生影响因为完整的alpha混合复合材料将每一次表面的变化进行。
- *
- * 使表面可见的透明区域是基于视图层次结构中的布局位置的。如果布局后的变换属性用于在顶部的图形绘制一个兄弟视图,视图可能不正确的复合表面。
- *
- * 访问底层的表面通过SurfaceHolder接口提供,这可以通过调用getholder()检索。
- *
- * 表面将被创建为你而SurfaceView的窗口是可见的;你应该实现surfacecreated(SurfaceHolder)
- * 和surfacedestroyed(SurfaceHolder)发现当表面被创建和销毁窗口的显示和隐藏。
- *
- * 这个类的目的之一是提供一个表面,其中一个二级线程可以呈现到屏幕上。如果你要使用它,你需要知道一些线程的语义:
- *
- * 所有的图形和SurfaceHolder。回调方法将从线程运行的窗口叫SurfaceView(通常是应用程序的主线程)。因此,
- * 他们需要正确地与任何状态,也接触了绘图线程的同步。
- *
- * 你必须确保拉丝只触及表面,底层是有效的——SurfaceHolder.lockCanvas。回调。surfacecreated()
- * 和surfacedestroyed() SurfaceHolder。回调。
- */
- SurfaceView surfaceView = (SurfaceView) findViewById(R.id.preview_view);
- /**
- * SurfaceHolder 类解释
- *
- * 抽象接口,有人拿着一个显示面。允许你
- *
- * 控制的表面大小和格式,编辑在表面的像素,和
- *
- * *显示器更改为表面。此接口通常可用
- *
- * 通过SurfaceView类 {@link SurfaceView}
- *
- * 当使用该接口从一个线程以外的一个运行 {@link SurfaceView}, 你要仔细阅读
- *
- * 方法 {@link #lockCanvas} and {@link Callback#surfaceCreated
- * Callback.surfaceCreated()}.
- */
- /**
- * surfaceView.getHolder() 返回SurfaceHolder 对象
- */
- SurfaceHolder surfaceHolder = surfaceView.getHolder();
- if (hasSurface) { // 判断是否 有显示
- // 初始化相机
- initCamera(surfaceHolder);
- } else {
- // 添加回调监听
- surfaceHolder.addCallback(this);
- // 设置视图类型 这是被忽略的,这个值是在需要时自动设定的。
- surfaceHolder.setType(SurfaceHolder.SURFACE_TYPE_PUSH_BUFFERS);
- }
- // 解码格式
- decodeFormats = null;
- // 字符集
- characterSet = null;
- playBeep = true;
- // 获取系统音频服务 AUDIO_SERVICE(音频服务)
- // AudioManager 提供了访问音量和振铃模式控制
- AudioManager audioService = (AudioManager) getSystemService(AUDIO_SERVICE);
- // 判断当前的模式 是否为 (铃声模式,可能是声音和振动。)
- if (audioService.getRingerMode() != AudioManager.RINGER_MODE_NORMAL) {
- // 设置 播放闹铃 为false
- playBeep = false;
- }
- //* 初始化 报警音频
- initBeepSound();
- // 设置震动状态为 true
- vibrate = true;
- }
接下来看下初始化媒体播放器,及震动模块代码,MediaPlayer 做过流媒体或音频相关开发都用过,这里是用文件流加载
raw目录下的文件。 Vibrator类 操作该设备上的振子的类,也就是让我们手机产生震动效果,请看一下代码块,注释有很多是自己理解和百度翻译。
- /**
- * 初始化 报警音频
- */
- private void initBeepSound() {
- if (playBeep && mediaPlayer == null) {
- // 在stream_system音量不可调的,用户发现它太大声,所以我们现在播放的音乐流。
- setVolumeControlStream(AudioManager.STREAM_MUSIC);
- // 初始化 媒体播放器
- mediaPlayer = new MediaPlayer();
- /*
- * 设置此播放器的音频流式。看到{@链接audiomanager }
- *
- * 对于一个流类型列表。必须调用这个方法之前,prepare() 或
- *
- * 为目标流式成为有效的为prepareasync()
- *
- * 此后。
- */
- mediaPlayer.setAudioStreamType(AudioManager.STREAM_MUSIC);
- /**
- *
- 当媒体源的结束时调用一个回调函数 已达到在播放。
- *
- * @param监听器回调将运行
- */
- mediaPlayer.setOnCompletionListener(beepListener);
- /**
- * 在资源管理入口文件描述符。这提供你自己的
- *
- * 打开FileDescriptor,可以用来读取数据,以及
- *
- * 该项数据在文件中的偏移和长度。
- */
- AssetFileDescriptor file = getResources().openRawResourceFd(
- R.raw.beep);
- try {
- /**
- * file.getFileDescriptor() 返回FileDescriptor,可以用来读取的数据文件。
- *
- * setDataSource() 设置数据源(FileDescriptor)使用。这是来电者的责任
- *
- * 关闭文件描述符。这是安全的,这样做,只要这个呼叫返回。
- */
- mediaPlayer.setDataSource(file.getFileDescriptor(),
- file.getStartOffset(), file.getLength());
- // 关闭 资源文件管理器
- file.close();
- /**
- * 设置该播放器的音量。
- *
- * 此接口建议用于平衡音频流的输出
- *
- * 在一个应用程序中。除非你正在写一个申请
- *
- * 控制用户设置时,应优先使用该原料药
- *
- * {@link AudioManager#setStreamVolume(int, int, int)}
- * 其中设置的所有流的体积
- *
- * 特定类型。请注意,通过量值是在范围0到1原标量。
- *
- * UI控件应该相应的对数。
- *
- * @param leftVolume
- *
- * 左量标量
- *
- * @param rightVolume
- * 对体积标量
- */
- mediaPlayer.setVolume(BEEP_VOLUME, BEEP_VOLUME);
- /**
- * 准备播放,同步播放。
- *
- * 在设置数据源和显示表面,你要么
- *
- * 电话prepare()或prepareasync()。文件,就可以prepare(),
- *
- * 块直到MediaPlayer准备播放。
- *
- * @throws IllegalStateException
- * 如果被称为无效状态
- */
- mediaPlayer.prepare();
- } catch (IOException e) {
- mediaPlayer = null; // 异常 释放播放器对象
- }
- }
- }
- // 震动持续时间
- private static final long VIBRATE_DURATION = 200L;
- /**
- * 打声音和振动
- */
- private void playBeepSoundAndVibrate() {
- if (playBeep && mediaPlayer != null) {
- /**
- * 开始或恢复播放。如果播放以前被暂停,
- *
- * 播放将继续从它被暂停的地方。如果播放了
- *
- * 被停止,或从未开始,播放将开始在
- *
- * 开始。
- *
- * @throws IllegalStateException
- * 如果被称为无效状态
- */
- mediaPlayer.start();
- }
- if (vibrate) {
- /**
- * getSystemService(VIBRATOR_SERVICE);
- *
- * 使用 {@link #getSystemService}检索{@link android.os.Vibrator}
- * 与振动硬件相互作用。
- *
- * @see #getSystemService
- * @see android.os.Vibrator
- *
- *
- * Vibrator类 操作该设备上的振子的类。 如果你的进程存在,你开始的任何振动都将停止。
- *
- * 要获得系统振子的实例,调用 {@link Context#getSystemService}具有
- * {@link Context#VIBRATOR_SERVICE} 作为参数。
- */
- Vibrator vibrator = (Vibrator) getSystemService(VIBRATOR_SERVICE);
- /**
- * 为指定的时间周期振动。
- *
- * 此方法要求调用方持有权限
- *
- * {@link android.Manifest.permission#VIBRATE}.
- *
- * @param milliseconds
- * 振动的毫秒数。
- *
- * VIBRATE_DURATION 震动持续时间
- */
- vibrator.vibrate(VIBRATE_DURATION);
- }
- }
- /**
- * 在播放时调用一个回调函数的接口定义媒体来源已完成
- */
- private final OnCompletionListener beepListener = new OnCompletionListener() {
- public void onCompletion(MediaPlayer mediaPlayer) {
- /**
- * 寻找指定的时间位置。
- *
- * @param 毫秒毫秒的偏移从开始寻求
- *
- * @抛出时,如果内部播放器引擎尚未初始化
- */
- mediaPlayer.seekTo(0);
- }
- };
接下来看相机初始化模块,及相机控制模块,这里用到了Activity生命周期函数,主要是关闭相机,终止线程等相关操作。
- /**
- * 初始化
- *
- * @param surfaceHolder
- */
- private void initCamera(SurfaceHolder surfaceHolder) {
- try {
- // 打开摄像头驱动和初始化硬件参数。
- CameraManager.get().openDriver(surfaceHolder);
- } catch (IOException ioe) {
- return;
- } catch (RuntimeException e) {
- return;
- }
- if (handler == null) {
- // 这个类处理所有的消息,包括为捕获的异常
- handler = new CaptureActivityHandler(this, decodeFormats,
- characterSet);
- }
- }
- /**
- * 当 Activity 失去焦点时调用
- */
- @Override
- protected void onPause() {
- super.onPause();
- if (handler != null) {
- // 退出同步
- handler.quitSynchronously();
- handler = null;
- }
- // 关闭摄像头驱动程序,如果仍在使用
- CameraManager.get().closeDriver();
- }
- /**
- * 销毁时调用
- */
- @Override
- protected void onDestroy() {
- /**
- * 启动一个有序的关机之前提交的
- *
- * 任务执行,但没有新任务将被接受。
- *
- * 如果已关闭,没有任何附加效果
- */
- inactivityTimer.shutdown();
- super.onDestroy();
- }
- /**
- * 处理扫描结果
- *
- * @param result
- * @param barcode
- */
- public void handleDecode(Result result, Bitmap barcode) {
- // 试图取消此任务的执行 , 创建并执行将启用的一一个射击动作在给定的延迟。
- inactivityTimer.onActivity();
- // 打声音和振动
- playBeepSoundAndVibrate();
- // 获取扫描结果
- String resultString = result.getText();
- if (resultString.equals("")) {
- Toast.makeText(MipcaActivityCapture.this, "Scan failed!",
- Toast.LENGTH_SHORT).show();
- } else {
- // 回传扫描结果
- Intent resultIntent = new Intent();
- Bundle bundle = new Bundle();
- bundle.putString("result", resultString);
- bundle.putParcelable("bitmap", barcode);
- resultIntent.putExtras(bundle);
- this.setResult(RESULT_OK, resultIntent);
- }
- MipcaActivityCapture.this.finish();
- }
(2)以上只是浅谈如何调用相机,以及处理扫描效果等,接线来深入分析扫描线程,及处理扫描效果 handler 回调等,刚才有讲到CaptureActivityHandler 类这个类处理Handler消息下面就看相关代码。
首先我们看下这个类的构造函数,在这个构造函数中,构造了解码线程类 DecodeThread类,这个类非常关键稍后会讲到,这里要注意,我们在构建中已经启用线程 decodeThread.start();
- /**
- *
- * @param activity 处理 Handler消息的Activity
- * @param decodeFormats 条形码格式结合
- * @param characterSet 字符集
- */
- public CaptureActivityHandler(MipcaActivityCapture activity,
- Vector<BarcodeFormat> decodeFormats, String characterSet) {
- this.activity = activity;
- decodeThread = new DecodeThread(activity, decodeFormats, characterSet,
- new ViewfinderResultPointCallback(activity.getViewfinderView()));
- decodeThread.start();
- state = State.SUCCESS;
- //开始自己捕捉预览解码。
- CameraManager.get().startPreview();
- restartPreviewAndDecode();
- }
看到了构造处理消息 Handler类代码块,那么还记得那个模块构造的该类对象不,我们刚才有讲到相机初始化模块请看一下代码。
- /**
- * 初始化
- *
- * @param surfaceHolder
- */
- private void initCamera(SurfaceHolder surfaceHolder) {
- try {
- // 打开摄像头驱动和初始化硬件参数。
- CameraManager.get().openDriver(surfaceHolder);
- } catch (IOException ioe) {
- return;
- } catch (RuntimeException e) {
- return;
- }
- if (handler == null) {
- // 这个类处理所有的消息,包括为捕获的异常
- handler = new CaptureActivityHandler(this, decodeFormats,
- characterSet);
- }
- }
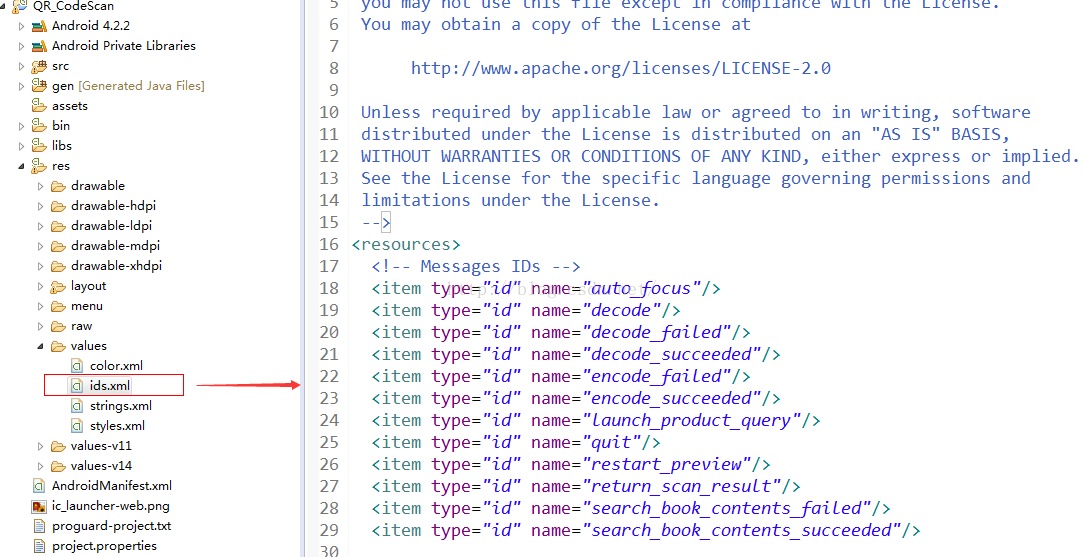
接下来分析这个类的关键模块 Handler消息处理模块 handleMessage()消息处理函数,这里肯定大家会对一些用到的Id感到好奇其实这里的Id是定义在 下图中xml文件中,大家可以详细看下。
接下来言归正传,还是继续分析 handleMessage(),这里有用到枚举类,用来标记状态,public void handleMessage(Message message)函数都有注释,这里就不详解了。
- private enum State {
- PREVIEW, // 预览
- SUCCESS, // 成功
- DONE // 完成
- }
- @Override
- public void handleMessage(Message message) {
- switch (message.what) {
- case R.id.auto_focus:
- // Log.d(TAG, "Got auto-focus message");
- /**
- * 当一个自动对焦结束,开始另一个。这是
- *
- * 最接近的
- *
- * 连续AF似乎找了一点,但我不确定是什么
- *
- * 做其他的。
- */
- if (state == State.PREVIEW) {
- CameraManager.get().requestAutoFocus(this, R.id.auto_focus);
- }
- break;
- case R.id.restart_preview:
- Log.d(TAG, "Got restart preview message");
- //重新启动预览和解码
- restartPreviewAndDecode();
- break;
- case R.id.decode_succeeded: //得到解码成功消息
- Log.d(TAG, "Got decode succeeded message");
- state = State.SUCCESS;
- Bundle bundle = message.getData();
- /***********************************************************************/
- Bitmap barcode = bundle == null ? null : (Bitmap) bundle
- .getParcelable(DecodeThread.BARCODE_BITMAP);
- activity.handleDecode((Result) message.obj, barcode);
- break;
- case R.id.decode_failed:
- /**
- * 我们尽可能快地解码,所以当一个解码失败,开始另一个。
- */
- state = State.PREVIEW;
- CameraManager.get().requestPreviewFrame(decodeThread.getHandler(),
- R.id.decode);
- break;
- case R.id.return_scan_result:
- Log.d(TAG, "返回扫描结果消息");
- activity.setResult(Activity.RESULT_OK, (Intent) message.obj);
- activity.finish();
- break;
- case R.id.launch_product_query:
- Log.d(TAG, "产品查询消息");
- String url = (String) message.obj;
- Intent intent = new Intent(Intent.ACTION_VIEW, Uri.parse(url));
- intent.addFlags(Intent.FLAG_ACTIVITY_CLEAR_WHEN_TASK_RESET);
- activity.startActivity(intent);
- break;
- }
- }
下面看下解码过程中,用到了两个关键函数 quitSynchronously()该函数主要是处理相机关闭相机预览帧,阻止线程,清空Handler消息队列。细心的同学会发现该函数是在 处理扫描的Activity 生命周期函数 onPause()函数中用到
- /**
- * 退出同步
- */
- public void quitSynchronously() {
- state = State.DONE;
- // 告诉相机停止绘制预览帧。
- CameraManager.get().stopPreview();
- Message quit = Message.obtain(decodeThread.getHandler(), R.id.quit);
- /**
- *
- * 将此消息发送到指定的处理程序 {@link #getTarget}. 如果该字段未被设置,则会引发一个空指针异常。
- */
- quit.sendToTarget();
- try {
- /**
- * 阻止当前线程 <code>Thread.currentThread()</code>) 接收器完成它的执行和死亡。
- *
- * @throws InterruptedException
- * 如果当前线程被中断。 当前线程的中断状态将在异常之前被清除
- *
- * @see Object#notifyAll
- * @see java.lang.ThreadDeath
- */
- decodeThread.join();
- } catch (InterruptedException e) {
- // continue
- }
- // 绝对肯定我们不会发送任何排队的消息
- removeMessages(R.id.decode_succeeded);
- removeMessages(R.id.decode_failed);
- }
下面还有一个关键模块,主要是处理,重新启动预览和解码函数 restartPreviewAndDecode() 这里有用到 CameraManager类 该类是相机管理类稍后会讲到
- /**
- * 重新启动预览和解码
- */
- private void restartPreviewAndDecode() {
- if (state == State.SUCCESS) {
- state = State.PREVIEW;
- CameraManager.get().requestPreviewFrame(decodeThread.getHandler(),
- R.id.decode);
- CameraManager.get().requestAutoFocus(this, R.id.auto_focus);
- activity.drawViewfinder();
- }
- }
(3)讲完了Handler消息回传可能大家还是不明白如何加码过程,接下来深入分析解码线程类 DecodeThread类,首先我们来看下这个类的构造函数,这里用到了 CountDownLatch 类这个类可能大家也不常用,我也是第一次接触,这里可以参考博客
http://blog.csdn.NET/shihuacai/article/details/8856370 讲的很详细,
CountDownLatch,一个同步辅助类,在完成一组正在其他线程中执行的操作之前,它允许一个或多个线程一直等待。
构造函数中用到 Vector<BarcodeFormat> decodeFormats 集合,该集合主要是封装了解码格式,用到了DecodeFormatManager 解码格式管理类,稍后会讲到改类。
- /**
- *
- * @param activity
- * @param decodeFormats 条形码格式
- * @param characterSet 字符集
- * @param resultPointCallback 结果回调接口
- */
- DecodeThread(MipcaActivityCapture activity,
- Vector<BarcodeFormat> decodeFormats, String characterSet,
- ResultPointCallback resultPointCallback) {
- this.activity = activity;
- /**
- * 构建了一个countdownlatch与给定的计数初始化。
- *
- * * @param count 次数 {@link #countDown} 必须调用
- *
- * 在线程可以通过 {@link #await}
- *
- * @throws IllegalArgumentException 如果 {@code count} 是负数引发异常
- */
- handlerInitLatch = new CountDownLatch(1);
- hints = new Hashtable<DecodeHintType, Object>(3);
- //DecodeFormatManager类 这里把之前添加好的几个常量类,添加到解码的方法里面去,这样解码方法里面就有了所有的解码格式了,包括一维码和二维码。
- if (decodeFormats == null || decodeFormats.isEmpty()) {
- decodeFormats = new Vector<BarcodeFormat>();
- decodeFormats.addAll(DecodeFormatManager.ONE_D_FORMATS);
- decodeFormats.addAll(DecodeFormatManager.QR_CODE_FORMATS);
- decodeFormats.addAll(DecodeFormatManager.DATA_MATRIX_FORMATS);
- }
- /**
- * DecodeHintType 解码提示类型
- *
- * DecodeHintType.POSSIBLE_FORMATS 枚举值
- */
- hints.put(DecodeHintType.POSSIBLE_FORMATS, decodeFormats);
- if (characterSet != null) {
- hints.put(DecodeHintType.CHARACTER_SET, characterSet);
- }
- hints.put(DecodeHintType.NEED_RESULT_POINT_CALLBACK,
- resultPointCallback);
- }
下面我们就看下线程类最关键模块线程体,这里是在线程中构造 DecodeHandler 类Handler ,下面还有一个函数处理Handler
- @Override
- public void run() {
- /**
- * 初始化当前线程作为一个活套。
- *
- * 这给了你一个机会来创建处理程序,然后引用
- *
- * 这活套,然后再开始循环。一定要打电话
- *
- * {@link #loop()} 调用此方法后,通过调用 {@link #quit()}.
- *
- * 如果当前计数等于零,则没有发生任何事情。
- */
- Looper.prepare();
- handler = new DecodeHandler(activity, hints);
- /**
- * decrements伯爵的闩锁释放所有等待的线程,如果在达到零计数。
- *
- * 如果当前计数大于零则递减。
- *
- * 如果新计数为零,则所有等待线程被重新启用
- *
- * 线程调度的目的。
- *
- * 如果当前计数等于零,则没有发生任何事情。
- */
- handlerInitLatch.countDown();
- /**
- * 调用此方法后,通过调用
- *
- * {@link #quit()} 结束循环。
- */
- Looper.loop();
- }
- Handler getHandler() {
- try {
- /**
- * 导致当前线程等待锁存已计数的零,除非该线程是 {@linkplain Thread#interrupt interrupted}.
- *
- *
- *
- * 如果当前计数为零,则此方法立即返回。 如果当前计数大于零,则电流
- *
- * 线程成为禁用线程调度的目的和谎言休眠,直到有两点发生:
- *
- * 计数达到零由于调用的 {@link #countDown} 法;或 其他线程 { @linkplain
- * Thread#interrupt interrupts}
- * 当前线程。
- */
- handlerInitLatch.await();
- } catch (InterruptedException ie) {
- // continue?
- }
- return handler;
- }
(4)这些Handler和线程在哪里发挥它的价值呢,接下来请看 CameraManager 相机管理类,在CaptureActivityHandler 构造类中有提到CameraManager类的函数调用,接下了深入了解这个类,这个类被封装成了单例类,那么在哪里初始化的呢,请看代码 CameraManager.init(getApplication()); 这行代码肯定很熟悉,在扫描二维码Activity的 onCreate()函数中出现过。 CameraManager 的get()函数提供了当前类的对象。
构造函数中提供了三个类 CameraConfigurationManager相机配置管理器类和 AutoFocusCallback 类回调接口用来通知自动对焦完成,PreviewCallback类 用于提供预览帧的副本的回调接口,稍后会讲到这些类。
- /**
- * 随着调用活动的上下文初始化静态对象。
- *
- * @param context
- * The Activity which wants to use the camera.
- */
- public static void init(Context context) {
- if (cameraManager == null) {
- cameraManager = new CameraManager(context);
- }
- }
- /**
- * 得到cameramanager singleton实例。
- *
- * @return 返回一个参考的cameramanager 单例
- */
- public static CameraManager get() {
- return cameraManager;
- }
- private CameraManager(Context context) {
- this.context = context;
- this.configManager = new CameraConfigurationManager(context);
- // 摄像机。setoneshotpreviewcallback() 在 Android (蛋糕版本)的竞争条件,所以我们使用旧的
- // 摄像机。setpreviewcallback() 1.5和更早。 在 Android (甜甜圈)和后,我们需要使用
- // 一次打回的球越打越高,因为年纪越大,就可以淹没系统,导致它
- // 从内存中耗尽。我们不能用sdk_int由于引入的Donut SDK。
- // useoneshotpreviewcallback =整数。parseInt(版本。版本。SDK)>
- // build.version_codes.cupcake;
- useOneShotPreviewCallback = Integer.parseInt(Build.VERSION.SDK) > 3; // 3
- // =
- // Cupcake
- previewCallback = new PreviewCallback(configManager,
- useOneShotPreviewCallback);
- autoFocusCallback = new AutoFocusCallback();
- }
接下来我们就看下如何打开相机的,SurfaceHolder这个接口肯定不陌生,这个函数在相机初始化函数中有调用
initCamera(SurfaceHolder surfaceHolder),其实相机说拍摄的到的东西都是在SurfaceView上呈现在你眼前的,这里对 SurfaceView最关键的操作类SurfaceHolder 。这里有用到 CameraConfigurationManager相机配置管理类对象,稍后会讲到。
- /**
- * 打开摄像头驱动和初始化硬件参数。
- *
- * @param holder
- * 相机将绘制预览帧的表面对象。
- *
- * @throws IOException
- * 异常表示相机驱动程序未能打开。
- *
- */
- public void openDriver(SurfaceHolder holder) throws IOException {
- if (camera == null) {
- camera = Camera.open();
- if (camera == null) {
- throw new IOException();
- }
- /**
- * *设置用于实时预览的 {@link Surface}
- *
- * *表面或表面纹理是必要的预览,和
- *
- * 预览是必要的拍照。相同的表面可以重新设定
- *
- * 没有伤害。设置一个预览面将不设置任何预览表面
- *
- * 纹理是通过 {@link #setPreviewTexture}.。
- *
- *
- *
- * <P>
- * 的{@link #setPreviewTexture必须已经包含一个表面时,这
- *
- * 方法被称为。如果你使用的是Android {@link android.view.SurfaceView},
- *
- * 你需要登记一个{@link android.view.SurfaceView},用。
- *
- * {@link SurfaceHolder#addCallback(SurfaceHolder.Callback)} 和
- *
- * {@link SurfaceHolder.Callback#surfaceCreated(SurfaceHolder)} 之前
- *
- * 通知 setpreviewdisplay()或启动预览。
- *
- * <P>
- * 方法必须调用之前{@link #startPreview()}. 。这个
- *
- * 一个例外是,如果预览表面没有设置(或设置为空)
- *
- * 在startpreview()叫,那么这种方法可以调用一次
- *
- * 与非空参数设置预览表面。(这让
- *
- * 相机设置和表面创建发生在平行,节省时间。)
- *
- * 预览版在运行时可能没有其他更改。
- *
- *
- *
- * @param夹含表面上放置预览,
- *
- * 或空删除预览表面
- *
- * @抛出IOException如果方法失败(例如,如果表面
- *
- * 不可用或不适合)。
- */
- camera.setPreviewDisplay(holder);
- if (!initialized) {
- initialized = true;
- configManager.initFromCameraParameters(camera);
- }
- configManager.setDesiredCameraParameters(camera);
- // FIXME
- // SharedPreferences prefs =
- // PreferenceManager.getDefaultSharedPreferences(context);
- // 是否使用前灯
- // if (prefs.getBoolean(PreferencesActivity.KEY_FRONT_LIGHT, false))
- // {
- // FlashlightManager.enableFlashlight();
- // }
- FlashlightManager.enableFlashlight();
- }
- }
- /**
- * 关闭摄像头驱动程序,如果仍在使用
- */
- public void closeDriver() {
- if (camera != null) {
- FlashlightManager.disableFlashlight();
- camera.release();
- camera = null;
- }
- }
接下来看相机的启用和关闭,这里主要是对相机进行操作,相机的绘制预览帧,及监听等
- /**
- * 关闭摄像头驱动程序,如果仍在使用
- */
- public void closeDriver() {
- if (camera != null) {
- FlashlightManager.disableFlashlight();
- camera.release();
- camera = null;
- }
- }
- /**
- * 要求摄像机硬件开始绘制预览帧到屏幕上。
- */
- public void startPreview() {
- if (camera != null && !previewing) {
- /**
- * 开始捕获并绘制预览帧到屏幕。
- *
- * 预览将不会真正开始,直到提供一个表面
- *
- * {@link #setPreviewDisplay(SurfaceHolder)} or
- * {@link #setPreviewTexture(SurfaceTexture)}.
- *
- *
- * 如果 {@link #setPreviewCallback(Camera.PreviewCallback)},
- * {@link #setOneShotPreviewCallback(Camera.PreviewCallback)}, or
- * {@link #setPreviewCallbackWithBuffer(Camera.PreviewCallback)}
- *
- * 是称{@link Camera.PreviewCallback#onPreviewFrame(byte[], Camera)}
- *
- ** 预览数据将成为可用。
- */
- camera.startPreview();
- previewing = true;
- }
- }
- /**
- * 告诉相机停止绘制预览帧。
- */
- public void stopPreview() {
- if (camera != null && previewing) {
- if (!useOneShotPreviewCallback) {
- /**
- * 除此之外,还安装了一个回调函数来调用每个预览帧
- *
- * 在屏幕上显示。这个回调将被反复调用
- *
- * 只要预览是活动的。这种方法可以随时调用,
- *
- * 即使预览是活的。其他预览回调
- *
- * 重写。
- *
- * 如果你使用的是预览数据来创建视频或静止图像,
- *
- * 强烈考虑使用 {@link android.media.MediaActionSound}
- *
- * 到
- *
- * 正确地显示图像捕捉或记录开始/停止给用户
- */
- camera.setPreviewCallback(null);
- }
- camera.stopPreview();
- previewCallback.setHandler(null, 0);
- autoFocusCallback.setHandler(null, 0);
- previewing = false;
- }
- }
下面看相机,执行对焦等相关函数 requestPreviewFrame() 一个单独的预览框将返回给处理程序提供的处理。在CaptureActivityHandler类的handleMessage()函数和 restartPreviewAndDecode()函数中有调用,用户解码失败后的重新对焦,和重新启动预览和解码时有调用。
requestAutoFocus()请求相机的硬件来执行自动对焦。与requestPreviewFrame()出现的位置同样有调用。
这里有讲到两个重要的监听类 PreviewCallback类:用于提供预览帧的副本的回调接口,AutoFocusCallback类: 回调接口用来通知自动对焦完成,这两个类是相机回调监听接口,提供了设置Handler和,回调函数。requestPreviewFramerequestPreviewFramerequestPreviewFramerequestPreviewFrame
- /**
- * 一个单独的预览框将返回给处理程序提供的处理。数据将作为字节到达
- * 在message.obj场,宽度和高度编码为message.arg1和message.arg2, 分别。
- *
- * @param handler
- * 发送消息的处理程序
- *
- * @param message
- * 要发送的消息的字段。
- *
- */
- public void requestPreviewFrame(Handler handler, int message) {
- if (camera != null && previewing) {
- previewCallback.setHandler(handler, message);
- if (useOneShotPreviewCallback) {
- /**
- * 安装在下一个预览帧中调用的回调函数
- *
- * 除了在屏幕上显示。一次调用之后
- *
- * 回调被清除。这种方法可以称为任何时间,甚至当
- *
- * 预览是活的。其他预览回调重写
- *
- * 如果你使用的是预览数据来创建视频或静止图像,
- *
- * 强烈考虑使用 {@link android.media.MediaActionSound}
- *
- * 正确地显示图像捕捉或记录开始/停止给用户。
- */
- camera.setOneShotPreviewCallback(previewCallback);
- } else {
- /**
- * 安装一个回调以供每个预览帧调用
- *
- * 在屏幕上显示。这个回调将被反复调用
- *
- * 只要预览是活动的。这种方法可以随时调用,
- *
- * 即使预览是活的。其他预览回调
- *
- * 重写。
- *
- * 如果你使用的是预览数据来创建视频或静止图像,
- *
- * 强烈考虑使用 {@link android.media.MediaActionSound}
- *
- * 正确地显示图像捕捉或记录开始/停止给用户
- *
- ** @param 可接收每个预览帧的副本的回调对象
- * ,
- *
- * @see看 android.media.MediaActionSound
- *
- */
- camera.setPreviewCallback(previewCallback);
- }
- }
- }
- /**
- * 请求相机的硬件来执行自动对焦。
- *
- * @param处理器处理通知时,自动对焦完成。
- * @param消息的消息传递。
- */
- public void requestAutoFocus(Handler handler, int message) {
- if (camera != null && previewing) {
- autoFocusCallback.setHandler(handler, message);
- // Log.d(TAG, "Requesting auto-focus callback");
- /**
- * 启动相机自动对焦,并注册一个回调函数来运行
- *
- * 相机聚焦。此方法仅在预览时有效
- *
- * (之间 {@link #startPreview()} and before {@link #stopPreview()})
- *
- * 来电者应检查 {@link android.hardware.Camera.Parameters#getFocusMode()}
- *
- * 这种方法应该被称为。如果摄像头不支持自动对焦,
- *
- * 这是一个没有OP和 {@link AutoFocusCallback#onAutoFocus(boolean, Camera)}
- *
- * 回调将立即调用。
- *
- * 如果你的申请不应该被安装
- *
- * 在设备没有自动对焦,您必须声明,您的应用程序
- *
- * 使用自动对焦
- *
- * <a href="{@docRoot}
- * guide/topics/manifest/uses-feature-element.html
- * "><uses-feature></a>
- *
- * manifest element.
- *
- * 如果当前闪光模式不
- * {@link android.hardware.Camera.Parameters#FLASH_MODE_OFF},
- *
- * 在自动对焦时,根据驾驶和相机的硬件
- *
- * 自动曝光锁定
- * {@link android.hardware.Camera.Parameters#getAutoExposureLock()}
- *
- * 不要在自动对焦和之后的变化。但自动对焦程序可能会停止
- *
- * 自动曝光和自动白平衡在聚焦过程中瞬时。
- *
- * 停止预览 {@link #stopPreview()}
- *
- * 或触发仍然
- *
- * 图像捕捉
- * {@link #takePicture(Camera.ShutterCallback, Camera.PictureCallback, Camera.PictureCallback)}
- * ,
- *
- * 不会改变
- *
- * 焦点位置。应用程序必须调用cancelautofocus重置
- *
- *
- * 如果对焦成功,可以考虑使用 * {@link android.media.MediaActionSound} 正确播放自动对焦
- *
- * 成功的声音给用户。
- *
- *
- ** @param CB回调运行
- *
- * @看 cancelautofocus()
- *
- * @看
- * android.hardware.Camera.Parameters#setAutoExposureLock(boolean)
- *
- * @看 android.hardware.Camera.Parameters#setAutoWhiteBalanceLock(
- * boolean)
- *
- * 看 android.media.MediaActionSound
- */
- camera.autoFocus(autoFocusCallback);
- }
- }
下面 下
AutoFocusCallback 相机监听接口,对焦完成发送Handler消息是通知
- /**
- *
- * 回调接口用来通知自动对焦完成
- *
- * 不支持自动对焦的设备 将返回 boolean 类型的值假
- *
- * 回调到这个接口。如果您的应用程序需要自动对焦和 不应安装在设备没有自动对焦,您必须 声明你的应用程序使用
- *
- * Android 相机自动对焦源码请参考 <a href="{@docRoot}
- * guide/topics/manifest/uses-feature-element.html"><uses-feature></a>
- * manifest element.</p>
- *
- * 看#自动对焦 AutoFocusCallback
- *
- * 不建议使用新{@link android.hardware.camera2} API的新硬件应用。
- *
- */
- final class AutoFocusCallback implements Camera.AutoFocusCallback {
- private static final String TAG = AutoFocusCallback.class.getSimpleName();
- // 自动对焦区间MS
- private static final long AUTOFOCUS_INTERVAL_MS = 1500L;
- private Handler autoFocusHandler;
- private int autoFocusMessage;
- void setHandler(Handler autoFocusHandler, int autoFocusMessage) {
- this.autoFocusHandler = autoFocusHandler;
- this.autoFocusMessage = autoFocusMessage;
- }
- /**
- * 当你把摄像机自动对焦完成时。如果相机
- *
- * 如果相机不支持自动对焦和自动对焦,将会调用 onautofocus 将值立即回传
- *
- * <code>成功< /code>设置为<code>真< /code> 否则为假
- * 。
- *
- * 自动对焦程序不会自动曝光和自动白色 平衡完成后。
- *
- * @param成功真正的病灶是否成功,如果不假
- *
- * @param相机相机服务对象
- *
- * @看到Android的硬件。相机参数# setautoexposurelock(布尔)。
- *
- * @看到Android的硬件。相机参数# setautowhitebalancelock(布尔)。
- */
- @Override
- public void onAutoFocus(boolean success, Camera camera) {
- if (autoFocusHandler != null) {
- Message message = autoFocusHandler.obtainMessage(autoFocusMessage,
- success);
- autoFocusHandler.sendMessageDelayed(message, AUTOFOCUS_INTERVAL_MS);
- autoFocusHandler = null;
- } else {
- Log.d(TAG, "自动对焦回调,但没有处理程序");
- }
- }
- }
PreviewCallback类监听接口,onPreviewFrame()函数:预览帧显示,拿到相机捕捉的画面和返回的byte[]字节数据。
- /**
- * 用于提供预览帧的副本的回调接口
- *
- * 他们被显示。
- *
- *
- * “看# PreviewCallback(Camera.PreviewCallback)
- *
- * “看# OneShotPreviewCallback(Camera.PreviewCallback)
- *
- * “看# PreviewCallbackWithBuffer(Camera.PreviewCallback)
- *
- * “看# startPreview()
- *
- *
- *
- * @deprecated 我们建议使用新的 {@link android.hardware.camera2} 新应用程序接口。
- *
- */
- final class PreviewCallback implements Camera.PreviewCallback {
- private static final String TAG = PreviewCallback.class.getSimpleName();
- private final CameraConfigurationManager configManager;
- // 使用一次预览回调
- private final boolean useOneShotPreviewCallback;
- private Handler previewHandler;
- private int previewMessage;
- PreviewCallback(CameraConfigurationManager configManager,
- boolean useOneShotPreviewCallback) {
- this.configManager = configManager;
- this.useOneShotPreviewCallback = useOneShotPreviewCallback;
- }
- /**
- *
- * @param previewHandler
- * 预览处理程序
- * @param previewMessage
- * 预览信息
- */
- void setHandler(Handler previewHandler, int previewMessage) {
- this.previewHandler = previewHandler;
- this.previewMessage = previewMessage;
- }
- /**
- * 称为预览帧显示。调用这个回调在事件线程 {@link #open(int)}被称为。
- *
- * 如果使用 {@link android.graphics.ImageFormat#YV12}
- *
- * 格式的图形,参见方程 {@link Camera.Parameters#setPreviewFormat}
- *
- * 在预览回拨中的像素数据的安排
- *
- * 缓冲区
- *
- * @param 数据定义的格式的预览帧的内容
- * 通过 {@link android.graphics.ImageFormat},可以查询 具有
- * {@link android.hardware.Camera.Parameters#getPreviewFormat()}.
- *
- * 如果
- * {@link android.hardware.Camera.Parameters#setPreviewFormat(int)}
- * 永远不会被调用,默认的是 YCbCr_420_SP (NV21) .format
- * @param camera
- * 相机服务对象。
- */
- public void onPreviewFrame(byte[] data, Camera camera) {
- // 获取相机分辨率
- Point cameraResolution = configManager.getCameraResolution();
- if (!useOneShotPreviewCallback) {
- camera.setPreviewCallback(null);
- }
- if (previewHandler != null) {
- Message message = previewHandler.obtainMessage(previewMessage,
- cameraResolution.x, cameraResolution.y, data);
- message.sendToTarget();
- previewHandler = null;
- } else {
- Log.d(TAG, "预览回调,但没有处理程序");
- Log.d(TAG, "Got preview callback, but no handler for it");
- }
- }
- }
接下来可以通过相机拿到屏幕相关参数,来处理捕捉到的数据,getFramingRect()通过计算屏幕分辨率啦计算坐标位置,
getFramingRectInPreview()函数还是在计算坐标,buildLuminanceSource()函数非常重要,功能就是拿到YUV预览框宽高。在指定的Rect坐标内进行剪裁,拿到预览字符串判断剪裁大小,最后生成 PlanarYUVLuminanceSource
类对象,这个类会将结果生成 Bitmap,该函数在 DecodeHandler类中调用,用于计算要扫描成功后要捕捉的图片。
- /**
- * 计算框架矩形的界面应显示用户的位置 条码。这个目标有助于调整以及迫使用户持有该设备 足够远,以确保图像将集中。
- *
- * @return “返回”矩形在窗口坐标中绘制。
- */
- public Rect getFramingRect() {
- //获取屏幕分辨率
- Point screenResolution = configManager.getScreenResolution();
- //Rect framingRect 直接适用于矩形四整数坐标。矩形
- if (framingRect == null) {
- if (camera == null) {
- return null;
- }
- int width = screenResolution.x * 3 / 4;
- //当宽度最小框宽度
- if (width < MIN_FRAME_WIDTH) {
- width = MIN_FRAME_WIDTH;
- } else if (width > MAX_FRAME_WIDTH) {
- width = MAX_FRAME_WIDTH;
- }
- int height = screenResolution.y * 3 / 4;
- //当高度小于最小高度
- if (height < MIN_FRAME_HEIGHT) {
- height = MIN_FRAME_HEIGHT;
- } else if (height > MAX_FRAME_HEIGHT) {
- height = MAX_FRAME_HEIGHT;
- }
- int leftOffset = (screenResolution.x - width) / 2;
- int topOffset = (screenResolution.y - height) / 2;
- //重构一个坐标
- framingRect = new Rect(leftOffset, topOffset, leftOffset + width,
- topOffset + height);
- Log.d(TAG, "Calculated framing rect: " + framingRect);
- }
- return framingRect;
- }
- /**
- * 像 {@link #getFramingRect} 但坐标从预览
- *
- * 帧,而不是用户界面/屏幕。
- */
- public Rect getFramingRectInPreview() {
- if (framingRectInPreview == null) {
- Rect rect = new Rect(getFramingRect());
- // 获取相机分辨率
- Point cameraResolution = configManager.getCameraResolution();
- // 获取屏幕分辨率
- Point screenResolution = configManager.getScreenResolution();
- rect.left = rect.left * cameraResolution.y / screenResolution.x;
- rect.right = rect.right * cameraResolution.y / screenResolution.x;
- rect.top = rect.top * cameraResolution.x / screenResolution.y;
- rect.bottom = rect.bottom * cameraResolution.x / screenResolution.y;
- framingRectInPreview = rect;
- }
- return framingRectInPreview;
- }
- /**
- * 一个建立在适当的luminancesource对象工厂方法
- *
- * 预览缓冲区的格式,被描述为camera.parameters。
- *
- * @param data
- * 数据预览框。
- * @param width
- * 宽度图像的宽度。
- * @param height
- * 高度图像的高度。
- * @返回 planaryuvluminancesource 实例。
- */
- public PlanarYUVLuminanceSource buildLuminanceSource(byte[] data,
- int width, int height) {
- Rect rect = getFramingRectInPreview();
- int previewFormat = configManager.getPreviewFormat();
- String previewFormatString = configManager.getPreviewFormatString();
- switch (previewFormat) {
- /**
- * 这是标准的安卓格式,所有设备都需要支持。
- *
- * 在理论上,这是我们唯一关心的。
- */
- case PixelFormat.YCbCr_420_SP:
- /**
- * 这种格式从未在野外见过,但兼容
- *
- * 我们只关心
- *
- * 关于“关于”的,所以允许它。
- */
- case PixelFormat.YCbCr_422_SP:
- return new PlanarYUVLuminanceSource(data, width, height, rect.left,
- rect.top, rect.width(), rect.height());
- default:
- /**
- * 三星的时刻不正确地使用这个变量,而不是
- *
- * “文本”版本。
- *
- * 幸运的是,它也有所有的数据前,所以我们可以阅读
- *
- * 它
- */
- if ("yuv420p".equals(previewFormatString)) {
- return new PlanarYUVLuminanceSource(data, width, height,
- rect.left, rect.top, rect.width(), rect.height());
- }
- }
- throw new IllegalArgumentException("Unsupported picture format: "
- + previewFormat + '/' + previewFormatString);
- }
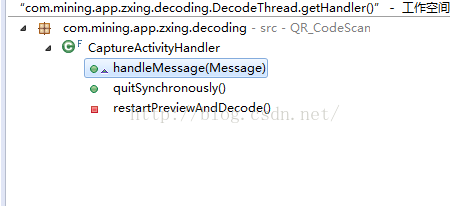
(4)讲到这里可能还是没有明白到底是如何解码的,接下进入解码DecodeHandler类,该类主要是提供了捕捉,二维码截图后的矩形图像,生成Bitmap图像。首先来看下构造函数,在哪里构造的,可能你并未发现,我告诉你在解码线程DecodeThread类 run()方法体中构造的,那在哪里调用的呢,就要看getHandler()函数在哪里有调用,看下图会发现我们有三处用到它,接下来细看每个位置。
- DecodeHandler(MipcaActivityCapture activity,
- Hashtable<DecodeHintType, Object> hints) {
- multiFormatReader = new MultiFormatReader();
- multiFormatReader.setHints(hints);
- this.activity = activity;
- }
- @Override
- public void run() {
- /**
- * 初始化当前线程作为一个活套。
- *
- * 这给了你一个机会来创建处理程序,然后引用
- *
- * 这活套,然后再开始循环。一定要打电话
- *
- * {@link #loop()} 调用此方法后,通过调用 {@link #quit()}.
- *
- * 如果当前计数等于零,则没有发生任何事情。
- */
- Looper.prepare();
- handler = new DecodeHandler(activity, hints);
- /**
- * decrements伯爵的闩锁释放所有等待的线程,如果在达到零计数。
- *
- * 如果当前计数大于零则递减。
- *
- * 如果新计数为零,则所有等待线程被重新启用
- *
- * 线程调度的目的。
- *
- * 如果当前计数等于零,则没有发生任何事情。
- */
- handlerInitLatch.countDown();
- /**
- * 调用此方法后,通过调用
- *
- * {@link #quit()} 结束循环。
- */
- Looper.loop();
- }
- Handler getHandler() {
- try {
- /**
- * 导致当前线程等待锁存已计数的零,除非该线程是 {@linkplain Thread#interrupt interrupted}.
- *
- *
- *
- * 如果当前计数为零,则此方法立即返回。 如果当前计数大于零,则电流
- *
- * 线程成为禁用线程调度的目的和谎言休眠,直到有两点发生:
- *
- * 计数达到零由于调用的 {@link #countDown} 法;或 其他线程 { @linkplain
- * Thread#interrupt interrupts}
- * 当前线程。
- */
- handlerInitLatch.await();
- } catch (InterruptedException ie) {
- // continue?
- }
- return handler;
- }
(4.1)我们来看第一处调用 handleMessage(Message message),代码块,这里调用了 CameraManager.get().requestPreviewFrame()类函数,接下来进入这个函数,看到这个代码块是不是很惊讶发现这是之前看到的模块,现在知道这个Handler是被谁调用的,被谁发消息的了吧,被PreviewCallback类监听接口发出的消息。
- case R.id.decode_failed:
- /**
- * 我们尽可能快地解码,所以当一个解码失败,开始另一个。
- */
- state = State.PREVIEW;
- CameraManager.get().requestPreviewFrame(decodeThread.getHandler(),
- R.id.decode);
- break;
- /**
- * 一个单独的预览框将返回给处理程序提供的处理程序。数据将作为字节到达
- * 在message.obj场,宽度和高度编码为message.arg1和message.arg2, 分别。
- *
- * @param handler
- * 发送消息的处理程序
- *
- * @param message
- * 要发送的消息的字段。
- *
- */
- public void requestPreviewFrame(Handler handler, int message) {
- if (camera != null && previewing) {
- previewCallback.setHandler(handler, message);
- if (useOneShotPreviewCallback) {
- /**
- * 安装在下一个预览帧中调用的回调函数
- *
- * 除了在屏幕上显示。一次调用之后
- *
- * 回调被清除。这种方法可以称为任何时间,甚至当
- *
- * 预览是活的。其他预览回调重写
- *
- * 如果你使用的是预览数据来创建视频或静止图像,
- *
- * 强烈考虑使用 {@link android.media.MediaActionSound}
- *
- * 正确地显示图像捕捉或记录开始/停止给用户。
- */
- camera.setOneShotPreviewCallback(previewCallback);
- } else {
- /**
- * 安装一个回调以供每个预览帧调用
- *
- * 在屏幕上显示。这个回调将被反复调用
- *
- * 只要预览是活动的。这种方法可以随时调用,
- *
- * 即使预览是活的。其他预览回调
- *
- * 重写。
- *
- * 如果你使用的是预览数据来创建视频或静止图像,
- *
- * 强烈考虑使用 {@link android.media.MediaActionSound}
- *
- * 正确地显示图像捕捉或记录开始/停止给用户
- *
- ** @param 可接收每个预览帧的副本的回调对象
- * ,
- *
- * @see看 android.media.MediaActionSound
- *
- */
- camera.setPreviewCallback(previewCallback);
- }
- }
- }
(4.2)我们来看第二处调用,quitSynchronously()这个函数也不陌生,这是退出时调用的
- /**
- * 退出同步
- */
- public void quitSynchronously() {
- state = State.DONE;
- // 告诉相机停止绘制预览帧。
- CameraManager.get().stopPreview();
- Message quit = Message.obtain(decodeThread.getHandler(), R.id.quit);
- /**
- *
- * 将此消息发送到指定的处理程序 {@link #getTarget}. 如果该字段未被设置,则会引发一个空指针异常。
- */
- quit.sendToTarget();
- try {
- /**
- * 阻止当前线程 <code>Thread.currentThread()</code>) 接收器完成它的执行和死亡。
- *
- * @throws InterruptedException
- * 如果当前线程被中断。 当前线程的中断状态将在异常之前被清除
- *
- * @see Object#notifyAll
- * @see java.lang.ThreadDeath
- */
- decodeThread.join();
- } catch (InterruptedException e) {
- // continue
- }
- // 绝对肯定我们不会发送任何排队的消息
- removeMessages(R.id.decode_succeeded);
- removeMessages(R.id.decode_failed);
- }
(4.3)我们来看第三处调用,restartPreviewAndDecode()重新启动预览和解码函数,其实执行的代码还是,(4.1)中讲到的 PreviewCallback监听接口,发送的Handler消息。
- /**
- * 重新启动预览和解码
- */
- private void restartPreviewAndDecode() {
- if (state == State.SUCCESS) {
- state = State.PREVIEW;
- CameraManager.get().requestPreviewFrame(decodeThread.getHandler(),
- R.id.decode);
- CameraManager.get().requestAutoFocus(this, R.id.auto_focus);
- activity.drawViewfinder();
- }
- }
(5)看完了相机解码流程,接下来看解码格式管理类 DecodeFormatManager类,该类封装了常用的一些条形码,二维码,商品码等一些格式结合。该类的其他几个函数并未使用,这里不做讲解。
- // Pattern.compile(",") 返回一个编译的形式给定正则表达式}
- private static final Pattern COMMA_PATTERN = Pattern.compile(",");
- // 产品格式
- static final Vector<BarcodeFormat> PRODUCT_FORMATS;
- // 一维码
- static final Vector<BarcodeFormat> ONE_D_FORMATS;
- // QR码格式
- static final Vector<BarcodeFormat> QR_CODE_FORMATS;
- // 数据矩阵格式
- static final Vector<BarcodeFormat> DATA_MATRIX_FORMATS;
- static {
- PRODUCT_FORMATS = new Vector<BarcodeFormat>(5);
- PRODUCT_FORMATS.add(BarcodeFormat.UPC_A); // UPC标准码(通用商品)
- PRODUCT_FORMATS.add(BarcodeFormat.UPC_E); // UPC缩短码(商品短码)
- PRODUCT_FORMATS.add(BarcodeFormat.EAN_13);
- PRODUCT_FORMATS.add(BarcodeFormat.EAN_8);
- PRODUCT_FORMATS.add(BarcodeFormat.RSS14);
- ONE_D_FORMATS = new Vector<BarcodeFormat>(PRODUCT_FORMATS.size() + 4);
- ONE_D_FORMATS.addAll(PRODUCT_FORMATS); // 此处将PRODUCT_FORMATS中添加的码加入
- ONE_D_FORMATS.add(BarcodeFormat.CODE_39);
- ONE_D_FORMATS.add(BarcodeFormat.CODE_93);
- ONE_D_FORMATS.add(BarcodeFormat.CODE_128);
- ONE_D_FORMATS.add(BarcodeFormat.ITF);
- QR_CODE_FORMATS = new Vector<BarcodeFormat>(1);// QR_CODE即二维码
- QR_CODE_FORMATS.add(BarcodeFormat.QR_CODE);
- DATA_MATRIX_FORMATS = new Vector<BarcodeFormat>(1); // 也属于一种二维码
- DATA_MATRIX_FORMATS.add(BarcodeFormat.DATA_MATRIX);
- }
(6)最后讲下相机如何配置 CameraConfigurationManager 相机配置管理器,改类中用到相机服务类 Camera.Parameters,这个类提供了相机设置,变焦等相关功能,注意这里用到很多parameters.get()函数,因为Parameters类中封装了一个字典,用于配置相机相关数据。改类提供了诸多函数和算法,但是最主要的功能是对外提供了相机分辨率 getCameraResolution()函数,屏幕分辨率getScreenResolution() 函数,预览格式getPreviewFormat()函数,获取预览格式字符串 getPreviewFormatString()函数等。其余函数是相关算法可以看代码理解
- /**
- *
- * 相机配置管理器
- *
- * @author ZQY
- *
- */
- /**
- * @author Administrator
- *
- */
- final class CameraConfigurationManager {
- private static final String TAG = CameraConfigurationManager.class
- .getSimpleName();
- // 所需的变焦
- private static final int TEN_DESIRED_ZOOM = 27;
- // 所需的锐度
- private static final int DESIRED_SHARPNESS = 30;
- /**
- * 返回一个编译的形式给定正则表达式
- *
- * @throws PatternSyntaxException
- * 如果正则表达式语法不正确,将会引发 PatternSyntaxException 异常。
- *
- * compile(String regularExpression, int flags) 此方法被重载
- * (regularExpression)正则表达式 可参考一下常量值设置 flags // *@see CANON_EQ
- * // * @see CASE_INSENSITIVE // * @see COMMENTS // * @see
- * #DOTALL // * @see #LITERAL // * @see #MULTILINE // * @see
- * #UNICODE_CASE // * @see #UNIX_LINES
- */
- private static final Pattern COMMA_PATTERN = Pattern.compile(",");
- private final Context context;
- // 屏幕分辨率
- private Point screenResolution;
- // 相机的分辨率
- private Point cameraResolution;
- // 预览格式
- private int previewFormat;
- // 预览格式字符串
- private String previewFormatString;
- CameraConfigurationManager(Context context) {
- this.context = context;
- }
- /**
- * 读,一时间,从应用程序所需要的相机的值。
- */
- void initFromCameraParameters(Camera camera) {
- /**
- * 返回此相机服务的当前设置。 如果对返回的参数进行修改,则必须通过 to
- * {@link #setParameters(Camera.Parameters)} 设置
- *
- * see #setParameters(Camera.Parameters) 调用此方法设置
- */
- Camera.Parameters parameters = camera.getParameters();
- /**
- * 返回预览帧的图像格式
- *
- * {@链接previewcallback }。
- *
- * @return 返回预览格式。 看android.graphics.imageformat 看# setpreviewformat
- */
- previewFormat = parameters.getPreviewFormat();
- /**
- * 返回字符串参数的值。
- *
- * @param参数名的关键的关键 返回参数的字符串值
- */
- previewFormatString = parameters.get("preview-format");
- // “默认预览格式:”+“预览格式”+“/”预览格式字符串 b
- Log.d(TAG, "Default preview format: " + previewFormat + '/'
- + previewFormatString);
- // 获取 应用程序的界面和窗口管理器对话。
- WindowManager manager = (WindowManager) context
- .getSystemService(Context.WINDOW_SERVICE);
- /**
- * Display 类解释
- *
- * 提供逻辑显示的大小和密度的信息。
- *
- * 显示区域以不同的方式描述。
- *
- * 用显示区域指定可能包含的显示的部分
- *
- * 一个应用程序窗口,不包括系统装饰。应用显示区域可以
- *
- * 小于真实的显示区域由于系统中减去所需空间
- *
- * 为装饰元素,如状态栏。使用下面的方法来查询
- *
- * *应用展示区 {@link #getSize}, {@link #getRectSize} and {@link #getMetrics}
- *
- * 真正显示区域指定包含内容的显示部分
- *
- * 包括系统装饰。即使如此,真正的显示区域可能比
- *
- * 物理尺寸的显示如果窗口管理器是模拟一个较小的显示
- *
- * 使用 (adb shell am display-size)
- *
- * 使用下面的方法来查询
- *
- * 真正的展示区: {@link #getRealSize}, {@link #getRealMetrics}.
- *
- * 逻辑显示并不一定代表一个特定的物理显示设备
- *
- * 如内置屏幕或外部显示器。逻辑的内容
- *
- * 显示可根据设备的一个或多个物理显示
- *
- * 这是当前连接的,以及是否已启用镜像。
- */
- Display display = manager.getDefaultDisplay();
- // 屏幕分辨率
- screenResolution = new Point(display.getWidth(), display.getHeight());
- // 打印屏幕分辨率值:screenResolution
- Log.d(TAG, "Screen resolution: " + screenResolution);
- // 相机的分辨率
- cameraResolution = getCameraResolution(parameters, screenResolution);
- // 相机分辨率:screenResolution
- Log.d(TAG, "Camera resolution: " + screenResolution);
- }
- /**
- * 设置相机拍摄的图像,用于预览
- *
- * 解码。我们在这里检测到预览格式
- *
- * buildluminancesource()可以建立一个适当的luminancesource类。
- *
- * 在未来,我们可能想力yuv420sp因为它是最小的,和
- *
- * 在某些情况下,可以使用平面的条形码扫描而无需复制。
- */
- void setDesiredCameraParameters(Camera camera) {
- /**
- * 返回此相机服务的当前设置。
- *
- * 如果对返回的参数进行修改,则必须通过
- *
- * {@link #setParameters(Camera.Parameters)} 设置生效
- *
- * 看 see #setParameters(Camera.Parameters) 的参数是 Camera.Parameters
- */
- Camera.Parameters parameters = camera.getParameters();
- // 设置预览大小 cameraResolution
- Log.d(TAG, "Setting preview size: " + cameraResolution);
- /**
- * 设置预览图片的尺寸。如果预览已经
- *
- * 开始,应用程序应在更改前先停止预览
- *
- * 预览大小。 宽度和高度的双方都是以相机为基础的。那
- *
- * 是,预览大小是在它被显示旋转之前的大小
- *
- * 定位。所以应用程序需要考虑显示方向
- *
- * 设置预览大小。例如,假设相机支持
- *
- * 尺寸320x480 480x320和预览。应用程序需要一个3:2
- *
- * 预览比。如果显示方向设置为0或180,则预览
- *
- * 大小应设置为480x320。如果显示方向被设置为
- *
- * 90或270,预览大小应设置为320x480。显示
- *
- * 设置图片大小时也应考虑*方向
- *
- * 缩略图大小。
- *
- * * @param宽度的图片,像素
- *
- * @param高度像素的图片,
- *
- * “看# setdisplayorientation(int)
- *
- * “看# getcamerainfo(int,camerainfo)
- *
- * “看# setpicturesize(int,int)
- *
- * “看# setjpegthumbnailsize(int,int)
- */
- parameters.setPreviewSize(cameraResolution.x, cameraResolution.y);
- setFlash(parameters);
- setZoom(parameters);
- // setSharpness(parameters);
- // modify here
- // camera.setDisplayOrientation(90);
- // 兼容2.1
- setDisplayOrientation(camera, 90);
- camera.setParameters(parameters);
- }
- /**
- * 获取相机分辨率
- *
- * @return
- */
- Point getCameraResolution() {
- return cameraResolution;
- }
- /**
- *
- 获取屏幕分辨率
- *
- * @return
- */
- Point getScreenResolution() {
- return screenResolution;
- }
- /**
- * 获得预览格式
- *
- * @return
- */
- int getPreviewFormat() {
- return previewFormat;
- }
- /**
- * 获取预览格式字符串
- *
- * @return
- */
- String getPreviewFormatString() {
- return previewFormatString;
- }
- /**
- * 获取相机分辨率
- *
- * @param parameters
- * 相机服务设置 即相机参数设置类
- * @param screenResolution
- * 屏幕分辨率
- * @return
- */
- private static Point getCameraResolution(Camera.Parameters parameters,
- Point screenResolution) {
- // 获取预览大小值
- String previewSizeValueString = parameters.get("preview-size-values");
- // 如果值为空 重新获取
- if (previewSizeValueString == null) {
- previewSizeValueString = parameters.get("preview-size-value");
- }
- // 相机的分辨率
- Point cameraResolution = null;
- if (previewSizeValueString != null) {
- // 打印 预览值参数
- Log.d(TAG, "preview-size-values parameter: "
- + previewSizeValueString);
- // 相机的分辨率
- cameraResolution = findBestPreviewSizeValue(previewSizeValueString,
- screenResolution);
- }
- if (cameraResolution == null) {
- /**
- * 确保相机分辨率为8,为屏幕可能不。
- */
- cameraResolution = new Point((screenResolution.x >> 3) << 3,
- (screenResolution.y >> 3) << 3);
- }
- return cameraResolution;
- }
- /**
- * 找到最佳的预览大小值
- *
- * @param previewSizeValueString
- * 预览大小值字符串
- * @param screenResolution
- * 屏幕分辨率
- * @return
- */
- private static Point findBestPreviewSizeValue(
- CharSequence previewSizeValueString, Point screenResolution) {
- int bestX = 0; // 最好的X
- int bestY = 0; // 最好的Y
- int diff = Integer.MAX_VALUE; // 最大值
- // 已 (逗号,) 拆分预览大小值字符串
- for (String previewSize : COMMA_PATTERN.split(previewSizeValueString)) {
- previewSize = previewSize.trim();
- /**
- * 返回给定代码点的第一个索引,或- 1。
- *
- * 搜索开始时并向移动 该字符串的结束。
- */
- int dimPosition = previewSize.indexOf('x');
- if (dimPosition < 0) {
- // 如果值小于零 打印 坏的预览大小
- Log.w(TAG, "Bad preview-size: " + previewSize);
- continue;
- }
- int newX;
- int newY;
- try {
- // 拿到新的 X值 和 Y 值
- newX = Integer.parseInt(previewSize.substring(0, dimPosition));
- newY = Integer.parseInt(previewSize.substring(dimPosition + 1));
- } catch (NumberFormatException nfe) {
- // 如果异常 打印 坏的预览大小
- Log.w(TAG, "Bad preview-size: " + previewSize);
- continue;
- }
- /**
- * Math.abs(int i) 返回参数的绝对值
- *
- * 如果参数是 {@code Integer.MIN_VALUE}, {@code Integer.MIN_VALUE} 返回
- */
- int newDiff = Math.abs(newX - screenResolution.x)
- + Math.abs(newY - screenResolution.y);
- if (newDiff == 0) {
- bestX = newX;
- bestY = newY;
- break;
- } else if (newDiff < diff) {
- bestX = newX;
- bestY = newY;
- diff = newDiff;
- }
- }
- /**
- * 如果 最好的X 最好的Y 都大于零 从新绘制
- */
- if (bestX > 0 && bestY > 0) {
- return new Point(bestX, bestY);
- }
- return null;
- }
- /**
- * 找到最好的MOT缩放值
- *
- * @param stringValues
- * 字符串值
- * @param tenDesiredZoom
- * 所需的变焦
- * @return
- */
- private static int findBestMotZoomValue(CharSequence stringValues,
- int tenDesiredZoom) {
- int tenBestValue = 0;
- // 以 (逗号,) 拆分字符串值
- for (String stringValue : COMMA_PATTERN.split(stringValues)) {
- stringValue = stringValue.trim();
- double value;
- try {
- // 得到整数值
- value = Double.parseDouble(stringValue);
- } catch (NumberFormatException nfe) {
- return tenDesiredZoom;
- }
- // 计算 改值得 十倍值
- int tenValue = (int) (10.0 * value);
- // 计算绝对值 得到最好的值
- if (Math.abs(tenDesiredZoom - value) < Math.abs(tenDesiredZoom
- - tenBestValue)) {
- tenBestValue = tenValue;
- }
- }
- return tenBestValue;
- }
- /**
- * 设置闪光
- *
- * @param parameters
- * 相机配置参数设置类
- */
- private void setFlash(Camera.Parameters parameters) {
- // FIXME:这是一个黑客把闪光灯关掉了三星Galaxy。
- // 这是一个黑客攻击,以解决不同的价值
- // 看一看
- // 限制看二检查蛋糕,每三星的建议
- // if (Build.MODEL.contains("Behold II") &&
- // CameraManager.SDK_INT == Build.VERSION_CODES.CUPCAKE) {
- if (Build.MODEL.contains("Behold II") && CameraManager.SDK_INT == 3) { // 3
- // =
- // Cupcake
- parameters.set("flash-value", 1);
- } else {
- parameters.set("flash-value", 2);
- }
- /**
- * 这是标准的设置,把所有的设备应该遵守
- */
- parameters.set("flash-mode", "off");
- }
- /**
- * 设定缩放等级
- *
- * @param parameters
- * 相机配置参数设置类
- */
- private void setZoom(Camera.Parameters parameters) {
- // 拿到 变焦支持 值
- String zoomSupportedString = parameters.get("zoom-supported");
- // 判断 zoomSupportedString 值不为空 且 字符串不为 boolean 类型的值
- if (zoomSupportedString != null
- && !Boolean.parseBoolean(zoomSupportedString)) {
- return;
- }
- // 所需的变焦
- int tenDesiredZoom = TEN_DESIRED_ZOOM;
- // 得到 最大变焦
- String maxZoomString = parameters.get("max-zoom");
- if (maxZoomString != null) {
- try {
- // 得到最大变焦值 10 倍值
- int tenMaxZoom = (int) (10.0 * Double
- .parseDouble(maxZoomString));
- // 如果所需变焦值 大于 最大变焦值
- if (tenDesiredZoom > tenMaxZoom) {
- tenDesiredZoom = tenMaxZoom;
- }
- } catch (NumberFormatException nfe) {
- // 打印异常的变焦值
- Log.w(TAG, "Bad max-zoom: " + maxZoomString);
- }
- }
- // 图片缩放最大
- String takingPictureZoomMaxString = parameters
- .get("taking-picture-zoom-max");
- if (takingPictureZoomMaxString != null) {
- try {
- // 最大缩放
- int tenMaxZoom = Integer.parseInt(takingPictureZoomMaxString);
- // 所需变焦 大于 图片最大缩放值
- if (tenDesiredZoom > tenMaxZoom) {
- tenDesiredZoom = tenMaxZoom;
- }
- } catch (NumberFormatException nfe) {
- // 异常的 图片缩放最大值
- Log.w(TAG, "Bad taking-picture-zoom-max: "
- + takingPictureZoomMaxString);
- }
- }
- // MOT缩放值
- String motZoomValuesString = parameters.get("mot-zoom-values");
- if (motZoomValuesString != null) {
- tenDesiredZoom = findBestMotZoomValue(motZoomValuesString,
- tenDesiredZoom);
- }
- // mot 变焦步骤
- String motZoomStepString = parameters.get("mot-zoom-step");
- if (motZoomStepString != null) {
- try {
- // MOT缩放值
- double motZoomStep = Double.parseDouble(motZoomStepString
- .trim());
- int tenZoomStep = (int) (10.0 * motZoomStep);
- if (tenZoomStep > 1) {
- tenDesiredZoom -= tenDesiredZoom % tenZoomStep;
- }
- } catch (NumberFormatException nfe) {
- // continue
- }
- }
- // 设置缩放。这有助于鼓励用户拉回来。
- // 一些设备,如有一个变焦参数
- if (maxZoomString != null || motZoomValuesString != null) {
- parameters.set("zoom", String.valueOf(tenDesiredZoom / 10.0));
- }
- // 大多数设备,像英雄,似乎暴露这个变焦参数。
- // 它的值“27”,似乎意味着2.7倍变焦
- if (takingPictureZoomMaxString != null) {
- parameters.set("taking-picture-zoom", tenDesiredZoom);
- }
- }
- /**
- * 获得理想的清晰度
- *
- * @return
- */
- public static int getDesiredSharpness() {
- return DESIRED_SHARPNESS;
- }
- /**
- *
- * 设置显示方向
- *
- * compatible 1.6
- *
- * @param camera
- * @param angle
- */
- protected void setDisplayOrientation(Camera camera, int angle) {
- Method downPolymorphic;
- try {
- /**
- * 返回一个表示公共方法的 {@code Method}对象
- *
- * 指定的名称和参数类型。
- *
- * {@code (Class[]) null} 等于空数组
- *
- * 该方法首先搜索 C类的代码 {@code Class} 最后C的父类
- *
- * 为匹配名称的方法。
- *
- * 将调用不存在方法异常将会引发 @throws NoSuchMethodException
- *
- * 看 see #getDeclaredMethod(String, Class[])
- */
- downPolymorphic = camera.getClass().getMethod(
- "setDisplayOrientation", new Class[] { int.class });
- if (downPolymorphic != null)
- /**
- * 返回动态调用此方法的结果。相当于
- * {@code receiver.methodName(arg1, arg2, ... , argN)}.
- *
- * 如果该方法是静态的,则忽略接收器参数(可能是空的)
- *
- * 如果该方法没有任何参数,您可以通过 {@code (Object[]) null} 来代替 分配一个空数组。
- *
- * 如果你调用一个可变参数的方法,你需要传递一个{@code Object[]}做,不是虚拟机,和
- *
- * 反射机制不会为您做此。(它不能,因为它会
- *
- * 暧昧。) 反射方法调用遵循通常的方法查找方法。
- *
- * 如果在调用过程中抛出异常,则该异常被捕获和
- *
- * 包装在一个invocationtargetexception。然后抛出此异常。
- *
- *
- *
- * 如果调用完成的话,返回值本身是
- *
- * 返回。如果该方法被声明为返回原始类型,则
- *
- * 返回值被装箱。如果返回类型无效,返回空
- */
- downPolymorphic.invoke(camera, new Object[] { angle });
- } catch (Exception e1) {
- }
- }
- }
(7)最后讲下相机中散光灯如何使用,FlashlightManager类控制散光灯,该类提供了多种反射技术,拿到封装的对象和方法,来实现硬件功能,请看相关注解
- /**
- *
- 这个类是用来激活弱光的一些相机的手机(不是闪光灯)
- *
- * 为了照亮扫描的表面。没有官方的方法来做这件事,
- *
- * 但是,允许访问此功能的类仍然存在于某些设备上。
- *
- * 因此通过大量的思考。
- *
- * 看 <a href=
- * "http://almondmendoza.com/2009/01/05/changing-the-screen-brightness-programatically/"
- * > http://almondmendoza.com/2009/01/05/changing-the-screen-brightness-
- * programatically/</a> and <a href=
- * "http://code.google.com/p/droidled/source/browse/trunk/src/com/droidled/demo/DroidLED.java"
- * > http://code.google.com/p/droidled/source/browse/trunk/src/com/droidled/demo
- * /DroidLED.java</a>.
- *
- * 感谢Ryan Alford指出该类的可用性。
- */
- final class FlashlightManager {
- private static final String TAG = FlashlightManager.class.getSimpleName();
- // 硬件服务
- private static final Object iHardwareService;
- // 设置闪光功能的方法
- private static final Method setFlashEnabledMethod;
- static {
- iHardwareService = getHardwareService();
- setFlashEnabledMethod = getSetFlashEnabledMethod(iHardwareService);
- if (iHardwareService == null) {
- Log.v(TAG, "该设备支持一个手电筒的控制");
- } else {
- Log.v(TAG, "该设备不支持控制手电筒");
- }
- }
- private FlashlightManager() {
- }
- /**
- * 控制相机闪光灯开关
- */
- // FIXME
- static void enableFlashlight() {
- setFlashlight(false);
- }
- /**
- *
- 禁用闪光灯
- */
- static void disableFlashlight() {
- setFlashlight(false);
- }
- private static Object getHardwareService() {
- // 反向映射 得到指定 类
- Class<?> serviceManagerClass = maybeForName("android.os.ServiceManager");
- if (serviceManagerClass == null) {
- return null;
- }
- Method getServiceMethod = maybeGetMethod(serviceManagerClass,
- "getService", String.class);
- if (getServiceMethod == null) {
- return null;
- }
- Object hardwareService = invoke(getServiceMethod, null, "hardware");
- if (hardwareService == null) {
- return null;
- }
- Class<?> iHardwareServiceStubClass = maybeForName("android.os.IHardwareService$Stub");
- if (iHardwareServiceStubClass == null) {
- return null;
- }
- Method asInterfaceMethod = maybeGetMethod(iHardwareServiceStubClass,
- "asInterface", IBinder.class);
- if (asInterfaceMethod == null) {
- return null;
- }
- return invoke(asInterfaceMethod, null, hardwareService);
- }
- private static Method getSetFlashEnabledMethod(Object iHardwareService) {
- if (iHardwareService == null) {
- return null;
- }
- Class<?> proxyClass = iHardwareService.getClass();
- return maybeGetMethod(proxyClass, "setFlashlightEnabled", boolean.class);
- }
- private static Class<?> maybeForName(String name) {
- try {
- /**
- * 返回一个代表类的{ @码类}对象
- *
- * 给定的名称。名称应该是非本原的名称
- *
- * 类,如在{ @链接类定义}中所描述的。
- *
- * 原始类型不能使用此方法来找到;使用{ @代码
- *
- * int.class }或{ @代码类型}而不是整数。
- *
- *
- *
- * 如果尚未加载该类,则加载和初始化
- *
- * 第一。这是通过调用类的类装入器来完成的
- *
- * 或其母类装入器中的一个。这可能是一个静态初始化运行
- *
- * 这一呼叫的结果。
- *
- *
- *
- * @抛出ClassNotFoundException
- *
- * 如果无法找到所需的类。
- *
- * @抛出连接失败错误
- *
- * 如果在连接过程中出现错误
- *
- * @投exceptionininitializererror
- *
- * 如果在静态初始化期间发生异常
- *
- * 类。
- */
- return Class.forName(name);
- } catch (ClassNotFoundException cnfe) {
- // OK
- return null;
- } catch (RuntimeException re) {
- Log.w(TAG, "Unexpected error while finding class " + name, re);
- return null;
- }
- }
- private static Method maybeGetMethod(Class<?> clazz, String name,
- Class<?>... argClasses) {
- try {
- return clazz.getMethod(name, argClasses);
- } catch (NoSuchMethodException nsme) {
- // OK
- return null;
- } catch (RuntimeException re) {
- Log.w(TAG, "Unexpected error while finding method " + name, re);
- return null;
- }
- }
- private static Object invoke(Method method, Object instance, Object... args) {
- try {
- /**
- *
- *
- * 返回动态调用此方法的结果。相当于
- *
- * { @代码语句(arg1,arg2接收器,…argn)}。
- *
- *
- *
- * 如果该方法是静态的,则忽略接收器参数(可能是空的)。
- *
- *
- *
- * 如果该方法没有任何参数,您可以通过{ @代码(对象[)]空}来代替
- *
- * 分配一个空数组。
- *
- *
- *
- * <BR>
- * 如果你调用一个可变参数的方法,你需要传递一个{ } [ ] @代码对象的
- *
- * 变参数:转换通常是在{ @代码javac }做,不是虚拟机,和
- *
- * 反射机制不会为您做此。(它不能,因为它会
- *
- * 暧昧。)
- *
- *
- *
- * *反射方法调用遵循通常的方法查找方法。
- *
- *
- *
- * 如果在调用过程中抛出异常,则该异常被捕获和
- *
- * 包装在一个invocationtargetexception。然后抛出此异常。
- *
- *
- *
- * 如果调用完成的话,返回值本身是
- *
- * 返回。如果该方法被声明为返回原始类型,则
- *
- * 返回值被装箱。如果返回类型无效,返回空。
- *
- *
- *
- * @param接收机
- *
- * 将调用该方法的对象(或静态方法为空)
- *
- * @param参数
- *
- * 参数的方法
- *
- * 返回结果
- *
- *
- *
- * @抛出NullPointerException异常
- *
- * 如果{“代码”接收器=空}为非静态方法
- *
- * @抛出非法存取异常
- *
- * 如果这个方法不容易(参阅{@链接AccessibleObject })
- *
- * @抛出时
- *
- * 如果参数的数目与参数的数目不匹配,该接收器
- *
- * 与声明类不相容,或争论不能拆箱
- *
- * 或转换为相应的参数类型的拉宽转换
- *
- * @投invocationtargetexception
- *
- * 如果被调用的方法引发异常
- *
- *
- */
- return method.invoke(instance, args);
- } catch (IllegalAccessException e) {
- Log.w(TAG, "Unexpected error while invoking " + method, e);
- return null;
- } catch (InvocationTargetException e) {
- Log.w(TAG, "Unexpected error while invoking " + method,
- e.getCause());
- return null;
- } catch (RuntimeException re) {
- Log.w(TAG, "Unexpected error while invoking " + method, re);
- return null;
- }
- }
- private static void setFlashlight(boolean active) {
- if (iHardwareService != null) {
- invoke(setFlashEnabledMethod, iHardwareService, active);
- }
- }
- }
(8)最后你会想如何实现扫描效果那个识别二位码控件如何实现,请看 ViewfinderView类,该类继承了View类,提供了绘制扫描控件 onDraw(Canvas canvas)函数
- @Override
- public void onDraw(Canvas canvas) {
- // 中间的扫描框,你要修改扫描框的大小,去CameraManager里面修改
- Rect frame = CameraManager.get().getFramingRect();
- if (frame == null) {
- return;
- }
- // 初始化中间线滑动的最上边和最下边
- if (!isFirst) {
- isFirst = true;
- slideTop = frame.top;
- slideBottom = frame.bottom;
- }
- // 获取屏幕的宽和高
- int width = canvas.getWidth();
- int height = canvas.getHeight();
- paint.setColor(resultBitmap != null ? resultColor : maskColor);
- // 画出扫描框外面的阴影部分,共四个部分,扫描框的上面到屏幕上面,扫描框的下面到屏幕下面
- // 扫描框的左边面到屏幕左边,扫描框的右边到屏幕右边
- canvas.drawRect(0, 0, width, frame.top, paint);
- canvas.drawRect(0, frame.top, frame.left, frame.bottom + 1, paint);
- canvas.drawRect(frame.right + 1, frame.top, width, frame.bottom + 1,
- paint);
- canvas.drawRect(0, frame.bottom + 1, width, height, paint);
- if (resultBitmap != null) {
- // Draw the opaque result bitmap over the scanning rectangle
- paint.setAlpha(OPAQUE);
- canvas.drawBitmap(resultBitmap, frame.left, frame.top, paint);
- } else {
- // 画扫描框边上的角,总共8个部分
- paint.setColor(Color.GREEN);
- canvas.drawRect(frame.left, frame.top, frame.left + ScreenRate,
- frame.top + CORNER_WIDTH, paint);
- canvas.drawRect(frame.left, frame.top, frame.left + CORNER_WIDTH,
- frame.top + ScreenRate, paint);
- canvas.drawRect(frame.right - ScreenRate, frame.top, frame.right,
- frame.top + CORNER_WIDTH, paint);
- canvas.drawRect(frame.right - CORNER_WIDTH, frame.top, frame.right,
- frame.top + ScreenRate, paint);
- canvas.drawRect(frame.left, frame.bottom - CORNER_WIDTH, frame.left
- + ScreenRate, frame.bottom, paint);
- canvas.drawRect(frame.left, frame.bottom - ScreenRate, frame.left
- + CORNER_WIDTH, frame.bottom, paint);
- canvas.drawRect(frame.right - ScreenRate, frame.bottom
- - CORNER_WIDTH, frame.right, frame.bottom, paint);
- canvas.drawRect(frame.right - CORNER_WIDTH, frame.bottom
- - ScreenRate, frame.right, frame.bottom, paint);
- // 绘制中间的线,每次刷新界面,中间的线往下移动SPEEN_DISTANCE
- slideTop += SPEEN_DISTANCE;
- if (slideTop >= frame.bottom) {
- slideTop = frame.top;
- }
- canvas.drawRect(frame.left + MIDDLE_LINE_PADDING, slideTop
- - MIDDLE_LINE_WIDTH / 2, frame.right - MIDDLE_LINE_PADDING,
- slideTop + MIDDLE_LINE_WIDTH / 2, paint);
- // 画扫描框下面的字
- paint.setColor(Color.WHITE);
- paint.setTextSize(TEXT_SIZE * density);
- paint.setAlpha(0x40);
- paint.setTypeface(Typeface.create("System", Typeface.BOLD));
- canvas.drawText(
- getResources().getString(R.string.scan_text),
- frame.left,
- (float) (frame.bottom + (float) TEXT_PADDING_TOP * density),
- paint);
- Collection<ResultPoint> currentPossible = possibleResultPoints;
- Collection<ResultPoint> currentLast = lastPossibleResultPoints;
- if (currentPossible.isEmpty()) {
- lastPossibleResultPoints = null;
- } else {
- possibleResultPoints = new HashSet<ResultPoint>(5);
- lastPossibleResultPoints = currentPossible;
- paint.setAlpha(OPAQUE);
- paint.setColor(resultPointColor);
- for (ResultPoint point : currentPossible) {
- canvas.drawCircle(frame.left + point.getX(), frame.top
- + point.getY(), 6.0f, paint);
- }
- }
- if (currentLast != null) {
- paint.setAlpha(OPAQUE / 2);
- paint.setColor(resultPointColor);
- for (ResultPoint point : currentLast) {
- canvas.drawCircle(frame.left + point.getX(), frame.top
- + point.getY(), 3.0f, paint);
- }
- }
- // 只刷新扫描框的内容,其他地方不刷新
- postInvalidateDelayed(ANIMATION_DELAY, frame.left, frame.top,
- frame.right, frame.bottom);
- }
- }
(9)其中还有几个相关辅助类没有贴上,ViewfinderResultPointCallback类,PlanarYUVLuminanceSource类,InactivityTimer类,FinishListener类,Intents类 这些可以详细看代码


 被折叠的 条评论
为什么被折叠?
被折叠的 条评论
为什么被折叠?
 到【灌水乐园】发言


