


1、下载logstash
a、官方下载地址:https://www.elastic.co/downloads/logstash
b、解压:tar -xzvf logstash-5.1.1.tar.gz
c、设置用户测试的配置文件:vim logstatsh_test.conf,编辑内容如下:
- 1
- 2
- 3
- 4
- 5
- 6
- 7
- 8
- 9
- 1
- 2
- 3
- 4
- 5
- 6
- 7
- 8
- 9
d、运行logstash测试:bin/logstash -f logstatsh_test.conf,运行成功界面如下:

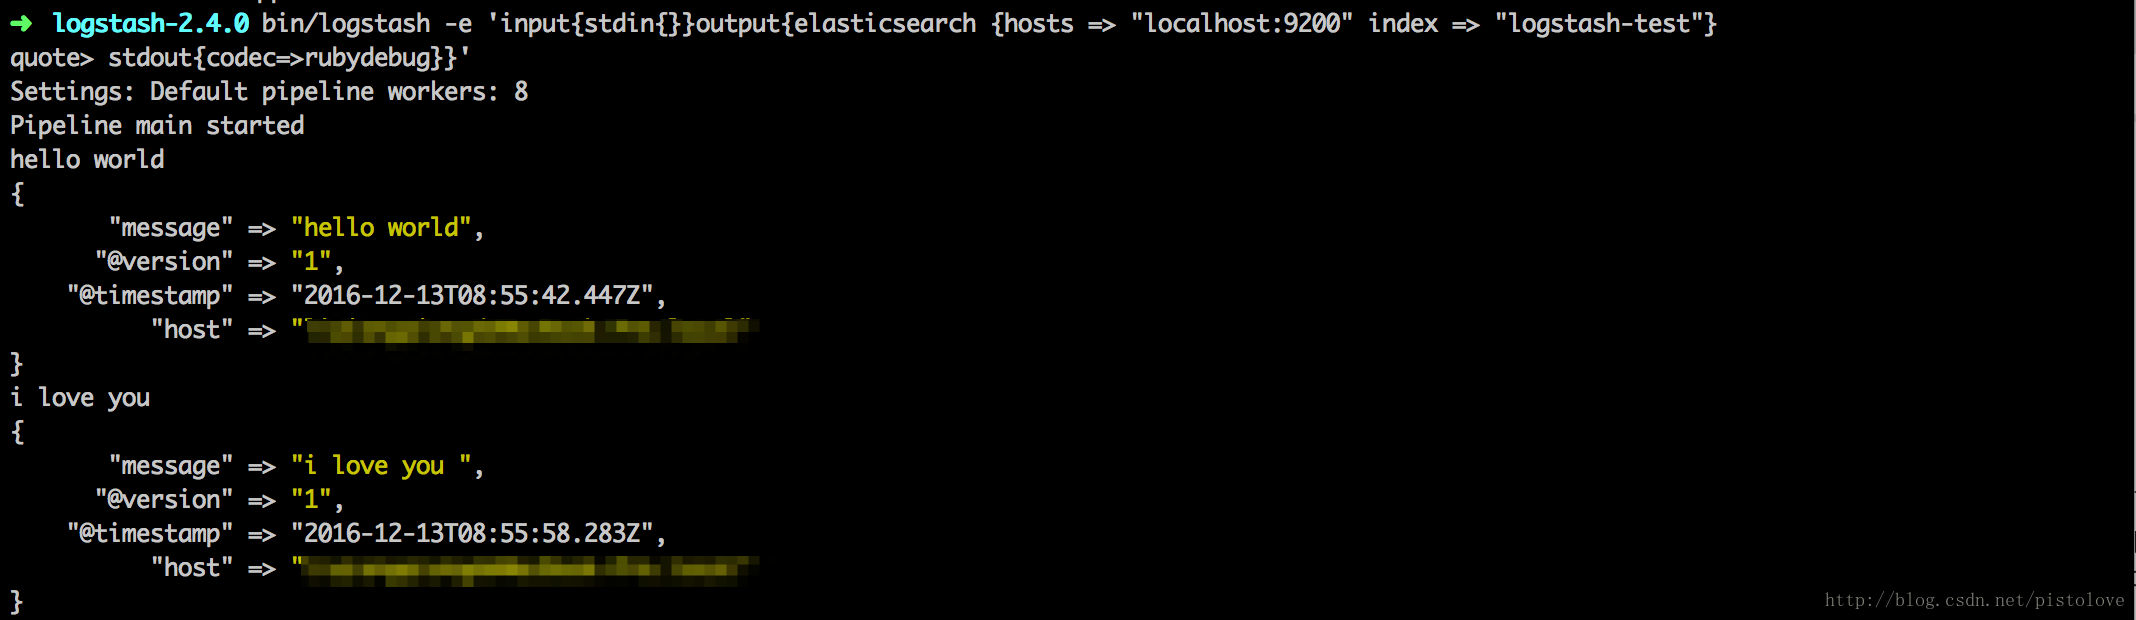
e、logstash和elasticsearch整合:可以直接命令行启动如下
- 1
- 2
- 1
- 2
或者对logstatsh_test.conf进行修改如下
- 1
- 2
- 3
- 4
- 5
- 6
- 7
- 8
- 9
- 10
- 11
- 12
- 13
- 1
- 2
- 3
- 4
- 5
- 6
- 7
- 8
- 9
- 10
- 11
- 12
- 13
f、状态查看:
2、下载elasticsearch
a、官方下载地址:https://www.elastic.co/downloads/elasticsearch
b、解压:tar -xzvf elasticsearch-5.1.1.tar.gz
c、配置文件:vim config/elasticsearch.yml
- 1
- 2
- 3
- 4
- 1
- 2
- 3
- 4
d、启动程序:/bin/elasticsearch
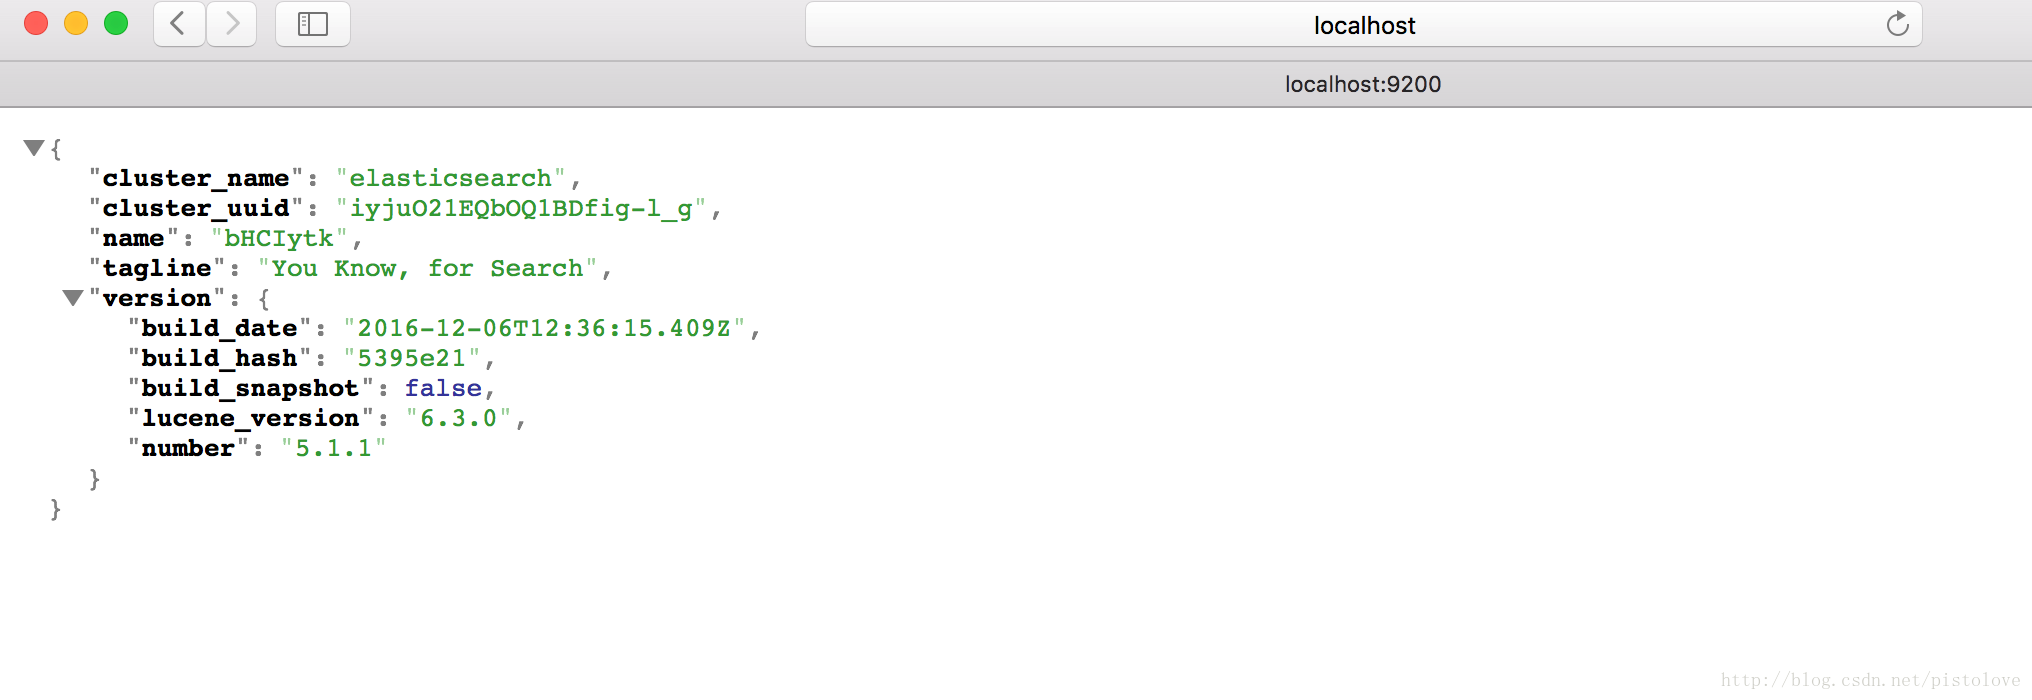
e、访问:http://localhost:9200/ 查看elasticsearch是否成功运行。
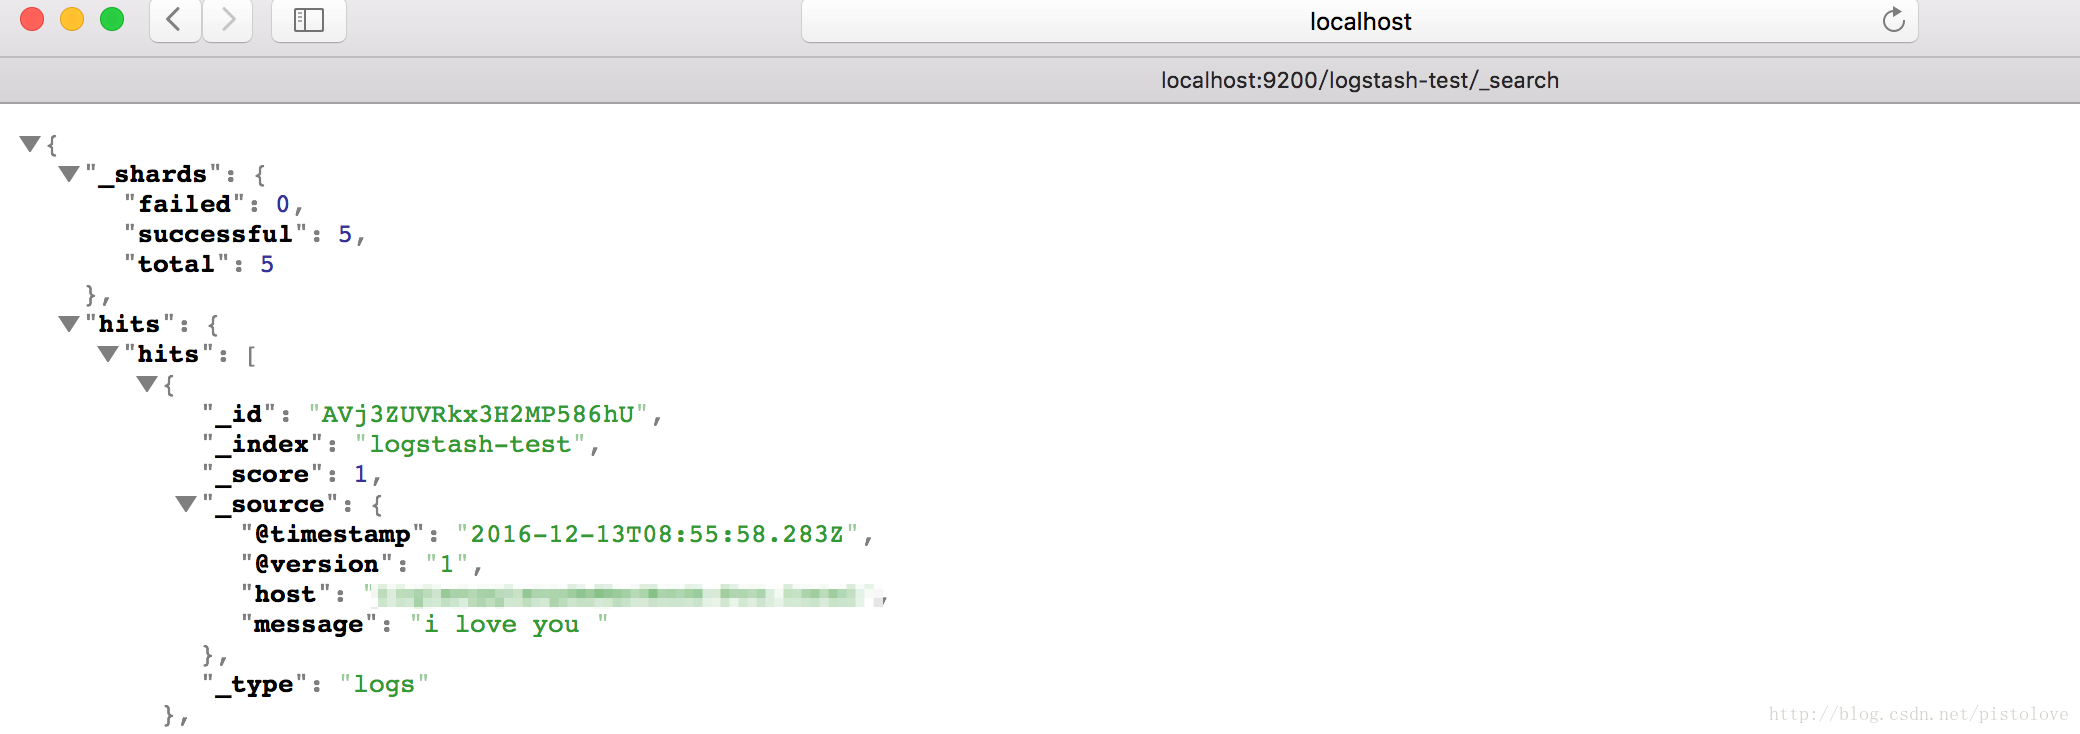
f、访问:http://localhost:9200/logstash_test/_search,查看logstash_test这个index下的日志信息。
3、下载下载kibana
a、官方下载地址:https://www.elastic.co/downloads/kibana
b、解压:tar -xzvf kibana-5.1.1.tar.gz
c、设置配置文件:打开config/kibana.yml,修改如下内容
- 1
- 2
- 3
- 4
- 5
- 6
- 1
- 2
- 3
- 4
- 5
- 6
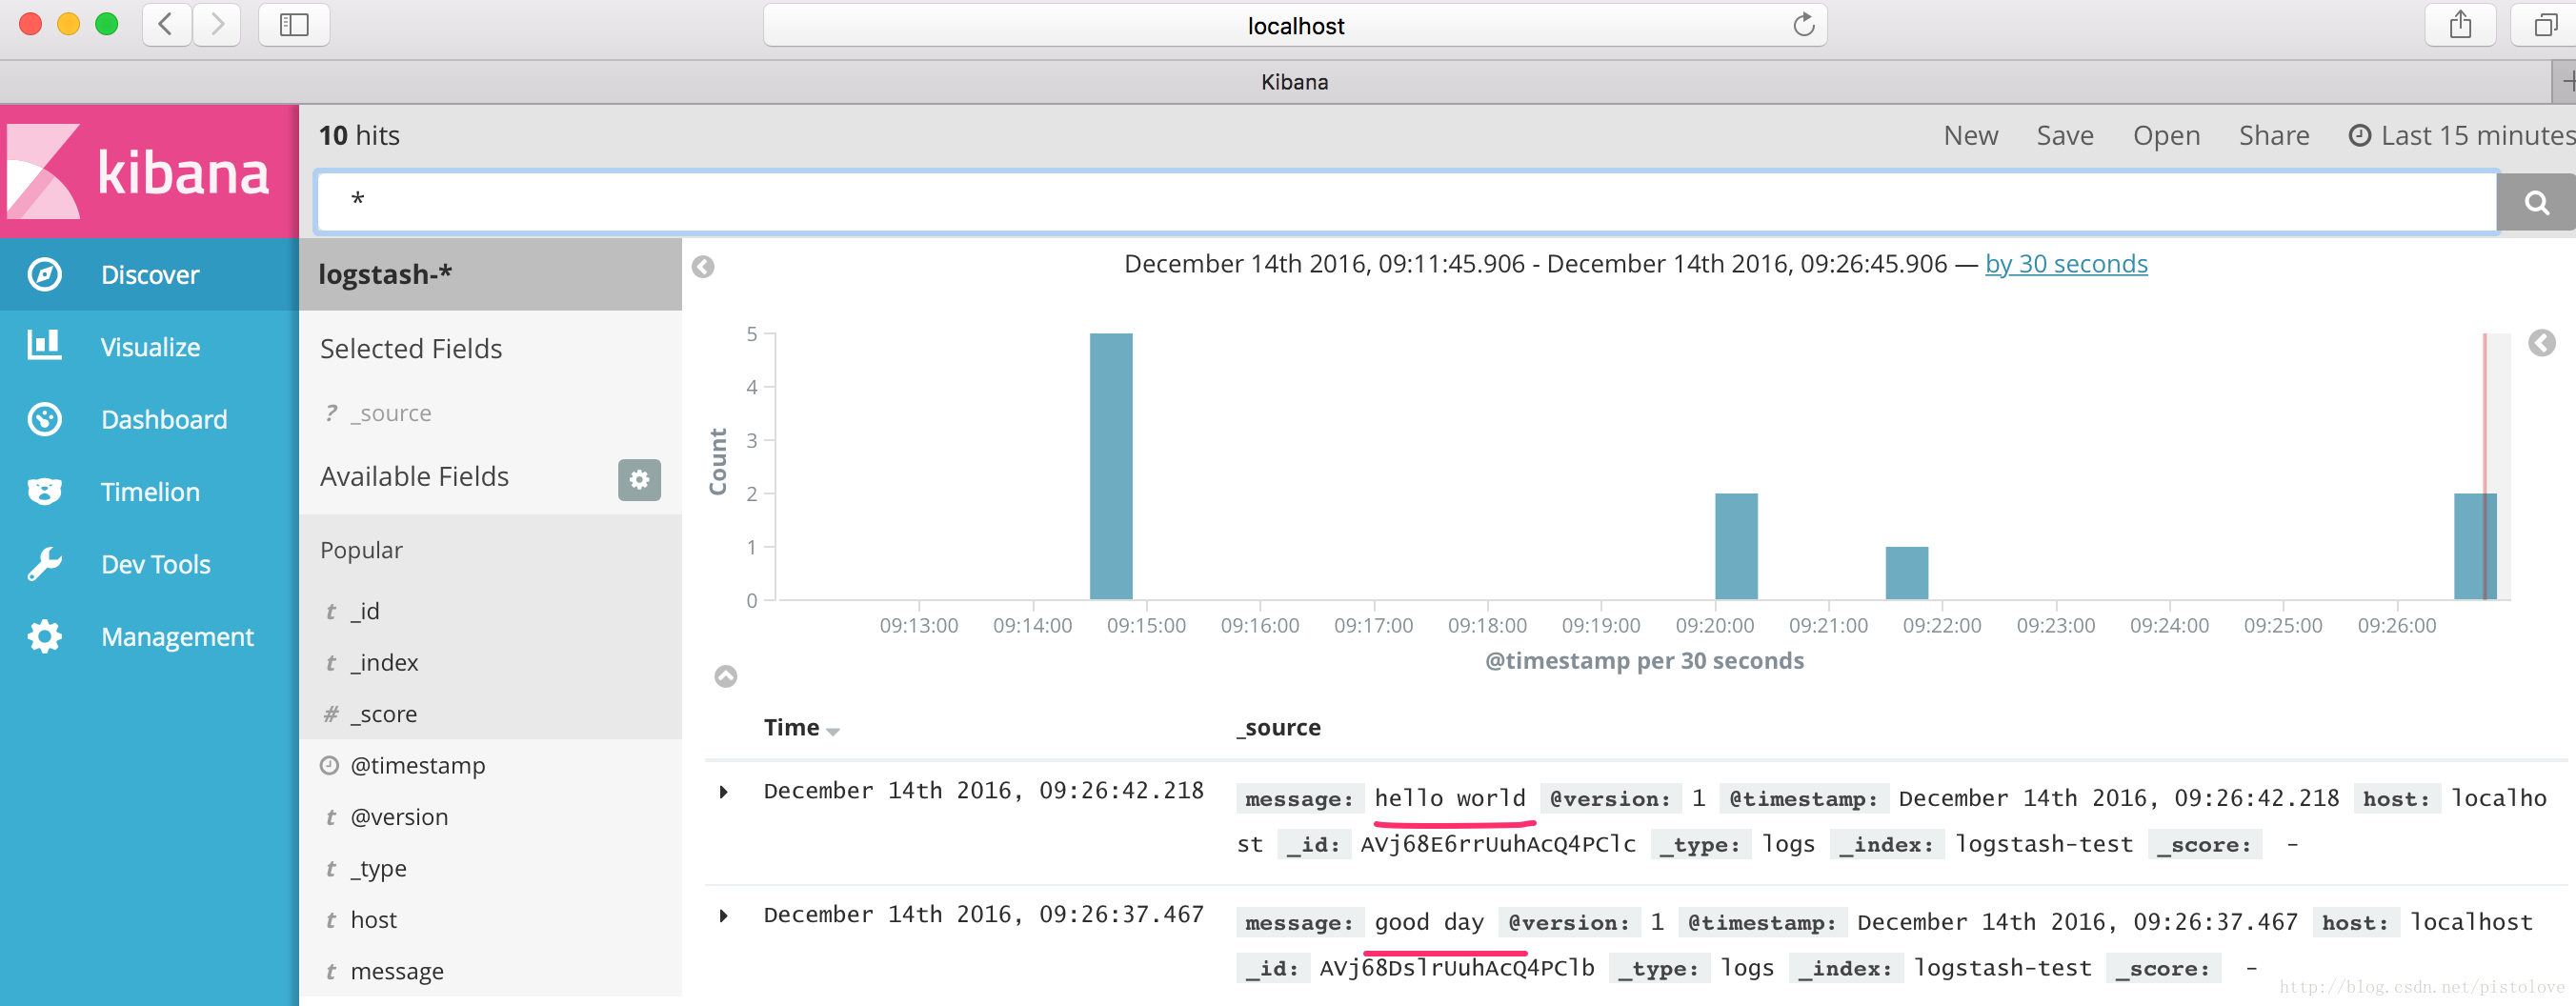
d、启动程序:bin/kibana
e、访问:http://localhost:8610/查看kibana是否成功运行,并检索查看已存入的信息。
4、注意:
a、elasticsearch和kibana版本要对应,否则服务起不来。
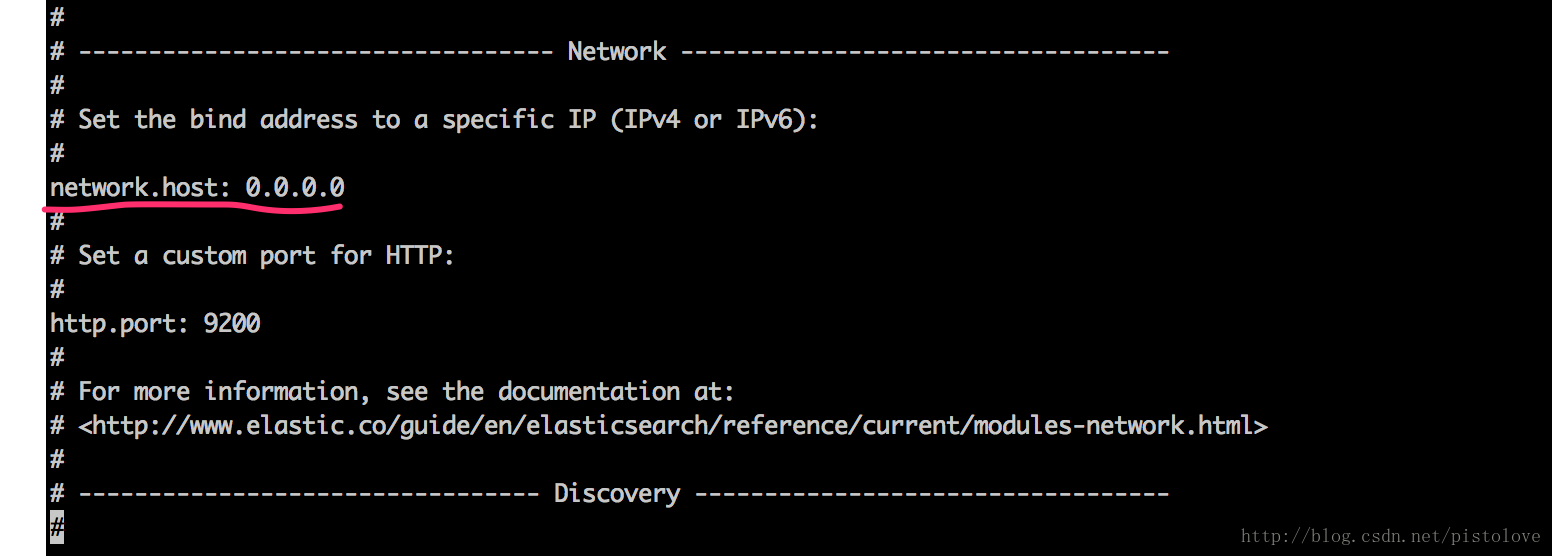
b、如果浏览器中访问http://localhost:9200/没有返回预期的结果,就需要修改Elasticsearch的配置,使其支持外网访问。首先,按Ctrl +C停止Elasticsearch,然后,打开Elasticsearch的配置文件vimconfig/elasticsearch.yml,找到network.host这一行。
c、max virtual memory areas vm.max_map_count [65530] likely too low, increase to at least [262144]
解决:切换到root用户修改配置sysctl.conf
vi /etc/sysctl.conf
添加下面配置:
vm.max_map_count=655360
并执行命令:
sysctl -p
d、max number of threads [1024] for user [lish] likely too low, increase to at least [2048]
解决:切换到root用户,进入limits.d目录下修改配置文件。
vi /etc/security/limits.d/90-nproc.conf
修改如下内容:
soft nproc 1024
修改为
soft proc 2048
e、 ERROR: bootstrap checks failed max file descriptors [4096] for elasticsearch process likely too low, increase to at least [65536] max number of threads [1024] for user [lishang] likely too low, increase to at least [2048]
解决:切换到root用户,编辑limits.conf 添加类似如下内容
vi /etc/security/limits.conf
添加如下内容:
soft nofile 65536
hard nofile 131072
soft nproc 2048
hard proc 4096
f、useradd: cannot open /etc/group;useradd: cannot open /etc/gshadow;useradd: cannot open /etc/passwd;useradd: cannot open /etc/shadow
1、lsattr /etc/group
—-i——–e- /etc/group
2、chattr -i /etc/group 依次去掉group、gshadow、passwd、shadow
3、创建elsearch用户组及elsearch用户
groupadd elasticsearch
4、更改elasticsearch文件夹及内部文件的所属用户及组为elasticsearch: elasticsearch
useradd elasticsearch -g elsearch -p elasticsearch
cd /elasticsearch-5.1.1
chown -R elasticsearch: elasticsearch elasticsearch-5.1.1
5、切换到elasticsearch用户再启动
su elasticsearch
cd elasticsearch
./bin/elasticsearch
g、logstash启动报错
- 1
- 1
如果重新设置了密码,但是没有配置密码,就需要像下面一样配置一下。
- 1
- 2
- 3
- 4
- 5
- 6
- 7
- 8

- 1
- 2
- 3
- 4
- 5
- 6
- 7
- 8


 3020
3020

 被折叠的 条评论
为什么被折叠?
被折叠的 条评论
为什么被折叠?
 到【灌水乐园】发言


