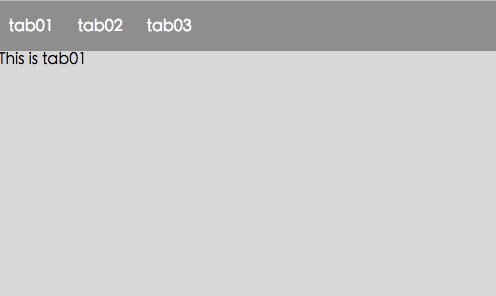
vue.js--Tab选项卡

这里写图片描述

代码如下:

<!DOCTYPE html>
<html lang="en">
<head>
    <meta charset="UTF-8">
    <title>Document</title>
    <style type="text/css">
        *{padding: 0;margin: 0}
        #app{
            width: 500px;height: 300px;margin: 0 auto;background-color: #ddd;
        }
        .top{
            height: 50px;line-height: 50px;width: 100%;background-color: #999;
        }
        .top ul li{display: inline-block;margin:0 10px;}
        .top ul li a{text-decoration: none;color: white;}
        .bottom{

        }
    </style>
</head>
<body>
    <div id="app">
        <div class="top">
            <ul>
                <li><a href="javascript:;" @click='tabToggle(tab01Text);'>{{tab01Text}}</a></li>
                <li><a href="javascript:;" @click='tabToggle(tab02Text);'>{{tab02Text}}</a></li>
                <li><a href="javascript:;" @click='tabToggle(tab03Text);'>{{tab03Text}}</a></li>
            </ul>
        </div>
        <div class="bottom">
            <component :is='currentView' keep-alive></component>
        </div>
    </div>
    <script type="text/javascript" src='vue.js'></script>
    <script>
        var tab01 = Vue.extend({
            template:'<p>This is tab01</p>'
        })
        var tab02 = Vue.extend({
            template:'<p>This is tab02</p>'
        })
        var tab03 = Vue.extend({
            template:'<p>This is tab03</p>'
        })
        var app = new Vue({
            el:'#app',
            data:{
                tab01Text:'tab01',
                tab02Text:'tab02',
                tab03Text:'tab03',
                currentView:'tab01'
            },
            components:{
                tab01:tab01,
                tab02:tab02,
                tab03:tab03
            },
            methods:{
               tabToggle:function(tabText){
                this.currentView=tabText
               }
            }
        })
    </script>
</body>
</html>
  • 0
    点赞
  • 3
    收藏
    觉得还不错? 一键收藏
  • 3
    评论
可以通过以下步骤使用vue2脚手架实现tab选项卡: 1. 在父组件中定义一个数组tabs,包含选项卡的标题和内容: ```javascript data() { return { tabs: [ { title: '选项卡1', content: '内容1' }, { title: '选项卡2', content: '内容2' }, { title: '选项卡3', content: '内容3' } ], activeTab: 0 } } ``` 2. 在模板中使用v-for指令渲染选项卡的标题,并绑定click事件,将索引赋值给activeTab: ```html <template> <div> <div class="tabs"> <div v-for="(tab, index) in tabs" :key="index" :class="{ active: activeTab === index }" @click="activeTab = index">{{ tab.title }}</div> </div> <div class="tab-content">{{ tabs[activeTab].content }}</div> </div> </template> ``` 3. 根据activeTab的值显示对应选项卡的内容。可以使用计算属性实现: ```javascript computed: { activeContent() { return this.tabs[this.activeTab].content } } ``` 4. 根据需要自定义样式即可实现tab选项卡效果。 完整代码示例: ```html <template> <div> <div class="tabs"> <div v-for="(tab, index) in tabs" :key="index" :class="{ active: activeTab === index }" @click="activeTab = index">{{ tab.title }}</div> </div> <div class="tab-content">{{ activeContent }}</div> </div> </template> <script> export default { data() { return { tabs: [ { title: '选项卡1', content: '内容1' }, { title: '选项卡2', content: '内容2' }, { title: '选项卡3', content: '内容3' } ], activeTab: 0 } }, computed: { activeContent() { return this.tabs[this.activeTab].content } } } </script> <style> .tabs { display: flex; justify-content: space-between; border-bottom: 1px solid #ccc; margin-bottom: 10px; } .tabs div { padding: 10px; cursor: pointer; } .tabs div.active { border-bottom: 2px solid #333; } .tab-content { padding: 10px; } </style> ```

“相关推荐”对你有帮助么?

  • 非常没帮助
  • 没帮助
  • 一般
  • 有帮助
  • 非常有帮助
提交
评论 3
添加红包

请填写红包祝福语或标题

红包个数最小为10个

红包金额最低5元

当前余额3.43前往充值 >
需支付:10.00
成就一亿技术人!
领取后你会自动成为博主和红包主的粉丝 规则
hope_wisdom
发出的红包
实付
使用余额支付
点击重新获取
扫码支付
钱包余额 0

抵扣说明:

1.余额是钱包充值的虚拟货币,按照1:1的比例进行支付金额的抵扣。
2.余额无法直接购买下载,可以购买VIP、付费专栏及课程。

余额充值