


前几天,蛋疼的技术主管非要实现类似装一个qq邮箱,然后可以使用qq邮箱日历的那么一个东西,相当于一个应用生成两个图标,但是不同的是点击不同的图标可以进入不同的应用,如下图的效果。
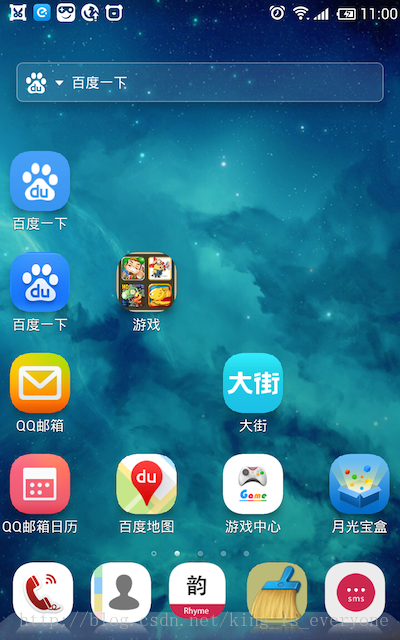
这效果百度了一天也不知道如何着手,只能自己搞,分享一下自己解决这个问题的过程,大概是这样的
1.首先分析来说整个桌面luncher是一个activity,所有的图标都是一个按钮而已,点击图标就是点击一个按钮然后去执行activity
2.查看launcher framework层的源代码,https://android.googlesource.com/platform/packages/apps/Launcher/+/master/src/com/android/launcher/Launcher.java 路径是这个,查看可通过翻墙。这类其实和咱自己写的类也没啥区别. 因为Launcher是继承了activity的
public final class Launcher extends Activity implements View.OnClickListener, OnLongClickListener
public void onClick(View v) {
        Object tag = v.getTag();
        if (tag instanceof ApplicationInfo) {
            // Open shortcut
            final Intent intent = ((ApplicationInfo) tag).intent;
            startActivitySafely(intent);
        } else if (tag instanceof FolderInfo) {
            handleFolderClick((FolderInfo) tag);
        }
}接下来看看startActivitySafely,其实在这里就是处理了下异常和添加一些个flag,但是flag是重点。解析来会继续说flag
    void startActivitySafely(Intent intent) {
        intent.addFlags(Intent.FLAG_ACTIVITY_NEW_TASK);
        try {
            startActivity(intent);
        } catch (ActivityNotFoundException e) {
            Toast.makeText(this, R.string.activity_not_found, Toast.LENGTH_SHORT).show();
        } catch (SecurityException e) {
            Toast.makeText(this, R.string.activity_not_found, Toast.LENGTH_SHORT).show();
            e(LOG_TAG, "Launcher does not have the permission to launch " + intent +
                    ". Make sure to create a MAIN intent-filter for the corresponding activity " +
                    "or use the exported attribute for this activity.", e);
        }
    }
FLAG_ACTIVITY_NEW_TASK设置此状态,首先会查找是否存在和被启动的Activity具有相同的亲和性的任务栈(即taskAffinity)如果有直接把这
个栈整体移动到前台,并保持栈中的状态不变,即栈中的activity顺序不变,如果没有,则新建一个栈来存放被启动的activity. 这就是为什么我们点击home键之后然后再点击图标会恢复到原来的状态,而不是重新去创建一个activity。
通过以上的分析大概能实现这样的东西了,现在我只需要让他们运行在不同的任务栈里面即可,相互之间不能够影响。下面是大概实现的流程,仅供参考,因为这个只是基础的模型而已。实际上我们在里面加了很多业务。
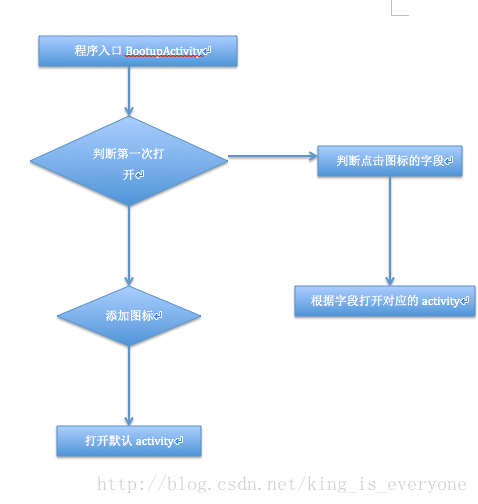
大概的思路就这样一下是代码的实现。主要是放入了一个字段叫做class然后点击图标的时候获取这个字段,打开相应的activity即可
public class BootupActivity extends Activity {

    private Handler handler  = new Handler(){
        @Override
        public void handleMessage(Message msg) {
            super.handleMessage(msg);
            switch (msg.what)
            {
                case 1:

                    break;
            }
        }
    };
    @Override
    protected void onCreate(Bundle savedInstanceState) {
        super.onCreate(savedInstanceState);

        Log.i("BootupActivity", "OnCreate");

        String className = getIntent().getStringExtra("Class");
        if (className==null) {
            addShortcutToDesktop(BootupActivity.this.getString(R.string.shopping_app_name), R.drawable.shopping_ic_launcher,
                    Activity1.class.getName(), Activity1.class);
            addShortcutToDesktop(BootupActivity.this.getString(R.string.xiaohua_app_name), R.drawable.xiaohua_ic_launcher,
                    Activity2.class.getName(), Activity2.class);
            startAppProcess(Activity1.class.getName());
        } else {
            startAppProcess(className);
        }


    }


    private void addShortcutToDesktop(String lable, int iconRes, String destClassName, Class<?> bootupClass) {

        Intent shortcut = new Intent(
                "com.android.launcher.action.INSTALL_SHORTCUT");

        // no rebuilding
        shortcut.putExtra("duplicate", false);
        // shortcut.addFlags(Intent.FLAG_ACTIVITY_MULTIPLE_TASK);
        // setting name
        shortcut.putExtra(Intent.EXTRA_SHORTCUT_NAME, lable);
        // setting icon
        if (iconRes!=0) {
            shortcut.putExtra(Intent.EXTRA_SHORTCUT_ICON_RESOURCE,
                    Intent.ShortcutIconResource.fromContext(this, iconRes));
        }

        // create a broadcast intent
        Intent intent = new Intent(this, bootupClass);
        intent.putExtra("Class", destClassName);
        intent.setAction(Intent.ACTION_MAIN);

        // setting intent
        shortcut.putExtra(Intent.EXTRA_SHORTCUT_INTENT, intent);

        // send broadcast
        sendBroadcast(shortcut);

    }
    private void startAppProcess(String bootupClass) {
        ActivityManager am = (ActivityManager) getSystemService(ACTIVITY_SERVICE);

        Intent i = new Intent();

        i.setComponent(new ComponentName(this.getPackageName(), bootupClass));
        i.putExtra("class", bootupClass);

        this.startActivity(i);

    }


}
以下是需要在配置文件里面配置的,需要注意到得时android:taskAffinity这个属性,不同的activity需要配置不同的。把主要的activity和默认打开的activity的亲和性配置成一样得。保证点击桌面图标和应用图标能够打开相同的任务栈。然后注意把主要的BootupActivity放在第一个位置。其他得都需要加上一个action并且和主要的相同。
<application
        android:icon="@drawable/ic_launcher"

        android:name="com.zlh.combined.MainApp"
        android:taskAffinity="com.p">
        <activity
            android:name=".BootupActivity"
            android:logo="@drawable/ic_action_search"
            >
            <intent-filter>
                <action android:name="android.intent.action.MAIN" />
                <category android:name="android.intent.category.LAUNCHER" />

            </intent-filter>
        </activity>
        <activity
            android:name=".Activity1"
            android:taskAffinity="com.p"
            android:process=":proxy2"
             >
            <intent-filter>
                <action android:name="android.intent.action.MAIN" />

            </intent-filter>
        </activity>
        <activity
            android:name=".Activity2"
            android:taskAffinity="com.c"
            android:process=":proxy3"
            >
            <intent-filter>
                <action android:name="android.intent.action.MAIN" />


            </intent-filter>
        </activity>

       </application>
    <!-- 创建桌面快捷方式 -->
    <uses-permission android:name="com.android.launcher.permission.INSTALL_SHORTCUT" />


 2789
2789

 被折叠的 条评论
为什么被折叠?
被折叠的 条评论
为什么被折叠?
 到【灌水乐园】发言


