


运行环境:
CentOS 7.6
Elasticsearch 6.8.4

软件下载:
https://github.com/lmenezes/cerebro/releases

概述:
cerebro is an open source(MIT License) elasticsearch web admin tool built using Scala, Play Framework, AngularJS and Bootstrap.
celebro 是一个Elasticsearch的web 管理工具,基于scala,play框架和angularJS和Bootstrap前端工具构建。

可以看到cerebro是对Elastic监控的工具,和对Elastic操作的工具。

安装需求:
需要安装Java 8版本
## java -version
java version "1.8.0_221"
Java(TM) SE Runtime Environment (build 1.8.0_221-b11)
Java HotSpot(TM) 64-Bit Server VM (build 25.221-b11, mixed mode)

可以选择rpm安装或者源码包安装:
我这里为了方便快捷直接使用rpm
# wget https://github.com/lmenezes/cerebro/releases/download/v0.8.5/cerebro-0.8.5-1.noarch.rpm


安装:
# rpm -ivh cerebro-0.8.5-1.noarch.rpm
Preparing...                          ################################# [100%]
Creating system group: cerebro
Creating system user: cerebro in cerebro with cerebro user-daemon and shell /bin/false
Updating / installing...
   1:cerebro-0.8.5-1                  ################################# [100%]
Created symlink from /etc/systemd/system/multi-user.target.wants/cerebro.service to /usr/lib/systemd/system/cerebro.service.
--查询一些信息:
# rpm -ql cerebro-0.8.5-1
/etc/cerebro
/etc/default/cerebro
/usr/bin/cerebro
/usr/lib/systemd/system/cerebro.service
/usr/share/cerebro/README.md
/usr/share/cerebro/bin/cerebro
/usr/share/cerebro/conf/application.conf
/usr/share/cerebro/conf/evolutions
/usr/share/cerebro/conf/evolutions/default
/usr/share/cerebro/conf/evolutions/default/1.sql
/usr/share/cerebro/conf/logback.xml
/usr/share/cerebro/conf/reference.conf
/usr/share/cerebro/conf/routes
....
/usr/share/cerebro/logs
/var/lib/cerebro
/var/log/cerebro
/var/run/cerebro

可以看到配置文件
/usr/share/cerebro/conf/application.conf
日志文件:
/var/log/cerebro
配置:
可以指定配置参数启动:
bin/cerebro -Dhttp.port=1234 -Dhttp.address=127.0.0.1
可以指定配置文件启动:


启动:
bin/cerebro -Dconfig.file=/some/other/dir/alternate.conf


配置:
# vim /usr/share/cerebro/conf/application.conf

# A list of known hosts
hosts = [
  {
   host = "http://192.168.8.102:9200"
   name = "ES Cluster"
  #  headers-whitelist = [ "x-proxy-user", "x-proxy-roles", "X-Forwarded-For" ]
  #}
  # Example of host with authentication
  #{
  #  host = "http://some-authenticated-host:9200"
  #  name = "Secured Cluster"
  #  auth = {
  #    username = "username"
  #    password = "secret-password"
  #  }
  }
]

cerebro的启动 状态查看和关闭:
# systemctl stop cerebro
# systemctl start cerebro
# systemctl status cerebro
● cerebro.service - Elasticsearch web admin tool
   Loaded: loaded (/usr/lib/systemd/system/cerebro.service; enabled; vendor preset: disabled)
   Active: active (running) since Thu 2019-12-12 14:36:39 CST; 6s ago
  Process: 11484 ExecStartPre=/bin/chmod 755 /run/cerebro (code=exited, status=0/SUCCESS)

为了便于问题排除可以直接使用命令启动cerebro:
# /usr/bin/cerebro
默认启动的:
[info] play.api.Play - Application started (Prod) (no global state)
[info] p.c.s.AkkaHttpServer - Listening for HTTP on /0:0:0:0:0:0:0:0:9000
允许网络范围内的任意主机登陆访问:


登陆:
192.168.8.102:9000
若在配置文件中配置好了则可以直接可以查看到cluster的名称:点击cluster的名称直接登陆即可。

若没有配置则需要指定clusters的名称和node address
登陆进入则是默认的overview界面:

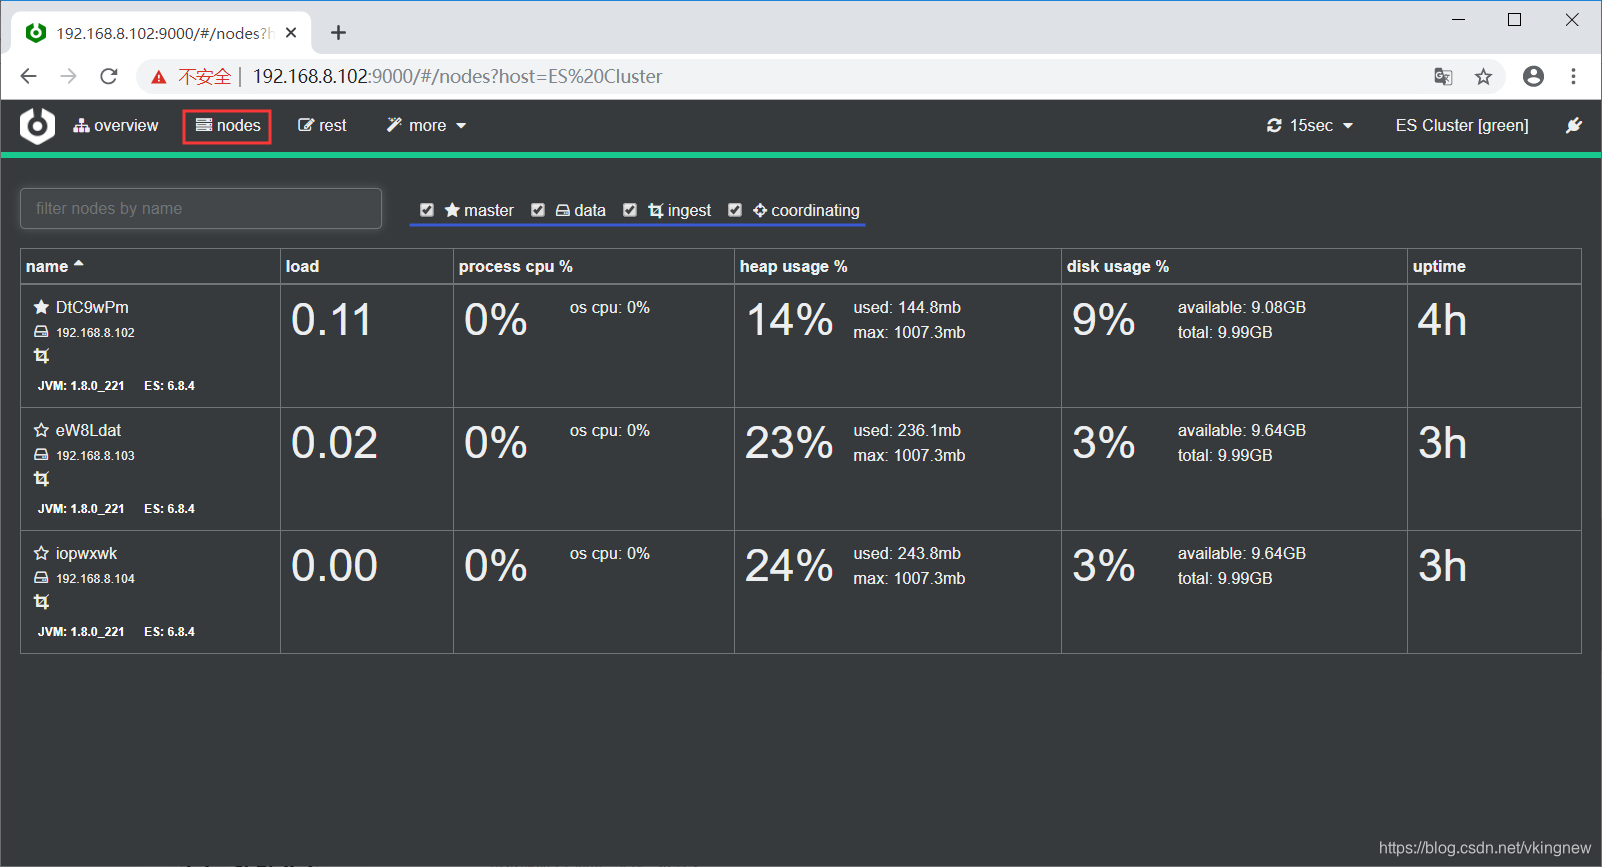
单机nodes可以看到节点的类型和监控信息:
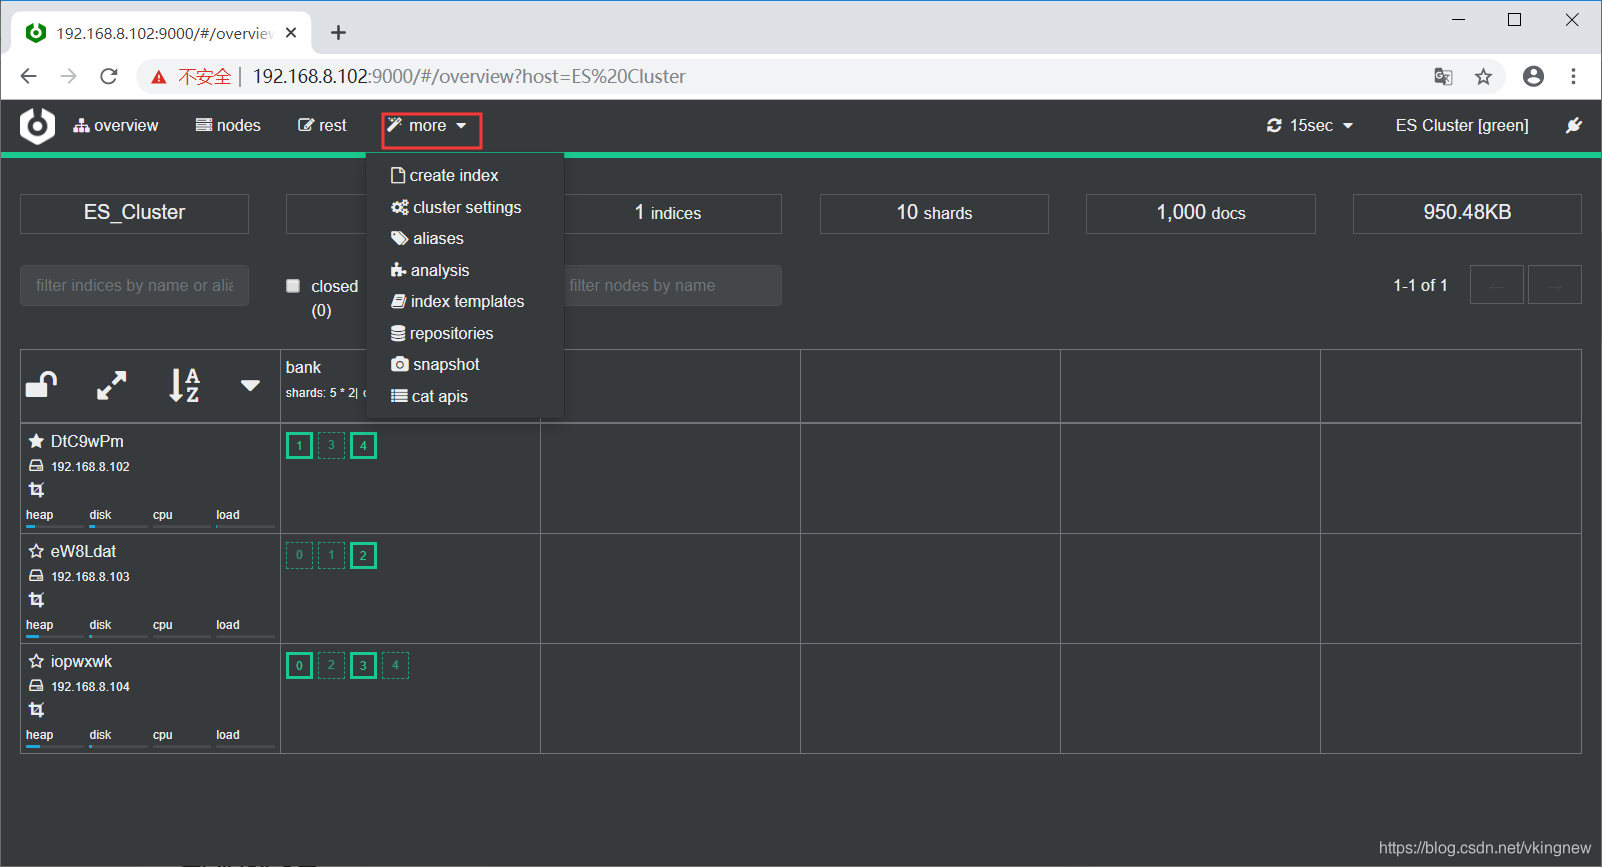
mores标签可以看到集群的相关信息:
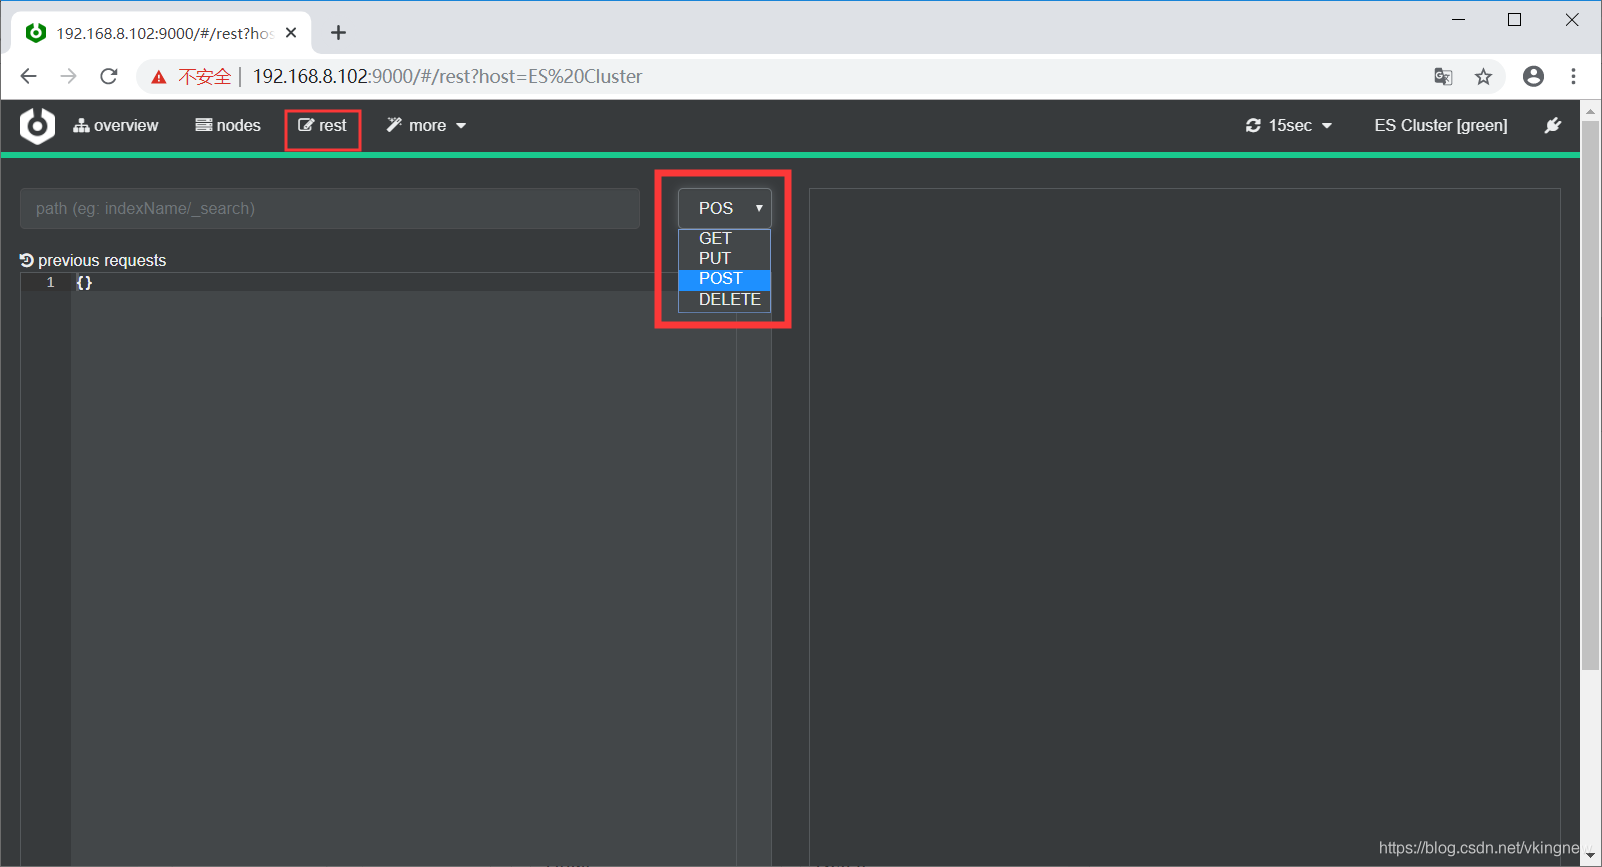
REST标签则提供了对Elasticsearch进行操作的基本命令:GET PUT POST DELETE
PUT操作:
# curl -X PUT "localhost:9200/customer/_doc/1?pretty" -H 'Content-Type: application/json' -d'
> {
>   "name": "John Doe"
> }
> '
{
  "_index" : "customer",
  "_type" : "_doc",
  "_id" : "1",
  "_version" : 1,
  "result" : "created",
  "_shards" : {
    "total" : 2,
    "successful" : 1,
    "failed" : 0
  },
  "_seq_no" : 0,
  "_primary_term" : 1
}

GET操作:
# curl -X GET "localhost:9200/customer/_doc/1?pretty"
{
  "_index" : "customer",
  "_type" : "_doc",
  "_id" : "1",
  "_version" : 1,
  "_seq_no" : 0,
  "_primary_term" : 1,
  "found" : true,
  "_source" : {
    "name" : "John Doe"
  }
}

批量操作:
# curl "localhost:9200/_cat/indices?v"
health status index    uuid                   pri rep docs.count docs.deleted store.size pri.store.size
green  open   customer OBC93MybQeuiHtNm_m_9-g   5   1          1            0      8.5kb          4.2kb
green  open   bank     x8KA6MJRSYqPiNbeRfuCqA   5   1       1000            0    950.4kb        475.2kb

--查询操作:
#curl -X GET "localhost:9200/bank/_search?pretty" -H 'Content-Type: application/json' -d'
{
  "query": { "match_all": {} },
  "sort": [
    { "account_number": "asc" }
  ]
}
'
--查询一条记录:
# curl -X GET "localhost:9200/bank/_search?pretty" -H 'Content-Type: application/json' -d'
> {
>   "query": { "match_all": {} },
>   "sort": [
>     { "account_number": "asc" }
>   ],
>   "from": 10,
>   "size": 1
> }
> '
{
  "took" : 3,
  "timed_out" : false,
  "_shards" : {
    "total" : 5,
    "successful" : 5,
    "skipped" : 0,
    "failed" : 0
  },
  "hits" : {
    "total" : 1000,
    "max_score" : null,
    "hits" : [
      {
        "_index" : "bank",
        "_type" : "_doc",
        "_id" : "10",
        "_score" : null,
        "_source" : {
          "account_number" : 10,
          "balance" : 46170,
          "firstname" : "Dominique",
          "lastname" : "Park",
          "age" : 37,
          "gender" : "F",
          "address" : "100 Gatling Place",
          "employer" : "Conjurica",
          "email" : "dominiquepark@conjurica.com",
          "city" : "Omar",
          "state" : "NJ"
        },
        "sort" : [
          10
        ]
      }
    ]
  }
}


#curl -X GET "localhost:9200/bank/_search?pretty" -H 'Content-Type: application/json' -d'
{
  "query": { "match": { "address": "mill lane" } }
}
'

#curl -X GET "localhost:9200/bank/_search?pretty" -H 'Content-Type: application/json' -d'
{
  "query": { "match_phrase": { "address": "mill lane" } }
}
'

复杂查询:
curl -X GET "localhost:9200/bank/_search?pretty" -H 'Content-Type: application/json' -d'
{
  "query": {
    "bool": {
      "must": [
        { "match": { "age": "40" } }
      ],
      "must_not": [
        { "match": { "state": "ID" } }
      ]
    }
  }
}
'

查询:balance在2000和3000之间的
curl -X GET "localhost:9200/bank/_search?pretty" -H 'Content-Type: application/json' -d'
{
  "query": {
    "bool": {
      "must": { "match_all": {} },
      "filter": {
        "range": {
          "balance": {
            "gte": 20000,
            "lte": 30000
          }
        }
      }
    }
  }
}
'

--聚合操作:
curl -X GET "localhost:9200/bank/_search?pretty" -H 'Content-Type: application/json' -d'
{
  "size": 0,
  "aggs": {
    "group_by_state": {
      "terms": {
        "field": "state.keyword"
      }
    }
  }
}
'

curl -X GET "localhost:9200/bank/_search?pretty" -H 'Content-Type: application/json' -d'
{
  "size": 0,
  "aggs": {
    "group_by_state": {
      "terms": {
        "field": "state.keyword"
      },
      "aggs": {
        "average_balance": {
          "avg": {
            "field": "balance"
          }
        }
      }
    }
  }
}
'


 1418
1418


 被折叠的 条评论
为什么被折叠?
被折叠的 条评论
为什么被折叠?
 到【灌水乐园】发言


