


最近在研究iOS的推送问题,遇到了一些问题,最终整理了一下,放在这里和大家分享。
APNS的推送机制
首先我们看一下苹果官方给出的对iOS推送机制的解释。如下图

Provider就是我们自己程序的后台服务器,APNS是Apple Push Notification Service的缩写,也就是苹果的推送服务器。
上图可以分为三个阶段:
第一阶段:应用程序的服务器端把要发送的消息、目的iPhone的标识打包,发给APNS。
第二阶段:APNS在自身的已注册Push服务的iPhone列表中,查找有相应标识的iPhone,并把消息发送到iPhone。
第三阶段:iPhone把发来的消息传递给相应的应用程序,并且按照设定弹出Push通知。
APNS推送通知的详细工作流程
下面这张图是说明APNS推送通知的详细工作流程:

根据图片我们可以概括一下:
1、应用程序注册APNS消息推送。
2、iOS从APNS Server获取devicetoken,应用程序接收device token。
3、应用程序将device token发送给程序的PUSH服务端程序。
4、服务端程序向APNS服务发送消息。
5、APNS服务将消息发送给iPhone应用程序。
准备工作
首先要有一台苹果的设备,模拟器是不支持推送的,所以你需要一台iphone,ipod touch或者ipad。
我们的客户端与苹果服务器之间和我们自己的服务器与苹果服务器之间都需要证书来进行链接。下面我们来开始进入证书的制作过程。
一 CSR文件
首先我们要有生成一个Certificate Signing Request(也就是CSR)的请求文件。
在应用程序里的使用工具中找到钥匙串访问。

选择从证书颁发机构请求证书

填上你的邮箱和常用名,常用名要记一下,一会会用到。然后选择保存到磁盘,继续


二、下载开发证书和发布证书
(这里我为了大家能看清楚,已经把之前的证书事先吊销了)
到https://developer.apple.com/devcenter/ios/index.action 登录后,在右侧的ios Developer Program里点击iOS Provisioning Portal。
进入下一级页面后在左侧选择Certificates


点击选择文件,选择刚才我们生成到桌面的CSR请求文件。注意,如果你在后面测试的时候出现了问题,请检查一下这里,这里的CSR请求文件必须是我们刚才生成的那个。


提交完成后返回页面。页面会是这样的,然后我们刷新一下页面

刷新后会出现一个下载按钮,我们点击下载。现在我们的开发证书已经配置并下载好了,发布证书的配置过程和开发证书是一致的,不再赘述。下载完后双击,会跳到钥匙串访问里。这就是我们之后要进行测的证书
三 配置AppID,配置并下载SSL证书
点击左侧的App IDs,找到我们要做推送功能的程序的id(如果没有的话要先New一个。注意,这里的App ID必须不能是通配的,通配的不可以做推送)。点击Configure


这里的文件同样的,还是选择我们生成在桌面上的CSR请求文件


然后点击继续


Status状态变成了绿色可用了。这里右边的下载和上一步的下载是一样的,如果在上一步中下载了证书,便无需再次下载。此时我们有了一个名字叫aps_development.cer的SSL证书,同样,我们把他放在桌面。双击后会跳到钥匙串访问,出现我们的SSL推送证书。同样,发布的SSL证书的步骤也是一样的。
四、下载Provisioning证书
在左侧选择Provisioning


之后变回出现下载按钮,我们点击下载。下载后双击,并将我们的设备上的描述文件更新一下(最好把之前的全部删除,然后再安装,防止出错)。
五 从钥匙串访问中导出秘钥
打开钥匙串访问,找到我们的专用秘钥(专用秘钥的名称就是我们在最开始生成CSR请求的时候填写的常用名)

右键选择导出


在这里需要输入一个密码来对文件进行加密。这里我们选择abcabc,当然你也可以自己选择是什么,但是这个密码必须要铭记,切记!

然后输入你电脑的密码,点击允许。这样我们就在桌面上生成了一个Push.p12文件。到此为止,我们在桌面上一共生成了三个文件。一个是CSR请求文件,一个是aps_development .cer的SSL证书文件,还有一个刚才生成的Push.p12秘钥文件。
现在我们的准备工作已经做完了。要开始对生成的文件进行处理了。原因上面已经解释过,因为我们的服务链接苹果服务器也是需要证书的,但是我们直接生成的证书windows系统(我们一般的服务器都是win系统的)是不识别的,所以我们需要生成一个后缀为pem的带证书带秘钥的文件。
六 处理证书
下面我们打开终端(位置:应用程序à实用工具à终端)。
cd到桌面,我们那三个文件所在的位置
1、把.cer的SSL证书转换为.pem文件,执行命令:
openssl x509 -in aps_development.cer -inform der -out PushChatCert.pem
在桌面上会生成一个PushChatCert.pem文件
2、把私钥Push.p12文件转化为.pem文件:
openssl pkcs12 -nocerts -out PushChatKey.pem -in Push.p12
这里需要我们输入密码,这个密码也就是我们导出p12文件时的密码,也就是我们上面设置的abcabc。然后,需要我们对生成的pem文件设置一个密语,这里我们推荐还是用上面这个abcabc,防止混乱(当然你也可以设置成别的更有意义的密语),这里的密语是要告诉我们服务器的。这样,桌面上又会生成一个PushChatKey.pem文件

3、对生成的这两个pem文件再生成一个pem文件,来把证书和私钥整合到一个文件里:
cat PushChatCert.pem PushChatKey.pem > ck.pem
生成ck.pem文件
这样,我们的文件就制作完了。下面进入测试阶段
为了测试证书是否工作,执行下面的命令:
telnet gateway.sandbox.push.apple.com 2195
它将尝试发送一个规则的,不加密的连接到APNS服务。如果你看到上面的反馈,那说明你的MAC能够到达APNS。按下Ctrl+C关闭连接。如果得到一个错误信息,那么你需要确保你的防火墙允许2195端口。一般这里都不会出现什么问题。

下面我们要使用我们生成的SSL证书和私钥来设置一个安全的链接去链接苹果服务器:
openssl s_client -connect gateway.sandbox.push.apple.com:2195 -cert PushChatCert.pem -key PushChatKey.pem
执行完这一句命令后需要我们输入密语
Enter pass phrase for PushChatKey.pem:
我们输入abcabc按回车
你会看到一个完整的输出,让你明白OpenSSL在后台做什么。如果链接是成功的,你可以随便输入一个字符,按下回车,服务器就会断开链接,如果建立连接时有问题,OpenSSL会给你返回一个错误信息。
当你在最后的时候你看到这样说明你已经成功了:
CONNECTED(00000003)
depth=1 /C=US/O=Entrust, Inc./OU=www.entrust.net/rpa isincorporated by reference/OU=(c) 2009 Entrust, Inc./CN=Entrust CertificationAuthority - L1C
verify error:num=20:unable to get local issuercertificate
verify return:0
---
Certificate chain
0s:/C=US/ST=California/L=Cupertino/O=Apple Inc./OU=iTMSEngineering/CN=gateway.sandbox.push.apple.com
i:/C=US/O=Entrust, Inc./OU=www.entrust.net/rpa is incorporated byreference/OU=(c) 2009 Entrust, Inc./CN=Entrust Certification Authority - L1C
1s:/C=US/O=Entrust, Inc./OU=www.entrust.net/rpa is incorporated byreference/OU=(c) 2009 Entrust, Inc./CN=Entrust Certification Authority - L1C
i:/O=Entrust.net/OU=www.entrust.net/CPS_2048incorp. by ref. (limits liab.)/OU=(c) 1999 Entrust.net Limited/CN=Entrust.netCertification Authority (2048)
---
Server certificate
-----BEGIN CERTIFICATE-----
MIIFGzCCBAOgAwIBAgIETBz90jANBgkqhkiG9w0BAQUFADCBsTELMAkGA1UEBhMC
……省略……
fMGbLqkGn8YogdPqe5T1
-----END CERTIFICATE-----
subject=/C=US/ST=California/L=Cupertino/O=AppleInc./OU=iTMS Engineering/CN=gateway.sandbox.push.apple.com
issuer=/C=US/O=Entrust, Inc./OU=www.entrust.net/rpa isincorporated by reference/OU=(c) 2009 Entrust, Inc./CN=Entrust CertificationAuthority - L1C
---
No client certificate CA names sent
---
SSL handshake has read 2731 bytes and written 2165 bytes
---
New, TLSv1/SSLv3, Cipher is AES256-SHA
Server public key is 2048 bit
Secure Renegotiation IS supported
Compression: NONE
Expansion: NONE
SSL-Session:
Protocol : TLSv1
Cipher : AES256-SHA
Session-ID:
Session-ID-ctx:
Master-Key:C7A47EED5E1F5……省略……369D4
Key-Arg : None
Start Time:1361862882
Timeout : 300 (sec)
Verify return code: 0 (ok)
---
在这里提醒一下,也许你会看到像我这样的提示:verify error:num=20:unable to get local issuercertificate
verify return:0
其实是没问题的。

七 项目测试
建立我们的推送的项目(注意BundleIdentifier必须和我们推送应用的App id一致)
在AppDelegate里didFinishLaunchingWithOptions函数里写
- (BOOL)application:(UIApplication *)applicationdidFinishLaunchingWithOptions:(NSDictionary *)launchOptions
{
……
//推送的形式:标记,声音,提示
[[UIApplication sharedApplication] registerForRemoteNotificationTypes: UIRemoteNotificationTypeBadge |UIRemoteNotificationTypeSound | UIRemoteNotificationTypeAlert];
return YES;
}
- (void)application:(UIApplication *)applicationdidRegisterForRemoteNotificationsWithDeviceToken:(NSData *)pToken {
NSLog(@"regisger success:%@",pToken);
//注册成功,将deviceToken保存到应用服务器数据库中
}
- (void)application:(UIApplication *)application didReceiveRemoteNotification:(NSDictionary *)userInfo{
// 处理推送消息
NSLog(@"userinfo:%@",userInfo);
NSLog(@"收到推送消息:%@",[[userInfo objectForKey:@"aps"] objectForKey:@"alert"]);
}
- (void)application:(UIApplication *)applicationdidFailToRegisterForRemoteNotificationsWithError:(NSError *)error {
NSLog(@"Registfail%@",error);
}
我们运行程序的时候会有提示,说我们的程序要发送推送通知。
下面我们把php服务器代码和生成的ck.pem文件放在统一文件夹下面(这里我们还是统一放在桌面上)。
用Xcode打开(其他工具也可以)php服务器端的代码,把deviceToken改成我们现在要进行测试的iphone的deviceToken(获得方法,:在Xcode的顶部工具栏点击windowàOrganizer,在左侧选中我们的iphone后,右边的Identifier后面的就是了),密语改成我们之前设置的abcabc。然后保存。
然后在终端运行命令(如果刚才你关闭了终端的话,最好ls一下,看看当前是不是在桌面),执行命令:
php pushMe.php
然后回车(pushMe为服务器文件名称)

第七部分
1.建立推送项目
- //
- // AppDelegate.m
- // TestPushNotifiy
- //
- // Created by silicon on 14-10-30.
- // Copyright (c) 2014年 silicon. All rights reserved.
- //
- #import "AppDelegate.h"
- @implementation AppDelegate
- @synthesize mainView = _mainView;
- - (BOOL)application:(UIApplication *)application didFinishLaunchingWithOptions:(NSDictionary *)launchOptions
- {
- if ([application respondsToSelector:@selector(isRegisteredForRemoteNotifications)])
- {
- //IOS8
- //创建UIUserNotificationSettings,并设置消息的显示类类型
- UIUserNotificationSettings *notiSettings = [UIUserNotificationSettings settingsForTypes:(UIUserNotificationTypeBadge | UIUserNotificationTypeAlert | UIRemoteNotificationTypeSound) categories:nil];
- [application registerUserNotificationSettings:notiSettings];
- } else{ // ios7
- [application registerForRemoteNotificationTypes:(UIRemoteNotificationTypeBadge |UIRemoteNotificationTypeSound |UIRemoteNotificationTypeAlert)];
- }
- self.window = [[UIWindow alloc] initWithFrame:[[UIScreen mainScreen] bounds]];
- // Override point for customization after application launch.
- self.window.backgroundColor = [UIColor whiteColor];
- [self.window makeKeyAndVisible];
- self.mainView = [[MainViewController alloc] initWithNibName:@"MainViewController" bundle:nil];
- self.window.rootViewController = self.mainView;
- return YES;
- }
- - (void)application:(UIApplication *)application didRegisterForRemoteNotificationsWithDeviceToken:(NSData *)pToken{
- NSLog(@"---Token--%@", pToken);
- }
- - (void)application:(UIApplication *)application didReceiveRemoteNotification:(NSDictionary *)userInfo{
- NSLog(@"userInfo == %@",userInfo);
- NSString *message = [[userInfo objectForKey:@"aps"]objectForKey:@"alert"];
- UIAlertView *alert = [[UIAlertView alloc] initWithTitle:@"提示" message:message delegate:self cancelButtonTitle:@"取消" otherButtonTitles:@"确定", nil nil];
- [alert show];
- }
- - (void)application:(UIApplication *)application didFailToRegisterForRemoteNotificationsWithError:(NSError *)error{
- NSLog(@"Regist fail%@",error);
- }
- - (void)applicationWillResignActive:(UIApplication *)application
- {
- // Sent when the application is about to move from active to inactive state. This can occur for certain types of temporary interruptions (such as an incoming phone call or SMS message) or when the user quits the application and it begins the transition to the background state.
- // Use this method to pause ongoing tasks, disable timers, and throttle down OpenGL ES frame rates. Games should use this method to pause the game.
- }
- - (void)applicationDidEnterBackground:(UIApplication *)application
- {
- // Use this method to release shared resources, save user data, invalidate timers, and store enough application state information to restore your application to its current state in case it is terminated later.
- // If your application supports background execution, this method is called instead of applicationWillTerminate: when the user quits.
- }
- - (void)applicationWillEnterForeground:(UIApplication *)application
- {
- // Called as part of the transition from the background to the inactive state; here you can undo many of the changes made on entering the background.
- }
- - (void)applicationDidBecomeActive:(UIApplication *)application
- {
- // Restart any tasks that were paused (or not yet started) while the application was inactive. If the application was previously in the background, optionally refresh the user interface.
- }
- - (void)applicationWillTerminate:(UIApplication *)application
- {
- // Called when the application is about to terminate. Save data if appropriate. See also applicationDidEnterBackground:.
- }
- @end
在appdelegate.m中加入以上代码,
- if ([application respondsToSelector:@selector(isRegisteredForRemoteNotifications)])
- {
- //IOS8
- //创建UIUserNotificationSettings,并设置消息的显示类类型
- UIUserNotificationSettings *notiSettings = [UIUserNotificationSettings settingsForTypes:(UIUserNotificationTypeBadge | UIUserNotificationTypeAlert | UIRemoteNotificationTypeSound) categories:nil];
- [application registerUserNotificationSettings:notiSettings];
- } else{ // ios7
- [application registerForRemoteNotificationTypes:(UIRemoteNotificationTypeBadge |UIRemoteNotificationTypeSound |UIRemoteNotificationTypeAlert)];
- }
函数:
- - (void)application:(UIApplication *)application didRegisterForRemoteNotificationsWithDeviceToken:(NSData *)pToken{
- NSLog(@"---Token--%@", pToken);
- }
- - (void)application:(UIApplication *)application didReceiveRemoteNotification:(NSDictionary *)userInfo{
- NSLog(@"userInfo == %@",userInfo);
- NSString *message = [[userInfo objectForKey:@"aps"]objectForKey:@"alert"];
- UIAlertView *alert = [[UIAlertView alloc] initWithTitle:@"提示" message:message delegate:self cancelButtonTitle:@"取消" otherButtonTitles:@"确定", nil nil];
- [alert show];
- }
这个函数则是当设备接收到来自苹果推送服务器的消息时触发的,用来显示推送消息。
- - (void)application:(UIApplication *)application didFailToRegisterForRemoteNotificationsWithError:(NSError *)error{
- NSLog(@"Regist fail%@",error);
- }
2.PHP服务端
将simplepush.php这个推送脚本也放在push文件夹中
- <?php
- // ??????????deviceToken???????????????
- $deviceToken = 'c95f661371b085e2517b4c12cc76293522775e5fd9bb1dea17dd80fe85583b41';
- // Put your private key's passphrase here:
- $passphrase = 'abc123';
- // Put your alert message here:
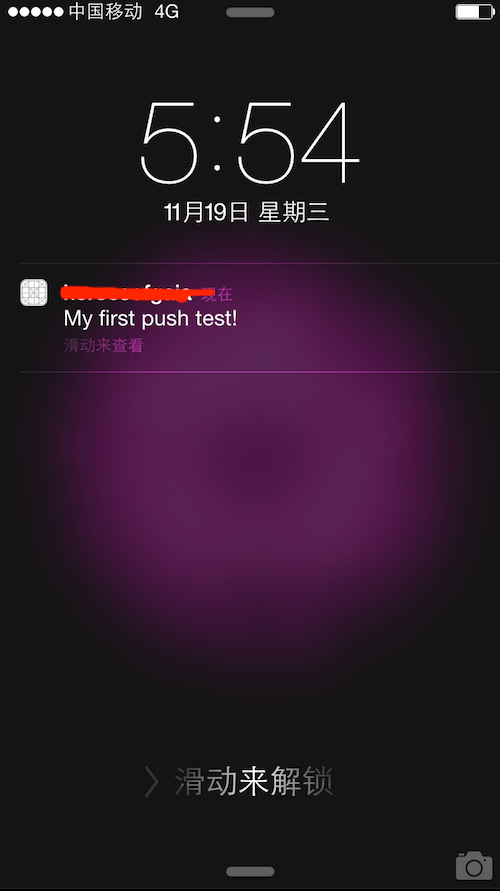
- $message = 'My first push test!';
- $ctx = stream_context_create();
- stream_context_set_option($ctx, 'ssl', 'local_cert', 'ck.pem');
- stream_context_set_option($ctx, 'ssl', 'passphrase', $passphrase);
- // Open a connection to the APNS server
- //??????????
- //$fp = stream_socket_client(?ssl://gateway.push.apple.com:2195?, $err, $errstr, 60, //STREAM_CLIENT_CONNECT, $ctx);
- //?????????????appstore??????
- $fp = stream_socket_client(
- 'ssl://gateway.sandbox.push.apple.com:2195', $err,
- $errstr, 60, STREAM_CLIENT_CONNECT|STREAM_CLIENT_PERSISTENT, $ctx);
- if (!$fp)
- exit("Failed to connect: $err $errstr" . PHP_EOL);
- echo 'Connected to APNS' . PHP_EOL;
- // Create the payload body
- $body['aps'] = array(
- 'alert' => $message,
- 'sound' => 'default'
- );
- // Encode the payload as JSON
- $payload = json_encode($body);
- // Build the binary notification
- $msg = chr(0) . pack('n', 32) . pack('H*', $deviceToken) . pack('n', strlen($payload)) . $payload;
- // Send it to the server
- $result = fwrite($fp, $msg, strlen($msg));
- if (!$result)
- echo 'Message not delivered' . PHP_EOL;
- else
- echo 'Message successfully delivered' . PHP_EOL;
- // Close the connection to the server
- fclose($fp);
- ?>
此刻就是见证奇迹的时候了
使用终端进入到push文件夹,在终端输入 php simplepush.php

若显示以上提示则表示推送成功了。
附上一张成功图。


 2497
2497

 被折叠的 条评论
为什么被折叠?
被折叠的 条评论
为什么被折叠?
 到【灌水乐园】发言


