


ZooKeeper的安装非常简单,它的工作模式分为单机模式、集群模式和伪集群模式,本博客旨在总结ZooKeeper单机模式下如何安装、配置、启动和使用:
一、安装配置ZooKeeper(在Windows操作系统下)
a、下载ZooKeeper压缩安装文件,这里下载稳定版——zookeeper-3.4.5.tar.gz
b、解压压缩文件,这里将其解压到C盘根目录下,打开解压后的文件夹,得到下图:
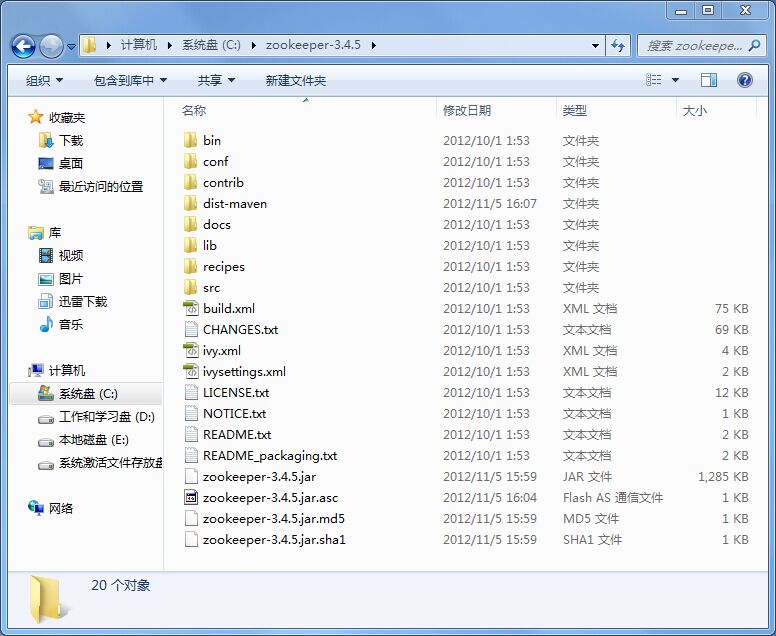
c、点击上图名为“conf”的文件夹,可以看到下图:
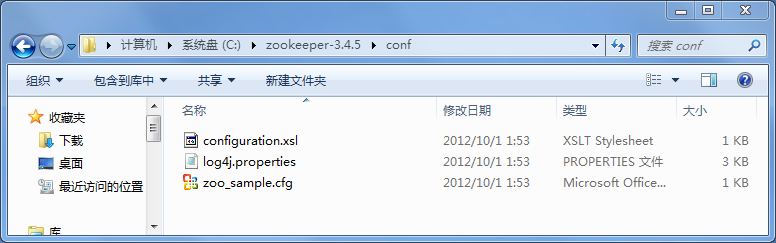
d、用记事本打开上图名为“zoo_sample.cfg”的文件,可以看到如下内容:
# The number of milliseconds of each tick
tickTime=2000
# The number of ticks that the initial
# synchronization phase can take
initLimit=10
# The number of ticks that can pass between
# sending a request and getting an acknowledgement
syncLimit=5
# the directory where the snapshot is stored.
# do not use /tmp for storage, /tmp here is just
# example sakes.
dataDir=/tmp/zookeeper
# the port at which the clients will connect
clientPort=2181
#
# Be sure to read the maintenance section of the
# administrator guide before turning on autopurge.
#
# http://zookeeper.apache.org/doc/current/zookeeperAdmin.html#sc_maintenance
#
# The number of snapshots to retain in dataDir
#autopurge.snapRetainCount=3
# Purge task interval in hours
# Set to "0" to disable auto purge feature
#autopurge.purgeInterval=1
这里对上面几个参数做一下必要的说明:
tickTime:用于定义ZooKeeper服务器之间或客户端与服务器之间维持心跳的时间间隔,即每隔tickTime毫秒就会发送一个心跳。上面设置的是2000毫秒。
initLimit:用来设置ZooKeeper服务器集群中连接到Leader的Follower服务器最长能能接受("设定值"*tickTime)毫秒时间的心跳。超过该时间后ZooKeeper服务器集群中的Follower服务器还没有返回信息,那么表明该Follower服务器连接失败。上面设置的是(10*2000)毫秒。该属性是针对ZooKeeper为集群模式或伪集群模式时使用的参数
syncLimit:用于设置ZooKeeper服务器集群中Leader服务器与Follower服务器之间发送消息时请求和应答的最大时长,其时间长度为("设定值"*tickTime)毫秒。上面设置的是(5*2000)毫秒。该属性是针对ZooKeeper为集群模式或伪集群模式时使用的参数
dataDir:ZooKeeper保存数据的目录,默认情况下,ZooKeeper将写数据的日志文件也保存在这个目录里。注意:该目录不能是/tmp
clientPort:客户端连接ZooKeeper服务器的端口,Zookeeper监听该端口并通过该端口接受客户端的访问请求
e、在conf文件夹中新建名为“zoo.cfg”的文件(ZooKeeper在启动时会找名为“zoo.cfg”的文件并将其作为默认配置文件),并用记事本打开,将原来名为“zoo_sample.cfg”的文件中的内容拷贝到新建的“zoo.cfg”文件中并进行必要的修改,如:
# The number of milliseconds of each tick
tickTime=2000
# The number of ticks that the initial
# synchronization phase can take
# initLimit=10
# The number of ticks that can pass between
# sending a request and getting an acknowledgement
# syncLimit=5
# the directory where the snapshot is stored.
# do not use /tmp for storage, /tmp here is just
# example sakes.
dataDir=C:/zookeeper-3.4.5/data
# the port at which the clients will connect
clientPort=2181
#
# Be sure to read the maintenance section of the
# administrator guide before turning on autopurge.
#
# http://zookeeper.apache.org/doc/current/zookeeperAdmin.html#sc_maintenance
#
# The number of snapshots to retain in dataDir
#autopurge.snapRetainCount=3
# Purge task interval in hours
# Set to "0" to disable auto purge feature
#autopurge.purgeInterval=1
至此ZooKeeper在Windows操作系统中安装配置完毕,但需要指出的是ZooKeeper是使用Java编写的,因此运行ZooKeeper之前必须安装Java环境——配置JDK,且JDK的版本要大于或等于1.6。
二、启动ZooKeeper
打开上面第一张图片中显示的名为“bin”的文件夹,得到下图:

a、启动ZooKeeper服务器端:在Windows操作系统中双击上图名为“zkServer.cmd”的文件,在Linux操作系统中使用命令运行名为“zkServer.sh”的文件;
b、启动ZooKeeper客户端:在Windows操作系统中双击上图名为“zkCli.cmd”的文件,在Linux操作系统中使用命令运行名为“zkCli.sh”的文件;
注意:上面两步不能颠倒,否则ZooKeeper客户端不能成功启动;
三、使用ZooKeeper
在Windows操作系统中双击“zkServer.cmd”文件和“zkCli.cmd”文件后会出现两个cmd窗口,千万不要关闭哟,否则下面程序就不能运行了:
package com.ghj.packageoftest;

import org.apache.zookeeper.CreateMode;
import org.apache.zookeeper.WatchedEvent;
import org.apache.zookeeper.Watcher;
import org.apache.zookeeper.ZooDefs.Ids;
import org.apache.zookeeper.ZooKeeper;

public class ZooKeeperClient {

    public static void main(String[] args) throws Exception{
        Watcher watcher = new Watcher(){
        	// 监控所有被触发的事件
            public void process(WatchedEvent event) {
                System.out.println("触发了" + event.getType() + "事件!");
            }
        };

        ZooKeeper zooKeeper = new ZooKeeper("127.0.0.1:2181", 5000, watcher);//第一个参数:ZooKeeper服务器客户端的连接地址,如果ZooKeeper是集群模式或伪集群模式(即ZooKeeper服务器有多个),那么每个连接地址之间使用英文逗号间隔,单个连接地址的语法格式为“主机IP:ZooKeeper服务器端口号”;
                                                                             //第二个参数:session超时时长(单位:毫秒)
                                                                             //第三个参数:用于监控目录节点数据变化和子目录状态变化的Watcher对象
        zooKeeper.create("/RootNode", "RootNodeData".getBytes(), Ids.OPEN_ACL_UNSAFE, CreateMode.PERSISTENT);//创建一个节点名为“/RootNode”的目录节点
        System.out.println("“/RootNode”节点状态:" + zooKeeper.exists("/RootNode",true));//判断指定目录节点是否存在
        System.out.println("“RootNode”节点上数据:"+new String(zooKeeper.getData("/RootNode", false, null)));//获取“RootNode”节点上的数据
        zooKeeper.create("/RootNode/ChildNode1", "ChildNode1Data".getBytes(), Ids.OPEN_ACL_UNSAFE,CreateMode.PERSISTENT);//在“RootNode”节点下创建一个名为“ChildNode1”的子目录节点
        zooKeeper.create("/RootNode/ChildNode2", "ChildNode2Data".getBytes(), Ids.OPEN_ACL_UNSAFE,CreateMode.PERSISTENT);//在“RootNode”节点下创建一个和“ChildNode1”同级的名为“ChildNode2”的子目录节点
        System.out.println("目录节点“RootNode”下的所有子目录节点有:"+zooKeeper.getChildren("/RootNode",true)); //取出目录节点“RootNode”下的所有子目录节点
        zooKeeper.setData("/RootNode/ChildNode2","NewChildNode2Data".getBytes(),-1);//修改名为“ChildNode2”的目录节点数据

        zooKeeper.delete("/RootNode/ChildNode1", -1);//删除“/RootNode/ChildNode1”目录节点
        System.out.println("“/RootNode/ChildNode1”节点状态:" + zooKeeper.exists("/RootNode/ChildNode1", false));//判断“/RootNode/ChildNode1”目录节点是否存在
        zooKeeper.delete("/RootNode/ChildNode2", -1);//删除“/RootNode/ChildNode2”目录节点
        zooKeeper.delete("/RootNode", -1);//删除“/RootNode”目录节点
        zooKeeper.close(); //关闭与ZooKeeper的连接
    }
}【0分下载示例代码】


 712
712


 被折叠的 条评论
为什么被折叠?
被折叠的 条评论
为什么被折叠?
 到【灌水乐园】发言


