


最近在使用自己手机,发现一种动画效果非常不错,就是天气随着时间季节,状态栏和ToorBar颜色都会发生改变,搜索资料得出的三种方案….
方案一
将手机状态栏透明化: 状态栏透明了,状态栏的颜色就会自动跟随下面的布局
两种方式:

1.代码方式
 /**
     * 设置透明状态栏
     * <p>
     * 可在Activity的onCreat()中调用
     * <p>
     * 注意:需在顶部控件布局中加入以下属性让内容出现在状态栏之下:
     * android:clipToPadding="true"   // true 会贴近上层布局 ; false 与上层布局有一定间隙
     * android:fitsSystemWindows="true"   //true 会保留actionBar,title,虚拟键的空间 ; false 不保留
     *
     * @param activity activity
     */
    public static void setTransparentStatusBar(Activity activity) {
        //5.0及以上
        if (Build.VERSION.SDK_INT >= Build.VERSION_CODES.LOLLIPOP) {
            View decorView = activity.getWindow().getDecorView();
            int option = View.SYSTEM_UI_FLAG_LAYOUT_FULLSCREEN
                    | View.SYSTEM_UI_FLAG_LAYOUT_STABLE;
            decorView.setSystemUiVisibility(option);
            activity.getWindow().setStatusBarColor(Color.TRANSPARENT);
            //4.4到5.0
        } else if (Build.VERSION.SDK_INT >= Build.VERSION_CODES.KITKAT) {
            WindowManager.LayoutParams localLayoutParams = activity.getWindow().getAttributes();
            localLayoutParams.flags = (WindowManager.LayoutParams.FLAG_TRANSLUCENT_STATUS | localLayoutParams.flags);
        }
    }

    ---------------------分割线--------------------------

2.在values,values-v19,values-v21目录下分别 创建主题

//values
<style name="TranslucentTheme" parent="AppTheme">
</style>

//values-v19
<style name="TranslucentTheme" parent="Theme.AppCompat.Light.NoActionBar">
        <item name="android:windowTranslucentStatus">true</item>
        <item name="android:windowTranslucentNavigation">false</item>
</style>

//values-v21
<style name="TranslucentTheme" parent="Theme.AppCompat.Light.NoActionBar">
        <item name="android:windowTranslucentStatus">true</item>
        <item name="android:windowTranslucentNavigation">false</item>
        <item name="android:statusBarColor">@android:color/transparent</item>
</style>
- 1
- 2
- 3
- 4
- 5
- 6
- 7
- 8
- 9
- 10
- 11
- 12
- 13
- 14
- 15
- 16
- 17
- 18
- 19
- 20
- 21
- 22
- 23
- 24
- 25
- 26
- 27
- 28
- 29
- 30
- 31
- 32
- 33
- 34
- 35
- 36
- 37
- 38
- 39
- 40
- 41
- 42
- 43
- 44
- 45
- 46
- 47
- 48
- 49
- 50
- 1
- 2
- 3
- 4
- 5
- 6
- 7
- 8
- 9
- 10
- 11
- 12
- 13
- 14
- 15
- 16
- 17
- 18
- 19
- 20
- 21
- 22
- 23
- 24
- 25
- 26
- 27
- 28
- 29
- 30
- 31
- 32
- 33
- 34
- 35
- 36
- 37
- 38
- 39
- 40
- 41
- 42
- 43
- 44
- 45
- 46
- 47
- 48
- 49
- 50
效果图:
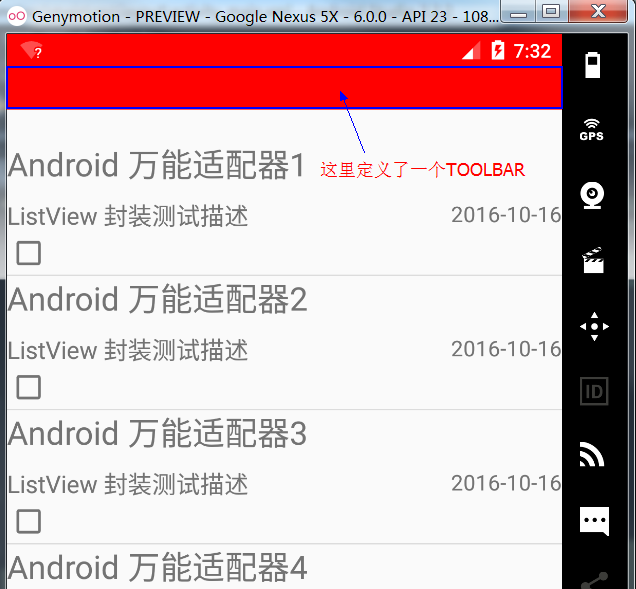
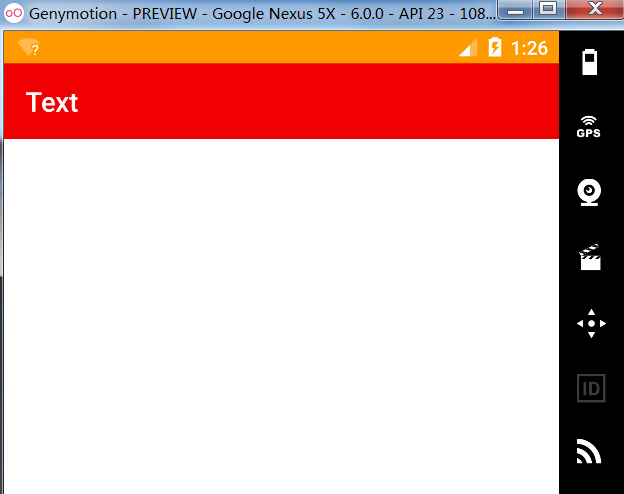
方案二 (推荐)
嵌套布局,修改布局文件的根布局为状态栏着色,子步局用来指定页面的背景颜色
1.如方案一将状态栏透明化

2.修改布局文件

//善用 这两个属性
//android:clipToPadding="true"   // true 会贴近上层布局 ; false 与上层布局有一定间隙
//android:fitsSystemWindows="true"   //true 会保留actionBar,title,虚拟键的空间 ; false 不保留
<RelativeLayout xmlns:android="http://schemas.android.com/apk/res/android"
    xmlns:app="http://schemas.android.com/apk/res-auto"
    android:layout_width="match_parent"
    android:layout_height="match_parent"
    android:background="#ff9900"
    android:fitsSystemWindows="true">

    <LinearLayout
        android:layout_width="match_parent"
        android:layout_height="match_parent"
        android:background="#ffffff"
        android:orientation="vertical">

        <android.support.v7.widget.Toolbar
            android:id="@+id/toolbar"
            android:layout_width="match_parent"
            android:layout_height="wrap_content"
            android:background="#f00000"
            android:theme="@style/AppTheme.AppBarOverlay"
            app:title="Text" />

    </LinearLayout>

</RelativeLayout>
- 1
- 2
- 3
- 4
- 5
- 6
- 7
- 8
- 9
- 10
- 11
- 12
- 13
- 14
- 15
- 16
- 17
- 18
- 19
- 20
- 21
- 22
- 23
- 24
- 25
- 26
- 27
- 28
- 29
- 30
- 31
- 32
- 33
- 1
- 2
- 3
- 4
- 5
- 6
- 7
- 8
- 9
- 10
- 11
- 12
- 13
- 14
- 15
- 16
- 17
- 18
- 19
- 20
- 21
- 22
- 23
- 24
- 25
- 26
- 27
- 28
- 29
- 30
- 31
- 32
- 33
效果图:
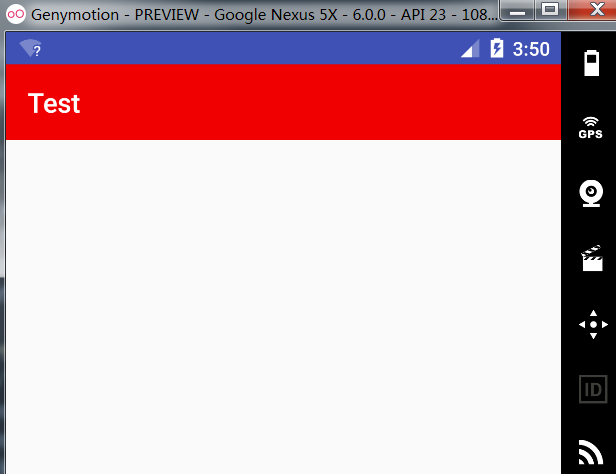
方案三
使用Android:fitsSystemWindows=”true”属性,给状态栏留出空间,添加一个和状态栏宽高相同的View覆盖透明的状态栏
一.如方案一将状态栏透明化


二.指定状态栏高度,两种方式:

1.代码获取状态栏高度:

  /**
     * 获取状态栏高度
     *
     * @param context 上下文
     * @return 状态栏高度
     */
    public static int getStatusBarHeight(Context context) {
        int result = 0;
        int resourceId = context.getResources()
                .getIdentifier("status_bar_height", "dimen", "android");
        if (resourceId > 0) {
            result = context.getResources().getDimensionPixelSize(resourceId);
        }
        return result;
    }

-------------------------分割线------------------------------

2.在values,valuse-v19 目录下直接指定高度:
(这种方式可能会因为设备分辨率不同,有稍微误差)

//values
<dimen name="padding_top">0dp</dimen>

//values-v19
<dimen name="padding_top">25dp</dimen>


3.添加一个View覆盖状态栏

 private void addStatusBarView() {
        View view = new View(this);
        view.setBackgroundColor(getResources().getColor(R.color.colorPrimary));
        LinearLayout.LayoutParams params = new LinearLayout.LayoutParams(ViewGroup.LayoutParams.MATCH_PARENT,
                getStatusBarHeight(this));

        ViewGroup decorView = (ViewGroup) findViewById(android.R.id.content);

        decorView.addView(view, params);
    }
- 1
- 2
- 3
- 4
- 5
- 6
- 7
- 8
- 9
- 10
- 11
- 12
- 13
- 14
- 15
- 16
- 17
- 18
- 19
- 20
- 21
- 22
- 23
- 24
- 25
- 26
- 27
- 28
- 29
- 30
- 31
- 32
- 33
- 34
- 35
- 36
- 37
- 38
- 39
- 40
- 41
- 42
- 43
- 44
- 45
- 46
- 47
- 48
- 1
- 2
- 3
- 4
- 5
- 6
- 7
- 8
- 9
- 10
- 11
- 12
- 13
- 14
- 15
- 16
- 17
- 18
- 19
- 20
- 21
- 22
- 23
- 24
- 25
- 26
- 27
- 28
- 29
- 30
- 31
- 32
- 33
- 34
- 35
- 36
- 37
- 38
- 39
- 40
- 41
- 42
- 43
- 44
- 45
- 46
- 47
- 48
效果图:
封装的一个工具类:
注意使用上面强调的两个属性在布局中的使用
public class StatusBar {
    /**
     * 设置透明状态栏
     * <p>
     * 可在Activity的onCreat()中调用
     * <p>
     * 注意:需在顶部控件布局中加入以下属性让内容出现在状态栏之下:
     * android:clipToPadding="true"   // true 会贴近上层布局 ; false 与上层布局有一定间隙
     * android:fitsSystemWindows="true"   //true 会保留actionBar,title,虚拟键的空间 ; false 不保留
     *
     * @param activity activity
     */
    public static void setTransparentStatusBar(Activity activity) {
        //5.0及以上
        if (Build.VERSION.SDK_INT >= Build.VERSION_CODES.LOLLIPOP) {
            View decorView = activity.getWindow().getDecorView();
            int option = View.SYSTEM_UI_FLAG_LAYOUT_FULLSCREEN
                    | View.SYSTEM_UI_FLAG_LAYOUT_STABLE;
            decorView.setSystemUiVisibility(option);
            activity.getWindow().setStatusBarColor(Color.TRANSPARENT);
            /**
             * 如果上面无效,用这个
             *activity.getWindow().addFlags(WindowManager.LayoutParams.FLAG_DRAWS_SYSTEM_BAR_BACKGROUNDS);
             *activity.getWindow().setStatusBarColor(Color.TRANSPARENT);
             */
            //4.4到5.0
        } else if (Build.VERSION.SDK_INT >= Build.VERSION_CODES.KITKAT) {
            WindowManager.LayoutParams localLayoutParams = activity.getWindow().getAttributes();
            localLayoutParams.flags = (WindowManager.LayoutParams.FLAG_TRANSLUCENT_STATUS | localLayoutParams.flags);
            /**
             * 如果上面无效,用这个
             * activity.getWindow().addFlags(WindowManager.LayoutParams.FLAG_TRANSLUCENT_STATUS);
             */

        }
    }

    /**
     * 获取状态栏高度
     *
     * @param context 上下文
     * @return 状态栏高度
     */
    public static int getStatusBarHeight(Context context) {
        int result = 0;
        int resourceId = context.getResources()
                .getIdentifier("status_bar_height", "dimen", "android");
        if (resourceId > 0) {
            result = context.getResources().getDimensionPixelSize(resourceId);
        }
        return result;
    }


    /**
     * 判断状态栏是否存在
     *
     * @param activity activity
     * @return true :存在   ;  false: 不存在
     */
    public static boolean isStatusBarExists(Activity activity) {
        WindowManager.LayoutParams params = activity.getWindow().getAttributes();
        return (params.flags & WindowManager.LayoutParams.FLAG_FULLSCREEN) != WindowManager.LayoutParams
                .FLAG_FULLSCREEN;
    }

    /**
     * 添加状态栏View
     *
     * @param activity 需要设置的 activity
     * @param argb     Color.argb(alpha, 0, 0, 0)  颜色属性
     */
    private static void addStatusBarView(Activity activity, int argb) {
        ViewGroup contentView = (ViewGroup) activity.findViewById(android.R.id.content);
        // 移除半透明矩形,以免叠加
        if (contentView.getChildCount() > 1) {
            contentView.removeViewAt(1);
        }
        contentView.addView(createStatusBarView(activity, argb));
    }

    /**
     * 创建矩形 View
     *
     * @param argb Color.argb(alpha, 0, 0, 0)  颜色属性
     * @return View
     */
    private static View createStatusBarView(Activity activity, int argb) {
        // 绘制一个和状态栏一样高的矩形
        View statusBarView = new View(activity);
        LinearLayout.LayoutParams params =
                new LinearLayout.LayoutParams(ViewGroup.LayoutParams.MATCH_PARENT,
                        getStatusBarHeight(activity));
        statusBarView.setLayoutParams(params);
        statusBarView.setBackgroundColor(argb);
        return statusBarView;
    }


}


 1084
1084


 被折叠的 条评论
为什么被折叠?
被折叠的 条评论
为什么被折叠?
 到【灌水乐园】发言


