


This article is one of a series of blog posts that accompany the Livestream on the Neo4j Twitch Channel where I build an application on top of Neo4j with Nest.js.
本文是Neo4j Twitch频道上的Livestream随附的一系列博客文章之一,我在其中使用Nest.js在Neo4j之上构建了一个应用程序。
This article assumes some prior knowledge of Neo4j and Nest.js. If you haven’t already done so, you can read the previous articles at:
本文假定您具有Neo4j和Nest.js的一些先验知识。 如果您还没有这样做,可以在以下位置阅读以前的文章:
我应该使用哪些测试?(Which tests should I use?)
So far, I’ve only really touched End-to-End testing. End-to-end (or E2E) tests are functional tests that test the application as a whole. In the streams so far I’ve used E2E tests to test the entire application stack and represent a user’s entire journey through the website, including:
到目前为止,我只真正接触过端到端测试。 端到端(E2E)测试是对整个应用程序进行测试的功能测试。 到目前为止,在流中,我已经使用了E2E测试来测试整个应用程序堆栈,并代表用户浏览网站的整个过程,包括:
- Authorisation授权书
For example, the tests that cover the POST /articles endpoint provide tests to ensure that the following elements are working correctly:
例如,覆盖POST /articles端点的测试提供测试以确保以下元素正常工作:
- Validation Pipe are working correctly 验证管道运行正常
- The user is correctly authenticating用户正确验证
- The database is up and the data is being correctly added to the database数据库已启动,并且数据已正确添加到数据库中
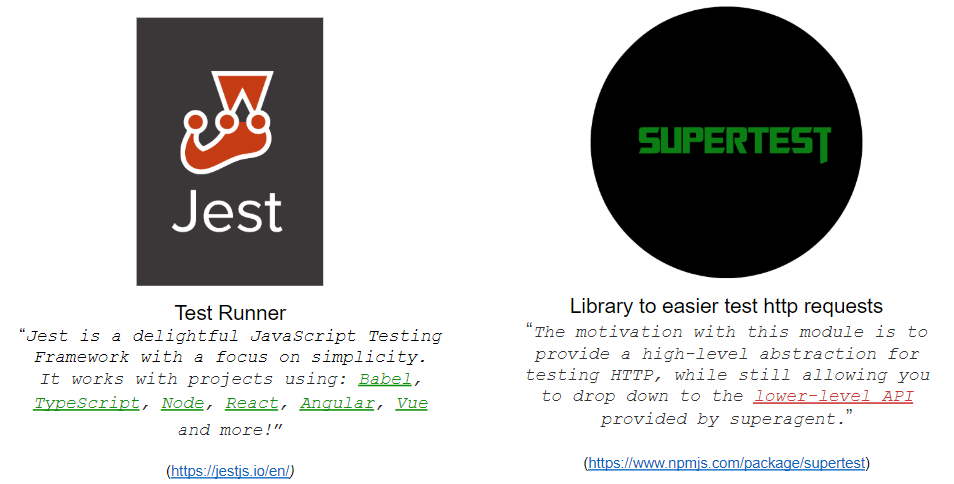
These tests are all run through Jest using Supertest to mimic HTTP requests to the API. With a front end, it would also make sense to use a tool like Selenium or Cypress to automate the clicking of buttons and filling in of forms.
这些测试都是通过Jest运行的 使用 超级测试 模拟对API的HTTP请求。 对于前端,使用诸如Selenium或Cypress之类的工具来自动单击按钮和填写表格也很有意义。
These are great and can be quick to run for small applications, but if you are following Test Driven Development on a large project, running hundreds of tests on each save could become time consuming. At the start of the project, a lot of those elements may not be in place, so it doesn’t make much sense to write a set of failing tests for middleware that aren’t on the roadmap for several months.
这些功能很好,可以在小型应用程序上快速运行,但是如果您在大型项目上进行“测试驱动开发”,则每次保存都要运行数百个测试可能会很耗时。 在项目开始时,其中许多元素可能都没有到位,因此为几个月没有上路的中间件编写一组失败的测试没有多大意义。
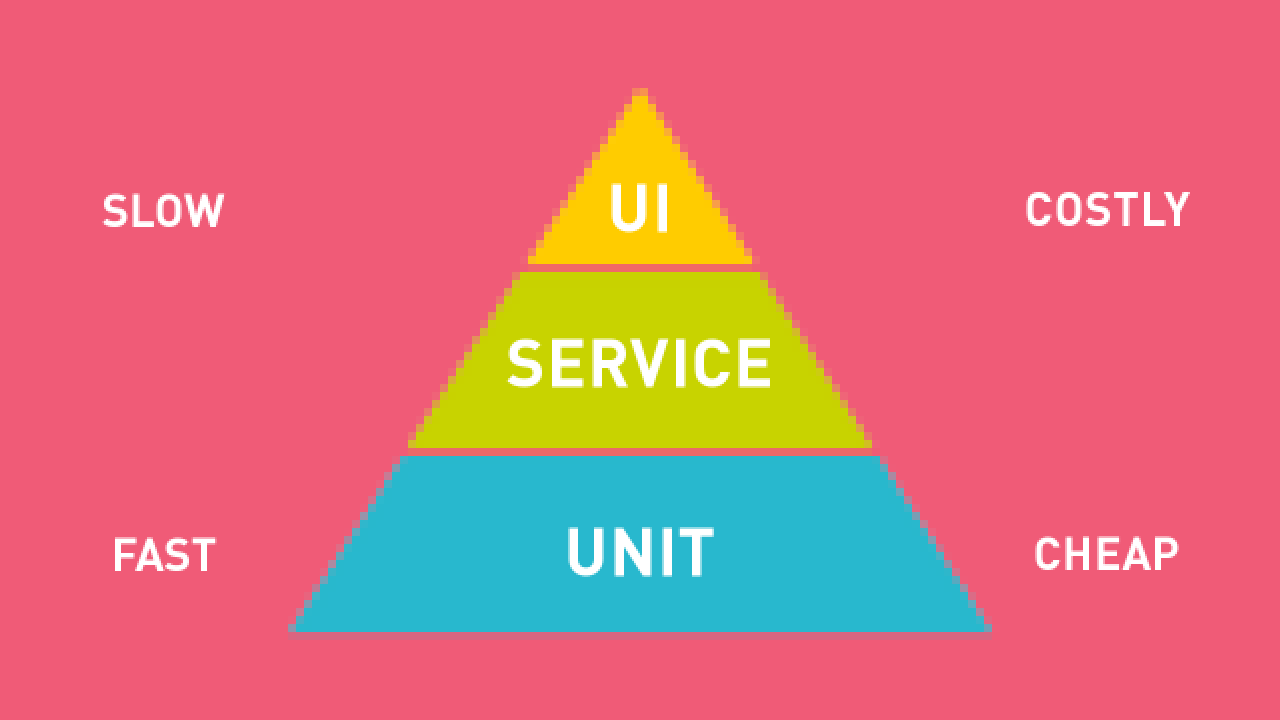
For this reason, most people start with unit tests. The goal of unit testing is to write more precise tests that verify that each single element that makes up the code base work under specific conditions. For example, what happens when a third-party API returns a particular response? What happens if the API goes down?
因此,大多数人从单元测试开始。 单元测试的目的是编写更精确的测试,以验证构成代码库的每个单个元素在特定条件下均能正常工作。 例如,当第三方API返回特定响应时会发生什么? 如果API掉线了怎么办?
These can be hard to simulate in real-life, besides it could cost a lot of money to keep sending requests to some Google API to constantly test these conditions.
这些可能很难在现实生活中进行模拟,此外,将请求不断发送到某些Google API来不断测试这些条件可能会花费大量金钱。
This is where mocking comes in handy. Instead of sending a request with each test, mocking the API class will mean that we can “spy” on a call to a method and return a specific result on a test-by-test basis.
这是嘲笑的地方 派上用场。 代替对每个测试发送请求,模拟API类将意味着我们可以“侦听”对方法的调用,并在逐个测试的基础上返回特定的结果。
In our case, we don’t want to rely on a Neo4j instance to unit test our code. We can instead mock the read and write methods on the Neo4jService and return certain results based on the test case.
在我们的例子中,我们不想依靠Neo4j实例对我们的代码进行单元测试。 相反,我们可以在Neo4jService上模拟读写方法,并根据测试用例返回某些结果。
用Jest测试Nest.js (Testing Nest.js with Jest)
For this, we will use the tests that have already been auto-generated with the nest generate commands. These use the @nestjs/testing package and a testing framework called Jest.
为此,我们将使用已经通过nest generate命令自动生成的测试。 这些使用@nestjs/testing包和一个名为Jest的测试框架。
As an example, we’ll take a look at testing the create() method on the ArticleService. The generated unit test file is in the same folder, called article.service.spec.ts.
作为示例,我们将测试在ArticleService上测试create()方法。 生成的单元测试文件位于名为article.service.spec.ts的同一文件夹中。
At the top of the test file, you’ll see a beforeEach function that creates a new testing module. The idea of the testing module is that rather than registering the entire application, we only register the elements that we require to make the test pass — in the long run this will make the tests a lot quicker.
在测试文件的顶部,您将看到一个beforeEach函数,该函数创建一个新的测试模块。 测试模块的想法是,我们无需注册整个应用程序,而仅注册使测试通过所需的元素-从长远来看,这将使测试更快。
// article.service.spec.ts
beforeEach(async () => {
  const module: TestingModule = await Test.createTestingModule({
    providers: [ArticleService],
  }).compile();  service = module.get<ArticleService>(ArticleService);
});
Running the test as it stands will cause a couple of knock-on problems:
按原样运行测试会导致几个连锁问题:
ArticleService被标记为范围提供者 (ArticleService is marked as a scoped provider)
Firstly, the following line ensures that the ArticleService is scoped to the request:
首先,以下行确保ArticleService的作用域为请求:
// article.service.ts
@Injectable({ scope: Scope.REQUEST })
By default Injectable classes are singletons — meaning that a single instance of the class is created for the entire application. Because this services is scoped to the request, a new instance will be instantiated with each request, allowing us to inject the Request.
默认情况下,可Injectable类为单例-意味着将为整个应用程序创建该类的单个实例。 由于此服务的范围仅限于请求,因此每个请求都将实例化一个新实例,从而使我们能够注入Request 。
Calling module.get to retrieve an instance of the module will return the following error:
调用module.get检索模块的实例将返回以下错误:
ArticleService is marked as a scoped provider. Request and transient-scoped providers can't be used in combination with "get()" method. Please, use "resolve()" instead.Because this is a scoped provider that is instantiated with the request, Nest can’t instantiate it outside of a request. It will instead need to resolve a new instance. Changing the call from .get to .resolve will solve this error:
由于这是使用请求实例化的作用域提供者,因此Nest无法在请求之外实例化它。 相反,它将需要解析一个新实例。 将呼叫从.get更改为.resolve将解决此错误:
service = await module.resolve<ArticleService>(ArticleService);Nest无法解析ArticleService的依存关系 (Nest can’t resolve dependencies of the ArticleService)
Next, because we pass through an instance of the Neo4jService into the ArticleService constructor, we need to make sure that the Neo4jModule has been registered within the testing module.
接下来,因为我们将Neo4jService的实例Neo4jService到ArticleService构造函数中,所以我们需要确保Neo4jModule已在测试模块中注册。
As it stands, the testing module is not aware of the Neo4jService and will throw the following error:
就目前而言,测试模块不知道Neo4jService并将抛出以下错误:
Nest can't resolve dependencies of the ArticleService (REQUEST, ?). Please make sure that the argument Neo4jService at index [1] is available in the RootTestModule context.To fix this, we’ll need to register the Neo4jModule with the application. In the main application, we use the ConfigService to pull the applicable config values from the .env file in the root. But as we’ll be mocking the interactions between the application and Neo4j we can put in any old information.
要解决此问题,我们需要在应用程序中注册Neo4jModule 。 在主应用程序中,我们使用ConfigService从根目录中的.env文件中提取适用的配置值。 但是,当我们要模拟应用程序和Neo4j之间的交互时,我们可以输入任何旧信息。
Just as we do in the AppModule, we can add the Neo4jModule to the imports key on instantiating the testing module, but instead using forRoot rather than forRootAsync:
就像我们在AppModule中所做的一样,我们可以在实例化测试模块时将Neo4jModule添加到imports键,但是可以使用forRoot而不是forRootAsync :
// article.service.spec.ts
import { Neo4jModule} from 'nest-neo4j';// ...
const module: TestingModule = await Test.createTestingModule({
  imports: [
    Neo4jModule.forRoot({
      scheme: 'neo4j',
      host: 'localhost',
      port: 7687,
      username: 'neo4j',
      password: 'neox'
    })
  ],
  providers: [ArticleService],
}).compile();
客户端由于身份验证失败而未被授权 (The client is unauthorized due to authentication failure)
Re-running the tests, you’ll an error message saying that authentication to Neo4j has failed:
重新运行测试,您将收到一条错误消息,提示对Neo4j的身份验证失败:
// article.service.spec.ts
Neo4jError: The client is unauthorized due to authentication failure.
At the moment Neo4j is still trying to authenticate — to stop this from happening, we can instruct jest to mock the entire Neo4j Driver class:
目前Neo4j仍在尝试进行身份验证-为了阻止这种情况的发生,我们可以指示玩笑模拟整个Neo4j Driver类:
jest.mock('neo4j-driver/lib/driver')Now for each test in this suite, the Neo4j driver module will be mocked, so none of the code from that file will actually be executed, and instead we can check that the functions have been called and if necessary return our own responses.
现在,对于该套件中的每个测试,将模拟Neo4j驱动程序模块,因此实际上不会执行该文件中的任何代码,而是可以检查是否已调用函数,并在必要时返回我们自己的响应。
More information on mocking entire modules
The Neo4j driver itself is down-stream of any of the code we will be testing.
Neo4j驱动程序本身是我们将要测试的任何代码的下游。
测试create()方法 (Testing the create() method)
In order to test the create method, we’ll first need to create a group to hold the test.
为了测试create方法,我们首先需要创建一个组来保存测试。
describe('::create()', () => {
  it('should create a new article', async () => {
    // Test will go here...
  })
})
Because this is a service scoped to each request, many methods including the create method expect the request to be injected into the service and for it also to contain a User.
因为这是一个针对每个请求的服务,所以许多方法(包括create方法)都希望将请求注入到服务中,并且该请求还包含一个User 。
The request property on the method is a private method, so we’ll have to use Object.defineProperty to an object that contains an instance of the User entity class. In order to fake this, we can import Node class from the Neo4j driverneo4j-driver/lib/graph-types.js and create a new instance.
该方法的request属性是私有方法,因此我们必须对包含User实体类实例的对象使用Object.defineProperty 。 为了伪造这一点,我们可以从Neo4j驱动程序neo4j-driver/lib/graph-types.js导入Node类并创建一个新实例。
// article.service.spec.ts
import { User } from '../user/entity/user.entity'
import { Node } from 'neo4j-driver/lib/graph-types'
import { int } from 'neo4j-driver'// Create User
const userNode = new Node(int(9999), ['User'], { id: 'test-user' })
const user = new User(userNode)
In order to ensure that this is found in our class, we can use Object.defineProperty to set the value of service.request to an object that contains the User.
为了确保可以在我们的类中找到它,我们可以使用Object.defineProperty将service.request的值设置为包含User的对象。
Object.defineProperty(service, 'request', { value: { user } })Next, we’ll want to mock a response from Neo4j. We can assume from the E2E tests that the actual Cypher query is fine, but we should check that the values returned by Neo4j are correctly processed by the service.
接下来,我们要模拟Neo4j的响应。 我们可以从E2E测试中假设实际的Cypher查询很好,但是我们应该检查服务是否正确处理了Neo4j返回的值。
Taking a look at the RETURN portion of the query you can see that the service expects the driver to return a user node, article node, array of nodes to represent tags, a boolean to indicate whether the user has favorited the node and a number to represent the total number of :FAVORITED relationships.
查看查询的RETURN部分,您可以看到该服务希望驱动程序返回用户节点,商品节点,代表标记的节点数组,指示用户是否喜欢该节点的布尔值以及要返回的数字。表示:FAVORITED关系的总数。
RETURN u, // User Node
  a, // Article Node
  [ (a)-[:HAS_TAG]->(t) | t ] AS tagList, // Array of tag nodes
  exists((a)<-[:FAVORITED]-(u)) AS favorited, // Boolean
  size((a)<-[:FAVORITED]-()) AS favoritesCount // Number
We can listen for calls to the write method on the Neo4jService using the jest.spyOn method. We can retrieve the instance of the Neo4jService that will be injected into the service by calling module.get.
我们可以监听到的调用write在方法Neo4jService使用jest.spyOn方法。 我们可以检索的实例Neo4jService将通过调用注入服务module.get 。
// Get the type of result to returned by the mocked method
import { Result } from 'neo4j-driver/lib/result'// Get the instance of the Neo4jService created by the TestModule
const neo4jService: Neo4jService = await module.get(Neo4jService)// Add some test data to pass to the call
const data = {
  title: 'Title',
  description: 'Description',
  body: 'Body',
  tagList: ['tag1', 'tag2'],
}// Listen to calls on neo4jService.write()
const write = jest.spyOn(neo4jService, 'write')
  // Each time the
  .mockResolvedValue(
    // Return a mocked value to mimic a <Result>
  )
The resolved value from the write method should be a QueryResult. In the ArticleService we only use the records array which contains an array of Record objects. Each record has a get method that is used to pull the individual items from the return.
来自write方法的解析值应该是QueryResult 。 在ArticleService中,我们仅使用records数组,其中包含Record对象的数组。 每个记录都有一个get方法,该方法用于从返回中提取单个项。
We can mock what the driver would return by adding a case statement.
我们可以通过添加一个case语句来模拟驱动程序将返回的内容。
.mockResolvedValue(<Result> {
  records: [
    {
      get: key => {
        switch (key) {
          case 'a':
           // If requesting 'a', return a `Node` with the data
           // passed to the `create` method
           const { tagList, ...properties } = data
           return new Node( int(100), ['Article'], { ...properties, id: 'test-article-1' })
          case 'tagList':
            // If 'tagList' return an array of Nodes with a
            // property to represent the name
            return data.tagList.map((name, index) => new Node ( int(200 + index), 'Tag', { name }))
          case 'favoritesCount':
            // If favouritesCount then return a random number
            return 100;
          case 'favorited':
            // If favorited, return a boolean
            return false;
        }        // Otherwise return null
        return null
      }
    }
  ]
})
As we only expect a single node, that is as complicated as we need to get.
因为我们只希望有一个节点,所以它变得和我们需要的一样复杂。
Then in order to rest the hydration we can run the method and then call toJson on the article that has been returned.
然后,为了保持水合作用,我们可以运行该方法,然后在返回的文章上调用toJson 。
const article = await service.create(data.title, data.description, data.body, data.tagList)const json = article.toJson()If all has gone well, we should get a JSON object with the original information passed to the create method with some additional information including the article ID. The author object should all properties passed to the mock User entity, and the values returned from the “Driver” should match.
如果一切顺利,我们应该获得一个JSON对象,并将原始信息传递给create方法,并提供一些附加信息,包括商品ID。 作者对象应将所有属性传递给模拟User实体,并且从“驱动程序”返回的值应匹配。
expect(json).toEqual({
  ...data,
  author: user.toJson(),
  id: 'test-article-1',
  favorited: false,
  favoritesCount: 100,
})
TL; DR:我不要样板 (TL;DR: I don’t want boilerplate)
I’ve added a set of methods to the nest-neo4j package so you don’t need to scour the neo4j-driver repository in order to find the methods.
我已经在nest-neo4j包中添加了一组方法,因此您无需搜索neo4j-driver存储库即可找到这些方法。
mockNode(labels: string | string[], properties: object)— Return a node with the label(s) and properties supplied.mockNode(labels: string | string[], properties: object)—返回带有标签和提供的属性的节点。mockRelationship(type: string, properties: object, start?: Node, end?: Node)— Return a relationship object with the type and properties defined. You can either pass node instances to represent the start and end nodes, or a random one will be generatedmockRelationship(type: string, properties: object, start?: Node, end?: Node)—返回具有定义的类型和属性的关系对象。 您可以传递节点实例来表示起始节点和结束节点,也可以生成一个随机实例mockResult(rows: object[])— this method will return a mocked version of theResultclass with arecordskey. Each record has akeysarray and agetmethod for retrieving a single value.mockResult(rows: object[])—此方法将返回带有records键的Result类的mockResult(rows: object[])版本。 每个记录都有一个keys数组和一个用于获取单个值的get方法。
For example, the code above could be replaced with the following:
例如,上面的代码可以替换为以下代码:
// Import methods
import { mockNode, mockResult } from 'nest-neo4j/dist/test'// Mock Result
const write = jest.spyOn(neo4jService, 'write')
  .mockResolvedValue(
    mockResult([
      {
        u: user,
        a: mockNode('Article', { ...data, id: 'test-article-1' }),
        tagList: data.tagList.map(name => mockNode('Tag', { name })),
        favoritesCount,
        favorited,
      },
    ])
  )
As the weeks progress, I will be adding more test cases and examples — for example what happens when Neo4j throws a Constraint Error? Or what happens if the service is unavailable?
随着几周的进展,我将添加更多的测试用例和示例-例如,当Neo4j抛出约束错误时会发生什么? 或者如果服务不可用怎么办?
Star or Watch the nest-neo4j repository to be notified of any commits.
标记或监视nest-neo4j存储库,以将任何提交通知给我。
Until next week!
直到下周!
~ Adam
〜亚当
翻译自: https://medium.com/neo4j/testing-your-neo4j-nest-js-application-49959313a32c


 2575
2575


 被折叠的 条评论
为什么被折叠?
被折叠的 条评论
为什么被折叠?
 到【灌水乐园】发言


