


Making an SSL certificate for your website is not that hard and anyone can do this as long as you follow the steps in this article. I’ve had to face this problem building my websites and after a lot of practice doing it, I know the steps required with my eyes closed. In this article, I will use examples from the Hostinger Admin Panel but the same logic should apply with any other hosting providers.
为您的网站制作SSL证书并不难,只要您遵循本文中的步骤,任何人都可以做到这一点。 建立网站时,我不得不面对这个问题,经过大量的练习,我知道我所需要采取的步骤。 在本文中,我将使用Hostinger管理面板中的示例,但相同的逻辑应适用于任何其他托管服务提供商。
登录到主机管理面板或hpanel。 (Log in to your Hosting Admin Panel or hpanel.)
You will need to login to your Admin Panel to have the chance to change your website’s SSL Certificate Settings. You can also log in with your personal account and manage the website for a client if they have given you access to it.
您将需要登录到管理面板,才能更改网站的SSL证书设置。 您也可以使用您的个人帐户登录并为客户管理网站(如果他们授予您访问权限)。

转到您的托管选项卡,然后选择网站。 (Go to your Hosting Tab and Select the Website.)
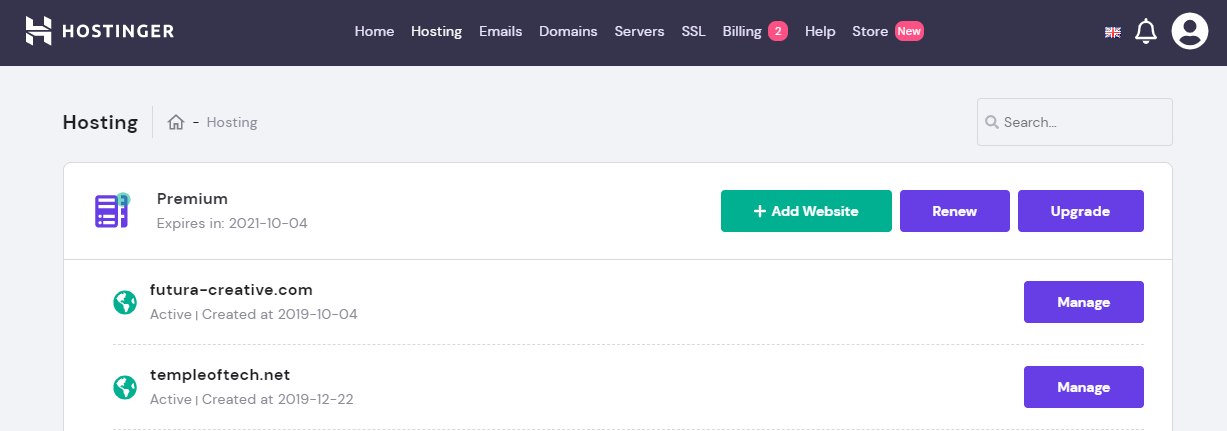
After you log in to your account you will need to select the Hosting tab and there will be the hosting plan with all the domains that you own below it. Click ‘Manage’ on the website that you want to get an SSL Certificate for.
登录到帐户后,您需要选择Hosting(托管)标签,然后将在其下方提供一个托管计划,其中包含您拥有的所有域。 在您要获取SSL证书的网站上单击“管理”。
从“高级”部分中选择SSL选项 (Select SSL option From the Advanced Section)
Once you have selected your website, the specific page for that site will open and there are a number of different features and settings you can tweak. Scroll down and go the Advanced section and from there press the SSL option.
选择网站后,将打开该网站的特定页面,您可以调整许多不同的功能和设置。 向下滚动并进入“高级”部分,然后从此处按SSL选项。

现在让我们创建免费的SSL (Now let’s Create the Free SSL)
You will need to go to this website where you can create a free SSL Certificate by following the steps below.
您需要访问此网站,您可以按照以下步骤在其中创建免费的SSL证书。
- First, add the URL of your website and press the button. 首先,添加您网站的URL,然后按按钮。

- Select the options as shown in the picture and press Create after adding an email address in the above space. 选择图片中所示的选项,然后在上述空间中添加电子邮件地址后按创建。

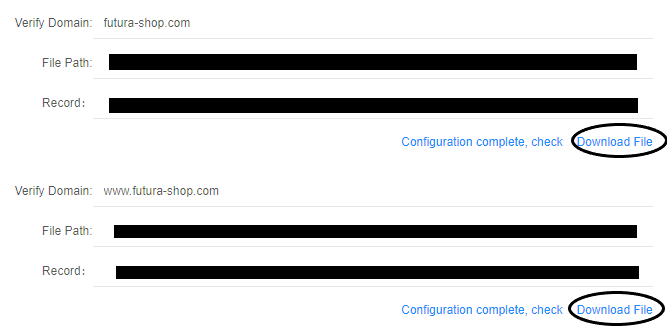
- You will automatically download a zip folder with a security Key since I have chosen those options. You will see the fields below for Verifying the domain, the file path that you need to go to, and the record which is the file of the SSL. You will need to download both of them. 由于选择了这些选项,因此您将自动下载带有安全密钥的zip文件夹。 您将在下面看到用于验证域的字段,需要转到的文件路径以及作为SSL文件的记录。 您将需要下载它们。
再次转到Hostinger面板,然后找到“文件管理器”。 (Go to The Hostinger Panel once again and find File Manager.)
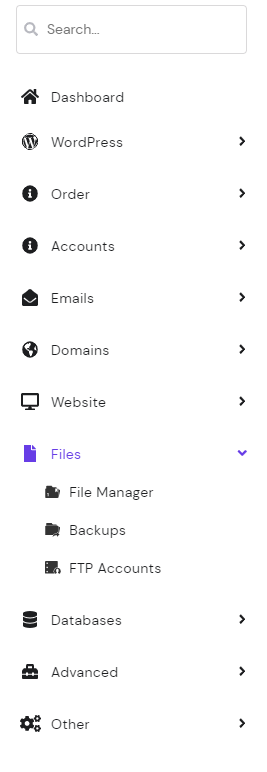
Now after you have done the last step in the hpanel from the sidebar of the webpage you can find the file manager easily, it’s under Files.
现在,从网页的侧边栏完成hpanel的最后一步之后,您可以轻松找到文件管理器,它位于Files下。
将文件上传到目录中。 (Upload the files in the directory.)
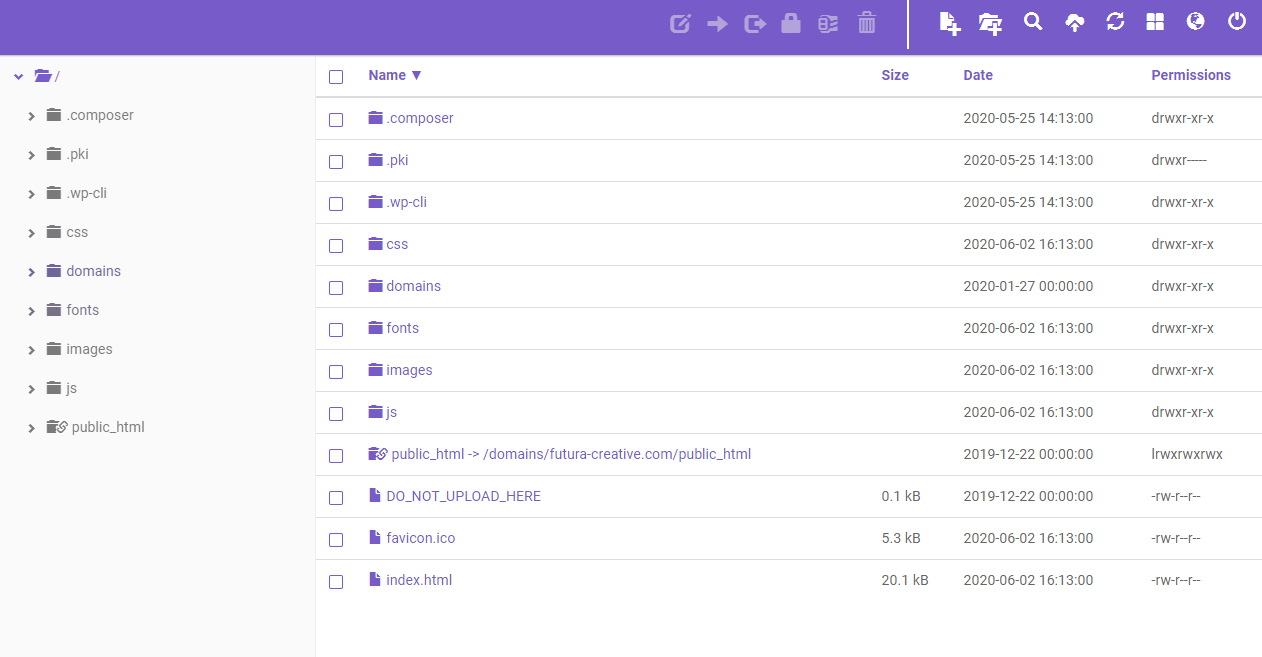
You then need to follow the path that was provided by the SSL website and upload the downloaded files there. That’s it this step is fairly simple.
然后,您需要遵循SSL网站提供的路径,并将下载的文件上传到该网站。 就是这样,这一步非常简单。
验证证书。 (Validate the Certificate.)
Now you need to go back to the website where you downloaded the SSL files and press the validation button. Three fields with an encrypted code will appear.
现在,您需要返回下载SSL文件的网站,然后按确认按钮。 将出现三个带有加密代码的字段。
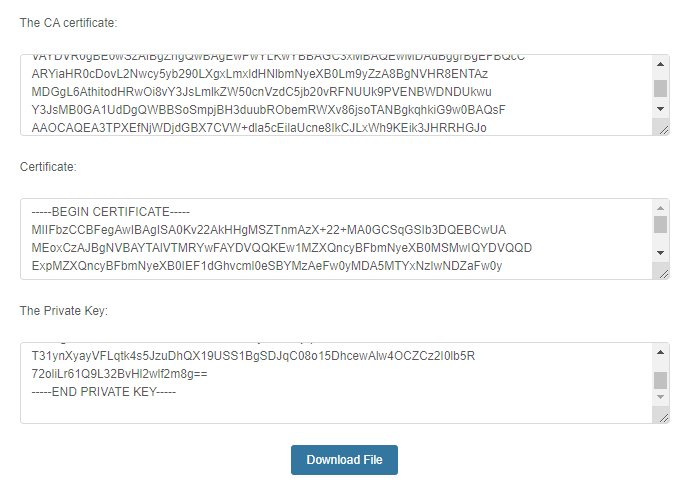
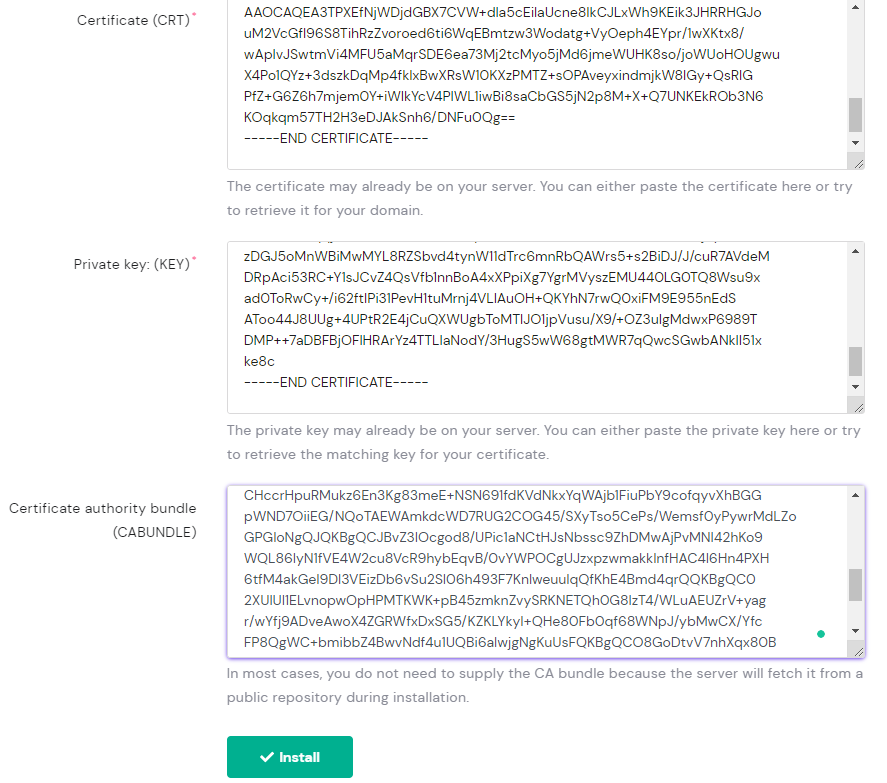
You will have to copy and paste them to the respective fields in the Hostinger panel SSL webpage. And then press the Install button at the end of the page like this.
您将必须将它们复制并粘贴到Hostinger面板SSL网页的相应字段中。 然后按此页面末尾的“安装”按钮。
That’s it you are finished the SSL Certificate is installed on your website.
就这样,您的网站上已安装了SSL证书。
翻译自: https://levelup.gitconnected.com/how-to-create-an-ssl-certificate-for-free-667f7d453424


 945
945

 被折叠的 条评论
为什么被折叠?
被折叠的 条评论
为什么被折叠?
 到【灌水乐园】发言


