


 本文介绍了如何在Xcode中利用聚合目标来创建XCframework,为iOS和macOS平台提供跨平台的框架支持。
xcode提交构建版本
If you’re already familiar with how to build xcframworks using command line tools, then this article is how you take that to the next level.
如果您已经熟悉如何使用命令行工具来构建xcframworks,那么本文就是将其带入更高层次的方法。
If you haven’t built or don’t know how to build xcframeworks, I’ve already explained that in details in my previous article here.
如果您还没有建立或不知道如何建立xcframeworks,我已经解释说,在细节我以前的文章在这里。
汇总目标 (Aggregated Targets)
Aggregated Targets is used when we need to build multiple targets together somehow.
当我们需要以某种方式一起构建多个目标时,将使用聚合目标。
We will start by our example FruitBasket from the previous article and you can download it from this git repo, here is a preview of the code we have in there.
我们将从上一篇文章的示例FruitBasket开始,您可以从git repo下载它,这是其中包含的代码的预览。
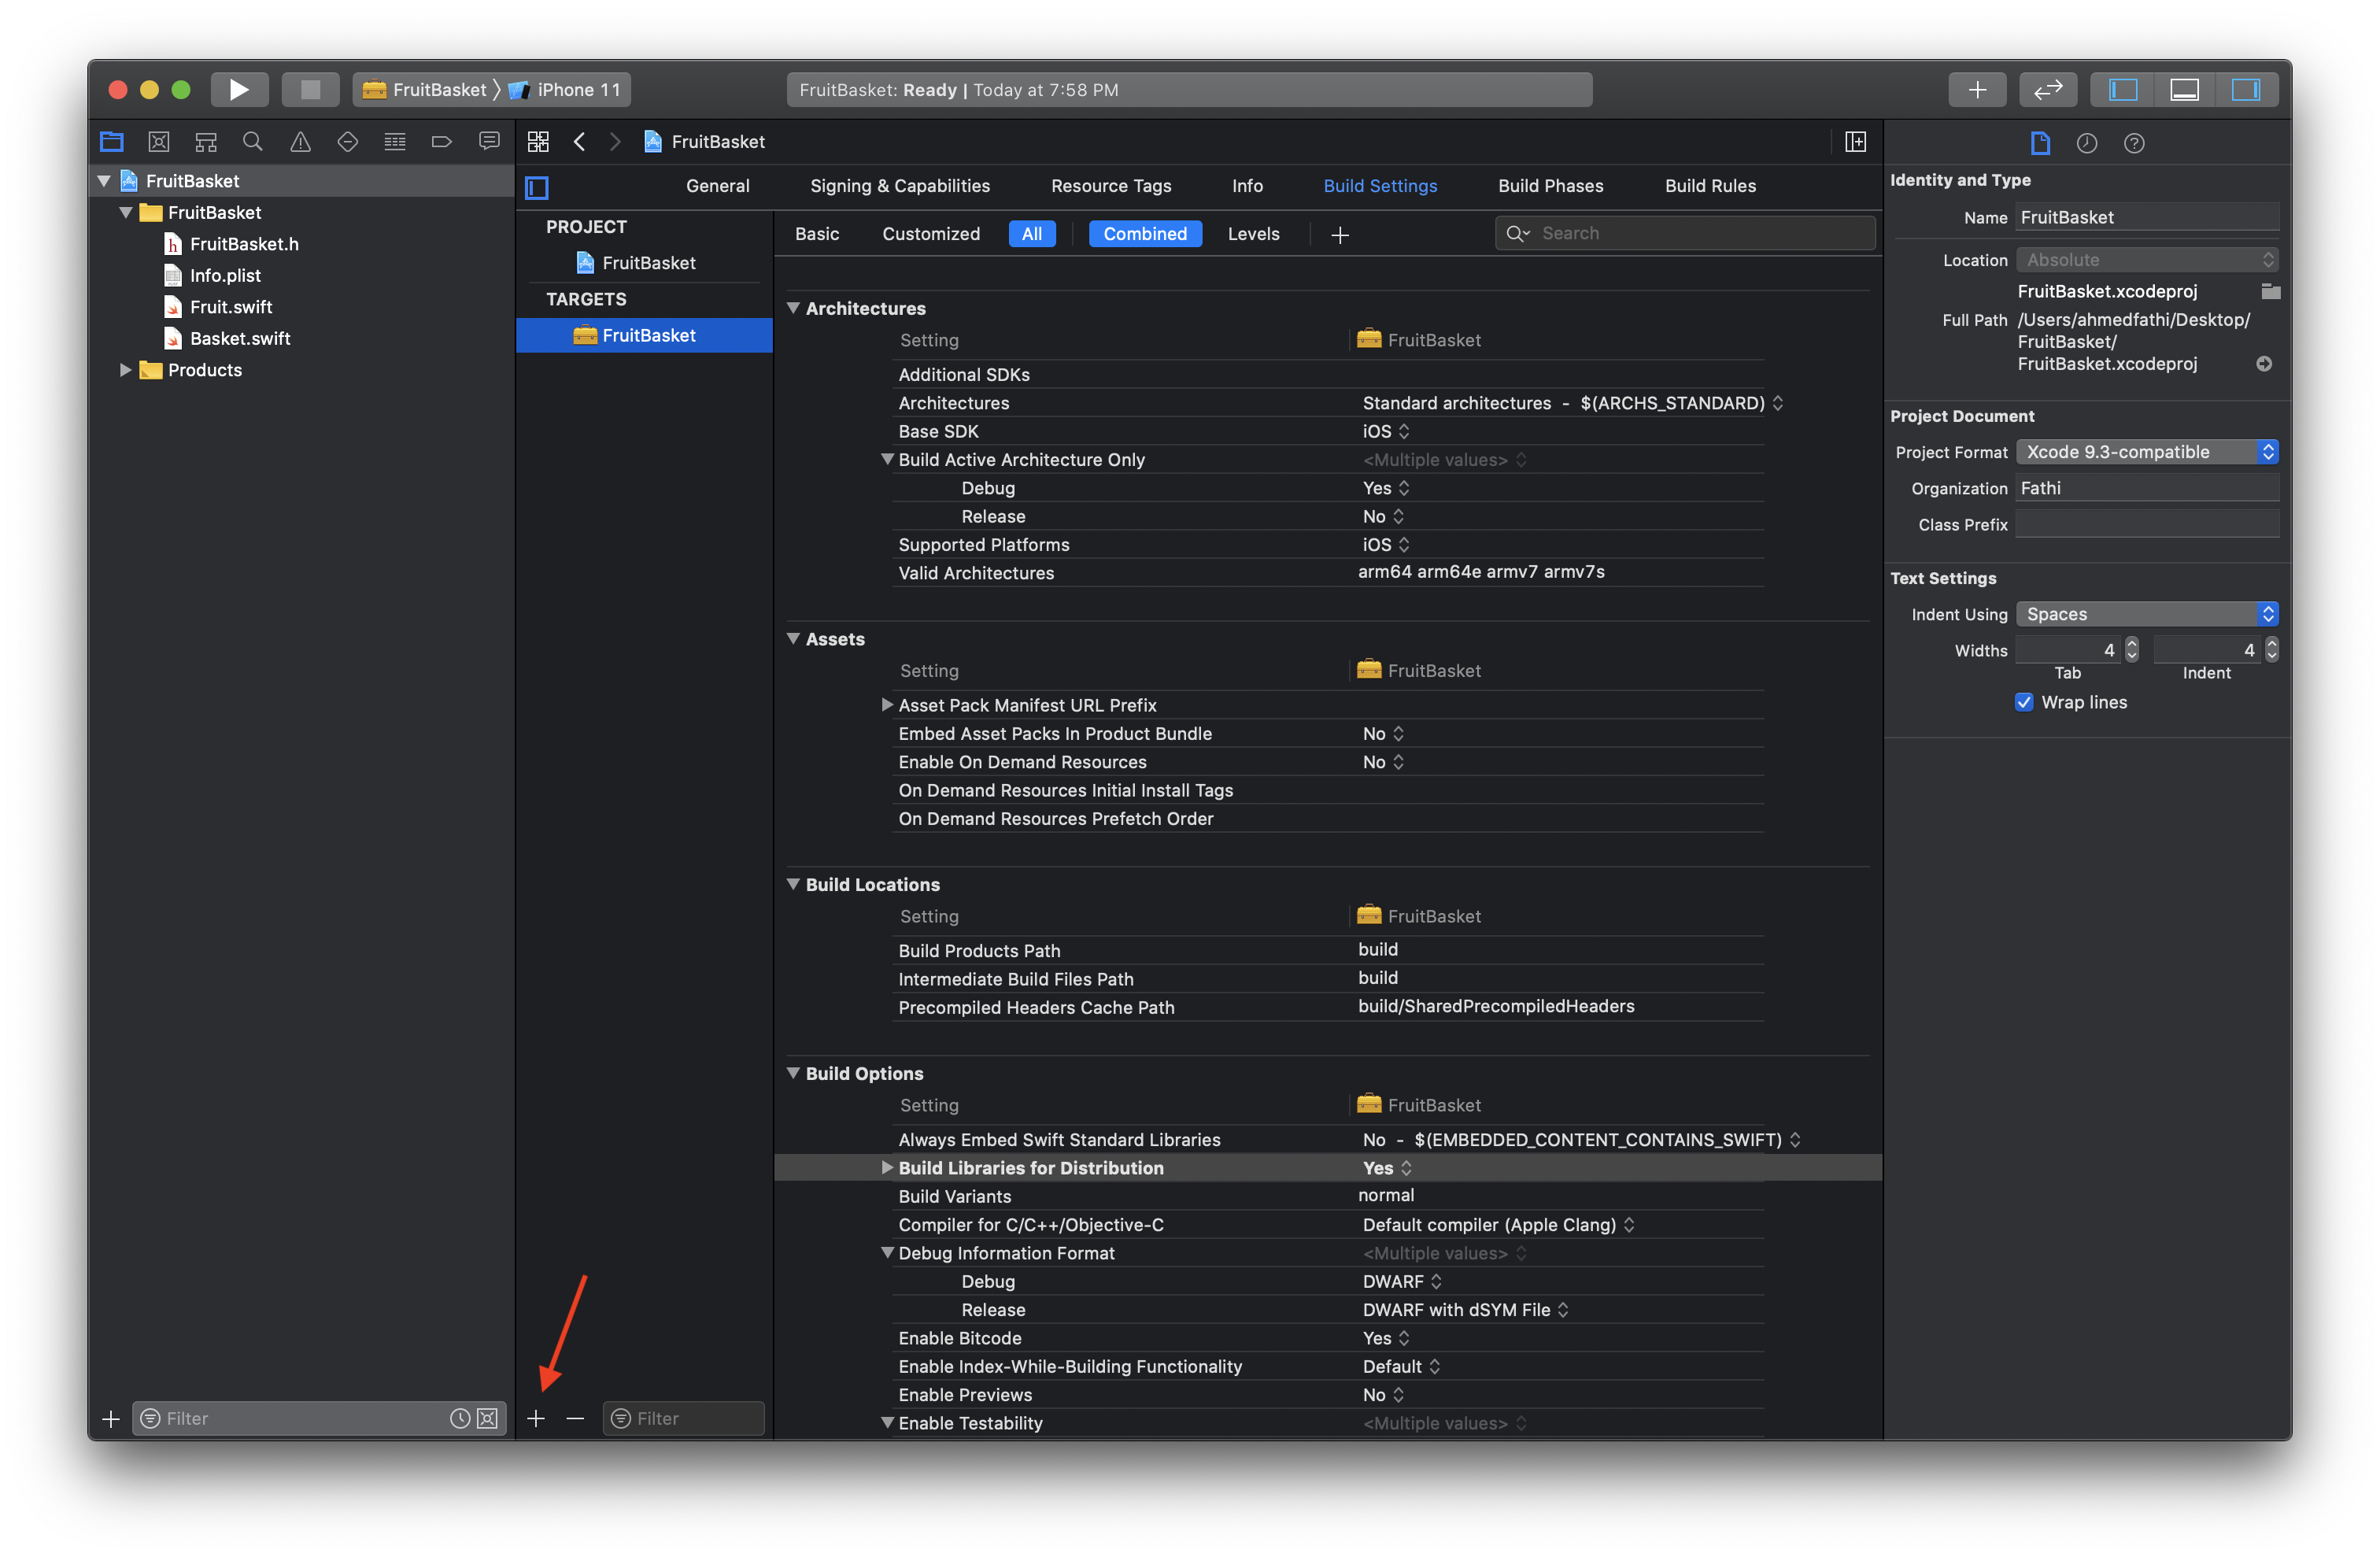
Open up xcode and start by adding new target to you project from this little + icon at the bottom.
打开xcode,然后从底部的小图标开始向项目添加新目标。
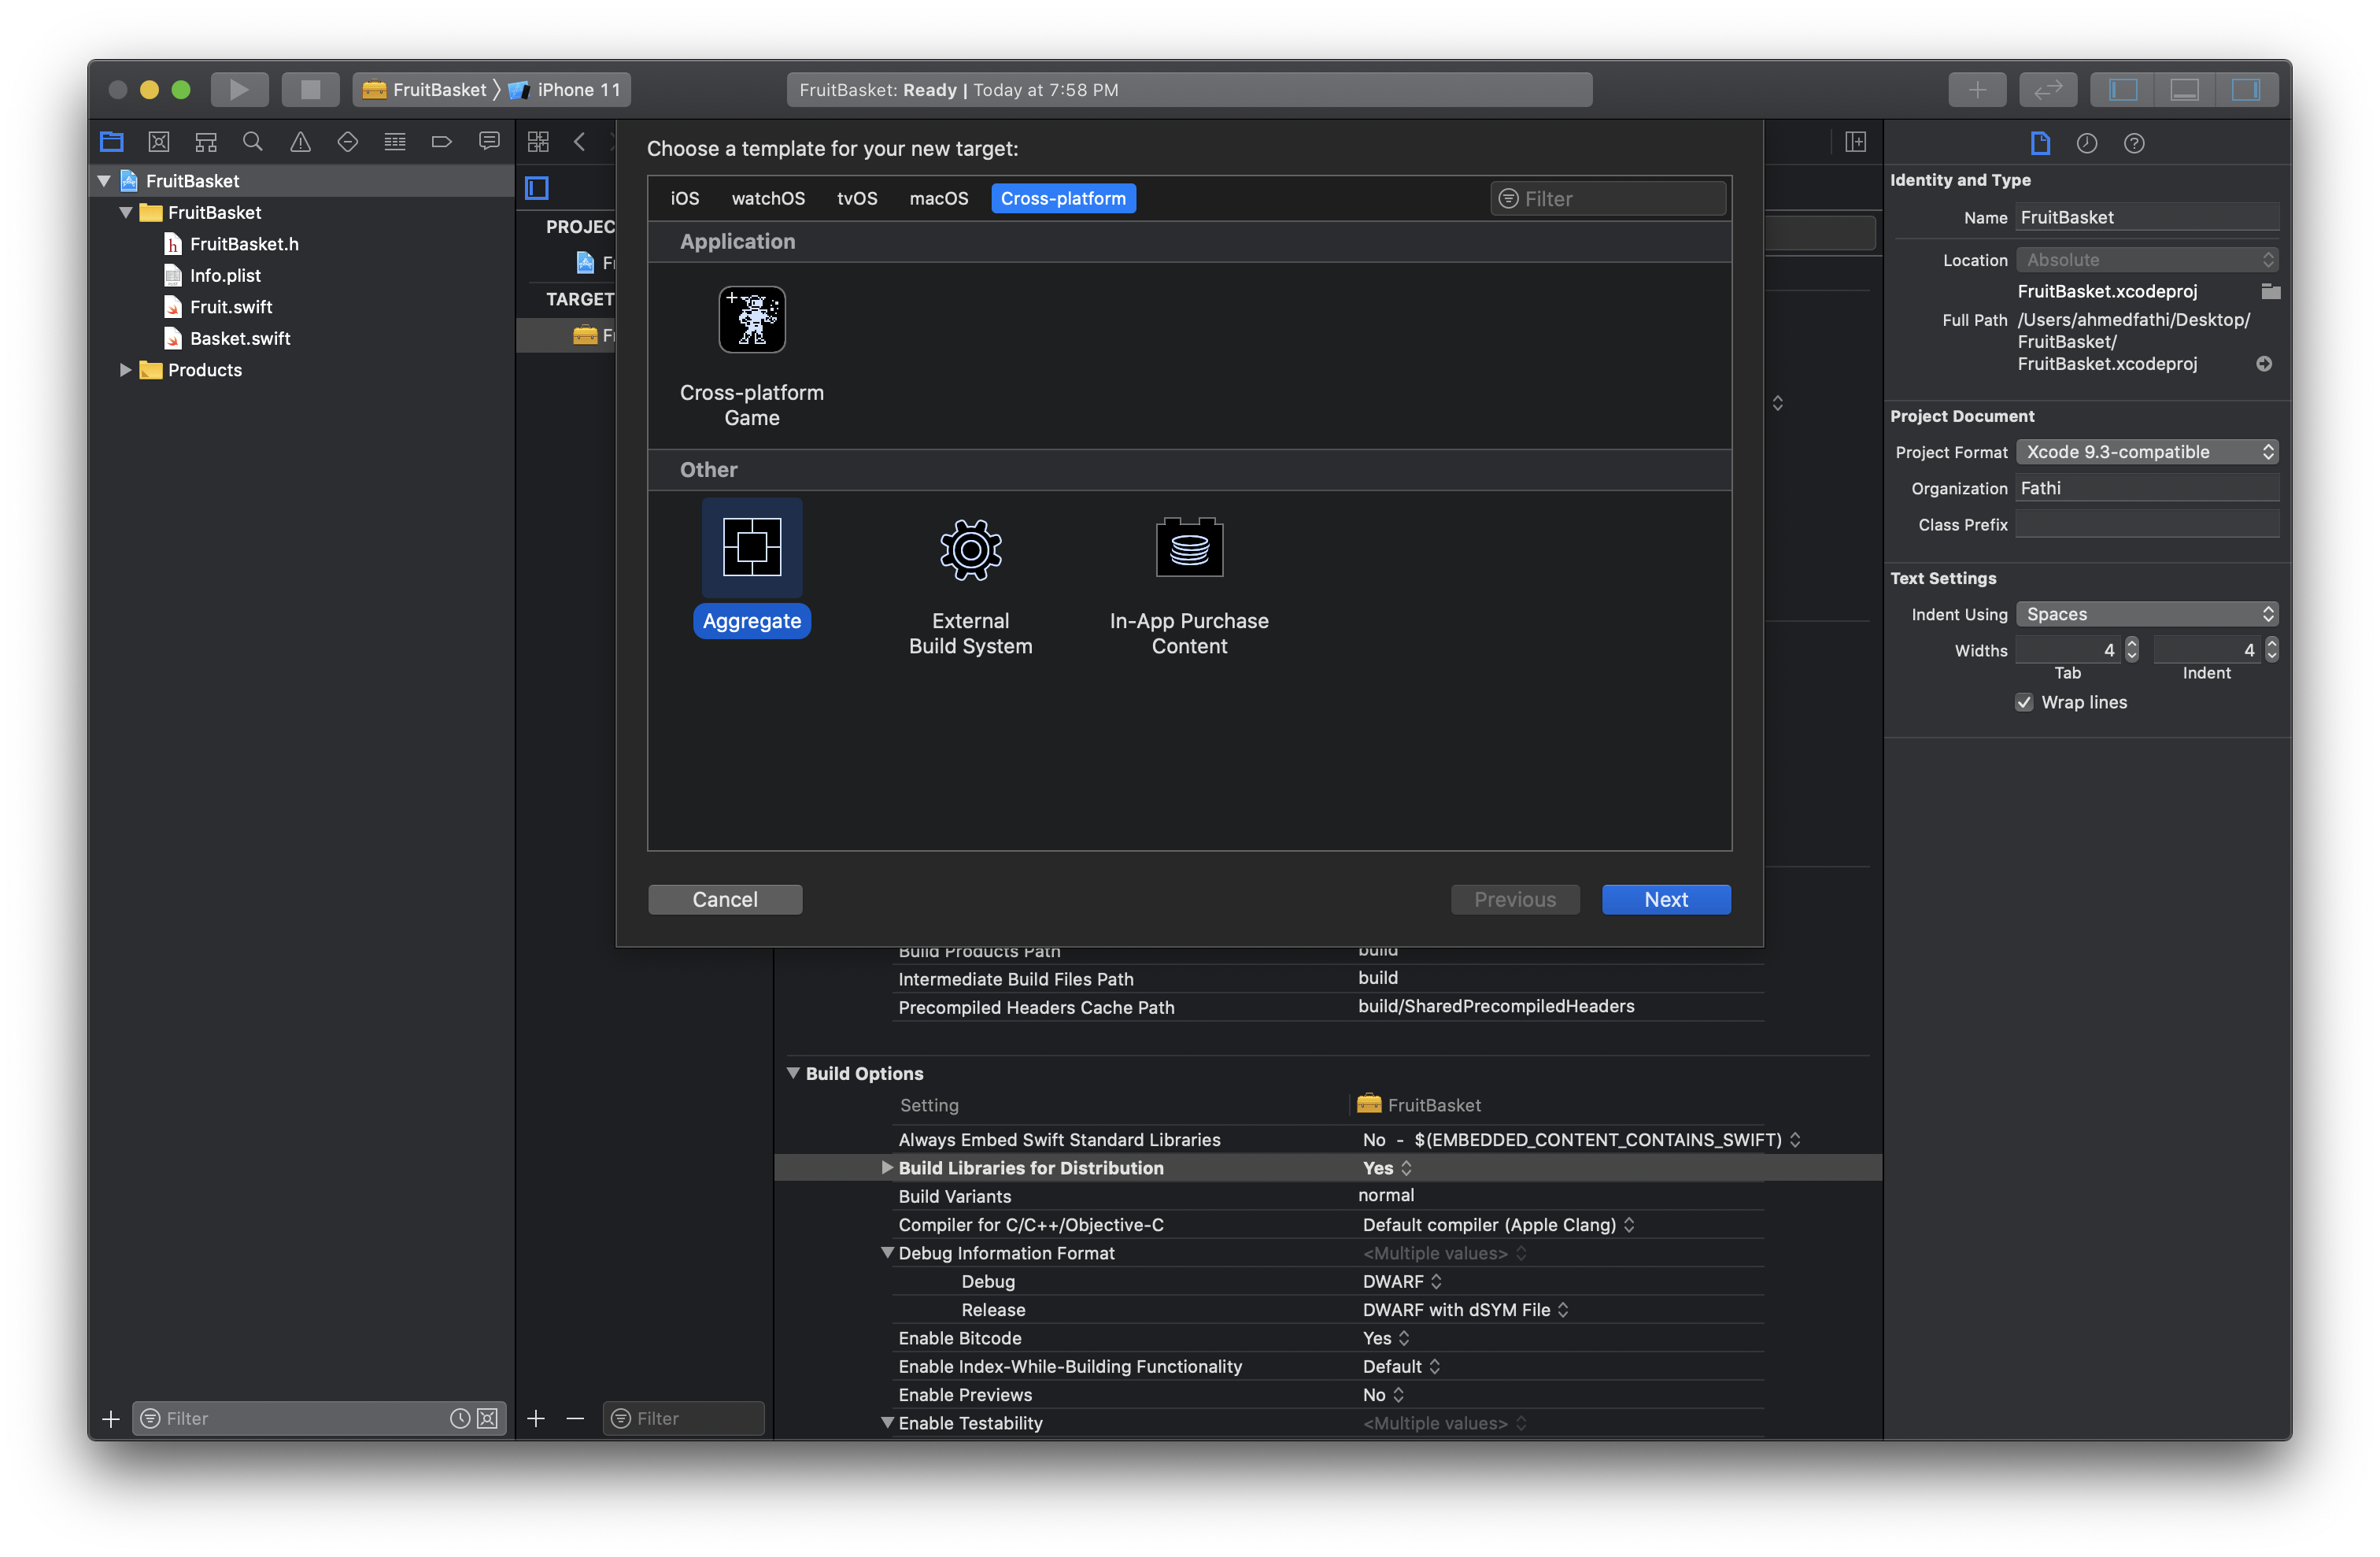
Choose Cross platform and then Aggregate.
选择“跨平台” ,然后选择“聚合” 。
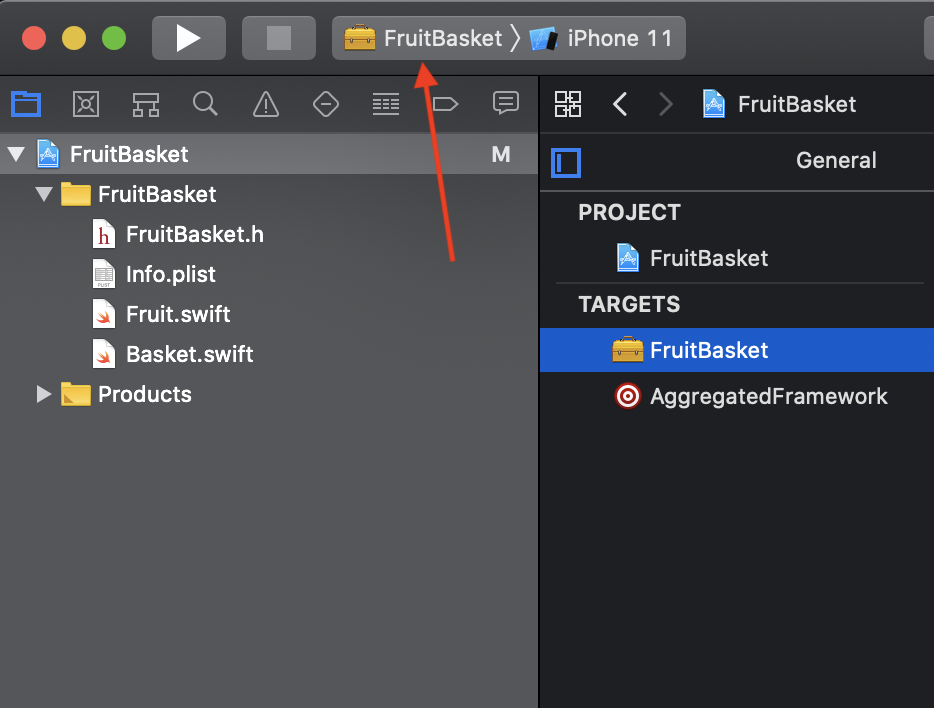
Choose the name you want, In my case I’ll name it AggregatedFramework
选择您想要的名称,在我的情况下,我将其命名为AggregatedFramework
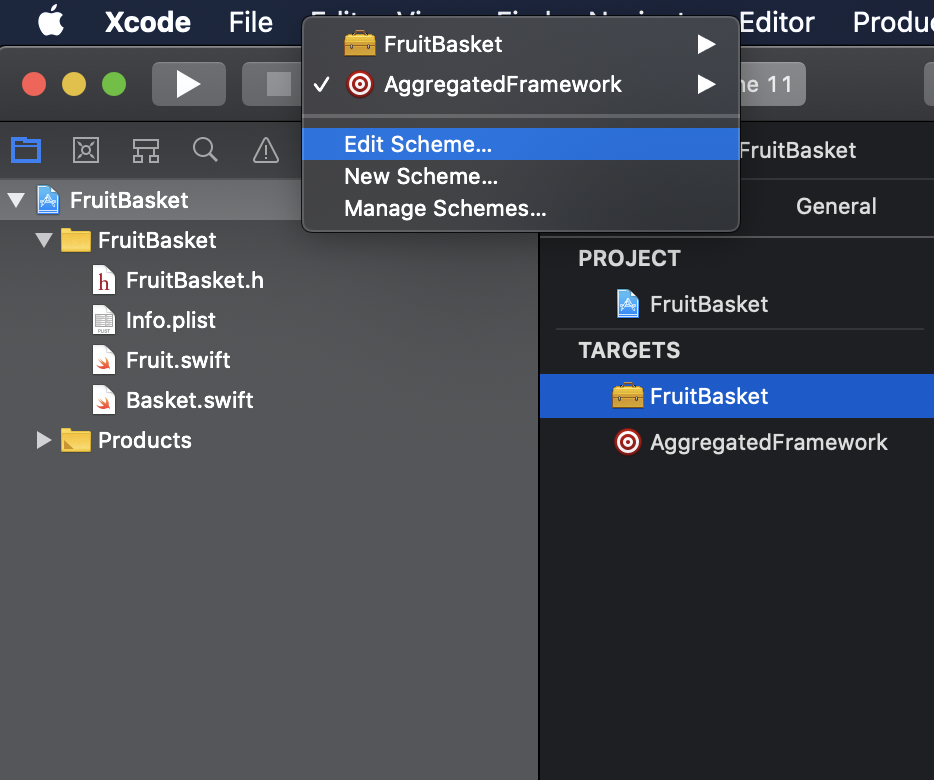
Change the scheme to AggregatedFramework Scheme.
将方案更改为AggregatedFramework Scheme。
Then click on Edit Scheme…
然后点击编辑方案...
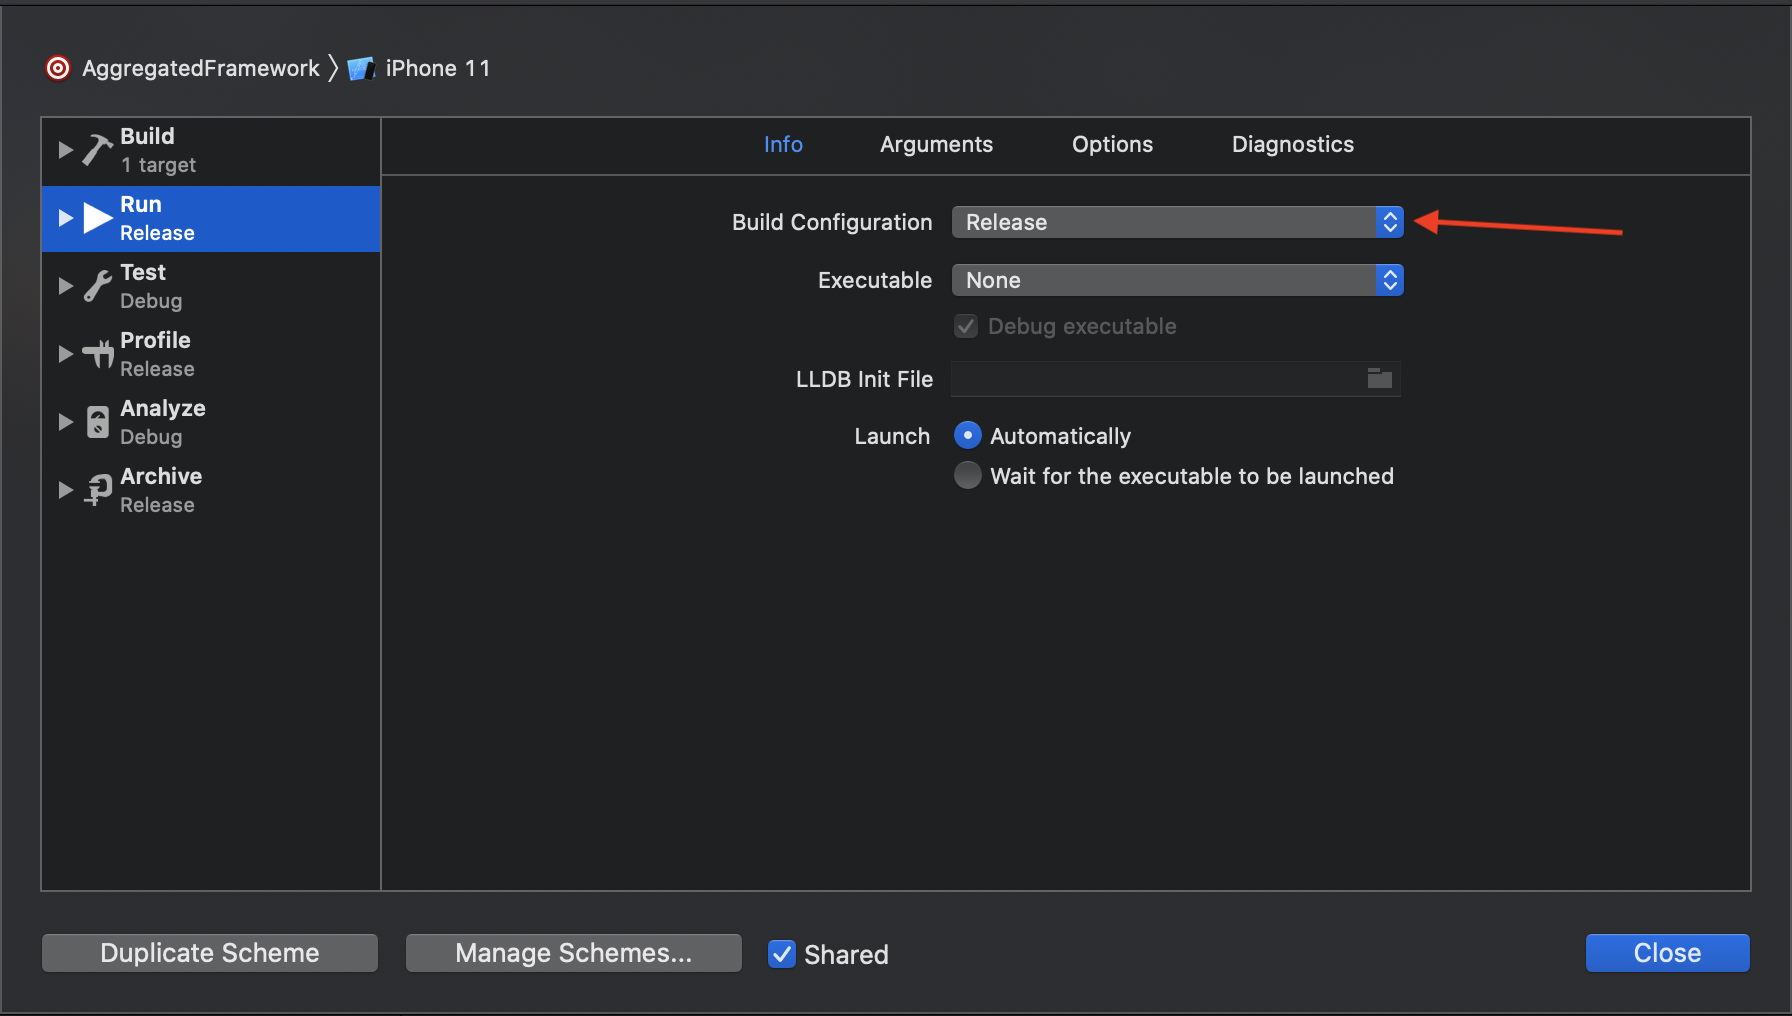
Choose Run tab from the left panel then change the build configuration to release.
从左侧面板中选择“运行”选项卡,然后将构建配置更改为发布。
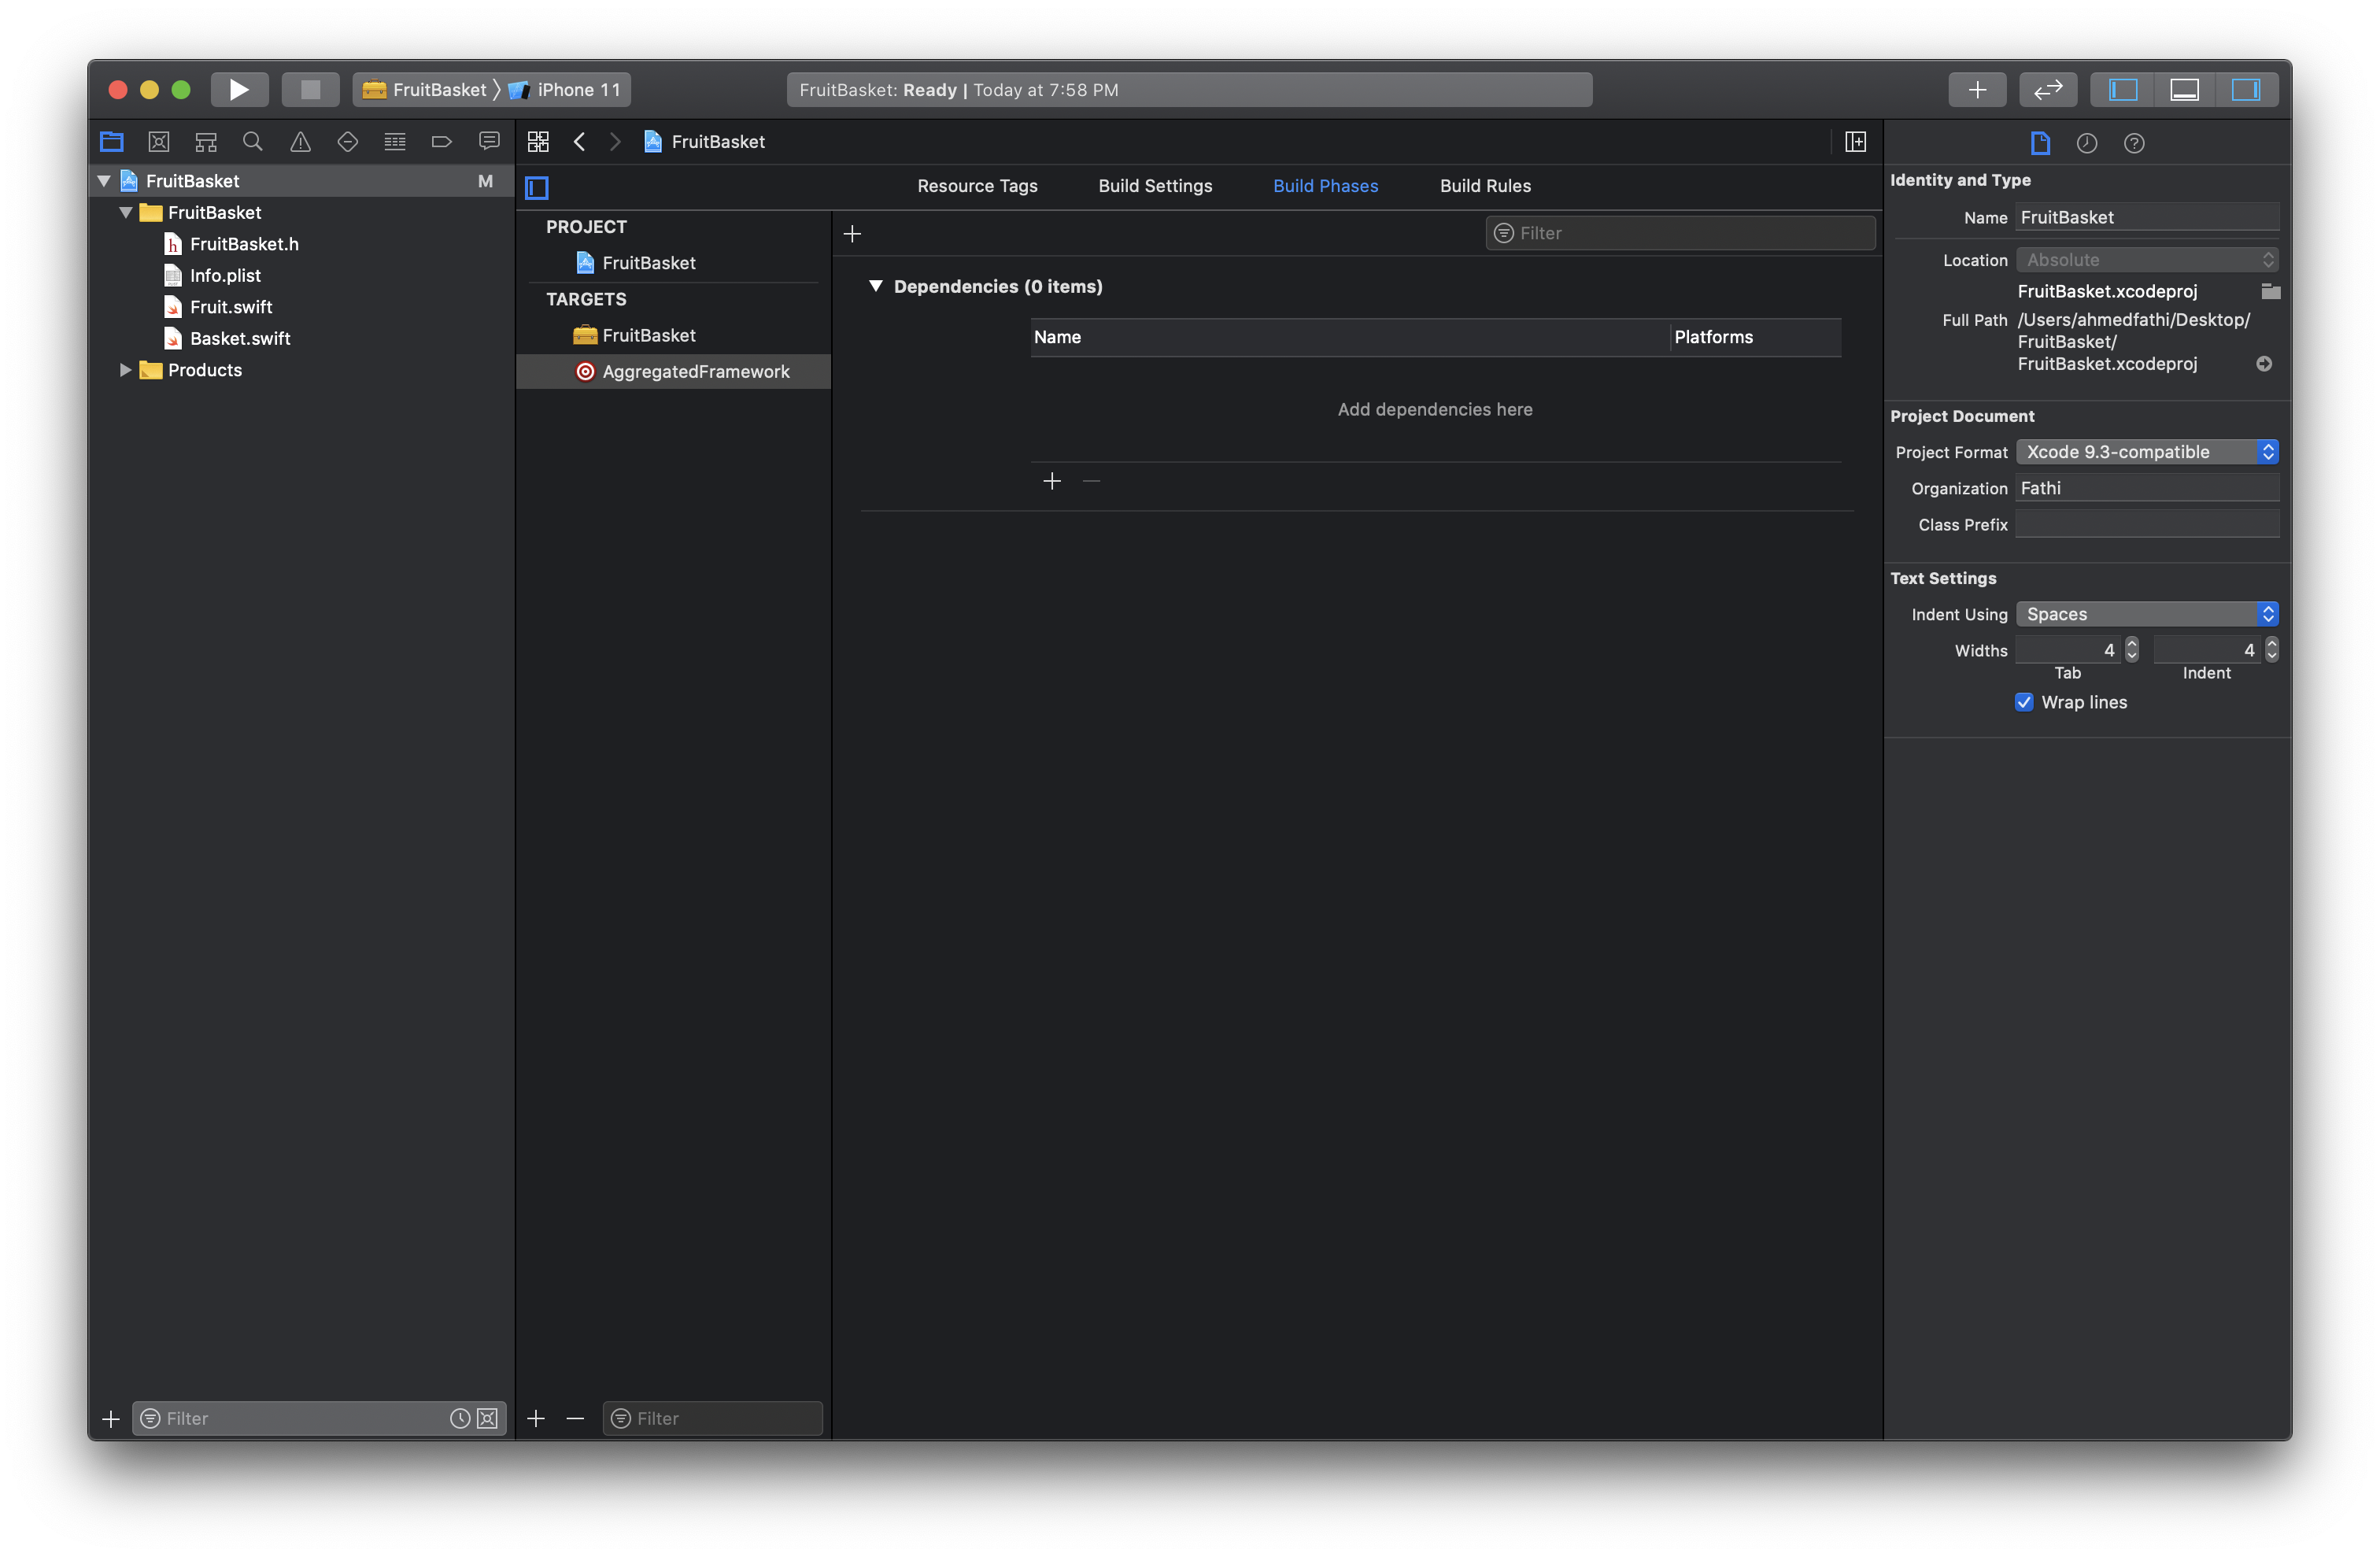
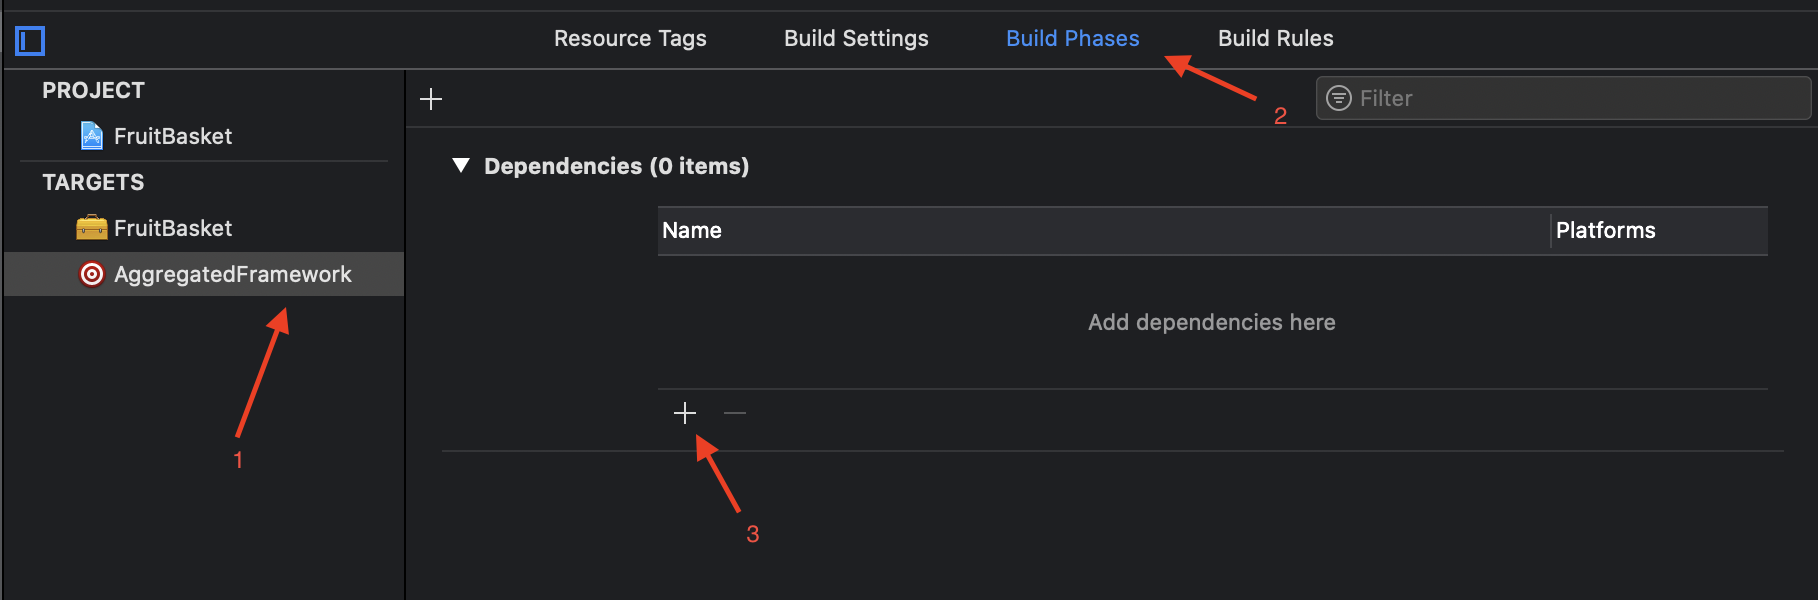
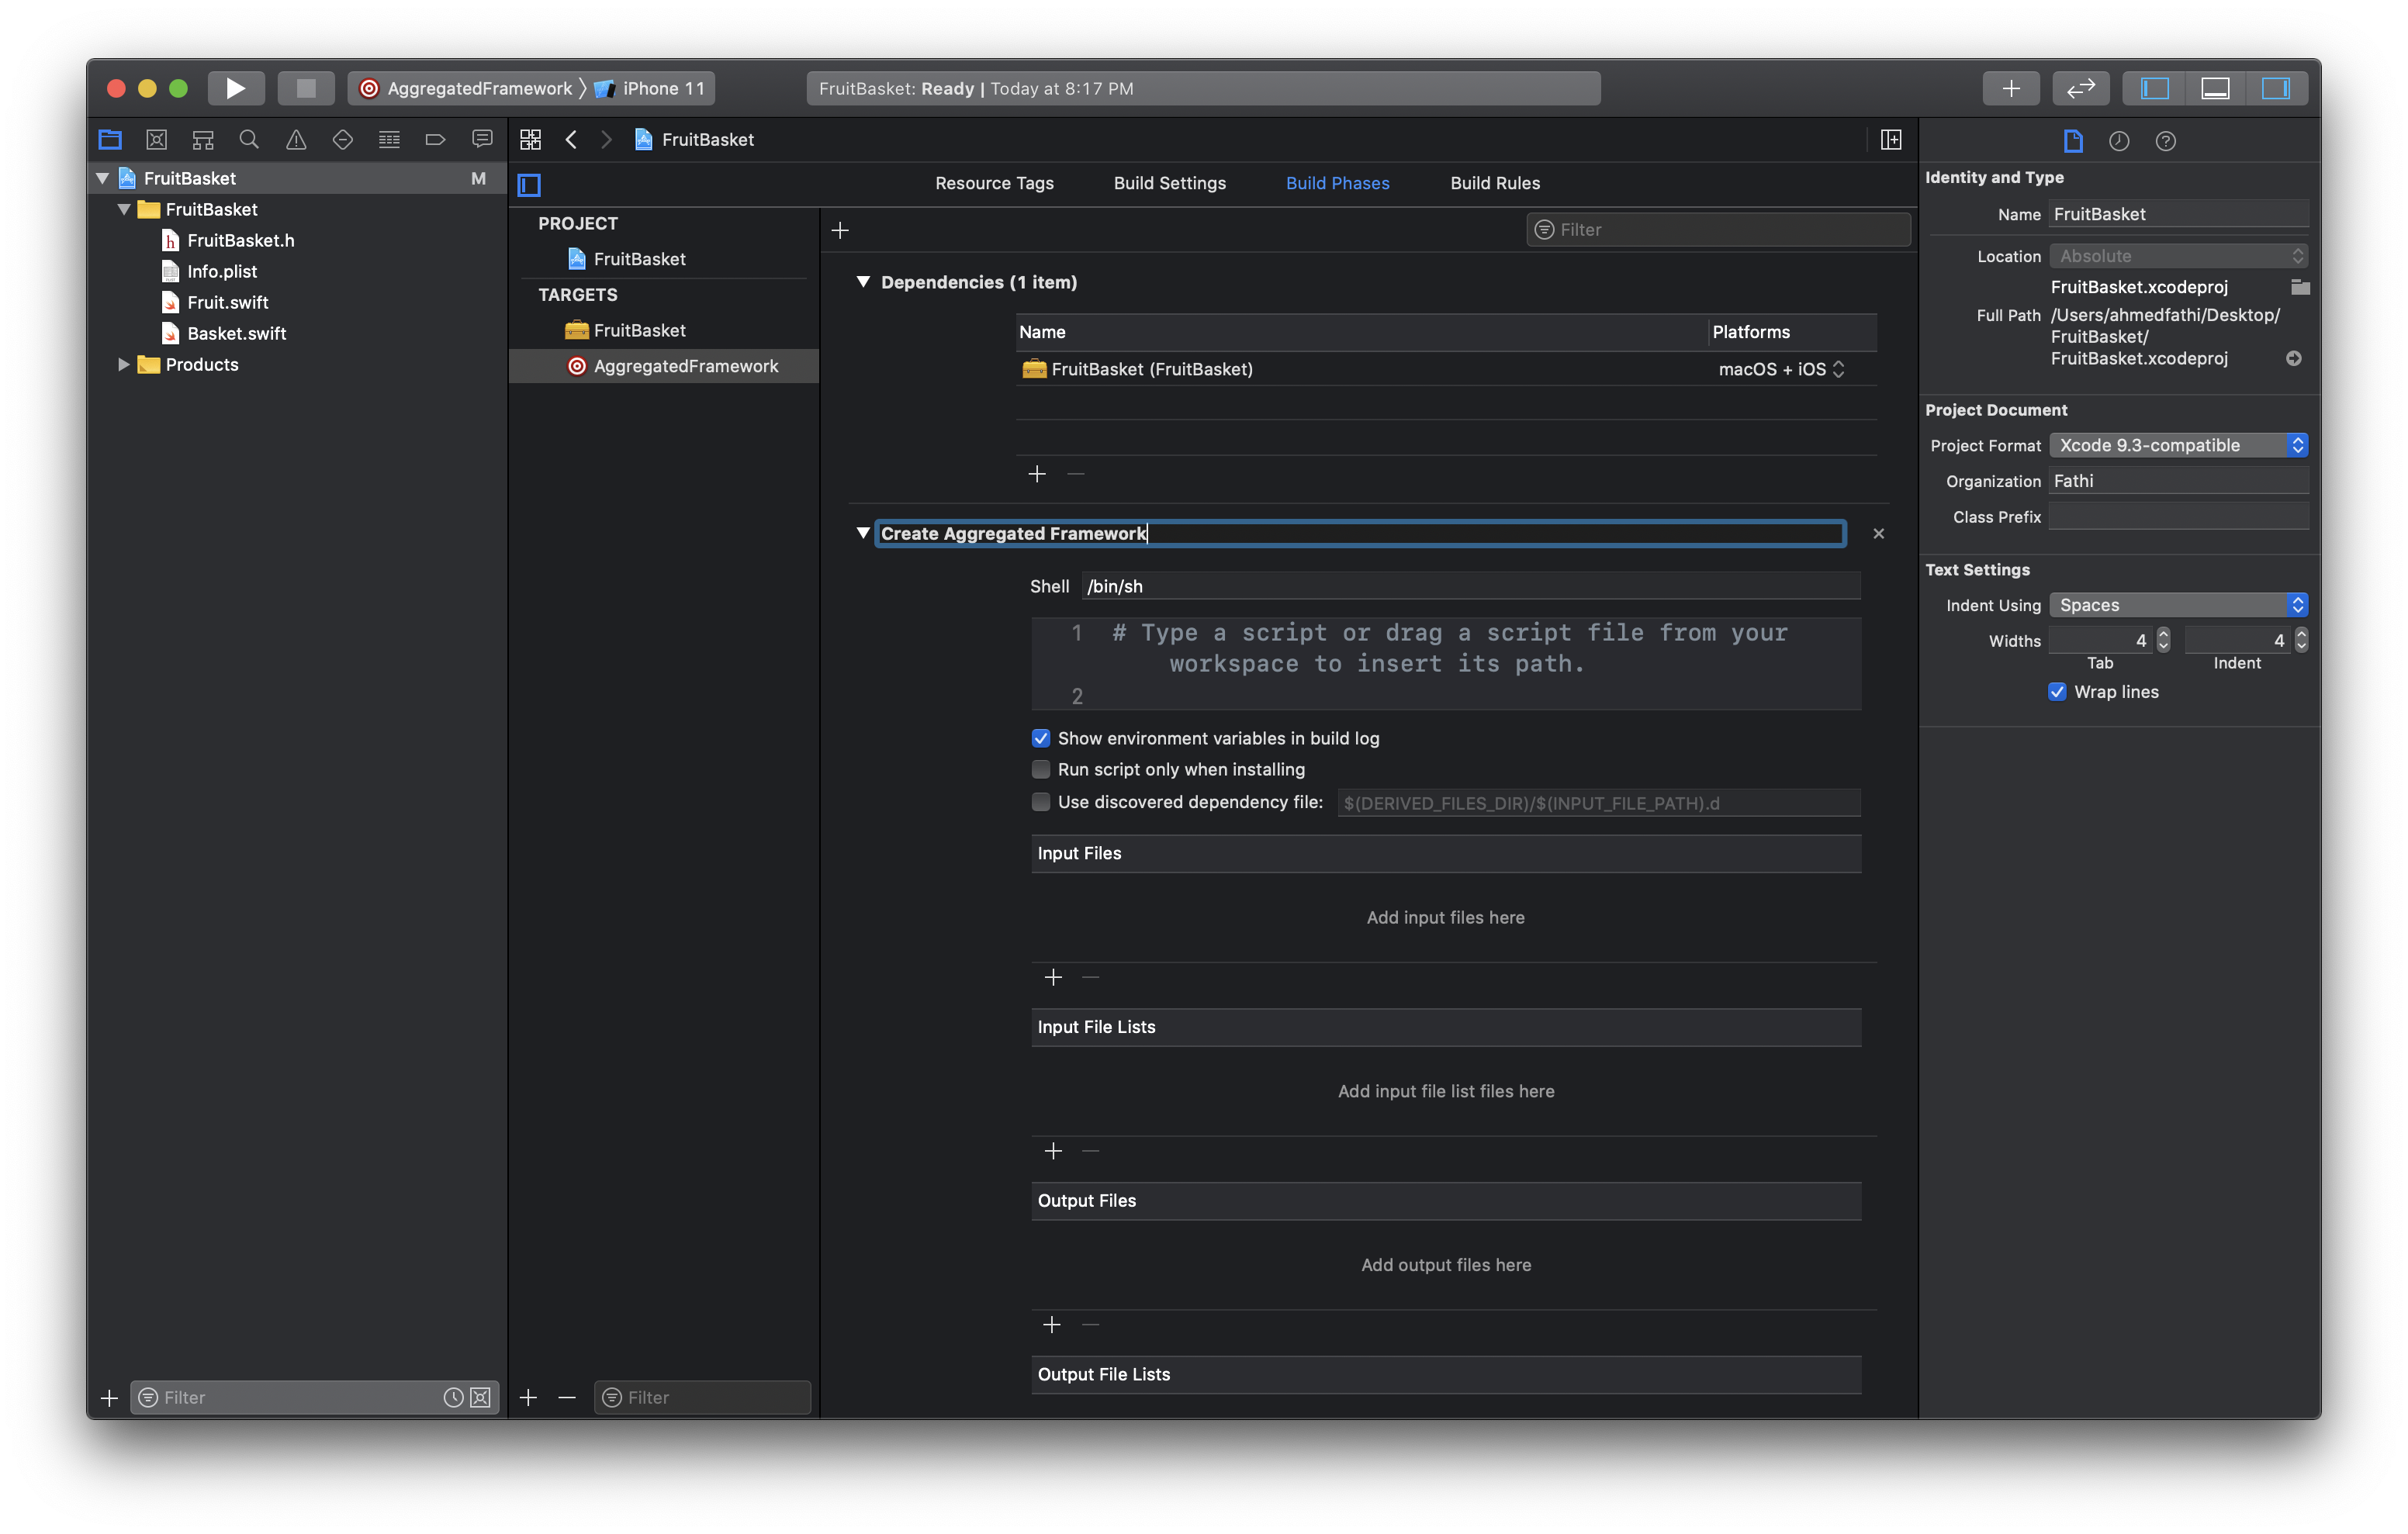
Go back and choose AggregatedFramework from the targets then choose Build Phases then click on the little + to add a dependency, and choose FruitBasket Framework Target.
返回并从目标中选择AggregatedFramework ,然后选择Build Phases,然后单击little +添加依赖项,然后选择FruitBasket Framework Target。
Then click on the other + above dependancies word to add a New Run Script Phase
然后单击上面的其他依赖项词以添加新的运行脚本阶段
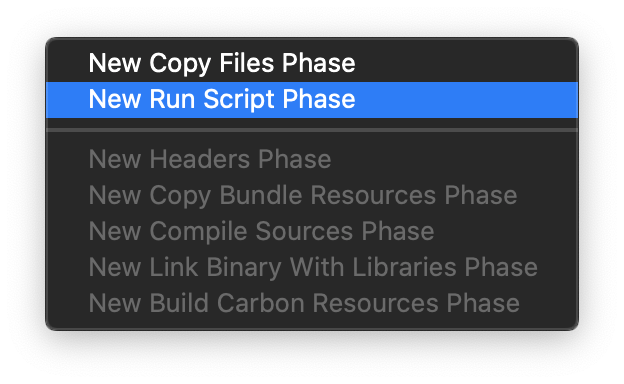
You can rename the script to what it will do, for example Create Aggregated Framework
您可以将脚本重命名为它将执行的操作,例如,创建聚合框架
Let’s start typing in the script area.I’ll start by creating some variable for the things that I’m going to use through out the script so it stays neat, clean, readable for others and easy to change later.
让我们开始在脚本区域输入内容,首先为将要在脚本中使用的东西创建一些变量,以使其保持整洁,干净,对其他人可读并在以后易于更改。
Start by creating the scheme and framework name variables as below
首先创建方案和框架名称变量,如下所示
SCHEME_NAME="FruitBasket"
FRAMEWORK_NAME="FruitBasket"
If you have multiple schemes in your project for iOS & macOS then create all those variables as you’re going to need them, for our case we one have one scheme.
如果您的项目中有多个针对iOS和macOS的方案,请在需要时创建所有这些变量,对于我们来说,我们有一个方案。
Then I’ll create some variables to hold the paths for the xcarchives and the output.
然后,我将创建一些变量来保存xcarchives和输出的路径。
SIMULATOR_ARCHIVE_PATH="${BUILD_DIR}/${CONFIGURATION}/${FRAMEWORK_NAME}-iphonesimulator.xcarchive"DEVICE_ARCHIVE_PATH="${BUILD_DIR}/${CONFIGURATION}/${FRAMEWORK_NAME}-iphoneos.xcarchive"OUTPUT_DIC="./xcframework/"Then I’ll add the xcodebuild command to generate the simulator xcarchive with the scheme name and path we created for the simulator archive
然后,我将添加xcodebuild命令以使用我们为模拟器档案创建的方案名称和路径来生成模拟器xcarchive
# Simulator xcarchieve
xcodebuild archive \
  -scheme ${SCHEME_NAME} \
  -archivePath ${SIMULATOR_ARCHIVE_PATH} \
  -sdk iphonesimulator \
  SKIP_INSTALL=NO
and the command to generate the iphoneos xcarchive for devices
以及用于为设备生成iphoneos xcarchive的命令
# Device xcarchieve
xcodebuild archive \
  -scheme ${SCHEME_NAME} \
  -archivePath ${DEVICE_ARCHIVE_PATH} \
  -sdk iphoneos \
  SKIP_INSTALL=NO
Time to generate the output but first we’ll clean the old output directory if exists
是时候生成输出了,但是首先我们将清理旧的输出目录(如果存在)
# Clean up old output directory
rm -rf "${OUTPUT_DIC}"# Create xcframwork combine of all frameworks
xcodebuild -create-xcframework \
  -framework ${SIMULATOR_ARCHIVE_PATH}/Products/Library/Frameworks/${FRAMEWORK_NAME}.framework \
  -framework ${DEVICE_ARCHIVE_PATH}/Products/Library/Frameworks/${FRAMEWORK_NAME}.framework \
  -output ${OUTPUT_DIC}/${FRAMEWORK_NAME}.xcframework
Full script
完整脚本
SCHEME_NAME="FruitBasket"
FRAMEWORK_NAME="FruitBasket"
SIMULATOR_ARCHIVE_PATH="${BUILD_DIR}/${CONFIGURATION}/${FRAMEWORK_NAME}-iphonesimulator.xcarchive"
DEVICE_ARCHIVE_PATH="${BUILD_DIR}/${CONFIGURATION}/${FRAMEWORK_NAME}-iphoneos.xcarchive"
OUTPUT_DIC="./xcframework/"
# Simulator xcarchieve
xcodebuild archive \
  -scheme ${SCHEME_NAME} \
  -archivePath ${SIMULATOR_ARCHIVE_PATH} \
  -sdk iphonesimulator \
  SKIP_INSTALL=NO
# Device xcarchieve
xcodebuild archive \
  -scheme ${SCHEME_NAME} \
  -archivePath ${DEVICE_ARCHIVE_PATH} \
  -sdk iphoneos \
  SKIP_INSTALL=NO
# Clean up old output directory
rm -rf "${OUTPUT_DIC}"
# Create xcframwork combine of all frameworks
xcodebuild -create-xcframework \
  -framework ${SIMULATOR_ARCHIVE_PATH}/Products/Library/Frameworks/${FRAMEWORK_NAME}.framework \
  -framework ${DEVICE_ARCHIVE_PATH}/Products/Library/Frameworks/${FRAMEWORK_NAME}.framework \
  -output ${OUTPUT_DIC}/${FRAMEWORK_NAME}.xcframework
Now that everything is set, make sure you still choose the AggregatedTarget and run you project.
既然一切都已设置好,请确保仍然选择AggregatedTarget并运行项目。
Once it builds successfully check your project directory, you should be able to see a new directory named xcframework which contains your framework and if you look inside you should see both simulator and iphone architectures are in there.
一旦成功构建,请检查项目目录,您应该能够看到一个名为xcframework的新目录,其中包含您的框架;如果您在内部查看,则应该会看到模拟器和iPhone架构。

如果您也有macOS目标... (In case you have macOS target also…)
In case you have macOS target also then you’ll adjust the script to be as follows
如果您也有macOS目标,则可以将脚本调整如下
IOS_SCHEME_NAME="YOUR_SCHEME_NAME_FOR_IOS"
MACOS_SCHEME_NAME="YOUR_SCHEME_NAME_FOR_MACOS"
FRAMEWORK_NAME="FruitBasket"SIMULATOR_ARCHIVE_PATH="${BUILD_DIR}/${CONFIGURATION}/${FRAMEWORK_NAME}-iphonesimulator.xcarchive"
DEVICE_ARCHIVE_PATH="${BUILD_DIR}/${CONFIGURATION}/${FRAMEWORK_NAME}-iphoneos.xcarchive"
MACOS_ARCHIVE_PATH="${BUILD_DIR}/${CONFIGURATION}/${FRAMEWORK_NAME}-macos.xcarchive"
OUTPUT_DIC="./xcframework/"# Simulator xcarchieve
xcodebuild archive \
  -scheme ${IOS_SCHEME_NAME} \
  -archivePath ${SIMULATOR_ARCHIVE_PATH} \
  -sdk iphonesimulator \
  SKIP_INSTALL=NO
# Device xcarchieve
xcodebuild archive \
  -scheme ${IOS_SCHEME_NAME} \
  -archivePath ${DEVICE_ARCHIVE_PATH} \
  -sdk iphoneos \
  SKIP_INSTALL=NO
# MacOS xcarchieve
xcodebuild archive \
  -scheme ${MACOS_SCHEME_NAME} \
  -archivePath ${MACOS_ARCHIVE_PATH} \
  SKIP_INSTALL=NO
# Clean up old output directory
rm -rf "${OUTPUT_DIC}"
# Create xcframwork combine of all frameworks
xcodebuild -create-xcframework \
  -framework ${SIMULATOR_ARCHIVE_PATH}/Products/Library/Frameworks/${FRAMEWORK_NAME}.framework \
  -framework ${DEVICE_ARCHIVE_PATH}/Products/Library/Frameworks/${FRAMEWORK_NAME}.framework \
  -framework ${MACOS_ARCHIVE_PATH}/Products/Library/Frameworks/${FRAMEWORK_NAME}.framework \
  -output ${OUTPUT_DIC}/${FRAMEWORK_NAME}.xcframework
Don’t forget to change the schemes names to match yours, then run your aggregated target and check the results.
不要忘记更改方案名称以匹配您的方案名称,然后运行汇总的目标并检查结果。
测试框架 (Testing the framework)
Create a new project from xcode, single view app is okay for testing.
从xcode创建一个新项目,单视图应用程序可以进行测试。

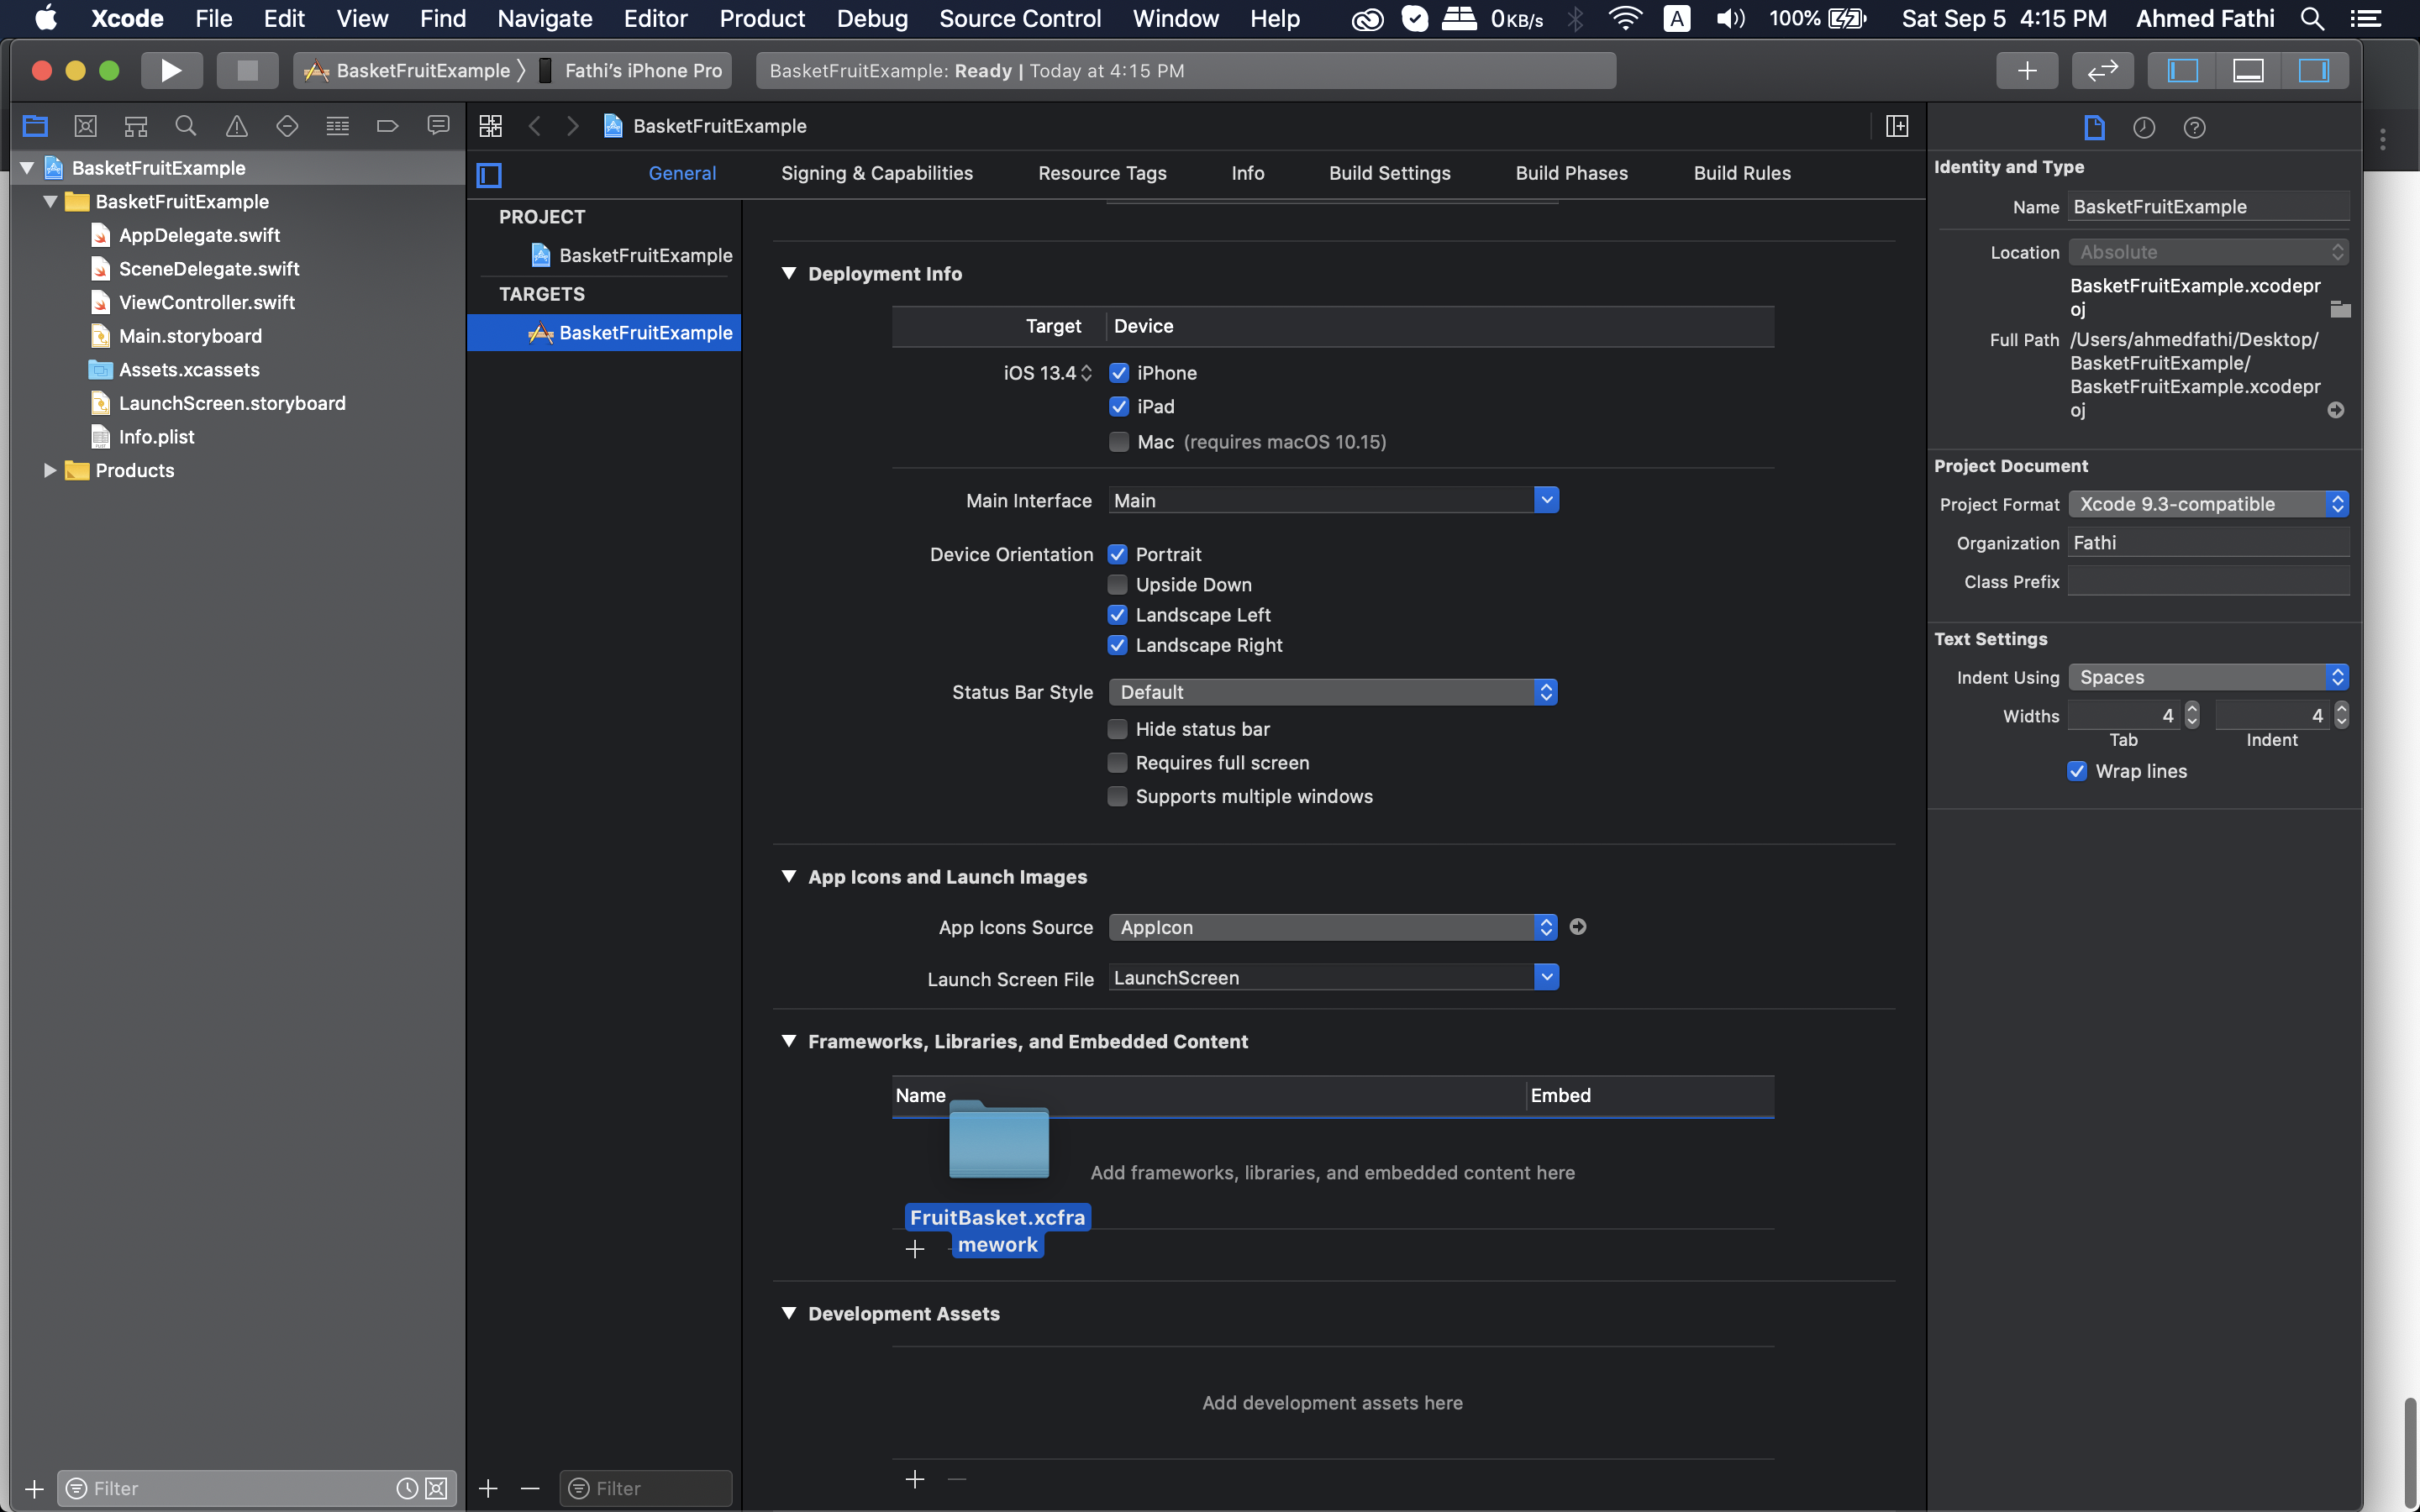
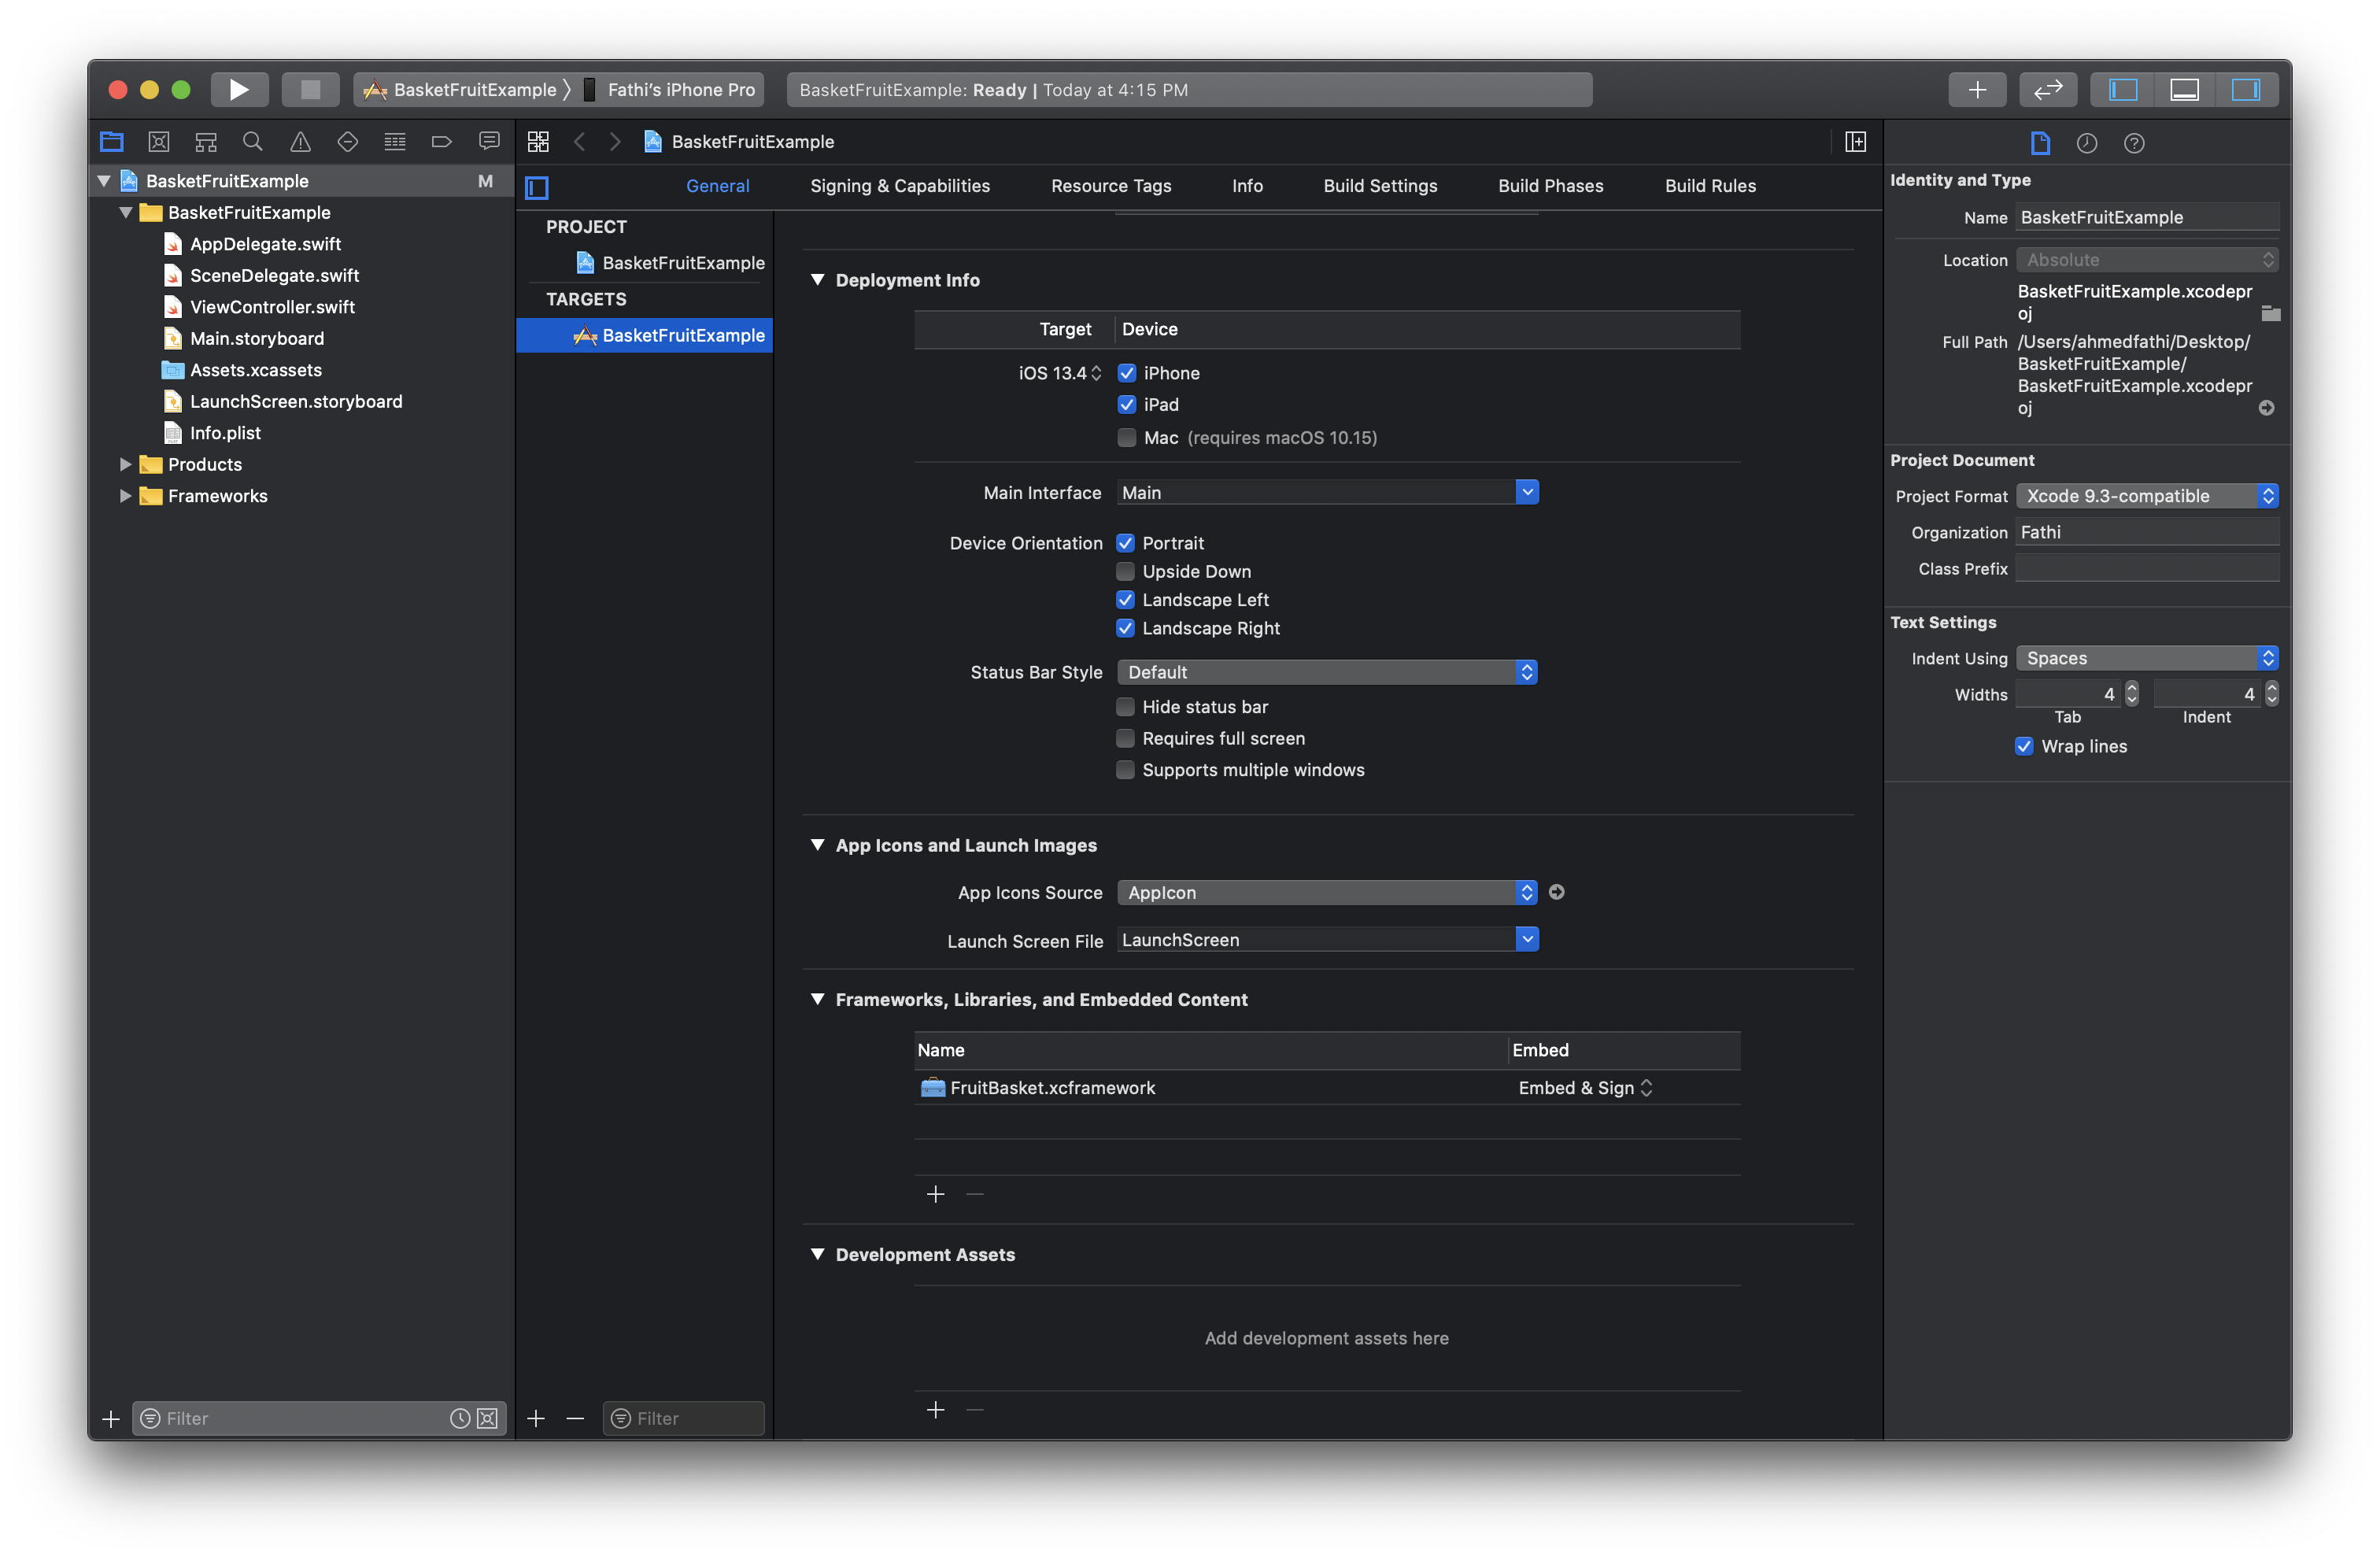
Add your xcframework file you have just created by dragging and dropping it in Framworks, Libraries, and Embedded Content
通过将您刚刚创建的xcframework文件拖放到Framworks,Libraries和Embedded Content中来添加它
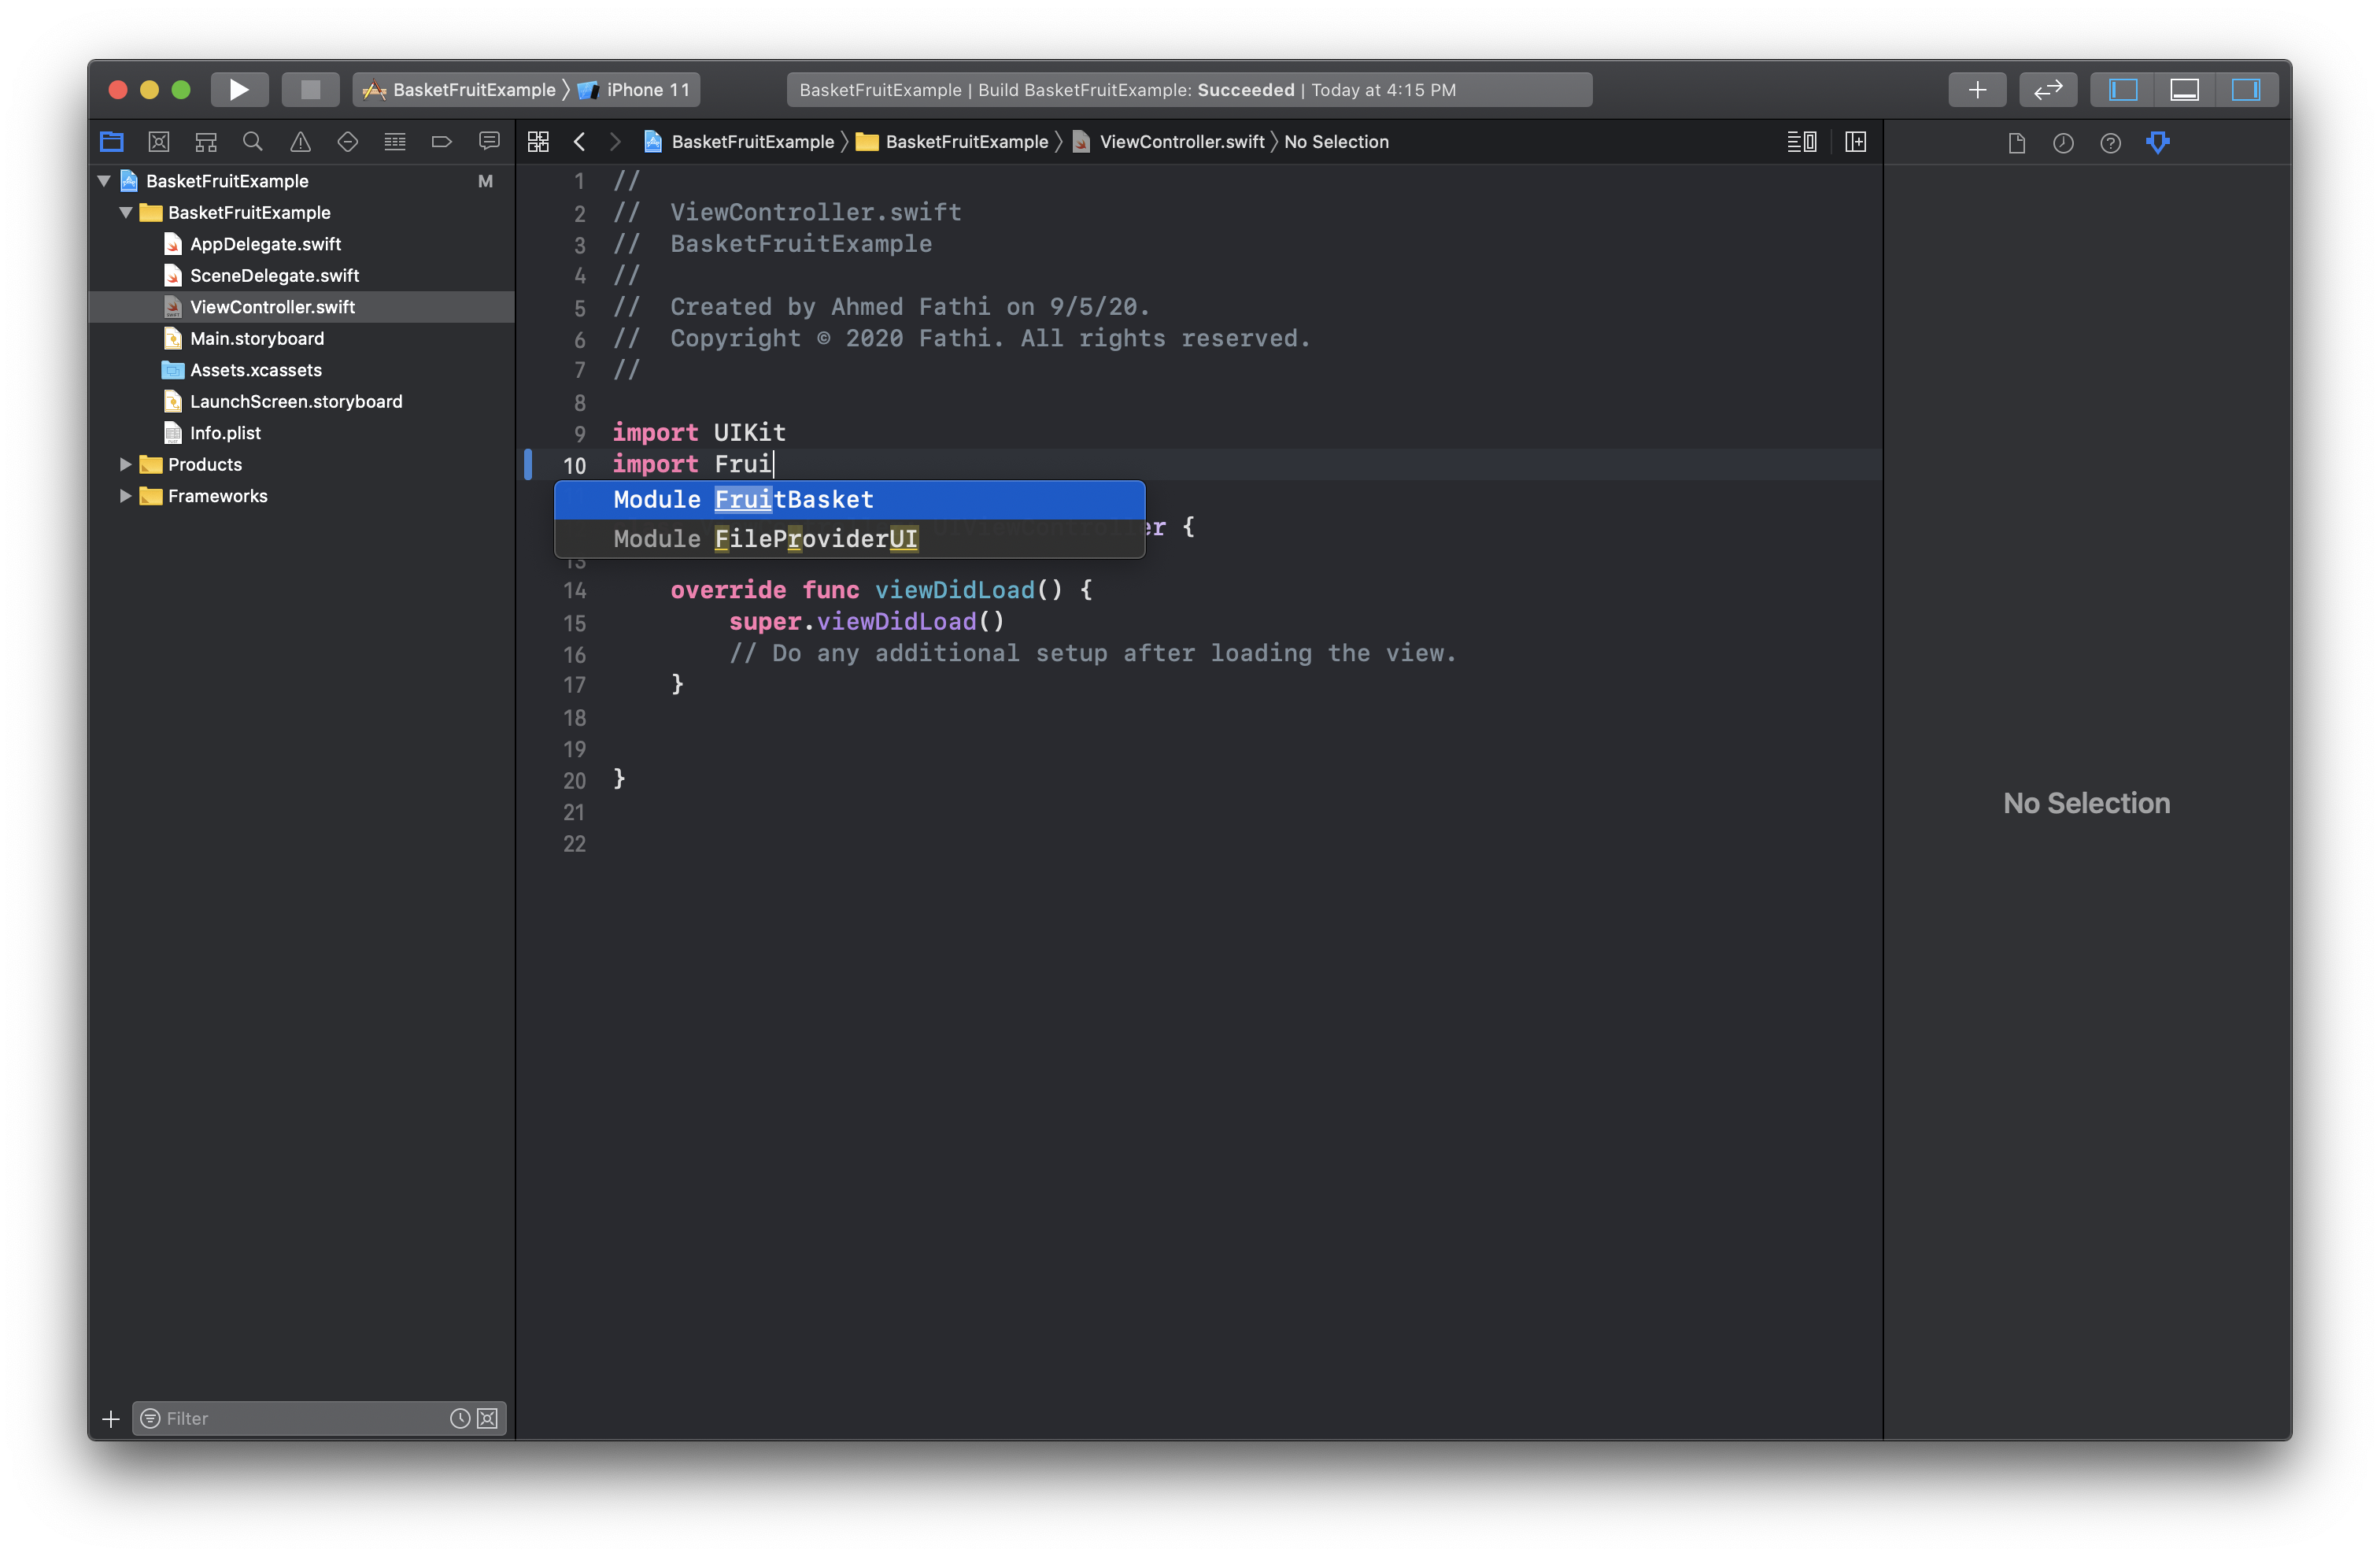
Now switch over to your view controller and import the framework and start testing it.
现在切换到您的视图控制器并导入框架并开始对其进行测试。
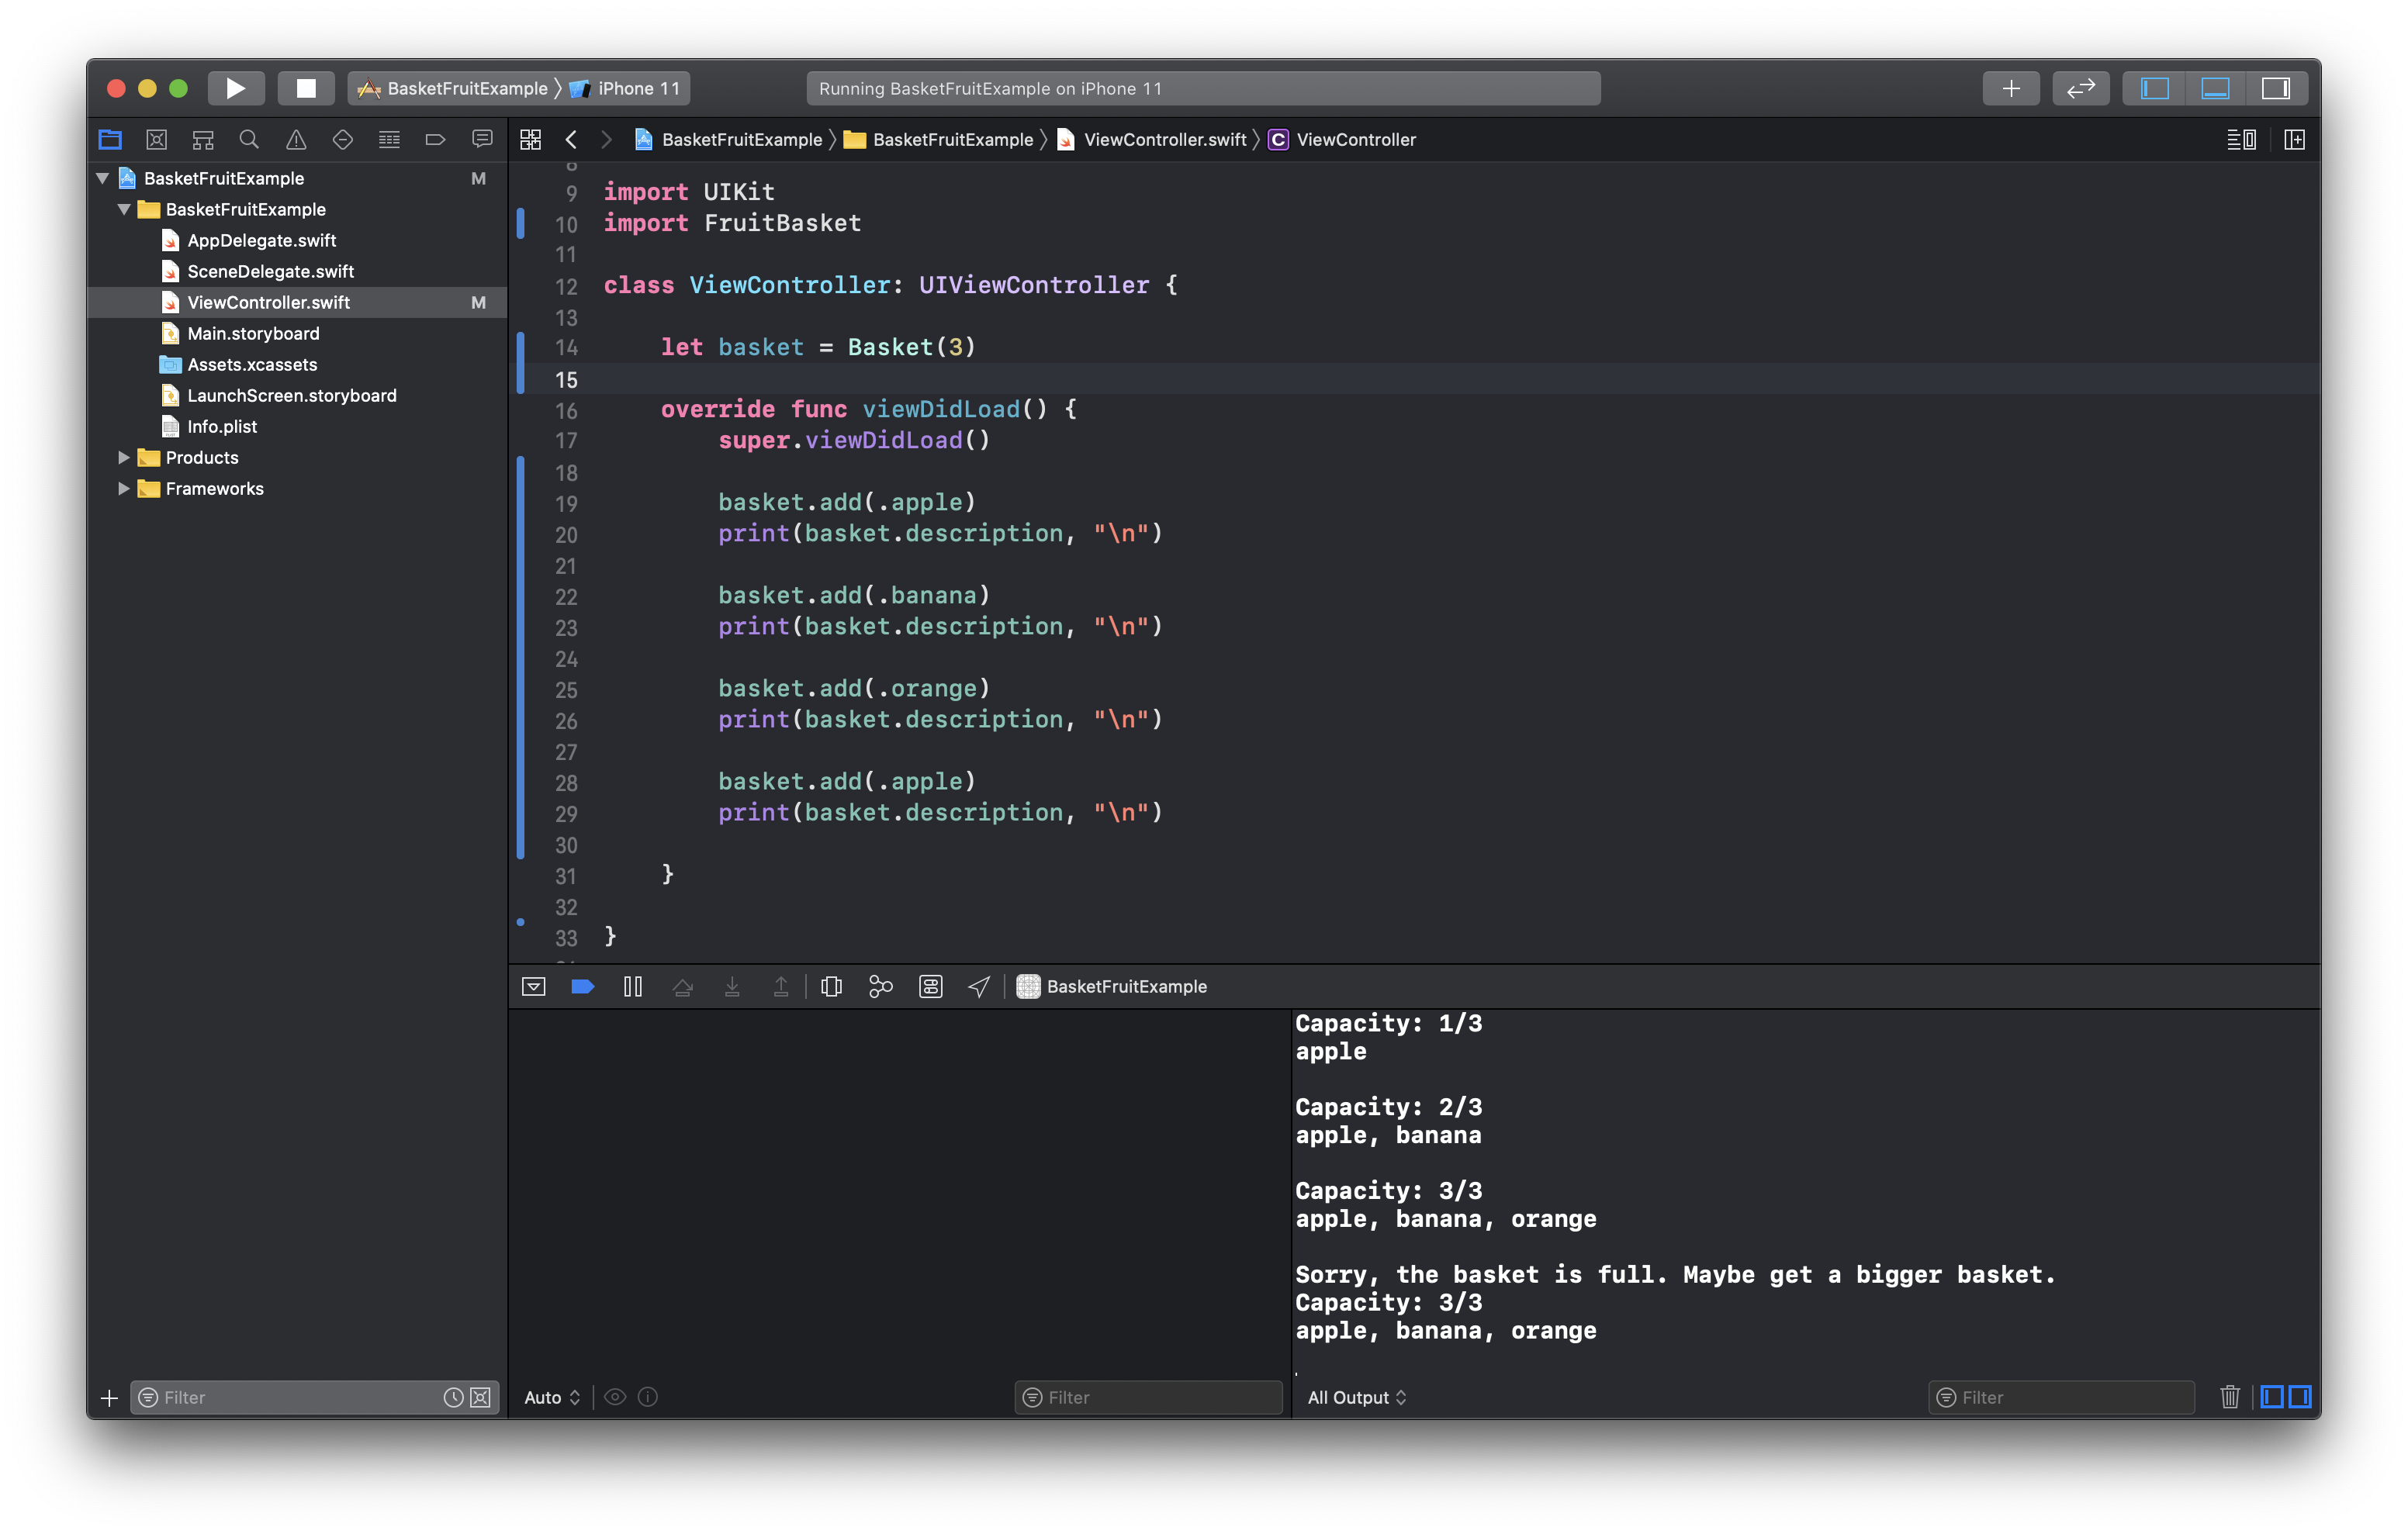
Run it on both simulator and real device and it should run and give you the same results.
在模拟器和真实设备上运行它,它应该运行并给您相同的结果。
Complete code are on this github repo and make sure you’re on aggregated-target branch.
完整的代码在此github存储库上,并确保您位于“聚合目标”分支上。
Thank you for taking the time.All you comments and ideas are welcomed.AhmedFathi680@gmail.comLinkedInGithub
感谢您抽出宝贵的时间,欢迎提出您的意见和想法。 AhmedFathi680@gmail.com LinkedIn Github上
翻译自: https://levelup.gitconnected.com/build-xcframework-using-aggregated-targets-in-xcode-cac4ceaf6cf0
xcode提交构建版本


 1918
1918

 被折叠的 条评论
为什么被折叠?
被折叠的 条评论
为什么被折叠?
 到【灌水乐园】发言


