


face++人脸检测论文
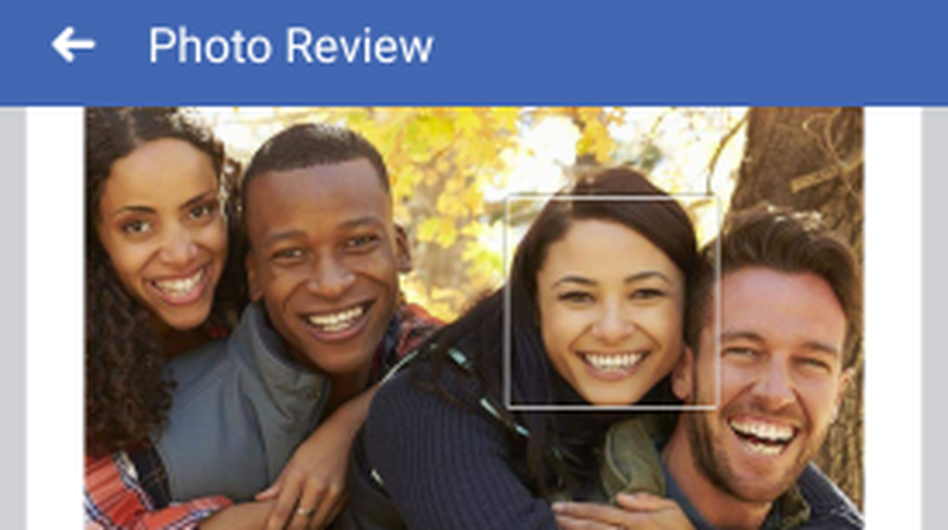
While using Facebook, have you ever wondered how the system is able to recognize and suggest people to tag in the pictures you upload without you giving them any information?
使用Facebook时,您是否想知道系统如何能够识别并建议人们在您上传的图片中添加标签,而无需您提供任何信息?
I remember the good old days where Facebook used to make you click in the image, tag everyone in the picture . Nowadays, Facebook already does the job for you, all you need to do is confirm the name of the person and the picture can be uploaded.
我记得过去的美好时光,Facebook曾经使您单击图像,在图像中标记所有人。 如今,Facebook已经为您完成工作,您需要做的就是确认此人的姓名,然后可以上传图片。
Facial detection, it’s a way of identifying a human face and digital images or videos. Numerous companies have used this technology for security, social media, law-enforcement, entertainment and other fields that we interact with on daily basis. When it comes to facial detection, there’s many ways of doing it, we’re going to use face API JS library built on tensor flow to set up the face detection.
面部检测是一种识别人脸和数字图像或视频的方法。 众多公司已将此技术用于安全,社交媒体,执法,娱乐和我们日常互动的其他领域。 当涉及到面部检测时,有很多方法可以使用,我们将使用基于张量流构建的面部API JS库来设置面部检测。
Prerequisites
先决条件
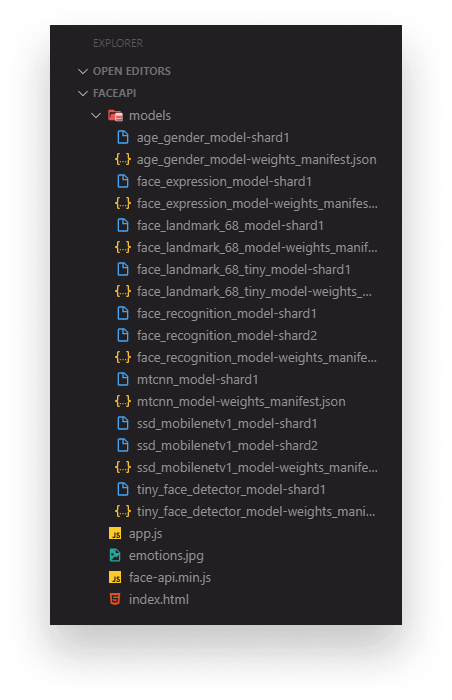
The very first thing we need to do is include the models that will be used for recognition. Create a models folder and download the models from https://github.com/WebDevSimplified/Face-Detection-JavaScript/tree/master/models
我们需要做的第一件事就是包含将用于识别的模型。 创建models文件夹,然后从https://github.com/WebDevSimplified/Face-Detection-JavaScript/tree/master/models下载模型
To get started, we need to create an HTML file, where we are going to use a video tag and we want to style it however we want. For this purpose, I want to do the width of 720 and a height of 650, make sure we set the height and the width and the tag, the face will not be able to be scan properly if we don’t assign any values to the width and height , and we don’t need the audio so we will make sure that its muted because we don’t need it for the facial detection. We will use the ID video so it’s available in the script.
首先,我们需要创建一个HTML文件,在该文件中我们将使用视频标签,并根据需要设置样式。 为此,我要设置720的宽度和650的高度,请确保我们设置了高度,宽度和标签,如果我们不将任何值分配给,则将无法正确扫描人脸width和height,并且我们不需要音频,因此可以确保将其静音,因为我们不需要面部检测。 我们将使用ID视频,以便在脚本中使用该视频。
<!DOCTYPE html>
<html lang="en">
  <head>
    <meta charset="UTF-8" />
    <meta name="viewport" content="width=device-width, initial-scale=1.0" />
    <meta http-equiv="X-UA-Compatible" content="ie=edge" />
    <title>Face Detection</title>
    <script defer src="face-api.min.js"></script>
    <script defer src="script.js"></script>
    <link rel="stylesheet" href="/style.css" />
    <style></style>
  </head>
  <body>
    <video id="video" width="720" height="560" autoplay muted></video>
  </body>
</html>
The next thing we want to do next is do some styling and this is going to make sure that our video is centered in the page.
接下来要做的是做一些样式设置,这将确保我们的视频在页面中居中。
<!DOCTYPE html>
<html lang="en">
  <head>
    <meta charset="UTF-8" />
    <meta name="viewport" content="width=device-width, initial-scale=1.0" />
    <meta http-equiv="X-UA-Compatible" content="ie=edge" />
    <title>Face Detection</title>
    <script defer src="face-api.min.js"></script>
    <script defer src="script.js"></script>
    <link rel="stylesheet" href="/style.css" />
    <style>
      body {
        margin: 0;
        padding: 0;
        width: 100vw;
        height: 100vh;
        display: flex;
        justify-content: center;
        align-items: center;
      }


      canvas {
        position: absolute;
      }
    </style>
  </head>
  <body>
    <video id="video" width="720" height="560" autoplay muted></video>
  </body>
</html>
In order for us to have the camera working , first we need to grab the video element in our script file. Then we’re going to create a function which we’re gonna call star video, that function will connect the video from a WebCam to our program. In order to get the Webcam running, we need to use navigator.getUserMedia() which is going to take an object as a parameter {video: {} }, the second parameter is a method which is the source of the video (stream) => (video.srcObject = stream), we will also include an error function in case we receive an error (err) => console.error(err), make sure to invoke startVideo () and have your script file in the HTML file. Once those steps are done, you can copy the path of your file or in Vs Code there is a go live feature. Once you open your localhost, you should be able to see yourself in the camera.
为了使摄像机正常工作,首先我们需要在脚本文件中获取视频元素。 然后,我们将创建一个称为星空视频的功能,该功能会将视频从WebCam连接到我们的程序。 为了使网络摄像头正常运行,我们需要使用navigator.getUserMedia() ,它将对象作为参数{video:{}} ,第二个参数是一个方法,该方法是视频(流)的源=>(video.srcObject = stream) ,如果我们收到错误(err)=> console.error(err ) ,我们还将包括一个错误函数,请确保调用startVideo()并将脚本文件包含在HTML中文件。 完成这些步骤后,您可以复制文件的路径,或者在“ Vs代码”中具有上线功能。 打开本地主机后,您应该可以在相机中看到自己。
const video = document.getElementById("video");


function startVideo() {
  navigator.getUserMedia(
    { video: {} },
    (stream) => (video.srcObject = stream),
    (err) => console.error(err)
  );
}
startVideo()
For this next step, we will go to a script file and we want to load all the face recognition models. Since all the models are asynchronous, we want to use Promise.all which is going to run all these asynchronous calls that will make this faster to execute.. We will pass an array with all promises from the models folder, then we want to call out the startVideo function.
对于下一步,我们将转到脚本文件,并希望加载所有面部识别模型。 由于所有模型都是异步的,因此我们要使用Promise.all,它将运行所有这些异步调用,这将使执行速度更快。.我们将传递一个包含所有来自模型文件夹的promise的数组,然后我们要调用退出startVideo功能。
const video = document.getElementById("video");
Promise.all([
  faceapi.nets.tinyFaceDetector.loadFromUri("/models"),
  faceapi.nets.faceLandmark68Net.loadFromUri("/models"),
  faceapi.nets.faceRecognitionNet.loadFromUri("/models"),
  faceapi.nets.faceExpressionNet.loadFromUri("/models"),
]).then(startVideo);


function startVideo() {
  navigator.getUserMedia(
    { video: {} },
    (stream) => (video.srcObject = stream),
    (err) => console.error(err)
  );
}
Now we’re going to do is set an event listener for when the video play, this event is going to take a function for the video to recognize your face. In order for the camera to recognize his face, first we want to set an interval so we can run the code multiple times inside our event listener, we are going to run this function every 100 milliseconds. We want to make sure it’s an asynchronous function because this is an asynchronous library. Now we want to get the detections, so we want to await the face API and then pass the video elements and the type of library we are going to use to detect the faces then we will use (.withFaceLandmarks) which will draw the different session on the face with dots. If we want to see our emotions, we can call (.withFaceExpressions), this would return whatever emotion you are displaying while the video is playing on your computer, with this it will detect all the faces in the webcam (it works for more than 3 people in the webcam). Now we need a canvas to be on top of the video from a camera, so we can create a canvas from the video we are receiving with (faceapi.createCanvasFromMedia(video)) and to add that canvas to the screen all we need to do is append it using document.body.append(canvas).
现在,我们要做的是为视频播放时设置一个事件侦听器,该事件将使用视频的功能来识别您的脸部。 为了使相机识别他的脸,首先我们要设置一个间隔,以便我们可以在事件监听器中多次运行代码,我们将每100毫秒运行一次此功能。 我们想确保它是一个异步函数,因为这是一个异步库。 现在我们要进行检测,因此我们要等待人脸API,然后传递视频元素和将用于检测人脸的库的类型,然后使用(.withFaceLandmarks)绘制不同的会话带点的脸上。 如果我们想看到自己的情绪,可以调用(.withFaceExpressions) ,它将返回您在计算机上播放视频时所显示的任何情绪,从而可以检测网络摄像头中的所有面Kong(网络摄像头中有3个人)。 现在我们需要一个画布放在摄像机视频的顶部,因此我们可以根据接收到的视频创建一个画布(faceapi.createCanvasFromMedia(video)) ,并将该画布添加到屏幕上,我们需要做的所有事情使用document.body.append(canvas)追加它。
We want our canvas to be perfectly sized with our video, so we are going to create a variable (displaySize) that contains an object with two keys which are the width: video.width and height: video.height. Inside the setInterval, we are going to create a resized detection variable and set it equals to the (faceapi.resizeResults(detections, displaySize)) that it’s going to adjust the box to the size of our faces and the camera size as well.
我们希望我们的画布与视频大小完美匹配,因此我们将创建一个变量(displaySize) ,该变量包含一个对象,该对象具有两个键,即宽度:video.width和height:video.height。 在setInterval内,我们将创建一个调整大小的检测变量,并将其设置为等于(faceapi.resizeResults(detections,displaySize)) ,以便将框调整为我们的脸部大小和相机大小。
In order for us to have a clear video and not have the canvas to be in front of the video the entire time, we want to do is canvas.getContext(“2d”).clearRect(0, 0, canvas.width, canvas.height) this will clear everything for us. An important detail is that we always want to match the canvas to its display size and we can do that with faceapi.matchDimensions(canvas, displaySize). Lastly, all we want to do is draw the face detections, the landmarks and the facial expression.
为了使我们拥有清晰的视频,而不是让画布始终处于视频的前面,我们要做的是canvas.getContext(“ 2d”)。clearRect(0,0,canvas.width,canvas .height),这将为我们清除所有内容。 一个重要的细节是,我们始终希望将画布与其显示尺寸匹配,我们可以使用faceapi.matchDimensions(canvas,displaySize)来做到这一点。 最后,我们要做的就是绘制面部检测,地标和面部表情。
const video = document.getElementById("video");
Promise.all([
  faceapi.nets.tinyFaceDetector.loadFromUri("/models"),
  faceapi.nets.faceLandmark68Net.loadFromUri("/models"),
  faceapi.nets.faceRecognitionNet.loadFromUri("/models"),
  faceapi.nets.faceExpressionNet.loadFromUri("/models"),
]).then(startVideo);


function startVideo() {
  navigator.getUserMedia(
    { video: {} },
    (stream) => (video.srcObject = stream),
    (err) => console.error(err)
  );
}


video.addEventListener("play", () => {
  const canvas = faceapi.createCanvasFromMedia(video);
  document.body.append(canvas);
  const displaySize = { width: video.width, height: video.height };
  faceapi.matchDimensions(canvas, displaySize);
  setInterval(async () => {
    const detections = await faceapi
      .detectAllFaces(video, new faceapi.TinyFaceDetectorOptions())
      .withFaceLandmarks()
      .withFaceExpressions();
    const resizedDetections = faceapi.resizeResults(detections, displaySize);
    canvas.getContext("2d").clearRect(0, 0, canvas.width, canvas.height);
    faceapi.draw.drawDetections(canvas, resizedDetections);
    faceapi.draw.drawFaceLandmarks(canvas, resizedDetections);
    faceapi.draw.drawFaceExpressions(canvas, resizedDetections);
  }, 100);
});
If you would like to get the project as is, visit https://github.com/AndersonQuinones/What-s-my-Emotion- for the second part of the code!
如果您想按原样获得该项目,请访问https://github.com/AndersonQuinones/What-s-my-Emotion-以获取代码的第二部分!
翻译自: https://medium.com/@anderson.quinones10/face-detection-with-face-api-js-and-javascript-aa425a151a60
face++人脸检测论文


 93
93


 被折叠的 条评论
为什么被折叠?
被折叠的 条评论
为什么被折叠?
 到【灌水乐园】发言


