


_rasa_chatbot
Imagine you could build a system that can automatically reach out to users to collect feedback? This is possible today and this blog post will outline how to do it.
假设您可以建立一个可以自动与用户联系以收集反馈的系统? 今天这是可能的,这篇博客文章将概述如何做。
In this post I will take you through how you build a chatbot using Rasa Open Source. The post was inspired by a series of great blog posts on this topic, but adds in a little of my own experience in doing the deployment.
在这篇文章中,我将带您了解如何使用Rasa Open Source构建聊天机器人。 该帖子的灵感来自与此主题有关的一系列出色的博客文章,但是增加了我自己进行部署的一些经验。
Rasa provides a framework that is understandable and intuitive, avoiding blackbox approaches and making it possible to get something up and running very quickly. It also provides intuitive tools that are accessible to non-technical people. This empowers everyone to improve the system incrementally, meaning that you won’t be stuck with a system that needs an engineer to improve.
Rasa提供了一个易于理解和直观的框架,避免了使用黑匣子方法,并使其能够快速启动并运行。 它还提供了非技术人员可以使用的直观工具。 这使每个人都可以逐步改进系统,这意味着您不会被需要工程师进行改进的系统所困扰。
入门 (Getting started)
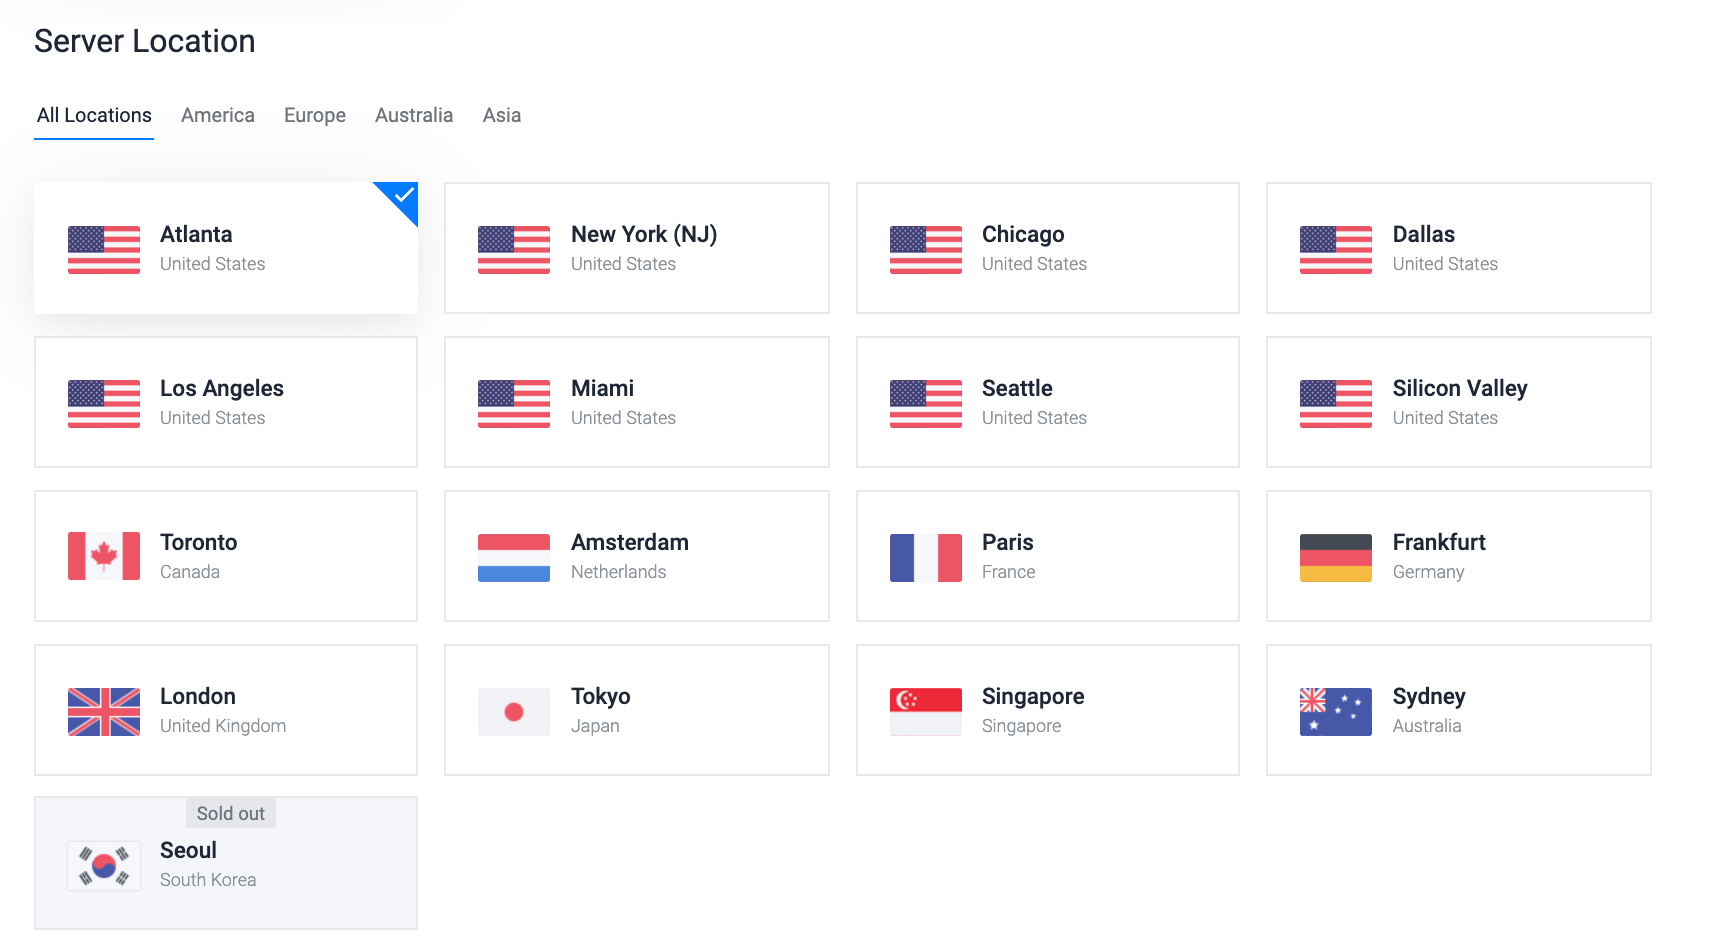
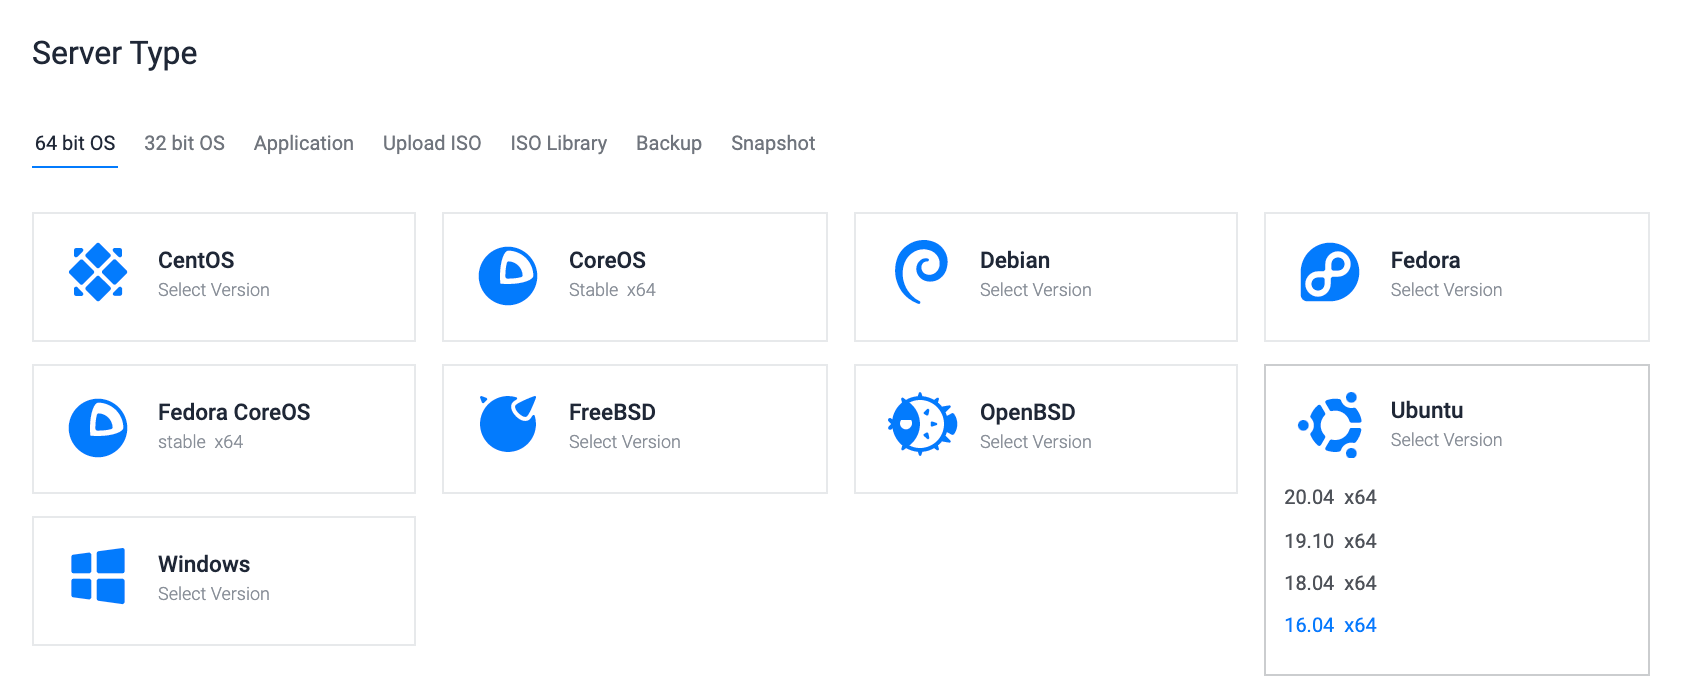
The first decision you need to make is where do you host the chatbot? A number of suggestions will suggest using ngrok and run the chatbot locally, but, on balance, I have preferred to do this on my own cloud host which allows you to be more security conscious from the outset. I have always used Vultr (mostly because the instances are reasonably priced) and did the same here. I got a Ubuntu 16.04 loaded 80GB, 2 CPU, 4GB RAM machine for $20 a month which is pretty reasonable.
您需要做出的第一个决定是在何处托管聊天机器人? 许多建议会建议使用ngrok并在本地运行chatbot,但总的来说,我更愿意在自己的云主机上执行此操作,这使您从一开始就更加注重安全性。 我一直使用Vultr (主要是因为实例的价格合理),在这里也做过同样的事情。 我有一个Ubuntu 16.04负载80GB,2 CPU,4GB RAM的机器,每月20美元,这是相当合理的。


Once you have the machine up and running, you can connect to the machine with ssh (e.g. ssh root@155.138.207.212) into the machine. Now you can set up the infrastructure.
一旦机器启动并运行,就可以通过ssh(例如ssh root @ 155.138.207.212)连接到机器。 现在您可以设置基础结构。

The first of these is the actual chatbot. In this post we use Rasa Open Source. We also need a way to have the chatbot interact with the outside world. Usually this is quite painful, but Node-Red is an intuitive architecture for handling the incoming and outgoing interactions with the chatbot.
其中第一个是实际的聊天机器人。 在本文中,我们使用Rasa Open Source 。 我们还需要一种使聊天机器人与外界交互的方法。 通常这很痛苦,但是Node-Red是一种直观的体系结构,用于处理与聊天机器人的传入和传出交互。

Node-Red allows you to handle incoming packets, manipulate those packets and pass them around as you need to. This makes it easy to provide access to your bot through different communication modes. For example, if you wanted to be able to text your bot and chat to it from a phone, then integrating your chatbot with something like Twilio (for text message interfacing) is really easy.
Node-Red允许您处理传入的数据包,处理这些数据包并根据需要传递它们。 这样可以轻松地通过不同的通信模式提供对您的机器人的访问。 例如,如果您希望能够给您的机器人发短信并通过电话与它聊天,那么将您的聊天机器人与Twilio之类的东西(用于文本消息接口)进行集成非常简单。
设置Docker,Node-Red和Rasa (Setting up Docker, Node-Red and Rasa)
For the purposes of reproducibility, Docker provides a great way to modularize services. For those that haven’t really used Docker, I’d encourage you to read more, but this should get you up and running.
出于可复制性的目的, Docker提供了一种很好的模块化服务的方法。 对于那些还没有真正使用过Docker的人,我鼓励您阅读更多内容,但这应该可以使您正常运行。
First, make sure that docker is installed on the Vultr machine.
首先,确保在Vultr计算机上安装了docker。
curl -fsSL https://download.docker.com/linux/ubuntu/gpg | sudo apt-key add -sudo add-apt-repository "deb [arch=amd64] https://download.docker.com/linux/ubuntu $(lsb_release -cs) stable"sudo apt-get updatesudo apt-get install -y docker-ce python-minimal curlsudo curl -o /usr/local/bin/docker-compose -L "https://github.com/docker/compose/releases/download/1.15.0/docker-compose-$(uname -s)-$(uname -m)"sudo chmod +x /usr/local/bin/docker-composeGreat! Now lets lay things out to make it easier for use. First we make a directory to hold the chatbot architecture.
大! 现在让我们进行布局,使其更易于使用。 首先,我们创建一个目录来保存聊天机器人的体系结构。
root@chatbot:~# mkdir rasa-bot-docker
root@chatbot:~# cd rasa-bot-docker
Next we need to define the services that we want to use in a docker-compose.yml file. This file will determine how things get launched, and is usually kept in it’s own folder (see rasa-bot-docker below)
接下来,我们需要在docker-compose.yml文件中定义要使用的服务。 该文件将确定启动方式,通常保存在其自己的文件夹中(请参见下面的rasa-bot-docker )
docker-compose.yml
docker-compose.yml
version: '3.0'
services:
  rasa:
    image: rasa/rasa:latest-full
    networks: ['rasa-network']
    user: root
    ports:
    - "5005:5005"
    volumes:
    - ./app_mount:/app
    command:
    - run
    - --enable-api
    - --endpoints
    - endpoints.yml
  action_server:
    image: rasa/rasa-sdk:latest
    networks: ['rasa-network']
    ports:
    - "5055:5055"
    volumes:
    - "./app_mount:/app/actions"
  duckling:
    image: rasa/duckling:latest
    networks: ['rasa-network']
    ports:
    - "8000:8000"
  node-red:
    image: nodered/node-red
    user: root
    ports:
    - 1880:1880
    volumes:
    - "./node-red-data:/data"
networks: {rasa-network: {}}
You can start the system moving with
您可以通过以下方式启动系统
root@chatbot:~# docker-compose up
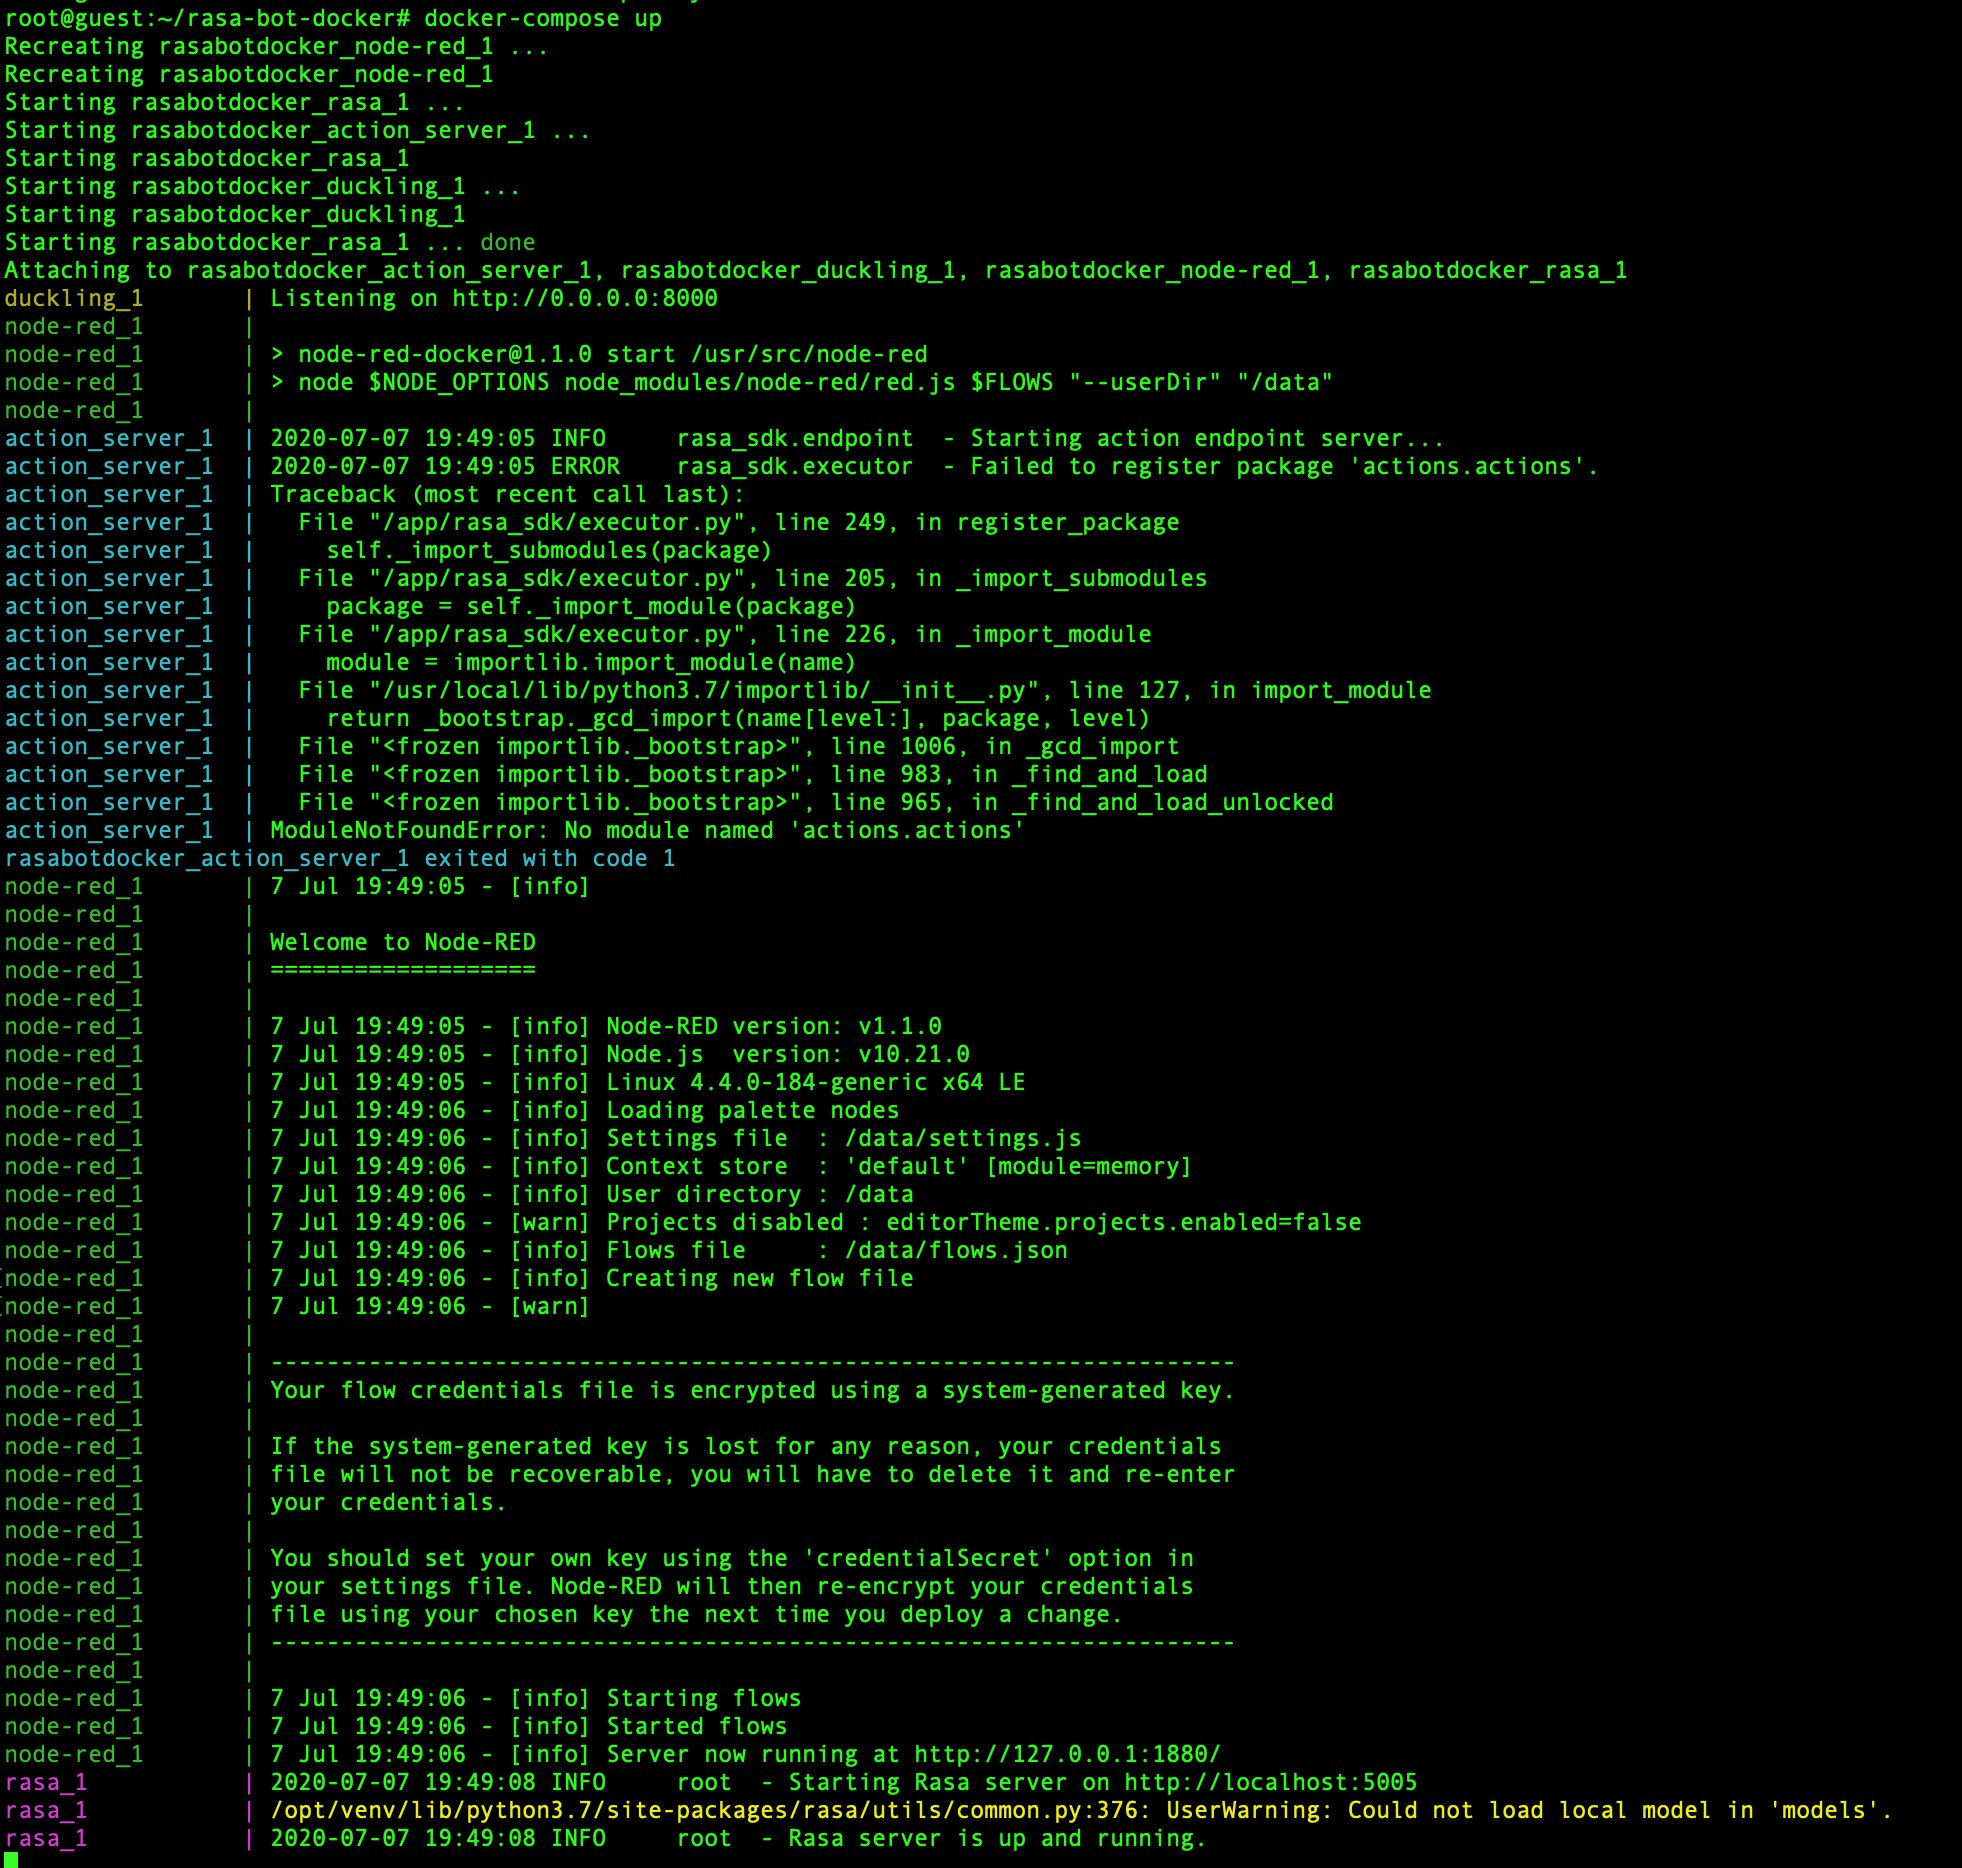
At this point you should be able to connect to your version of Node-Red through a web browser. You can get there by noting down the IP address assigned to your machine on Vultr (e.g. 155.138.207.212) , and navigating to 155.138.207.212:1880 (remember our firewall opened up the 1880 port, so if you can’t get in, you might want to check that the firewall is setup correctly). If all is working, you’ll see this on your browser
此时,您应该能够通过Web浏览器连接到您的Node-Red版本。 您可以在Vultr上记下分配给计算机的IP地址(例如155.138.207.212 ),然后导航到155.138.207.212:1880 ( 请记住我们的防火墙打开了1880端口,因此,如果您无法进入该地址,您可能要检查防火墙设置是否正确)。 如果一切正常,您将在浏览器中看到

If you have gotten this far, great! Next step is to set up the Rasa server. First thing is to make sure that a simple model is initiated.
如果您已经走了那么远,那就太好了! 下一步是设置Rasa服务器。 首先要确保启动一个简单的模型。
root@guest:~/rasa-bot-docker# docker run -it --user root -v $(pwd)/app_mount:/app rasa/rasa:latest-full init
Let’s interact directly with the bot using a web interaction through the command line - we’ll send it a simple message of ‘Hi’ using curl
让我们通过命令行使用Web交互直接与bot交互-我们将使用curl向其发送简单消息“嗨”
root@guest:~/rasa-bot-docker# docker-compose stop
root@guest:~/rasa-bot-docker# docker-compose up -d
root@guest:~/rasa-bot-docker# curl --request POST --url http://localhost:5005/webhooks/rest/webhook --header 'content-type: application/json' --data '{ "sender": "+14752339896", "message": "Hi"}' | python -mjson.tool
Awesome! it seems to work. Next step we need to integrate it with external services. This is where Node-Red comes into play. We’re going to send data to a Node-Red endpoint on port 1880 (see below)
太棒了! 它似乎有效。 下一步,我们需要将其与外部服务集成。 这是Node-Red发挥作用的地方。 我们将数据发送到端口1880上的Node-Red端点(请参见下文)
root@guest:~/rasa-bot-docker# curl --request POST --url http://localhost:1880/test_endpoint --header 'content-type: application/json' --data '{ "sender": "+14752339896", "message": "Hi"}' | python -mjson.toolTo handle this, we need to create a Node-Red instruction set. You can see this below- The icon on the left is an http_in node, the green one is a debug node and the one on the right is a http_response node.
为了解决这个问题,我们需要创建一个Node-Red指令集。 你可以看到这个如下─左边的图标是一个http_in节点,绿的是调试节点和右边的一个是HTTP_RESPONSE节点。


Now when you send a message to the test_endpoint, it should get mirrored right back to you!
现在,当您将消息发送到test_endpoint时 ,它应该会立即镜像给您!

Ok! So this simulates another service (e.g. Twilio) sending us data on port 1880 (the Node-Red port). All we should have to do now is hook up the http_in node to the chatbot, and we should get a response. To do this we just add the http_request node and point it at the chatbot.
好! 因此,这模拟了另一个服务(例如Twilio)在端口1880(节点红色端口)上向我们发送数据。 现在我们要做的就是连接http_in 聊天机器人的节点,我们应该得到响应。 为此,我们只需添加http_request 节点并将其指向聊天机器人。


Boom! There is the chatbot response!
繁荣! 有聊天机器人的回应!
Thank you for reading so far! I hope that this introduction to the Rasa infrastructure has been useful! In future posts I will
到目前为止,谢谢您的阅读! 我希望Rasa基础结构的这篇介绍对您有所帮助! 在以后的文章中,我将
- Discuss modifying the Rasa data used in training the model 讨论修改用于训练模型的Rasa数据
- Demonstrate how we can integrate external services (e.g. Twilio for text messaging, Slack etc.) to the Rasa service using the Node-Red interface 演示如何使用Node-Red接口将外部服务(例如,用于文本消息传递的Twilio,Slack等)集成到Rasa服务中
- Extend Rasa with Rasa-X, and show how you can set this up for yourself. 使用Rasa-X扩展Rasa,并说明如何自己进行设置。
_rasa_chatbot


 2943
2943

 被折叠的 条评论
为什么被折叠?
被折叠的 条评论
为什么被折叠?
 到【灌水乐园】发言


