


 本文将指导你如何利用scikit-learn建立一个电影推荐系统,并结合Flask创建一个API,最后部署到Heroku平台。通过这个项目,你将了解如何在实践中应用机器学习技术。
scikit-learn
Recommendation systems are everywhere. Some of the best examples are YouTube, Netflix, Spotify. Netflix and YouTube rely heavily on their recommendation systems to retain users on their platform for a longer time. Spotify recommends a curated list of songs to the user according to their interests. There are many more examples where recommendation systems play a pivotal role.
推荐系统无处不在。 最好的例子是YouTube,Netflix,Spotify 。 Netflix和YouTube严重依赖其推荐系统,以将用户保留在其平台上更长的时间。 Spotify根据用户的兴趣向他们推荐精选的歌曲列表。 推荐系统起着举足轻重的作用的例子很多。
但是等等,什么是推荐系统? (But wait, what is a recommendation system ?)
In short a recommendation system is an algorithm aimed at suggesting relevant data to a user based on past preferences or ratings given by the user or suggesting relevant data to a user based on the item’s attributes.
简而言之,推荐系统是一种算法,旨在基于用户过去给出的偏好或评级向用户建议相关数据,或基于商品的属性向用户建议相关数据。
To know more about recommendation systems go through the link mentioned below :-
要了解有关推荐系统的更多信息,请通过下面提到的链接:-
目的:- (Objective:-)
Build a basic Content-Based Movie Recommendation System and make an API using Flask and deploy it to Heroku.
构建基本的基于内容的电影推荐系统,并使用Flask制作API,并将其部署到Heroku。
We will discuss Content-Based Recommendation System, API and Heroku in detail as we move further in this article.
随着本文的深入,我们将详细讨论基于内容的推荐系统,API和Heroku 。
Now, let’s look into the contents of this article.
现在,让我们看一下本文的内容。
内容:- (Contents:-)
Data set Description
数据集说明
Build a Content-Based Recommendation System
建立基于内容的推荐系统
Build a REST API using Flask
使用Flask构建REST API
Test it on local host — 127.0.0.1
在本地主机上对其进行测试— 127.0.0.1
Deploy to Heroku — API goes online
部署到Heroku-API上线
We will cover the topics step by step and in the end, we will build a Movie Recommendation API that can be used by anyone to provide relevant movie suggestions to their users in an app or a website.
我们将逐步介绍主题,最后,我们将构建一个Movie Recommendation API ,任何人都可以使用该API向应用程序或网站中的用户提供相关的电影建议。
所以,让我们深入。 (So, let’s dive in.)
1.数据集说明 (1. Dataset Description)
关于数据集 (About the data set)
The first thing we require is data. Data about movies like the genre, cast, plot to name a few. For this task, I have taken data from Kaggle. We have two sources of data.
我们需要的第一件事是数据。 有关电影的数据,例如流派,演员表和情节 ,仅举几例。 为此,我从Kaggle获取了数据。 我们有两个数据源。
Now as we wanted a very basic recommendation system to see how it looks when the API is used in an app or website so we combine and modify the dataset according to our needs.
现在,由于我们需要一个非常基本的推荐系统,以了解在应用程序或网站中使用API时的外观,因此我们可以根据需要组合和修改数据集。
The pruning and preprocessing part of the dataset was done separately in one of my Jupyter Notebooks and that is a discussion for some other time. However, if you still want to know about the steps involved in pruning the dataset follow the link below.
数据集的修剪和预处理部分是在我的Jupyter笔记本中单独进行的,这是另外一段时间的讨论。 但是,如果您仍然想了解修剪数据集所涉及的步骤,请点击以下链接。
The notebook may be a little untidy because it was never meant to go online. So, apologies if it is a little hard for anyone to follow.
笔记本可能有点不整洁,因为它从未打算上网。 因此,对任何人都难以理解的情况表示歉意。
Below is the link to the dataset that will be used to build our Content-Based Recommendation System. Download this dataset and we are good to go.
以下是将用于构建我们的基于内容的推荐系统的数据集的链接。 下载此数据集,我们一切顺利。
数据集概述 (Dataset Overview)
So, we have 6477 movies in our dataset with the following attributes:-
因此,我们的数据集中有6477部电影具有以下属性:
cast: Top 3 actors/actresses of the movies
演员:电影中的前3名演员
genres: Top 3 genres of the movies
类型:电影的前3种类型
movie_id: TMDb and IMDb IDs for Hollywood and Bollywood movies
movie_id:好莱坞和宝莱坞电影的TMDb和IMDb ID
original_title: Title of the movies
original_title:电影的标题
plot: Basic overview of the movie
剧情:电影的基本概述
We have our dataset ready. Let’s move on to the next part i.e. Building a Content-Based Recommendation System.
我们已经准备好数据集。 让我们继续进行下一部分,即构建基于内容的推荐系统。
2.建立基于内容的推荐系统 (2. Build a Content-Based Recommendation System)

好,现在什么是基于内容的推荐系统? (OK, now what is a Content-Based Recommendation System ?)
Content-Based recommendation works on the principle that if a user likes a certain item then we recommend the user a similar item based on the item’s features or attributes. So in our case, if a user likes a movie of a particular genre or an actor then we recommend a movie on similar lines to our user. So, if a user has watched the movie Joker then our recommendation system would predict movies similar to Joker or with the same cast as that of Joker if we consider the movie’s cast.
基于内容的推荐基于以下原理:如果用户喜欢某个项目,那么我们会根据该项目的功能或属性向用户推荐类似的项目。 因此,在我们的情况下,如果用户喜欢特定类型的电影或演员,那么我们推荐与用户相似的电影。 因此,如果用户观看电影小丑那么我们的推荐系统会如果我们考虑到这部电影的演员阵容预测类似小丑或由同一演员主演作为小丑的电影。
Now that we have a basic idea of what is a Content-Based Recommendation System and how it works let’s code it out.
现在,我们对什么是基于内容的推荐系统及其工作原理有了基本的了解,让我们对其进行编码。
文件1 — Recommendation.py (File 1 — recommendation.py)
导入所需的软件包 (Import the required packages)
There are 5 functions present in recommendation.py. Let’s discuss about all of them one by one.
有存在于recommendation.py 5层的功能。 让我们一一讨论。
我)get_data() (i) get_data())
get_data() is used to fetch the data about the movies and return the dataset with it’s attributes as the result for further preprocessing.
get_data() 用于获取有关电影的数据,并返回具有属性的数据集作为进一步预处理的结果。
Line 2: we read the movie_data.csv.zip file using pandas.read_csv().
第2行:我们使用pandas.read_csv()读取movie_data.csv.zip文件。
Line 3: Convert the title of all the movies to lowercase letters.
第3行:将所有电影的标题转换为小写字母。
Line 4: Return the dataset as the function’s result.
第4行:将数据集作为函数的结果返回。
Return value of get_data() :-
get_data()的返回值:-

ii)Combine_data() (ii) combine_data())
combine_data() drops the columns not required for feature extraction and then combines the cast and genres column, finally returning the combine column as the result of this function.
Combine_data() 删除要素提取不需要的列,然后将 cast 和 genres 列 合并 ,最后 作为此函数的结果 返回 combin 列 。
Line 2: Drop the attributes not required for feature extraction.
第2行:删除特征提取不需要的属性。
Line 3: Combine the two columns cast and genres into one single column.
第3行:将两列演员表和流派合并为一列。
Line 5: We have a combined column with cast and genres values present in it so we remove the cast and genres columns existing separately from our dataset.
第5行:我们有一个合并的列,其中包含演员表和体裁值,因此我们从数据集中删除了单独存在的演员表和体裁列。
Line 6: Return the dataset with the combine column.
第6行:返回带有Combine列的数据集。
Return value of combine_data() :-
返回值Combine_data():-

Note : Before proceeding any further do go through the topics with their links mentioned below. It will be helpful for you to have a basic understanding of these topics before we move on to the next part i.e. transform_data().
注意 : 在继续进行操作之前,请 仔细 阅读以下内容及其链接。 在继续下一部分(即 transform_data()) 之前,对这些主题有一个基本的了解将对您有所帮助 。
iii)transform_data() (iii) transform_data())
transform_data() takes the value returned by combine_data() and the plot column from get_data() and applies CountVectorizer and TfidfVectorizer respectively and calculates the Cosine values.
transform_data() 从 get_data()中 获取Combine_data() 返回的值 和 plot 列, 分别 应用 CountVectorizer 和 TfidfVectorizer 并计算 余弦值。
Line 2: Make an object for CountVectorizer and initiate to remove English stopwords using the stop_words parameter.
第2行:为CountVectorizer创建对象,并使用stop_words参数启动以删除英语停用词 。
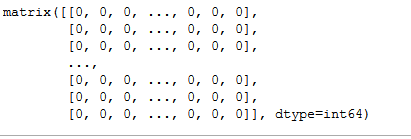
Line 3: Fit the CountVectorizer object count onto the value returned by combine_data() i.e. combined column values of cast and genres. After this, we get a sparse matrix as shown in our discussion about Bag-of-Words with the count values of each word.
第3行:将CountVectorizer对象计数拟合到Combine_data()返回的值上,即cast和genres的组合列值。 此后,我们得到一个稀疏矩阵 ,如关于词袋的讨论中所示,其中包含每个词的计数值。
Line 5: Make an object for TfidfVectorizer and initiate to remove English stopwords using the stop_words parameter.
第5行:为TfidfVectorizer创建对象,并使用stop_words参数启动以删除英语停用词 。
Line 6: Fit the TfidfVectorizer object tfdif onto the column plot that we get from get_data(). After this, we get a sparse matrix as shown in our discussion about Tf-Idf Vectorizer with values of each word.
第6行:将TfidfVectorizer对象tfdif拟合到我们从get_data()获得的列图中。 此后,我们得到一个稀疏矩阵 ,如关于Tf-Idf矢量化器的讨论中所示,其中包含每个单词的值。

Line 8: We combine the two sparse matrices we get by CountVectorizer and TfidfVectorizer into a single sparse matrix.
第8行:我们将CountVectorizer和TfidfVectorizer获得的两个稀疏矩阵 合并为一个稀疏矩阵 。
Line 10: We now apply Cosine Similarity on our combined sparse matrix.
第10行:我们现在在组合后的稀疏矩阵上应用余弦相似度 。
Line 12: Return the cosine similarity matrix generated as the result of transform_data()
第12行:返回作为transform_data()结果生成的余弦相似度矩阵
Return value of transform_data() :-
返回transform_data()的值:

We use TfidfVectorizer for the plot column because Tf-Idf assigns lower value to words having a higher frequency and higher value to words having a lower frequency in a particular document.
我们将 TfidfVectorizer 用于 图 列,因为 在特定文档中, Tf-Idf 将较低的值分配给频率较高的单词,将较高的值分配给频率较低的单词。
For example
例如
After Thanos, an intergalactic warlord, disintegrates half of the universe, the Avengers must reunite and assemble again to reinvigorate their trounced allies and restore balance.
在星际军阀塔诺斯(Thanos)瓦解了整个宇宙的一半之后,复仇者联盟必须重新团聚并重新集结,以重振其ounce缩的盟友并恢复平衡。
In this movie plot from Avengers: Endgame we will have higher values assigned to words such as Thanos and Avengers because they appear less number of times but have a higher significance in determining the main theme of the movie.
在《 复仇者联盟:残局》的 这部电影情节中, 我们将为诸如 Thanos 和 Avengers之类的 单词分配更高的值 , 因为它们出现的次数较少,但在确定电影的主题时具有更高的意义。
iv)Recommendation_movies() (iv) recommend_movies())
recommend_movies() takes four parameters.
Recommendation_movies()采用四个参数。
title : Name of the movie
标题:电影名称
data : Return value of get_data()
data: get_data()的返回值
combine : Return value of combine_data()
Combine : combining_data()的返回值
transform : Return value of transform_data()
transform: transform_data()的返回值
Line 3: Create a Pandas Series with indices of all the movies present in our dataset.
第3行:创建 熊猫系列,其中包含我们数据集中所有电影的索引。

Line 4: Get the index of the input movie that is passed onto our recommend_movies() function in the title parameter.
第4行:获取输入电影的索引,该索引将传递给title参数中传递给我们的Recommendation_movies()函数。
For example, we pass the movie Logan as our input movie. This line gives us the index of the movie Logan in the pandas series.
例如,我们将电影 Logan 作为输入电影 传递 。 这条线给了我们 熊猫系列中 电影 洛根 的索引 。

Line 6: Here we store the Cosine Values of each movie with respect to our input movie.
第6行:在此,我们存储每个电影相对于输入电影的余弦值。
For example our input movie is The Dark Knight. What this line does is it calculates the Cosine Values of all the movies with respect to our input movie.
例如,我们输入的电影是 《黑暗骑士》。 该行的作用是针对输入的影片计算所有影片的余弦值。

Line 7: After getting the cosine values we sort them in reverse order. As we have read from our brief introduction to the cosine similarity topic closer the document is to the source higher the cosine value.
第7行:获得余弦值后,我们以相反的顺序对其进行排序。 正如我们从对余弦相似性主题的简要介绍中所读到的那样,文档离源越近,则余弦值越高。
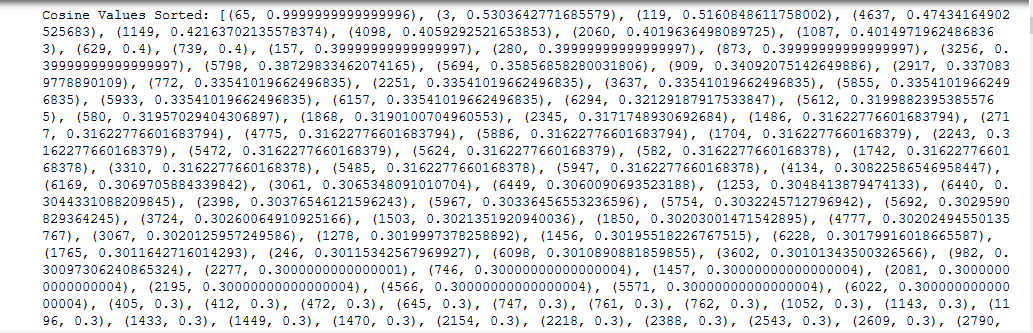
In the above image we see all the cosine values with respect to our input movie. The input movie will be most similar to itself so it’s value is 0.99. After that we see for index 3 our cosine value is 0.530. Now if you compare it with the pandas series output we had The Dark Knight Rises is at index 3 and as expected it is the most similar movie to The Dark Knight.
在上图中,我们看到了与输入影片有关的所有余弦值。 输入影片将与其自身最相似,因此其值为 0.99 。 之后,我们看到 索引3 的余弦值为 0.530。 现在,如果将其与熊猫系列的输出进行比较,我们的 《黑暗骑士崛起》排 在第 3位 ,正如预期的那样,这是与 《黑暗骑士 》最相似的电影 。
Line 8: We need the top 20 movies with respect to our input movie. So, we store the 20 most similar movies with respect to our input movie
第8行:相对于输入影片,我们需要排名前20位的影片。 因此,相对于输入影片,我们存储了20个最相似的影片

Line 10: We store the top 20 movies sorted according to our cosine values in a list.
第10行:我们将按照余弦值排序的前20首电影存储在列表中。
Line 12–14: In these lines, we store the movie indices with their respective columns.
第12–14行:在这些行中,我们将电影索引及其相应的列存储起来。


Line 16: We create a Pandas DataFrame with Movie_Id, Name, Genres as the columns.
第16行:我们以Movie_Id,Name,Genre作为列创建一个Pandas DataFrame。
Line 18 — 20: We store all the 20 movies similar to our input movie i.e The Dark Knight in the Pandas DataFrame we just created.
第18行-20:我们将所有20部与我们输入的电影(即《黑暗骑士》)相似的电影存储在我们刚创建的Pandas DataFrame中。
Line 22: Return the Pandas DataFrame with the top 20 movie recommendations.
第22行:返回带有前20条电影推荐的Pandas DataFrame。
Return value of recommend_movies() for The Dark Knight:-
黑暗骑士的recommise_movies ()返回值:

V)结果() (V) results())
result() takes a movie’s title as input and returns the top 20 recommendations.
result() 以 电影的标题 作为输入,并返回前20条推荐。
Line 2: convert the movie_name to lower case as all the movies is in lower case in our dataset. We do this as a precautionary measure. If a user types a movie name in lower case and upper case letters together then it won’t be a problem as our function will still return the results.
第2行:将movie_name转换为小写 ,因为在我们的数据集中,所有电影均为小写。 我们这样做是为了预防。 如果用户以小写字母和大写字母的形式键入电影名称,则不会有问题,因为我们的函数仍会返回结果。
For example: If the input is logan or Logan or lOgAn we still get our recommendations.
例如: 如果输入是 logan 或 Logan 或 lOgAn, 我们仍然会得到建议。
Line 4–6: We store the values returned by get_data(), combine_data() and transform_data().
第4-6行:我们存储get_data(),combining_data()和transform_data()返回的值。
Line 8–9: Check whether the input movie is present in our dataset. If not found in our dataset then we return that the movie is not found.
第8–9行:检查输入影片是否存在于我们的数据集中。 如果在我们的数据集中找不到,则返回未找到电影的信息。
Line 11–12: If our movie is present in the dataset then we call our recommend_movies() function and pass the return values of get_data(), combine_data() and transform_data() along with the movie name as the function’s parameter.
第11–12行:如果影片存在于数据集中,那么我们将调用我们的prepare_movies()函数,并将get_data(),combin_data()和transform_data()的返回值以及影片名称作为函数的参数传递。
Line 13: We return the movie results in Python dictionary format.
第13行:我们以Python字典格式返回电影结果。
Return value of results() :-
result()的返回值:-

Now that our recommendation system is ready let’s move on to the next part i.e. Build a REST API using Flask.
现在我们的推荐系统已经准备就绪,让我们继续进行下一部分,即使用Flask构建REST API。
3. 使用Flask构建REST API (3. Build a REST API using Flask)
烧瓶:- (Flask:-)
To understand this part of the article I suggest you have a basic idea about Flask. For our task, we just need to know about some beginner level functionalities.
为了理解本文的这一部分,我建议您对Flask有一个基本的了解。 对于我们的任务,我们只需要了解一些初学者级的功能。
To install Flask on your system head over to the terminal/Command Prompt and type pip install Flask. That’s it, Flask is now installed on your system.
要在系统上安装Flask,请转到终端/命令提示符,然后输入pip install Flask。 就是这样,Flask现在已安装在您的系统上。
To know the basics about a simple Flask application head on to the link below.
要了解有关简单Flask应用程序的基础知识,请转到下面的链接。
If you prefer video lectures do go through the brief explanation provided about Flask from this video.
如果您喜欢视频讲座,请仔细阅读此视频中有关Flask的简要说明。
Flask Hello World — Video lecture
Now, that we have a basic idea about Flask let’s move on to the next topic i.e. REST APIs.
现在,我们对Flask有一个基本概念,让我们继续下一个主题,即REST API。
REST API:- (REST API:-)
I highly recommend you all have a basic understanding of APIs and one of the design principles of an API i.e. REST API.
我强烈建议你所有的API有一个基本的了解和即REST API的API的设计原则之一。
Go through the link mentioned below. It will provide you with a basic overview of APIs and REST APIs.
通过下面提到的链接。 它将为您提供API和REST API的基本概述。
If you prefer video lectures do go through the brief explanation provided by Telusko about APIs and REST APIs.
如果您喜欢视频讲座,请仔细阅读Telusko提供的有关API和REST API的简要说明。
To know how a REST API can be created it’s highly useful if we first code some basic application and get to know more about the GET method and it’s working.
要知道如何创建REST API,如果我们首先编写一些基本应用程序并了解有关GET方法的更多信息并且它可以正常工作,那么它非常有用。
Below mentioned link builds a REST API using Flask with the GET method to display data to the client. Code this out and understand the basics and then move on to the code in our app.py file.
下面提到的链接使用Flask和GET方法构建REST API ,以将数据显示给客户端。 对此进行编码,并了解基本知识,然后转到我们的app.py文件中的代码。
文件2 — app.py (File 2 — app.py)
In this file, we will code our Flask application and use the recommendation system we built before.
在此文件中,我们将对Flask应用程序进行编码,并使用之前构建的推荐系统。
导入所需的软件包 (Import the required packages)
Line 1: We import the Flask class then the request library to send HTTPS requests and finally we import jsonify to return our results in a JSON format.
第1行:我们导入Flask类,然后导入请求库以发送HTTPS请求,最后导入jsonify以JSON格式返回结果。
Line 2: We import the flask_cors to enable cross-origin requests for our API.
第2行:我们导入flask_cors以启用针对我们API的跨域请求。
What is a cross-origin request?
什么是跨域请求 ?
Cross-origin resource sharing (CORS) is a mechanism that allows restricted resources on a web page to be requested from another domain outside the domain from which the first resource was served.
跨域资源共享 ( CORS )是一种机制,它允许从提供第一资源的域之外的另一个域请求网页上的受限资源。
To know more about the CORS policy do go through the below-mentioned link. It explains all you need to know about CORS policy.
要了解有关CORS政策的更多信息,请通过以下链接。 它说明了您需要了解的有关CORS政策的所有信息。
Line 3: we import our recommendation.py file as a module to use it in our app.py file.
3号线:我们导入我们的recommendation.py文件作为一个模块在我们app.py文件中使用它。
烧瓶代码:- (Flask Code:-)
Line 1: we create an instance of this class. The first argument is the name of the application’s module or package.
第1行:我们创建此类的实例。 第一个参数是应用程序的模块或软件包的名称。
Line 2: We use the CORS() method to enable the CORS policy on our API.
第2行:我们使用CORS()方法在API上启用CORS策略。
Line 4: We then use the route() decorator to tell Flask what URL should trigger our function. In this case, we use the /movie endpoint with the base URL.
第4行:然后,我们使用route()装饰器告诉Flask哪个URL应该触发我们的函数。 在这种情况下,我们将/ movie端点与基本URL结合使用。
Line 5: Now, we define a function named recommend_movies() which will be used to return the top 20 recommendations.
第5行:现在,我们定义一个名为recommended_movies()的函数,该函数将用于返回前20条建议。
Line 6: In this line, we call the results() function from our recommendation.py file and store the recommendations in a variable named res. The movie name is passed as a query string to our results() function using the request.args.get() and the parameter name is title.
第6行:在这一行中,我们从Recommendation.py文件中调用results()函数,并将建议存储在名为res的变量中。 电影名称使用request.args.get()作为查询字符串传递给我们的results()函数,参数名称为title。
Line 7: Lastly we return the results received from recommendation.py in a dictionary format to app.py and convert them to JSON format and return the results.
7号线:最后我们返回一个字典格式app.py并将其转换为JSON格式并返回结果从recommendation.py收到了成效。
Line 9: This line indicates that if we call our app.py file directly from the terminal/command prompt then it will execute what follows after.
第9行:该行表明,如果我们直接从终端/命令提示符处调用app.py文件,则它将执行随后的操作。
Line 10: We run the app after our app.py file is called directly in the terminal/command prompt. We set our port number to 5000 when running on localhost and we set debug=True to trace back any errors that occurs whilst running our application.
第10行:在终端/命令提示符中直接调用app.py文件后,我们运行该应用程序。 在本地主机上运行时,我们将端口号设置为5000 并且我们设置debug = True以追溯运行我们的应用程序时发生的任何错误。
4.在localhost上测试它— 127.0.0.1 (4. Test it on localhost — 127.0.0.1)
Now, that we are done with the coding part let’s test our application on localhost and see if it’s working.
现在,我们完成了编码部分,让我们在localhost上测试我们的应用程序,看看它是否正常运行。
If you want to use Postman for testing our API then download it from the below link.
如果您想使用Postman来测试我们的API,请从下面的链接下载它。
You can use your browser for testing as well if you prefer that over Postman. We will test on both of them and you will get to see the results.
如果您喜欢Postman,也可以使用浏览器进行测试。 我们将对它们进行测试,您将看到结果。
测试我们的API: (Testing our API:-)
Step — 1: Open up your command prompt if in Windows or terminal if you are using Linux.
步骤— 1:如果在Windows中,则打开命令提示符;如果使用Linux,则在终端中打开。
Step — 2: Navigate to the folder where you have stored the dataset, recommendation.py file and app.py file using command line.
步骤— 2:使用命令行导航到存储数据集, recommendation.py文件和app.py文件的文件夹。
We store our files in a folder named Recommendation 2.0. Below is our directory structure.
我们将文件存储在名为Recommendation 2.0的文件夹中。 下面是我们的目录结构。

All the files and the dataset should be present in a single folder for ease of use when developing the application.
所有文件和数据集都应存在于单个文件夹中,以便在开发应用程序时易于使用。
Step — 3: When we are in our Recommendation 2.0 folder type the following commands in the command line.
步骤— 3:当我们进入Recommendation 2.0文件夹时,在命令行中键入以下命令。
set FLASK_APP=app.pyfor running the application:-
用于运行应用程序:
flask runAfter executing both the commands we will see our application running on localhost.
执行完这两个命令后,我们将看到我们的应用程序在localhost上运行。

Step — 4: Test our API on localhost using Postman or any browser.
步骤4:使用Postman或任何浏览器在localhost上测试我们的API。
Let’s see our results when we pass a movie to our API.
让我们看看将电影传递给API时的结果。
邮差:- (Postman:-)

浏览器:- (Browser:-)

We are done with testing our API on localhost and it works perfectly.
我们已经完成了在本地主机上测试我们的API的工作,它可以完美运行。
Let’s move onto the last part i.e. deploying our API to Heroku.
接下来,我们将API部署到Heroku。
5.部署到Heroku-API联机 (5. Deploy to Heroku — API goes online)
GitHub资料库:- (GitHub Repository:-)
Before we move on to the deployment part we need to have a basic understanding about GitHub. You should be able to make a new repository, add files, delete files and create folders in the repository if necessary.
在继续进行部署之前,我们需要对GitHub有基本的了解。 如有必要,您应该能够建立新的存储库,添加文件,删除文件并在存储库中创建文件夹 。
Step — 1: Create a repository with any name you like. I have named my repository BioScope, the reason is me and my friends thought it was a cool name.
步骤— 1:用您喜欢的任何名称创建一个存储库。 我将存储库命名为BioScope,原因是我和我的朋友认为这是一个很酷的名字。

Step — 2: Create Procfile
步骤— 2: 创建Procfile
Heroku apps include a Procfile that specifies the commands that are executed by the app on startup. You can use a Procfile to declare a variety of process types, including: Your app’s web server.
Heroku应用程序包含一个Procfile ,该文件指定了应用程序在启动时执行的命令。 您可以使用Procfile声明各种进程类型,包括:应用程序的Web服务器。
To create one, open up a new file named Procfile (no extension) in the working directory and paste the following.
要创建一个文件,请在工作目录中打开一个名为Procfile(无扩展名)的新文件,然后粘贴以下内容。
web: gunicorn app:app --max-requests 2We add max requests to ensure our server restarts after every 2nd request to our API. This is done to ensure that we do not exceed our RAM limit of 512 MB allotted by Heroku when using the API.
我们添加了最大请求数,以确保我们的服务器在对API的第二个请求后都重新启动。 这样做是为了确保使用API时,我们不会超过Heroku分配的512 MB RAM限制。
Step — 3: Create requirements.txt
步骤3: 创建requirements.txt
The requirements.txt file will contain all of the dependencies for the flask app. If you’re not working from a new environment, this file will contain all requirements from your current environment.
requirements.txt文件将包含flask应用程序的所有依赖项。 如果您不是在新环境中工作,则此文件将包含当前环境中的所有要求。
At the bare minimum for this project, your requirements.txt should contain:
对于这个项目,最低要求 ,您的requirements.txt应该包含:
Flask==1.1.2
Flask-Cors==3.0.8
Flask-RESTful==0.3.7
gunicorn==20.0.4
joblib==0.13.2
jsonschema==2.6.0
pandas==0.25.1
pickleshare==0.7.5
requests==2.23.0
requests-file==1.4.3
scikit-learn==0.22.2
scipy==1.4.1
wcwidth==0.1.7
webencodings==0.5.1
Werkzeug==1.0.1
Copy paste the above in your requirements.txt file and commit it to the repository.
将以上内容复制粘贴到您的requirements.txt文件中,并将其提交到存储库中。
Step — 4: Commit recommendation.py, app.py.
步骤4:提交commitment.py,app.py。
Step — 5: Make a folder named dataset/ in your repository and commit the movie_data.csv.zip file.
步骤— 5:在您的存储库中创建一个名为dataset /的文件夹,并提交movie_data.csv.zip文件。
Our repository structure should look something like this:-
我们的存储库结构应如下所示:

The Jupyter Notebook contains the preprocessing part involved to make our movie_data.csv.zip file. So, this folder is optional. Apart from that all the other files and folders are necessary.
Jupyter笔记本包含用于制作movie_data.csv.zip文件的预处理部分。 因此,此文件夹是可选的。 除此之外,所有其他文件和文件夹都是必需的。
recommendation.py
Recommendation.py
app.py
app.py
requirements.txt
requirements.txt
Procfile
程序文件
Note: All of the above files should be at the working directory level and not in another folder.
注意 : 以上所有文件均应位于工作目录级别,而不应位于另一个文件夹中。
部署到Heroku: (Deploy to Heroku:-)
We can deploy our app using either Heroku CLI or GitHub. In this article we will discuss how we can deploy our app using GitHub.
我们可以使用Heroku CLI或GitHub部署我们的应用程序。 在本文中,我们将讨论如何使用GitHub部署应用程序。
Step — 1: Create a free account at www.heroku.com.
步骤— 1:在www.heroku.com上创建一个免费帐户。
Step — 2: Create a new app simply by choosing a name and clicking “create app”. This name doesn’t matter but it does have to be unique.
步骤2:只需选择一个名称并单击“创建应用程序”,即可创建一个新应用程序 。 该名称无关紧要,但必须唯一。

Step — 3: Connect your GitHub account by clicking the GitHub icon below.
步骤— 3:单击下面的GitHub图标,连接您的GitHub帐户。

Step — 4: Search for the correct repository and click connect.
步骤— 4:搜索正确的存储库,然后单击connect。

Step — 5: Scroll to the bottom of the page and click “Deploy Branch”.
步骤— 5:滚动到页面底部,然后单击“部署分支”。

如果一切正常,您应该会看到此消息。 (If everything worked correctly you should see this message.)

If something went wrong, check your requirements.txt, delete the dependencies that are giving you problems, and try again.
如果出现问题,请检查您的requirements.txt ,删除给您带来问题的依赖项,然后重试。
部署后测试我们的API: (Testing our API after deployment:-)
Notice the link through which we send the GET request.
请注意我们通过其发送GET请求的链接。

最后,我们的电影推荐API现在已经在线。 (Finally, our Movie Recommendation API is now online.)
Anyone with the Heroku link can now access the movie recommendation API and show movie suggestions to their users.
现在,拥有Heroku链接的任何人都可以访问电影推荐API并向其用户显示电影建议。
So, we have reached the end of this article. I hope you have learned something new and I surely want you all to use the API or build something similar to this.
因此,我们到了本文的结尾。 希望您学到了一些新知识,并且一定希望大家都使用API或构建类似的东西。
We just built a basic Content-Based Recommendation System. Much more can be done than this like building a Collaborative Recommendation System or even building a Hybrid Recommendation System. We will discuss about that in detail but that’s a story for another blog post.
我们刚刚构建了一个基本 的基于内容的推荐系统 。 除了构建 协作推荐系统 甚至构建 混合推荐系统 之外,还可以做更多的工作 。 我们将对此进行详细讨论,但这是另一篇博客文章的故事。
API链接:- (API Link:-)
完整代码:- (Full Code:-)
您可以通过以下方式与我联系:- (You can reach me on:-)
快乐阅读! (Happy Reading !!!)
scikit-learn


 被折叠的 条评论
为什么被折叠?
被折叠的 条评论
为什么被折叠?
 到【灌水乐园】发言


