


为什么用开源报表系统?http://reporting.pentaho.com/
做好配置数据源后不需要做代码的开发就可以展示各种报表
http://www.pentaho.com/download/这个用的是企业版,证书过期了,只能系统重装,再试用30天吧,推荐使用社区版
pentaho 是世界上最流行的开源商务智能软件。它是一个基于 Java 平台的商业智能 (Business Intelligence,BI) 套件,之所以说是套件是因为它包括一个 web server 平台和几个工具软件:报表,分析,图表,数据集成,数据挖掘等,可以说包括了商务智能的方方面面。Pentaho 是跨平台的, linux,windows 上都可以安装,而且安装十分简单,就两个步骤:解压,执行。
增加CATALINA_OPTS环境变量,让Apache-Tomcat服务器能使用比默认值更多的内存
Java代码 
CATALINA_OPTS= Dsun.rmi.dgc.server.gcInterval=3600000
配置jdk环境变量
Java代码
PATH = C:\Program Files (x86)\Java\jdk1.6.0_05\bin;C:\Program Files (x86)\Java\jdk1.6.0_05\jre\bin;C:\Program Files\Java\jdk1.6.0_05
JAVA_HOME = C:\Program Files (x86)\Java\jdk1.6.0_05
CLASSPATH = C:\Program Files (x86)\Java\jdk1.6.0_05\lib\tools.jar
bi-server平台是一个基于tomcat的JSP web 程序,包含两个界面:user console和administration console,分别对应的是用户控制台和管理控制台。其作用如下:
用户控制台:供用户登录进去对数据进行操作,如报表,分析等。localhost:8080
管理控制台:供管理员进去对用户,数据源(Data source),BI server等做全局设置。localhost:8099
创建样例数据库 (样例不报错)
进入MySQL控制台,导入sql命令:顺序如下:
Java代码
source E:\BI\pentaho\biserver-ce\data\mysql5\create_repository_mysql.sql
source E:\BI\pentaho\biserver-ce\data\mysql5\create_quartz_mysql.sql
source E:\BI\pentaho\biserver-ce\data\mysql5\load_sample_users_mysql.sql
source E:\BI\pentaho\biserver-ce\data\mysql5\migration.sql
导入成功可以查看样例程序报表
sample_data_mysql.sql,最后一个sql文件貌似没有,需要大家额外到pentaho官网下载,比较费事。接下我给大家一个集成版的sql脚本文件见附件,只需运行它便可以完成以上所以脚本文件的工作。
登录到administration console中,在administration 页面的”data sources”标签下,点左边的“sampledata”,可以看到当前使用的数据源仍就是hsql里面的 sampledata库。
在General页下
Driver Class 选"com.mysql.jdbc.Driver"
User Name: pentaho_user(默认是这个,所以不改)
Password: password(默认是这个,所以不改)
URL 修改为 jdbc:mysql://localhost:3306/sampledata (根据实际的mysql端口更改)
在Advanced页下
将"Validation Query" 设为空或者SELECT 1
下面将Pentaho BI平台指向MySQL数据库服务器 ,不再使用自带的HSQL数据库。下面,你将需要修改几个配置文件:
A、将biserver-ce\pentaho-solutions\system\applicationContext-spring-security-hibernate.properties
Java代码
jdbc.driver=org.hsqldb.jdbcDriver
jdbc.url=jdbc:hsqldb:hsql://localhost:9001/hibernate
jdbc.username=hibuser
jdbc.password=password
hibernate.dialect=org.hibernate.dialect.HSQLDialect
改成:
Java代码
jdbc.driver=com.mysql.jdbc.Driver
jdbc.url=jdbc:mysql://localhost:3306/hibernate
jdbc.username=hibuser
jdbc.password=password
hibernate.dialect=org.hibernate.dialect.MySQLDialect
B、将biserver-ce\pentaho-solutions\system\applicationContext-spring-security-jdbc.xml
Java代码
class="org.springframework.jdbc.datasource.DriverManagerDataSource">
value="jdbc:hsqldb:hsql://localhost:9001/hibernate" />
将高亮部分替换为:
Java代码
.....................
value="jdbc:mysql://localhost:3306/hibernate" />
C. 如果修改以上username/password后,进入biserver-ce\pentaho-solutions\system\hibernate目录:将mysql5.hibernate.cfg.xml中的也要修改:
Java代码
hibuser
password
biserver-ce\pentaho-solutions\bi-developers\datasources下的HQL_Datasource_MySQL.cfg.xml也要修改用户名密码
Java代码
hibuser
password
D、将biserver-ce\pentaho-solutions\system\hibernate/hibernate-settings.xml中的:
Java代码
system/hibernate/hsql.hibernate.cfg.xml
改成:
Java代码
system/hibernate/mysql5.hibernate.cfg.xml
配置 Hibernate和Quartz
Hibernate和Quartz需使用创建在MySQL服务器上的相应数据库。因此,需要修改biserver-ce\tomcat\webapps\pentaho\META-INF目录里的context.xml文件,将内容改为:
Java代码
factory="org.apache.commons.dbcp.BasicDataSourceFactory" maxActive="20" maxIdle="5"
maxWait="10000" username="hibuser" password="password"
driverClassName="com.mysql.jdbc.Driver" url="jdbc:mysql://localhost:3306/hibernate"
validationQuery="select 1" />
factory="org.apache.commons.dbcp.BasicDataSourceFactory" maxActive="20" maxIdle="5"
maxWait="10000" username="pentaho_user" password="password"
driverClassName="com.mysql.jdbc.Driver" url="jdbc:mysql://localhost:3306/quartz"
validationQuery="select 1"/>
修改biserver-ce\tomcat\webapps\pentaho\WEB_INF\目录里的 web.xml 文件,可以对Pentaho BI 平台进行以下配置:
pentaho-solutions 的位置
Java代码
solution-path
根据你的安装情况,进行相关参数配置改为
Java代码
solution-path
yourpath\to\biserver-ce\pentaho-solutions
URL找到下面这段代码:
Java代码
http://localhost:8080/pentaho/
修改样例(根据你的电脑或服务器的域名或IP地址修改):
Java代码
http://www.prashantraju.com:8080/pentaho/
http://192.168.1.10:8080/pentaho/
配置Email 修改文件biserver-ce\pentaho-solutions\system\smtp-email\email_config.xml
配置项,设置为SMTP发送服务器的名称或IP
配置项,如果需要认证则设置为true
配置项,用于当发送邮件时配置谁发的邮件,需要写一个可用的Email地址
配置和,登录邮箱的用户名和密码
配置发布密码Publishing
默认设置下,发布功能是禁止的,要打开它,需设置一个密码。
在biserver-ce\pentaho-solutions\system\目录找到publisher_config.xml文件
找到下面代码:
Java代码
修改样例(以后,要把内容发布到Pentaho BI平台,就需要下面设置的密码了):
Java代码
password
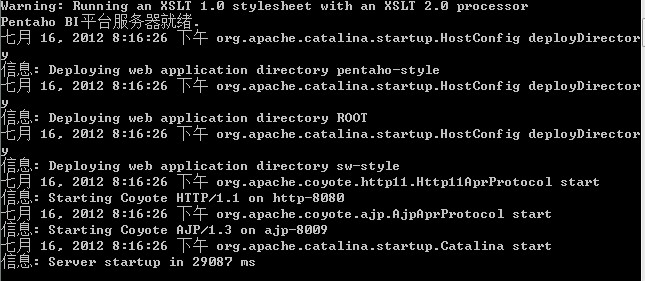
①下载解压biserver-ce-XX-stable.zip,执行目录下的脚本start-pentaho.sh 来启动user console
运行命令 ./start-pentaho.sh ( start-pentaho.bat) 输出如下:
②执行administration-console目录下的脚本start.sh来启动administration console。
运行命令./start-pac.sh & 输出如下:
Java代码
DEBUG: Using JAVA_HOME
DEBUG: _PENTAHO_JAVA_HOME=C:\Program Files (x86)\Java\jdk1.6.0_05
DEBUG: _PENTAHO_JAVA=C:\Program Files (x86)\Java\jdk1.6.0_05\bin\java.exe
17:28:48,762 INFO [JettyServer] Console is starting
17:28:48,786 INFO [/] org.pentaho.pac.server.BrowserLocaleServlet-1259414: init
17:28:48,786 INFO [/] org.pentaho.pac.server.DefaultConsoleServlet-16416372: in
it
17:28:48,786 INFO [/] org.pentaho.pac.server.PacServiceImpl-6609937: init
17:28:48,787 INFO [/] org.pentaho.pac.server.SchedulerServiceImpl-32481053: ini
t
17:28:48,787 INFO [/] org.pentaho.pac.server.SolutionRepositoryServiceImpl-5256
233: init
17:28:48,787 INFO [/] org.pentaho.pac.server.SubscriptionServiceImpl-24669796:
init
17:28:48,787 INFO [/] org.pentaho.pac.server.common.HibernateConfigurationServi
ceImpl-1012673: init
17:28:48,787 INFO [/] org.pentaho.pac.server.common.JdbcDriverDiscoveryServiceI
mpl-32960703: init
17:28:48,797 INFO [JettyServer] Console is now started. It can be accessed usin
g http://admin-PC:8099 or http://192.168.1.123:8099
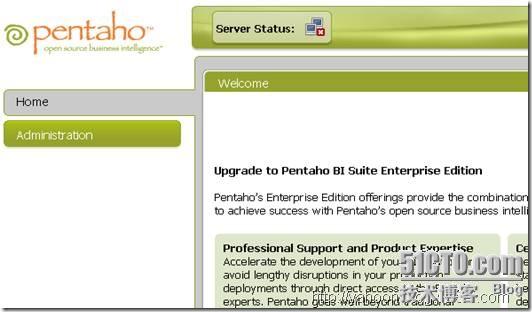
①登录user console
②登录administration console
打开链接http://localhost:8099 ,会提示输入用户密码,分别输入admin : password
登录进去以后显示的界面如下
6.停止
①执行目录下的脚本stop-pentaho.sh 来停止user console。
②执行administration-console目录下的脚本stop.sh来停止administration console。


 358
358


 被折叠的 条评论
为什么被折叠?
被折叠的 条评论
为什么被折叠?
 到【灌水乐园】发言


