


这篇文章主要介绍了JavaScript实现简单图片轮播效果,点击下标切换到该图片上,具有一定的参考价值,感兴趣的小伙伴们可以参考一下
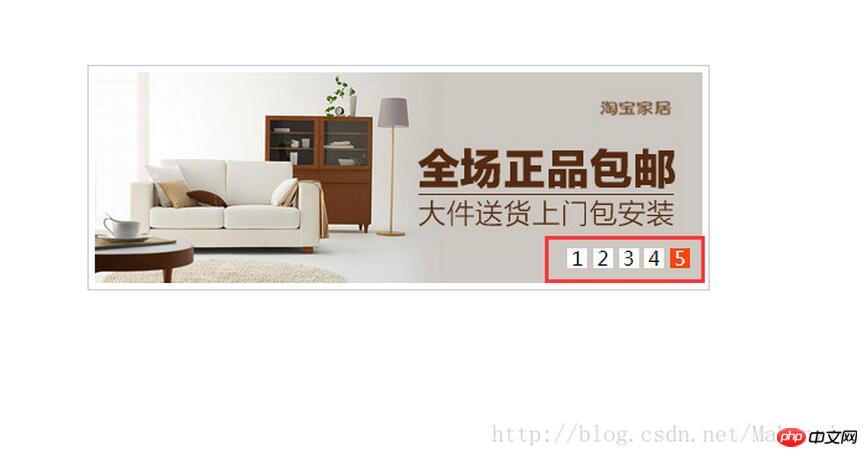
本文实例为大家分享了js实现简单图片轮播的具体代码,最终实现效果图
代码块
以上就是本文的全部内容,希望对大家的学习有所帮助,也希望大家多多支持脚本之家。
* {
margin: 0;
padding: 0
}
ul {
list-style: none
}
img {
vertical-align: top
}
.box {
width: 490px;
height: 170px;
margin: 100px auto;
padding: 5px;
border: 1px solid #ccc;
}
.inner {
width: 490px;
height: 170px;
background-color: pink;
overflow: hidden;
position: relative;
}
.inner ul {
width: 1000%;
position: absolute;
top: 0;
left: 0;
}
.inner li {
float: left;
}
.square {
position: absolute;
right: 10px;
bottom: 10px;
}
.square span {
display: inline-block;
width: 16px;
height: 16px;
background-color: #fff;
text-align: center;
line-height: 16px;
cursor: pointer;
}
.square span.current {
background-color: orangered;
color: #fff;
}


1
2
3
4
5
//鼠标经过按钮 按钮排他
var box = document.getElementById("box");
var inner = box.children[0]; //获取box下的第一个元素,也就是inner
var ul = inner.children[0]; //获取inner下的ul
var squareList = inner.children[1]; //获取inner下的第二个元素
var squares = squareList.children; //获取所有的按钮
var imgWidth = inner.offsetWidth;
// alert(imgWidth);
//给每个按钮注册鼠标经过事件
for(var i=0; i
squares[i].index = i; //把索引保存在自定义属性中
squares[i].onmouseover = function(){ //鼠标经过事件
//排他 干掉所有人
for(var j=0; j
squares[j].className = "";
}
//留下我自己
this.className = "current";
//以动画的方式把ul移动到指定的位置
//目标 和当前按钮索引有关,和图片宽度有关 而且是负数
var target = -this.index * imgWidth; //获取到索引
animate(ul,target);
}
}
function animate(obj, target) {
clearInterval(obj.timer);
obj.timer = setInterval(function () {
var step = 20;
var step = obj.offsetLeft < target ? step : -step;
if (Math.abs(obj.offsetLeft - target) > Math.abs(step)) {
obj.style.left = obj.offsetLeft + step + "px";
} else {
obj.style.left = target + "px";
clearInterval(obj.timer);
}
}, 15)
}


 被折叠的 条评论
为什么被折叠?
被折叠的 条评论
为什么被折叠?
 到【灌水乐园】发言


