


Eclipse + PHP + XDebug 开发环境是为了开发调试和调试一个网站.
MAC OS X: macOS Sierra 10.12.3
Apache
系统自带,启用方式:
sudo apachectl start (或者restart)
默认网站根目录:
/Library/WebServer/Documents/
如果此目录下有index.php
修改网站根目录:
/etc/httpd/httpd.conf (DocumentRoot "/Library/WebServer/Documents")
PHP
系统自带,启用方式,打开apache的配置文件
sudo vim /etc/apache2/httpd.conf
去掉 LoadModule php5_module libexec/apache2/libphp5.so 的注释
LoadModule php5_module libexec/apache2/libphp5.so
PDT 插件安装
PDT是PHP集成到Eclipse开发平台的插件
The PHP IDE project delivers a PHP Integrated Development Environment framework for the Eclipse platform. This project encompasses the development components necessary to develop PHP-based Web Applications and facilitates extensibility. It leverages the existing Web Tools Project in providing developers with PHP capabilities.
安装链接
Eclipse ->Help -> Install New Software and work with :
XDEBUG: 系统自带
启用方式:
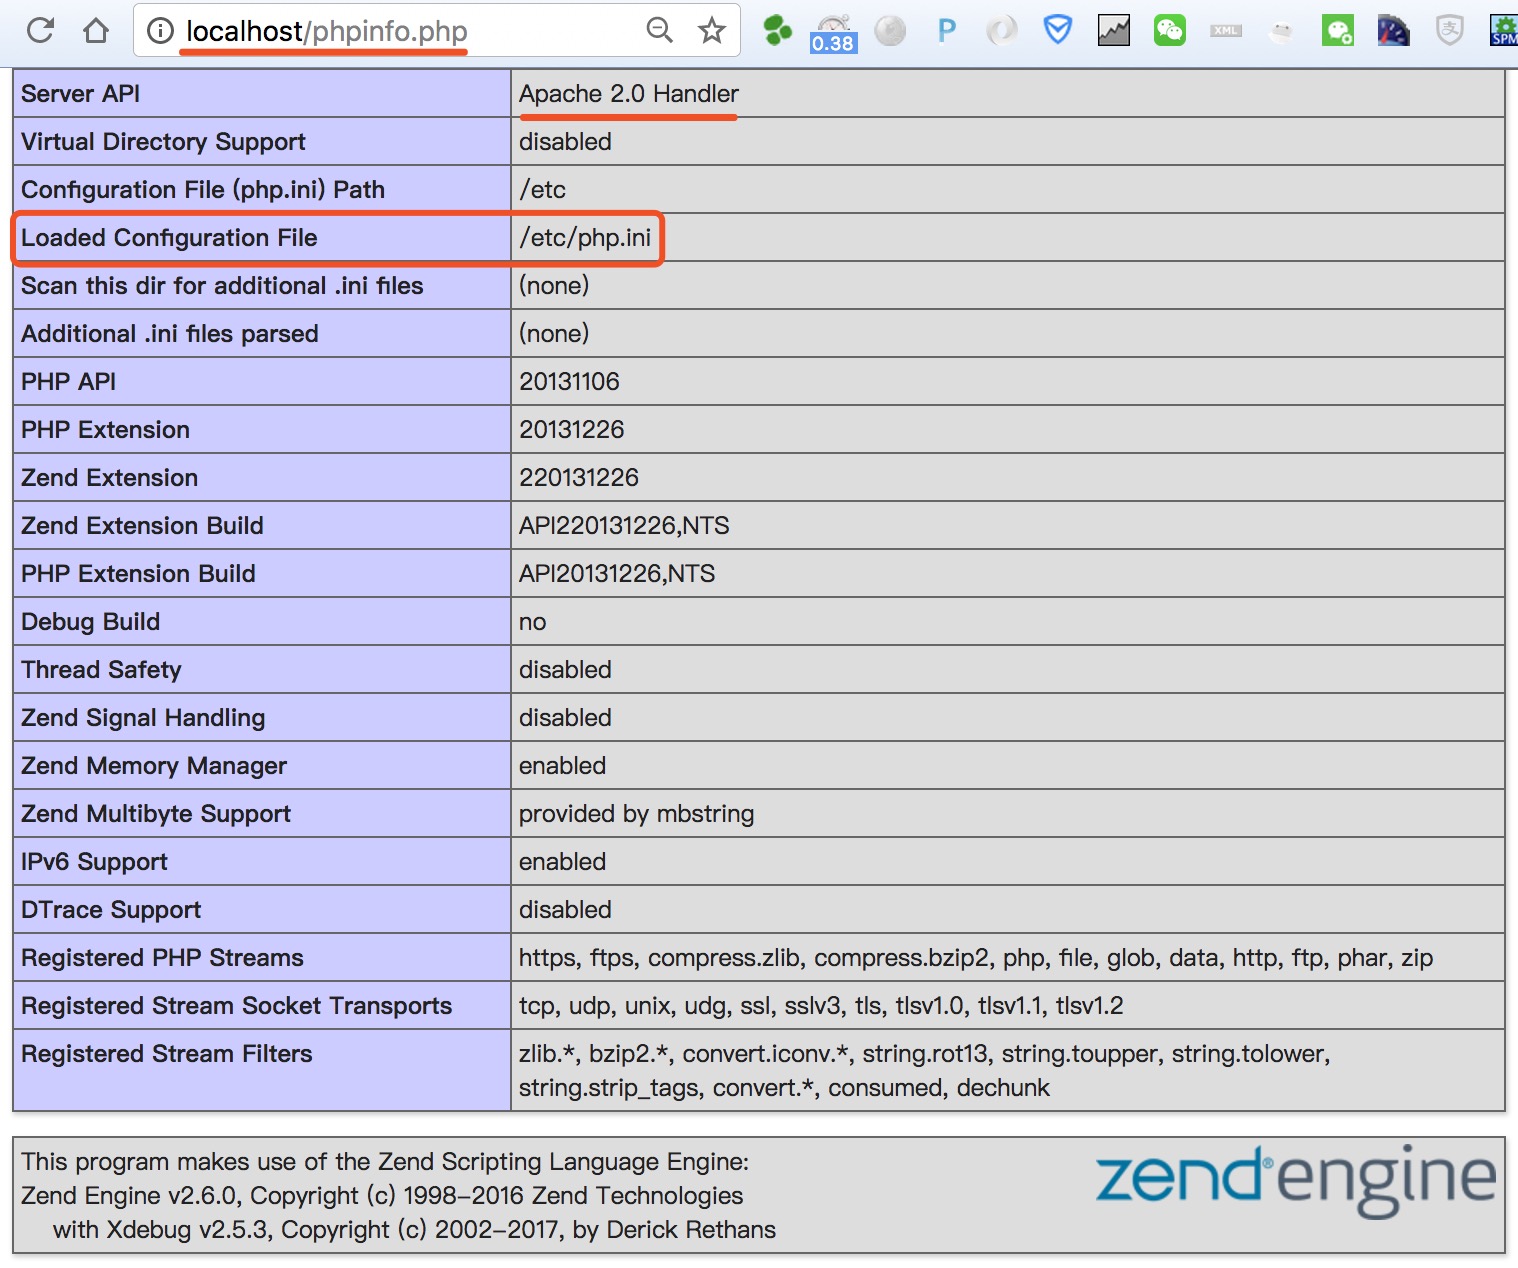
vim /etc/php.ini
去掉 zend_extension="/usr/lib/php/extensions/no-debug-non-zts-20090626/xdebug.so" 的注释
$ tail /etc/php.ini
; Local Variables:
; tab-width: 4
; End:
extension=mongo.so
extension=redis.so
extension=memcache.so
zend_extension=/usr/local/Cellar/php56/5.6.30_6/lib/php/extensions/no-debug-non-zts-20131226/xdebug.so
zend_extension=/usr/lib/php/extensions/no-debug-non-zts-20131226/xdebug.so
在 [XDEBUG] 添加如下配置:
xdebug.remote_handler=dbgp
xdebug.remote_port=9000
xdebug.auto_trace=on
xdebug.collect_params=on
xdebug.collect_return=on
xdebug.max_nestring_level=100
xdebug.profile_enable=on
xdebug.remote_enable=on
xdebug.remote_host=localhost
xdebug.trace_output_dir="/tmp"
xdebug.profile_output_dir="/tmp"
xdebug.idekey=webide
xdebug.mode=req
以上修改完成后记得重启apache
Eclipse
配置: Eclipse —> Preference(偏好设置...) —> php
PHP Debug:
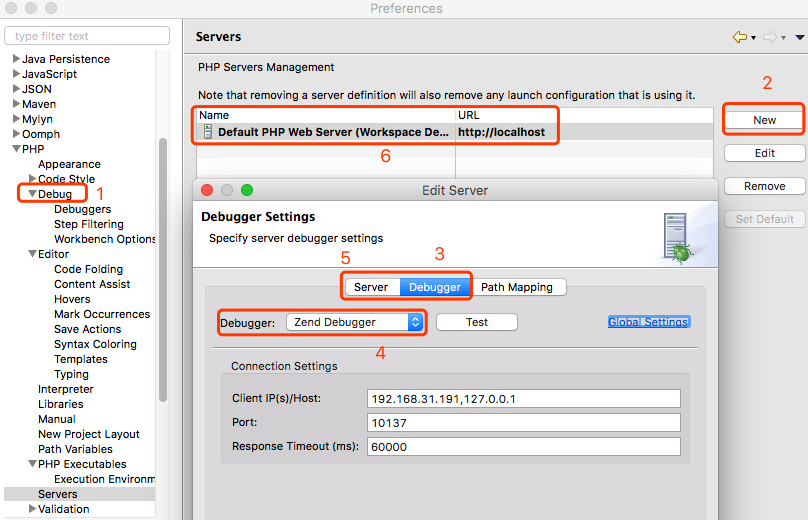
首先,新建Default PHP Web Server
Eclipse —> Perferences —> PHP —> Debug —> PHP Servers... —> New —> Generic PHP Server —> Debugger
—> 选择“Zend Debugger” —> Server —> 输入 Server Name 为“Default PHP Web Server”
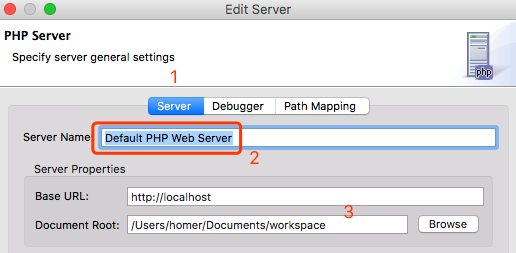
完成上图的配置Server后,如下图, PHP Server 选择 Default PHP Web Server
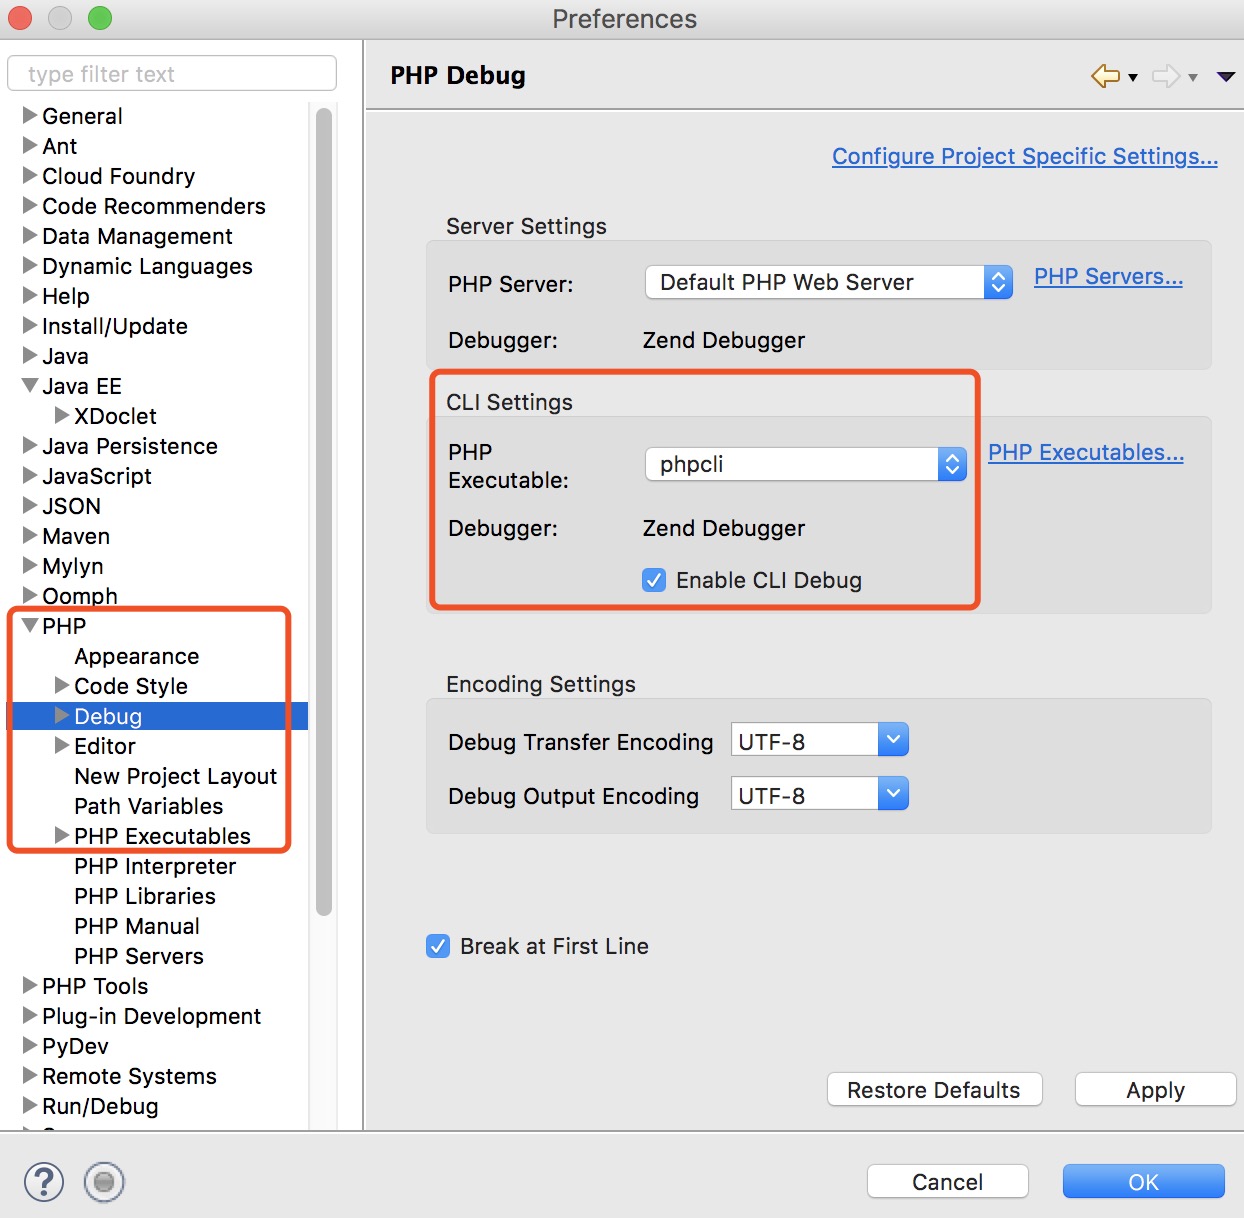
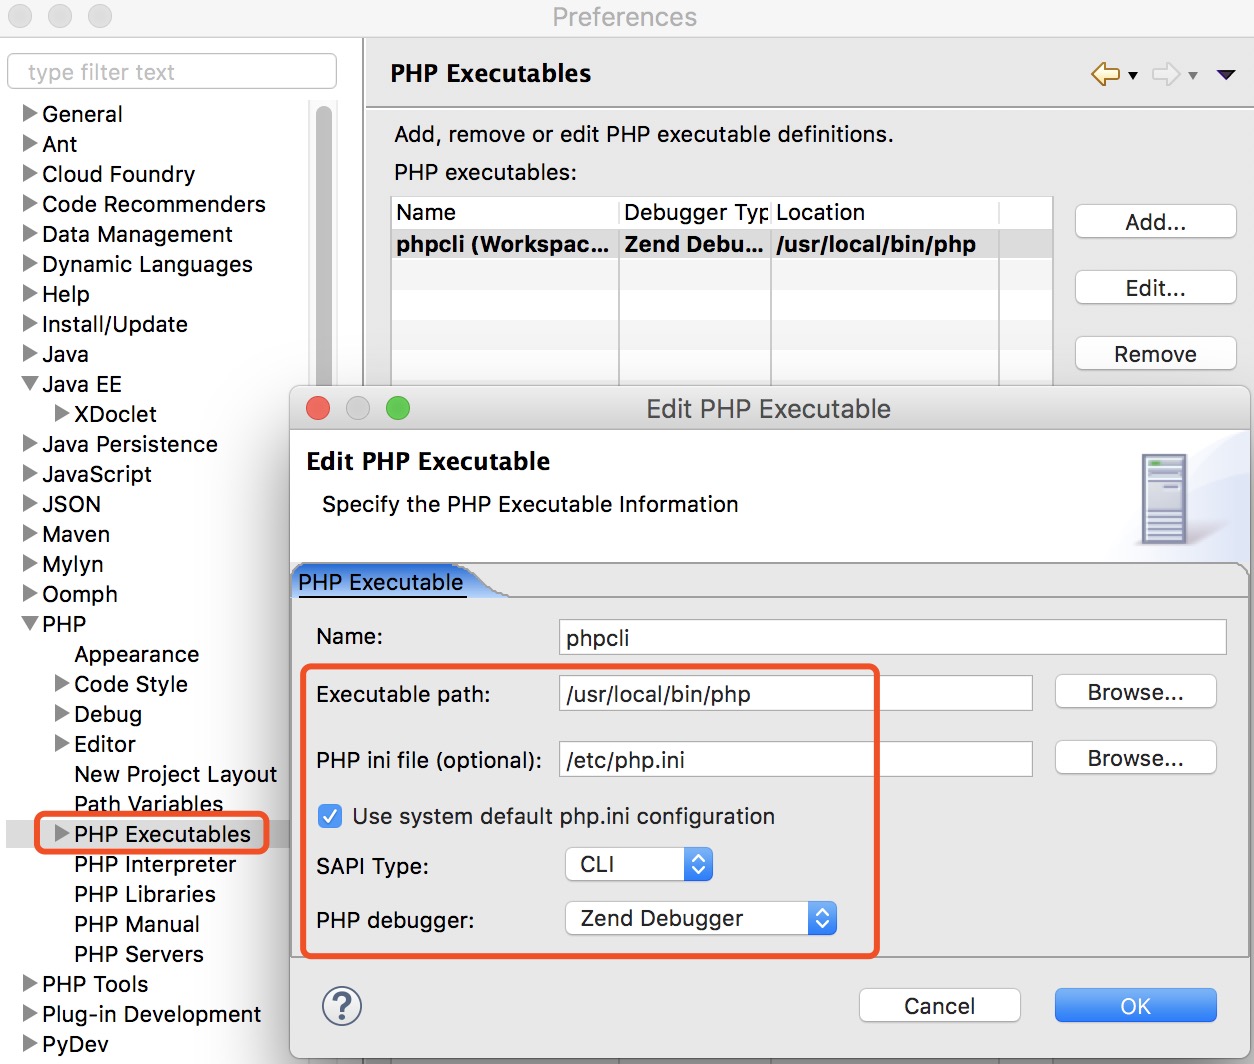
PHP Executables :
Server
Mac OS X 电脑上,DocumentRoot 默认根路径为:
vim /etc/apache2/httpd.conf
DocumentRoot "/Library/WebServer/Documents"
完整配置文件摘录:
#ServerName www.example.com:80
AllowOverride none
Require all denied
ServerName localhost ## 自定义域名
DocumentRoot "/Library/WebServer/Documents" ## 默认提供服务的根路径
## 默认根路径的权限配置
DirectoryIndex index.html index.php ## 自定义默认文件
Options FollowSymLinks Multiviews
MultiviewsMatch Any
AllowOverride None
Require all granted
修改默认的 DocumentRoot 路径到Eclipse wordspace 路径,如下图:
vim /etc/apache2/httpd.conf
ServerName localhost ## 自定义域名
DocumentRoot "/Users/homer/Documents/workspace" ## wordspace 项目根目录
## wordspace 项目根目录
DirectoryIndex index.html index.php ## 自定义默认文件
Options FollowSymLinks Multiviews
MultiviewsMatch Any
AllowOverride None
Require all granted
重启 Apache 服务:
sudo apachectl restart
启动Apache服务,默认的监听端口是80
sudo apachectl restart
然后访问: http://localhost 提示没有权限,如下图:
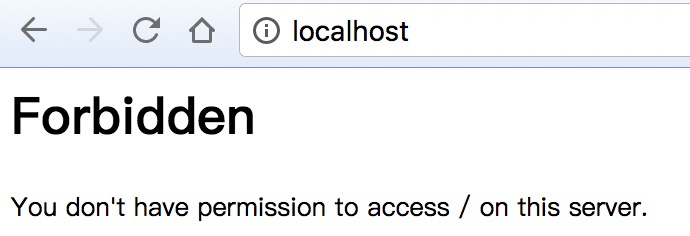
给出了403访问被禁止的消息,猜测是权限出现问题,查看Apache的日志:
$ tail /private/var/log/apache2/error_log
[Thu May 04 23:33:01.780883 2017] [core:error] [pid 10170] (13)Permission denied: [client ::1:54085] AH00035: access to / denied (filesystem path '/Users/user/Documents/workspace')because search permissions are missing on a component of the path
根据日志中的错误信息,判断一定是在这个路径上,某一个或者多个文件夹不允许_www用户(httpd的运行用户)search(针对文件夹的search对应的就是文件夹权限的x)。那么就从最后向最前找。很容易就发现/Users/user/Documents这个文件夹不允许其他人读取:
$ ll /Users/user/Documents
total 0
drwxr-x---4 homer staff 136 3 30 00:03 git
drwxr-----12 homer staff 408 5 4 23:26 workspace
因此,需要路径赋值权限:
$chmod -R o+xr /Users/homer/Documents
$ ll /Users/homer/Documents
total 0
drwxr-xr-x4 homer staff 136 3 30 00:03 git
drwxr--r-x12 homer staff 408 5 4 23:26 workspace
给路径赋值权限后,再次访问:
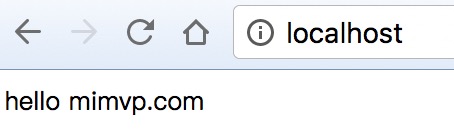
以上完成后在Eclipse 新建 php 项目,添加php文件,
然后就可以用 Debug as PHP Web page 调试

参考推荐:


 202
202


 被折叠的 条评论
为什么被折叠?
被折叠的 条评论
为什么被折叠?
 到【灌水乐园】发言


