


Apache Axis2 Eclipse Plugins allow Web service developers to easily and speedily expose the available plain old Java applications as Web services. The second part of the tutorial by Lahiru Sandakith walks you through two examples of developing and deploying a sample Web service using the Top Down approach (Contract First) using Axis2 Eclipse Plug-ins.
As a pre-requisite to this tutorial, it is recommended that you read from the Introduction to Getting Started in of this tutorial.
This part of the tutorial is also written for Eclipse SDK v3.2 and Axis2 Eclipse Plugin v1.1.
Tutorial Contents
The Top Down Approach in Web Services Development Using the Apache Axis2 Eclipse Plug-in
Start Eclipse SDK. First we have to create a JAVA project in Eclipse. (Follow the instruction on Eclipse SDK help.) You can give any name to the JAVA project, but for clarity, let us create a JAVA project called “TemperatureWebService”.
If you are continuing from Part 1 of the tutorial, you can use the same JAVA project in Eclipse called TemperatureWebService that you used in the Bottom Up approach. This can be used in the Top Down approach as well.
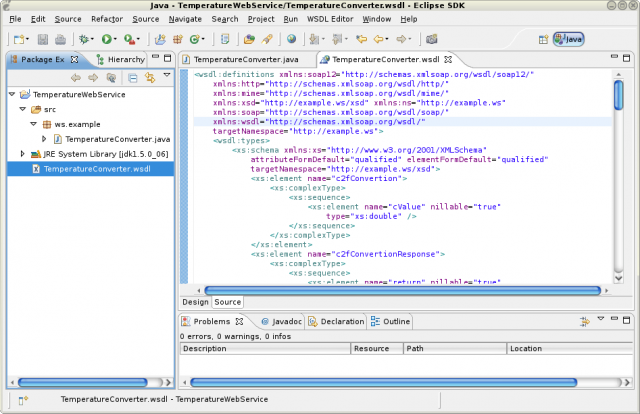
In the top down approach, we start with the service definition and then build the deployable Web service component. We will be using the as our WSDL service contract for developing, deploying, and testing our Web service created in the earlier steps. You can import this wsdl to the earlier created project under a resources folder.
Note : Also, you can point to any other WSDL and carry out the same procedure. The client code and some of the examples given in this part of the tutorial has been altered to work with other WSDLs as well.
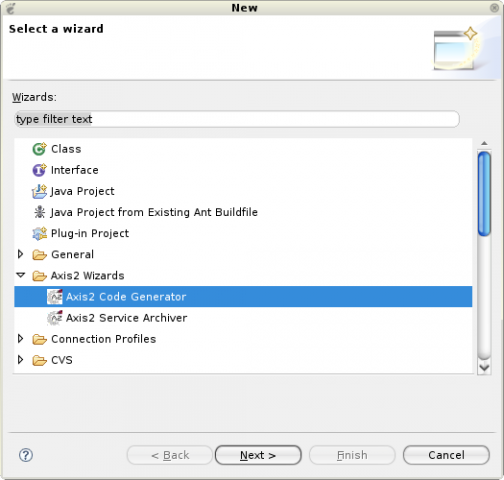
First we have to create the Server side and services.xml using the Axis2 Eclipse Codegen Plugin wsdl2java option. To start the Axis2 Eclipse Codegen Plugin, select it and click Next on the New wizard page.
Note : At any given time, you can go back through the wizard, change the settings, and even start the wizard all over again to create a different Web service on another JAVA project available in your workspace.
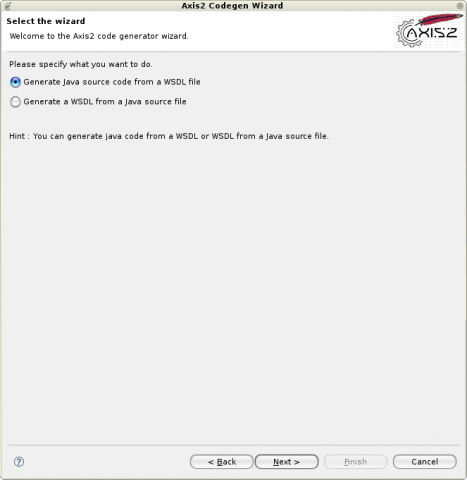
To create the client stub using the Axis2 Eclipse Codegen Plugin wsdl2java option, select Generate Java source code from WSDL file, and click Next to move to the next page.
Specify the TemperatureConverter.wsdl location. Else, you can select the location by downloading the file and then browsing for it. Click Next.
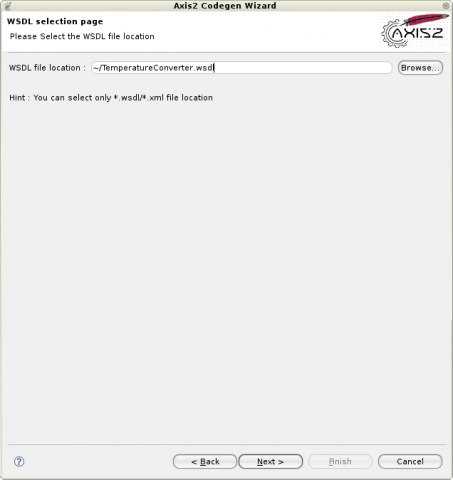
Once the WSDL file is selected, go to the next page where the codegen options must be selected. By far this is the most important page in the wizard. This page determines the characteristics of the code being generated.

Select the custom option and click Generate server side code with the service.xml. Click Next.
On the final page of the wizard, you can select the output file path by typing or browsing for it. You have the option of browsing only Eclipse workspace projects by clicking Add the source to a project on current eclipse workspace. Else you can save the codegen results to the file system.
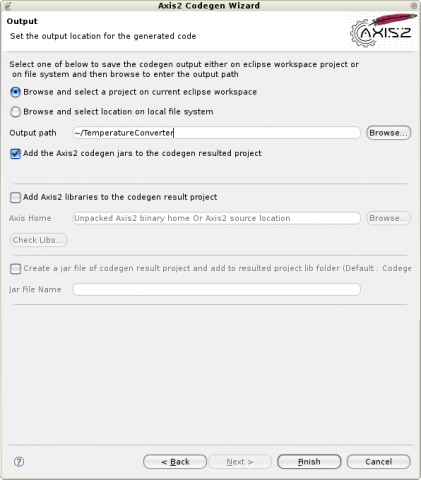
Click Add the source to a project on current eclipse workspace, and select the project you created earlier. Also click Add codegen jars to the codegen resulted project so that we can easily compile the code without worrying about adding Axis2 libraries to the JAVA project classpath as we did in the bottom up approach.
Click Finish. A message appears informing you that you have successfully completed the WSDL2Java code generation.
In order to compile the code we need to add the generated libraries to the project library path. You can add the .jar files in the lib directory by navigating the project properties of the Java project.
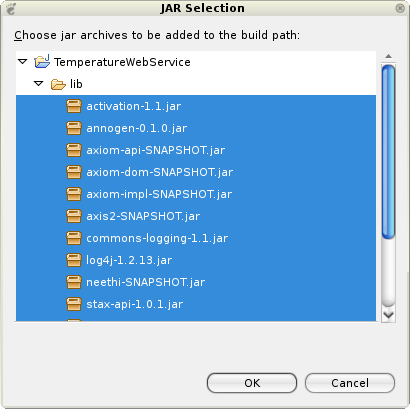
After adding the required libraries, you will be able to clean build the project without any errors.
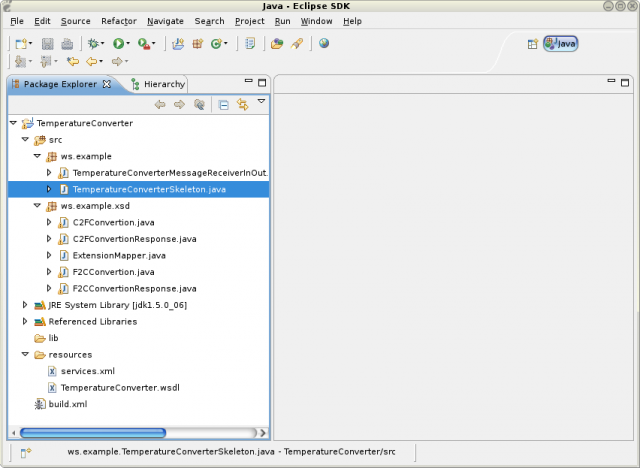
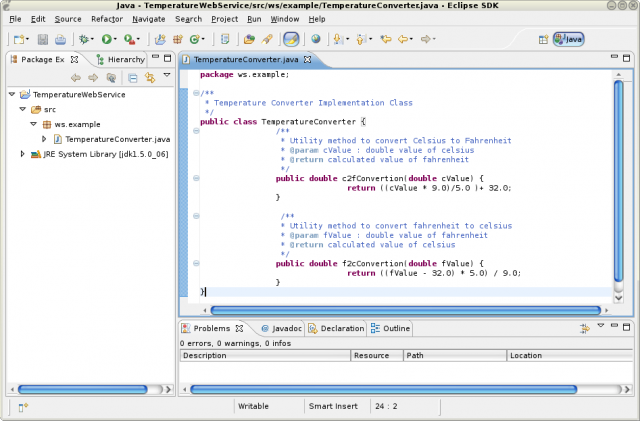
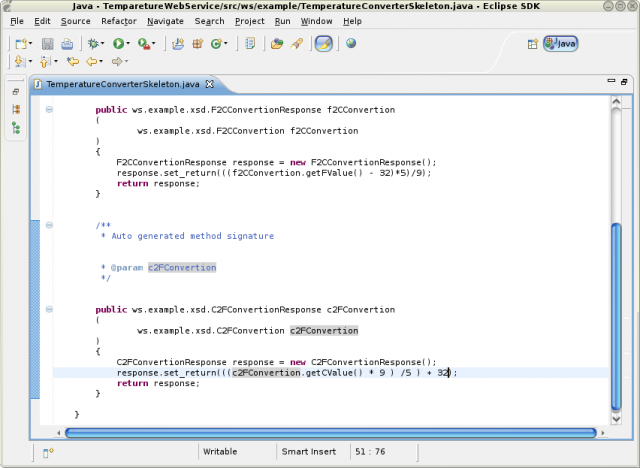
Next, fill the Skeleton class with the logic that you are implementing. Since the code generator only generated the skeleton of the logic, you have to fill the skeleton with the necessary business logic of the Web service you are going to deploy.
F2CConvertionResponse response = new F2CConvertionResponse();
response.set_return(((f2CConvertion.getFValue() - 32)*5)/9);
return response;
C2FConvertionResponse response = new C2FConvertionResponse();
response.set_return(((c2FConvertion.getCValue() * 9 ) /5 ) + 32);
return response;
Fill the TemperatureConverterSkeleton.java class with the logic for the two methods as shown in the image below.
Compile and build the whole project.
Next we have to create the Service Archive using the Axis2 Eclipse Service Archiver Plugin, and deploy it in our Axis2 Web application. These steps are similar to the Bottom up service archive generation.
By clicking File, New, and then Other or by simply pressing Ctrl + N, you can access the Axis2 wizards.
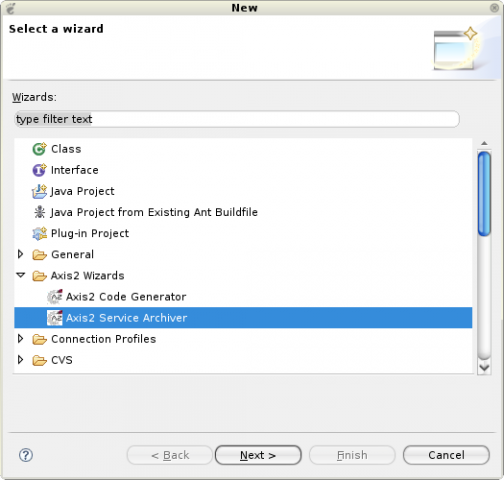
Select Axis2 Service Archiver and click Next.
On this page, browse and select the output location of the TemperatureWebService JAVA project that we developed earlier.
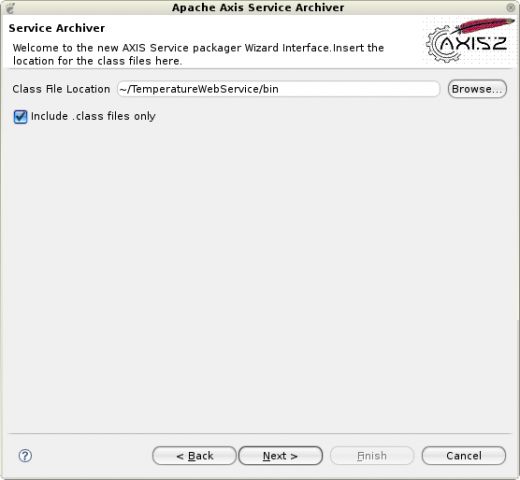
Here we point to our service implementation classes. In the case of more that one class, you do not need to do anything other than pointing to the JAVA project build location. The wizard will include all the implementation files. To be on the safe side, if you are going to expose a complex project as a Web service, it's always better to select the Include class files only check box to omit unnecessary resource files, which will only increase the size of the deployable service archive that we are going to create.
After selecting the correct output location, click Next.
Select the WSDL that you used to generate the code by browsing the WSDL file.
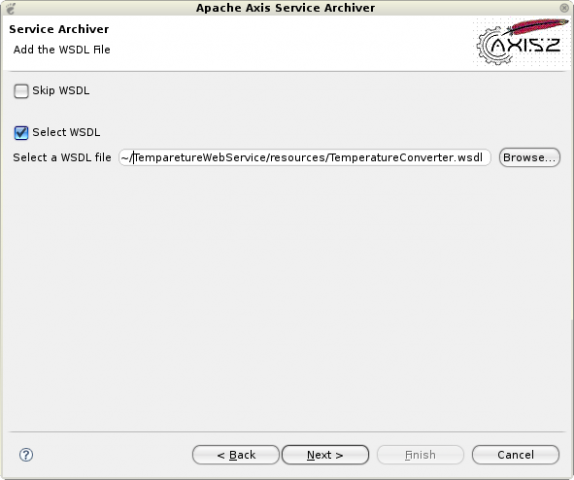
Click Next.
The next step is to add the libraries.
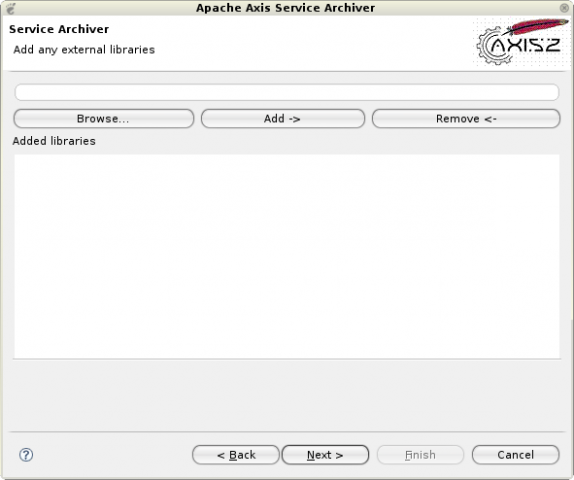
The library name (with full path) can be either typed or browsed for using the Browse button. Once a library name is entered, click Add to add the library to the list. The added libraries will be displayed in the Added libraries list. You can add as many external libraries as you wish.
If any added library has to be removed, select it from the Added libraries list and click Remove. In this example, we do not add any external libraries to the generated service.
Since we do not need any library at this time, click Next to proceed to the next page of the wizard.
This page is about the services.xml generation.
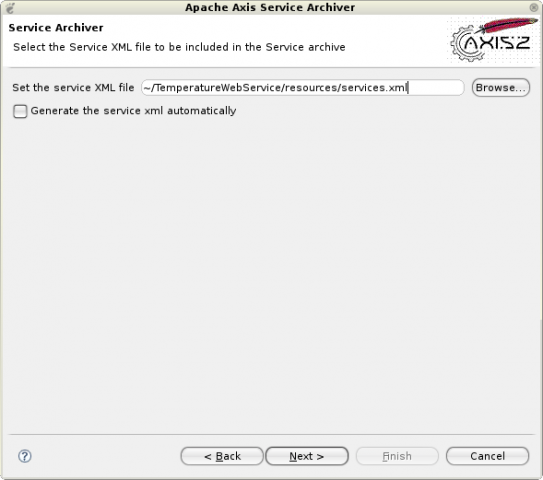
If you have a custom services.xml file, you can select the services.xml file on this page by browsing for it, or select the option of generating the service.xml automatically.
Select the generated services.xml by browsing the code generation results. Click Next.
The last page of the wizard asks for the output file location and the output archive file name.
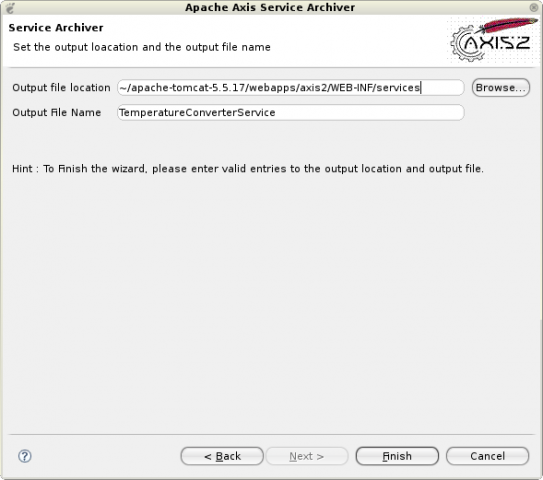
To be able to complete the wizard, you must enter a valid output file location and output file name. Note the location given in the example above. After specifying a name to identify the service you are deploying, you can directly guide the wizard to deploy the newly created Web service on any available Web service repository.
Since the Axis2 Web application is already deployed in the servlet container, you can easily guide the wizard to deploy the service in the Axis2 Webapp (Axis2.war) inside Apache Tomcat. After deploying the Web application, the service repository will be available in the webapp/axis2/WEB-INF/services folder.
After entering the necessary details, click Finish.
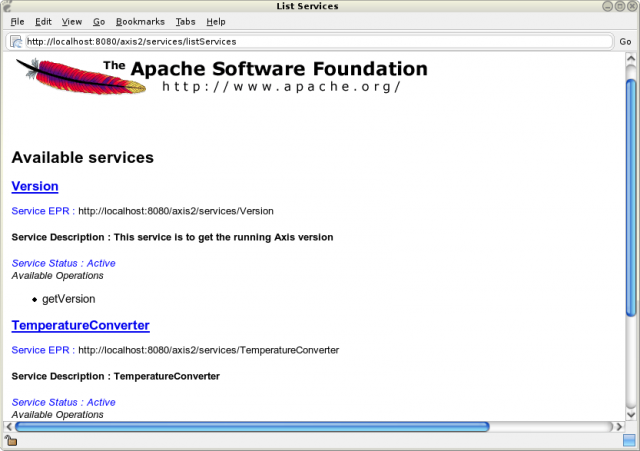
Start the servlet container (in this case Apache Tomcat) and navigate to This will lead to the Axis2 Web application home page. To verify that the newly created service is available, navigate to the Services tab and view the available services. Your Temperature Converter service will be there.
Next we have to generate code for the client side stubs using the Axis2 Eclipse Codegen Plugin, and invoke the Service.
This will enable you to test the deployed Temperature Converter Service by using the WSDL file that we have generated in the earlier steps.
To create the client stub using the Axis2 Eclipse Codegen Plugin wsdl2java option, start the Axis2 Eclipse Codegen Plugin by selecting it and clicking Next.
To create the client stub using the Axis2 Eclipse Codegen Plugin wsdl2java option, select Generate Java source code from WSDL file and click Next.
Select the TemperatureConverter.wsdl location by browsing for it. Click Next.
Once the WSDL file is selected, go to the next page where the codegen options must be selected.

This is the most important page in this wizard. This page determines the characteristics of the code being generated.
If this is the first time you invoked the wizard, you need not worry about these options since the most common options are selected by default. Advanced users will find it very easy to turn the knobs using these options. You can select Custom from the Select Codegen options list and then edit the fields that you need.
Since we are going to create stubs accepting the default values, we can just accept the default settings and click Next.
On the final page of the wizard, you can select the output file path by entering it or browsing for it. You have the option of browsing only Eclipse workspace projects by clicking Add the source to a project on current eclipse workspace. Else you have the option to save the codegen results to the file system.
Click Add the source to a project on current eclipse workspace and select the project that you created earlier. Also click Add codegen jars to the codegen resulted project so that we can easily compile the code without worrying about adding Axis2 libraries to the JAVA project classpath.
Click Finish. A message appears informing that you have successfully completed the WSDL2Java code generation.
We will now write the client, and use this client to invoke the Web service deployed earlier.
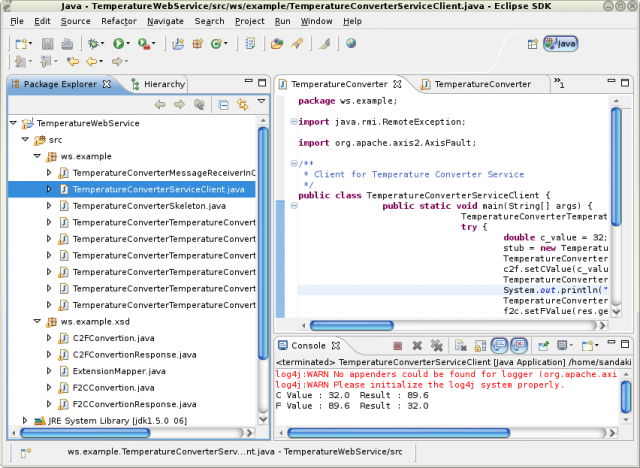
Add the following TemperatureConverterServiceClient. java class to the project to where stubs being generated. Remember to add the project to match the package decleared by the class.
package ws.example;
import java.rmi.RemoteException;
import org.apache.axis2.AxisFault;
/**
* Client for Temperature Converter Service
*/
public class TemperatureConverterServiceClient {
public static void main(String[] args) {
TemperatureConverterTemperatureConverterSOAP11Port_httpStub stub;
try {
double c_value = 32;
stub = new TemperatureConverterTemperatureConverterSOAP11Port_httpStub
("");
TemperatureConverterTemperatureConverterSOAP11Port_httpStub.C2FConvertion c2f
= new TemperatureConverterTemperatureConverterSOAP11Port_httpStub
.C2FConvertion(); c2f.setCValue(c_value);
TemperatureConverterTemperatureConverterSOAP11Port_httpStub
res .C2FConvertionResponse = stub.c2FConvertion(c2f);
System.out.println("C Value : "+c_value+ "\tResult : " +res.get_return());
TemperatureConverterTemperatureConverterSOAP11Port_httpStub.F2CConvertion f2c
= new TemperatureConverterTemperatureConverterSOAP11Port_httpStub
.F2CConvertion(); f2c.setFValue(res.get_return());
TemperatureConverterTemperatureConverterSOAP11Port_httpStub res1
= stub.f2CConvertion(f2c);
System.out.println("F Value : "+res.get_return()+ "\tResult : " +res1.get_return());
} catch (AxisFault e) {
e.printStackTrace();
} catch (RemoteException e) {
e.printStackTrace();
}
}
}
After adding the TemperatureConverterServiceClient. java class to the project, compile and build the project. After that you can run the client to test the service. If you have successfully carried out all the steps, then the temperature converter service will be invoked and the results of the service will be displayed on the command line output.
Note : The stub assumes that you run Tomcat on 8080 (if not you can change the stub URL and re-run the client).
Conclusion
Web service creation, deployment, and testing is no more a time consuming task. With the Axis2 Eclipse Plugins you can create, deploy, and test your Web service using a wizard. The time to write, deploy, and test a Web service is cut down to a minimum with the introduction of these tools.
References
Apache Axis2 -
Apache Axis2 Tools -
Eclipse.org -
Eclipse Plugins -


 被折叠的 条评论
为什么被折叠?
被折叠的 条评论
为什么被折叠?
 到【灌水乐园】发言


