


任务栏中的图标是一些进程的快捷方式,这些进程在计算机后台运行,如防病毒程序或音量控制。平时我们在使用QQ的时候,QQ主界面隐藏到系统托盘里,需要调用的时候在点击出来,很好很强大。

那么我们在C#中如何实现呢。本节将来一起探讨一下。其实就是NotifyICon控件的作用。那么您也会问那么,我在系统托盘中右键单击该Icon,会弹出菜单又是怎么实现的呢?

其实这个是contextMenuStrip控件的作用。那么当好友传来信息,托盘中好友头像Icon不断闪烁便是,该图片隐藏与显示的交叉实现了。使用Time控件控制显示的时间。这的确是个有趣的技巧。NotifyIcon控件提供了编写此功能的方法。Icon属性定义显示在通知区域中的图标。图标的弹出菜单由 ContextMenu属性确定。Text属性分配工具提示文本。要在通知区域中显示图标,必须将 Visible属性设置为 true。
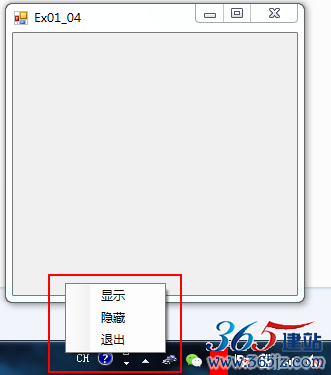
1.创建一个项目,向窗体中添加NotifyIcon控件和ContextMenuStrip控件;
2.为ContextMenuStrip控件添加子项;
3.选择NotifyIcon控件,在其属性窗口中将ContextMenuStrip属性设置为添加到窗体上的ContextMenuStrip控件,并为Icon属性设置图片。
注:必须为NotifyIcon控件的Icon属性设置图标,否则是看不到的
代码:
private void 显示ToolStripMenuItem_Click(object sender, EventArgs e)
{
this.Visible = true;
}
private void 设置ToolStripMenuItem_Click(object sender, EventArgs e)
{
this.Visible = false;
}
private void 退出ToolStripMenuItem_Click(object sender, EventArgs e)
{
Application.Exit();
}
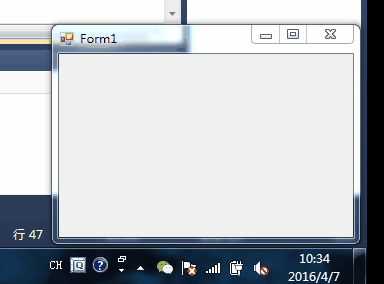
效果图:
2.图标的闪烁效果
在图标闪烁中提到,给NotifyIcon赋予一个ICON可以控制使其在任务栏显示,闪烁的效果是加上一个空白的图标,正常图标与空白图标的切换进而实现闪烁的效果。
注:不能使用清除icon的方法,否则图标是在该位置清除,会引起其他图标的移动,空白图标起到占位的作用
代码如下:
说明:property是vs的一个资源管理功能,可以存储系统图标及一些常量
private Icon blank = Properties.Resources.blank;
private Icon normal = Properties.Resources.normal;
private bool _status = true;
private bool _isBlink = false;
右键菜单控制图标是不是显示
private void toolStripMenuItem1_Click(object sender, EventArgs e)
{
if (_isBlink == false)
{
_isBlink = true;
timer1.Enabled = true;
timer1.Start();
}
else
{
_isBlink = false;
timer1.Stop();
notifyIcon1.ShowBalloonTip(5000, "提示", "关闭闪烁效果!", ToolTipIcon.Info);
}
}
定时器中修改图标的状态,定时反转图标
private void timer1_Tick(object sender, EventArgs e)
{
if (_status)
notifyIcon1.Icon = normal;
else
notifyIcon1.Icon = blank;
_status = !_status;
}
气泡提示:
notifyIcon1.ShowBalloonTip(5000, "提示", "关闭闪烁效果!", ToolTipIcon.Info);
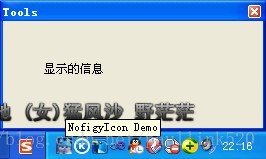
实例实践:在文本框中输入文字,在系统托盘中显示提示气泡信息
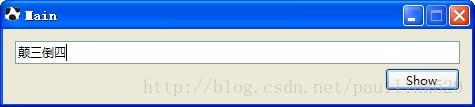
效果为:

具体代码分析如下:
public partial class Main : Form
{
public Main()
{
InitializeComponent();
}
private void btnShow_Click(object sender, EventArgs e)
{
string tipText = this.txtText.Text.Trim() == "" ? "No text!":this.txtText.Text.Trim();
this.notifyIcon.ShowBalloonTip(1000, "Tip", tipText, ToolTipIcon.Info);
//显示时间,标题Tip,显示文本,显示标号
}
private void notifyIcon_MouseMove(object sender, MouseEventArgs e)
{
// 获得屏幕的宽
Screen screen = Screen.PrimaryScreen;
int screenWidth = screen.Bounds.Width;
// 获得工作区域的高
int workAreaHeight = Screen.PrimaryScreen.WorkingArea.Height;
// 获得提示窗体的宽和高
int toolTipWidth = Tools.GetInstance().Width;
int toolTipHeight = Tools.GetInstance().Height;
// 那么提示窗体的左上角坐标就是:屏幕的宽 - 提示窗体的宽, 工作区域的高 - 提示窗体的高
Tools.GetInstance().Location = new Point(screenWidth - toolTipWidth, workAreaHeight - toolTipHeight);
// 显示提示窗体
Tools.GetInstance().Show();
// 开启Timer
this.timer1.Enabled = true;
}
private void timer1_Tick(object sender, EventArgs e)
{
// 关闭Timer
this.timer1.Enabled = false;
// 隐藏提示窗体
Tools.GetInstance().Hide();
}
}
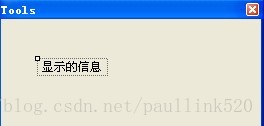
下面就这个栗子在添加一个仿QQ提示框
这个窗口的代码是:
private static Tools Instance = null;
public static Tools GetInstance()
{
if (Instance == null)
Instance = new Tools();
return Instance;
}
最终效果是:


 1145
1145


 被折叠的 条评论
为什么被折叠?
被折叠的 条评论
为什么被折叠?
 到【灌水乐园】发言


