


(1)从teamcity官网下载jmeter插件:https://teamcity.jetbrains.com/repository/download/TeamCityPluginsByJetBrains_JMeterPlugin_Build/.lastSuccessful/jmeter.zip
如果没法下载,可以通过网盘下载:
http://pan.baidu.com/s/1hrTk4aK
(2)安装jmeter插件,如下图进入管理员界面,在插件管理中导入下载好的jmeter.zip

(3)正常建立项目,如下图在Build Step中选择Command Line,然后按照下图配置
- Runner Type: Command Line
- Step name :自定义
- Run : Custom script
- Custom script:说明下这个命令因为我把jmeter的安装包放到部署teamcity的window服务器的d盘,所以我的脚本如下,路径根据自己代码自行调整
d:
cd D:\apache-jmeter-3.0\bin
jmeter.bat -n -t D:\apache-jmeter-3.0\bin\skjAutoTest\skjAutoTest.jmx -l test.jtl

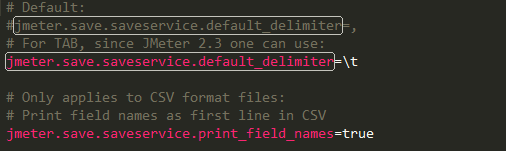
(4)修改jmeter安装包的配置文件apache-jmeter-3.0\bin\jmeter.properties,在配置文件中启动下面设置
jmeter.save.saveservice.default_delimiter=\t
jmeter.save.saveservice.print_field_names=true
(5)在Build Features中增加
- Build Features: Performance Metrics Calculation
- File to aggregate results: test.jtl

以上步骤做好保存,然后run下配置好了项目即可,在run成功后,如下图,在run好的界面中可以看到本次执行结果的结果


 72
72


 被折叠的 条评论
为什么被折叠?
被折叠的 条评论
为什么被折叠?
 到【灌水乐园】发言


