


准备目录
[root@sqh ~]# mkdir /usr/local/nginx
[root@sqh ~]# cd /usr/local/nginx
添加一些支持和依赖
1.安装gcc
安装redis需要先将官方下载的源码进行编译,编译依赖gcc环境,如果没有gcc环境,则需要安装。
查看gcc版本
gcc -v
如果未安装gcc,提示gcc 命令未找到,则需安装gcc。执行以下命令来完成gcc安装。
yum -y install gcc
2.pcre、pcre-devel安装
pcre(Perl Compatible Regular Expressions)是一个perl库,包括perl兼容的正则表达式库。nginx的http模块使用pcre来解析正则表达式,所以需要安装pcre库,pcre-devel是使用pcre开发的一个二次开发库。nginx也需要此库。执行以下命令进行安装:
yum install -y pcre pcre-devel
3.zlib安装
zlib库提供了很多种压缩和解压缩方式,nginx使用zlib对http包的内容进行gzip,所以需要在centos 7上安装zlib库。执行以下命令进行安装操作:
yum install -y zlib zlib-devel
4.openssl安装
yum install -y openssl openssl-devel
5.检查是否安装成功
gcc-4.4.7-23.el6.x86_64
libgcc-4.4.7-23.el6.i686
libgcc-4.4.7-23.el6.x86_64
gcc-c++-4.4.7-23.el6.x86_64
[root@sqh ~]# rpm -qa|grep openssl
openssl-1.0.1e-58.el6_10.i686
openssl-1.0.1e-58.el6_10.x86_64
openssl-devel-1.0.1e-58.el6_10.x86_64
[root@sqh ~]# rpm -qa|grep pcre
pcre-7.8-7.el6.x86_64
pcre-devel-7.8-7.el6.x86_64
pcre-7.8-7.el6.i686
[root@sqh ~]# rpm -qa|grep zlib
zlib-1.2.3-29.el6.x86_64
zlib-devel-1.2.3-29.el6.x86_64
zlib-1.2.3-29.el6.i686
下载
1.Nginx,在http://nginx.org/download/上下载相应的版本下载nginx-1.8.0.tar.gz
2.解压 tar -zxvf nginx-1.8.0.tar.gz
3.进入nginx-1.8.0/文件夹,设置一下配置信息./configure --prefix=/usr/local/nginx(安装后的文件存放路径)。
[root@sqh nginx-1.8.0]# ./configure --prefix=/usr/local/nginx
Configuration summary
  + using system PCRE library
  + OpenSSL library is not used
  + md5: using system crypto library
  + sha1: using system crypto library
  + using system zlib library

  nginx path prefix: "/usr/local/nginx"
  nginx binary file: "/usr/local/nginx/sbin/nginx"
  nginx configuration prefix: "/usr/local/nginx/conf"
  nginx configuration file: "/usr/local/nginx/conf/nginx.conf"
  nginx pid file: "/usr/local/nginx/logs/nginx.pid"
  nginx error log file: "/usr/local/nginx/logs/error.log"
  nginx http access log file: "/usr/local/nginx/logs/access.log"
  nginx http client request body temporary files: "client_body_temp"
  nginx http proxy temporary files: "proxy_temp"
  nginx http fastcgi temporary files: "fastcgi_temp"
  nginx http uwsgi temporary files: "uwsgi_temp"
  nginx http scgi temporary files: "scgi_temp"
make
make[1]: Leaving directory `/usr/local/nginx/nginx-1.8.0'
make -f objs/Makefile manpage
make[1]: Entering directory `/usr/local/nginx/nginx-1.8.0'
sed -e "s|%%PREFIX%%|/usr/local/nginx|" \
        -e "s|%%PID_PATH%%|/usr/local/nginx/logs/nginx.pid|" \
        -e "s|%%CONF_PATH%%|/usr/local/nginx/conf/nginx.conf|" \
        -e "s|%%ERROR_LOG_PATH%%|/usr/local/nginx/logs/error.log|" \
        < man/nginx.8 > objs/nginx.8
make[1]: Leaving directory `/usr/local/nginx/nginx-1.8.0'
make install
make -f objs/Makefile install
make[1]: Entering directory `/usr/local/nginx/nginx-1.8.0'
test -d '/usr/local/nginx' || mkdir -p '/usr/local/nginx'
test -d '/usr/local/nginx/sbin'         || mkdir -p '/usr/local/nginx/sbin'
test ! -f '/usr/local/nginx/sbin/nginx'         || mv '/usr/local/nginx/sbin/nginx'                '/usr/local/nginx/sbin/nginx.old'
cp objs/nginx '/usr/local/nginx/sbin/nginx'
test -d '/usr/local/nginx/conf'         || mkdir -p '/usr/local/nginx/conf'
cp conf/koi-win '/usr/local/nginx/conf'
cp conf/koi-utf '/usr/local/nginx/conf'
cp conf/win-utf '/usr/local/nginx/conf'
test -f '/usr/local/nginx/conf/mime.types'         || cp conf/mime.types '/usr/local/nginx/conf'
cp conf/mime.types '/usr/local/nginx/conf/mime.types.default'
test -f '/usr/local/nginx/conf/fastcgi_params'         || cp conf/fastcgi_params '/usr/local/nginx/conf'
cp conf/fastcgi_params         '/usr/local/nginx/conf/fastcgi_params.default'
test -f '/usr/local/nginx/conf/fastcgi.conf'         || cp conf/fastcgi.conf '/usr/local/nginx/conf'
cp conf/fastcgi.conf '/usr/local/nginx/conf/fastcgi.conf.default'
test -f '/usr/local/nginx/conf/uwsgi_params'         || cp conf/uwsgi_params '/usr/local/nginx/conf'
cp conf/uwsgi_params         '/usr/local/nginx/conf/uwsgi_params.default'
test -f '/usr/local/nginx/conf/scgi_params'         || cp conf/scgi_params '/usr/local/nginx/conf'
cp conf/scgi_params         '/usr/local/nginx/conf/scgi_params.default'
test -f '/usr/local/nginx/conf/nginx.conf'         || cp conf/nginx.conf '/usr/local/nginx/conf/nginx.conf'
cp conf/nginx.conf '/usr/local/nginx/conf/nginx.conf.default'
test -d '/usr/local/nginx/logs'         || mkdir -p '/usr/local/nginx/logs'
test -d '/usr/local/nginx/logs' ||         mkdir -p '/usr/local/nginx/logs'
test -d '/usr/local/nginx/html'         || cp -R html '/usr/local/nginx'
test -d '/usr/local/nginx/logs' ||         mkdir -p '/usr/local/nginx/logs'
make[1]: Leaving directory `/usr/local/nginx/nginx-1.8.0'
启动
启动代码格式:nginx安装目录地址 -c nginx配置文件地址
例如:
[root@sqh sbin]# /usr/local/nginx/sbin/nginx -c /usr/local/nginx/conf/nginx.conf
停止
nginx有三种停止方式:
从容停止
1.查看进程 ps -ef|grep nginx
[root@sqh sbin]# ps -ef|grep nginx
root      9862     1  0 01:04 ?        00:00:00 nginx: master process /usr/local/nginx/sbin/nginx -c /usr/local/nginx/conf/nginx.conf
nobody    9863  9862  0 01:04 ?        00:00:00 nginx: worker process
root      9886  1612  0 01:15 pts/0    00:00:00 grep nginx
2.杀死进程
[root@sqh sbin]# kill -QUIT 9862
快速停止
1、查看进程号
[root@sqh sbin]# ps -ef|grep nginx
root 2845 1 0 09:03 ? 00:00:00 nginx: master process /usr/local/nginx/sbin/nginx -c /usr/local/nginx/conf/nginx.conf
nobody 2851 2845 0 09:03 ? 00:00:00 nginx: worker process
root 2855 2711 0 09:04 pts/1 00:00:00 grep nginx
2.杀死进程
[root@sqh sbin]# kill -TERM 9892
强制停止
[root@sqh sbin]# pkill -9 nginx
重启
1、验证nginx配置文件是否正确
方法一:进入nginx安装目录sbin下,输入命令./nginx -t
[root@sqh sbin]# ./nginx -t
nginx: the configuration file /usr/local/nginx/conf/nginx.conf syntax is ok
nginx: configuration file /usr/local/nginx/conf/nginx.conf test is successful
说明配置文件正确!
方法二:在启动命令-c前加-t
[root@sqh sbin]# /usr/local/nginx/sbin/nginx -t -c /usr/local/nginx/conf/nginx.conf
nginx: the configuration file /usr/local/nginx/conf/nginx.conf syntax is ok
nginx: configuration file /usr/local/nginx/conf/nginx.conf test is successful
2、重启Nginx服务
方法一:进入nginx可执行目录sbin下,输入命令./nginx -s reload 即可
[root@sqh sbin]# ./nginx -s reload
方法二:查找当前nginx进程号,然后输入命令:kill -HUP 进程号 实现重启nginx服务
[root@sqh sbin]# ps -ef|grep nginx
root 2845 1 0 09:03 ? 00:00:00 nginx: master process /usr/local/nginx/sbin/nginx -c /usr/local/nginx/conf/nginx.conf
nobody 2851 2845 0 09:03 ? 00:00:00 nginx: worker process
root 2855 2711 0 09:04 pts/1 00:00:00 grep nginx
[root@sqh sbin]# kill -HUP 9928
配置nginx
修改配置文件
切换目录:[root@sqh nginx]# cd conf/
修改文件:[root@sqh conf]# vi nginx.conf
主要是修改server配置节的内容,listen为nginx的端口号,默认为80,可按需修改。

ESC键,退出编辑模式,按冒号键“:”进入命令模式,输入“wq”然后回车,保存并退出;
切换到sbin目录:[root@sqh conf]# cd /usr/local/nginx/sbin
启动Nginx: [root@sqh conf]# ./nginx
查看是否启动:[root@sqh sbin]# lsof nginx -i
开放防火墙端口:
/sbin/iptables -I INPUT -p tcp --dport 80 -j ACCEPT
/etc/rc.d/init.d/iptables save
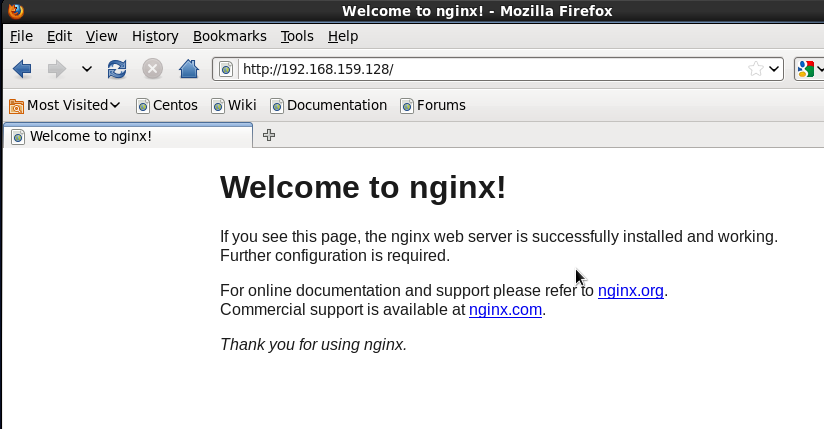
访问nginx,出现如下界面表示配置正常 (本机ip+80端口 ps:xxx.xxx.xxx.xxx:80)


 510
510


 被折叠的 条评论
为什么被折叠?
被折叠的 条评论
为什么被折叠?
 到【灌水乐园】发言


