| Delphi APP 開發入門(六)Object Pascal 語法初探 << 前情 今天教大家使用的是通知(Notification)功能,在Delphi XE6很貼心的也將通知的功能封裝成元件,只要簡單的設定屬性就可以使用了。我們以簡單的篇幅教大家快速使用程式的通知功能,在後面我們會以比較大的篇幅放在Google Cloud Messaging(GCM)搭配Kinvey的BAAS服務(Backend as a Service)實做出推播通知(Push Notification)功能。 通知Notification 在Delphi XE6使用通知功能相當簡單,只要在表單上放置TNotificationCenter(通知中心)元件就可以了!接著顯示通知的方式也相當簡單。 
一、馬上出現通知訊息 procedure TForm1.Button1Click(Sender: TObject);
var
MyNotification : TNotification; // 宣告一個TNotification
begin
MyNotification := NotificationCenter1.CreateNotification;
Try
MyNotification.AlertBody := '馬上顯示通知訊息'; // 訊息內容
NotificationCenter1.PresentNotification(MyNotification);
Finally
MyNotification.DisposeOf;
End;
end;
二、排程十秒後顯示通知 procedure TForm1.Button2Click(Sender: TObject);
var
MyNotification : TNotification;
begin
MyNotification := NotificationCenter1.CreateNotification;
Try
// 給排程的通知訊息名稱
MyNotification.Name := 'ScheduleNotification';
MyNotification.AlertBody := '十秒顯示通知訊息';
// 設定時間是現在加上十秒
MyNotification.FireDate := Now + EncodeTime(0,0,10,0);
NotificationCenter1.ScheduleNotification(MyNotification);
Finally
MyNotification.DisposeOf;
End;
end;
三、取消排程訊息 procedure TForm1.Button3Click(Sender: TObject);
begin
// 取消通知訊息,參數內需對應 Notification.Name
NotificationCenter1.CancelNotification('ScheduleNotification');
end;
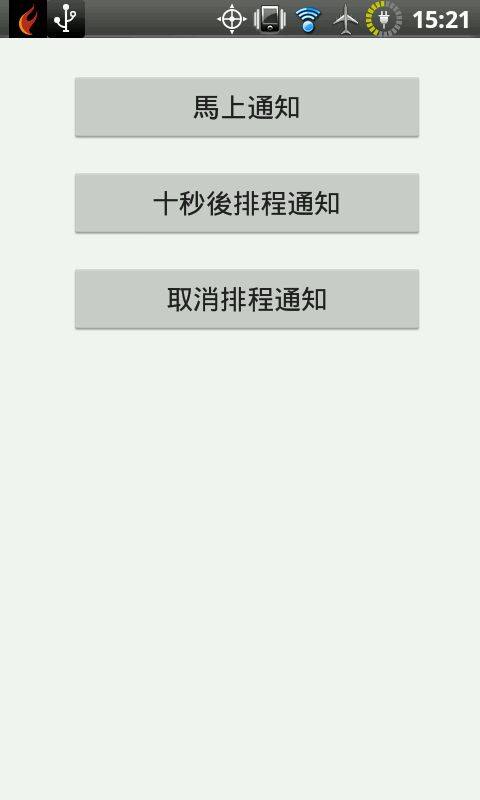
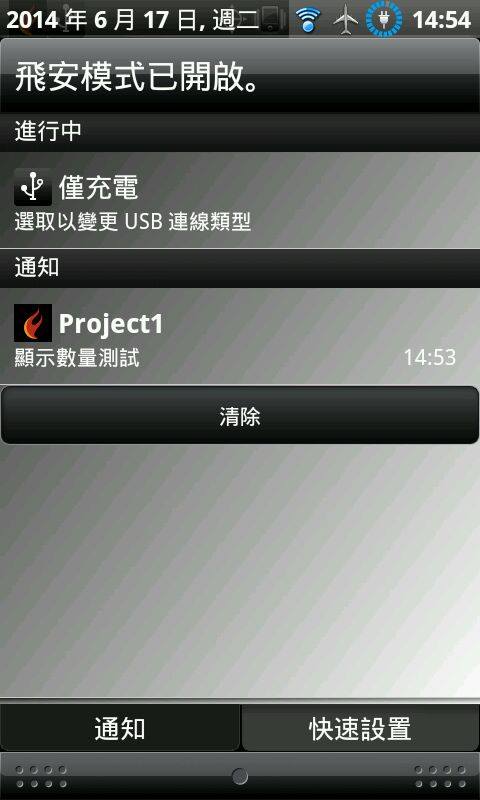
執行如下
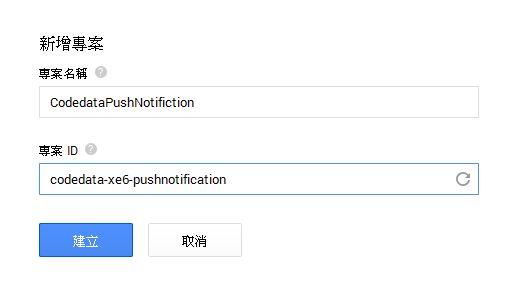
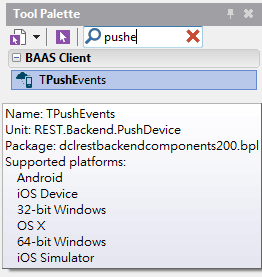
 推播通知Push Notification 接下來我們要談的是推播通知,當APP不在前景執行時,能夠用自己的平台或伺服器發送通知給行動的一項技術。在iOS平台上有APNS(Apple Push Notification Service),而Android平台上則叫做GCM(Google Cloud Messaging),在今天我們先以Android的GCM搭配BaaS服務Kinvey為例子。 Google Cloud Messaging 1.進入網站 https://console.developers.google.com
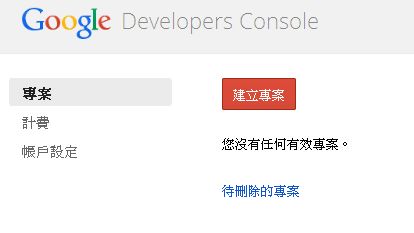
2.輸入專案名稱跟專案ID
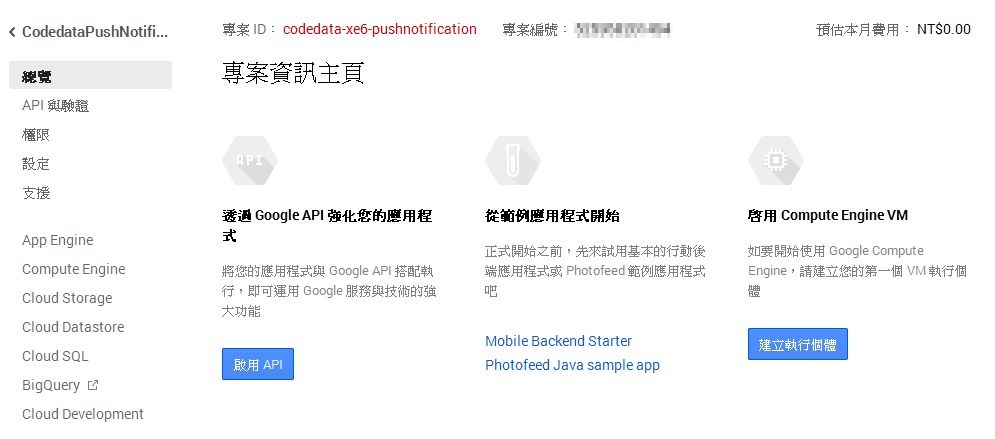
3.完成後,記得專案編號(等等在其他設定會用到)
4.接著點選API 找到 Google Cloud Messageing for Anroid 後按關閉按鈕打開 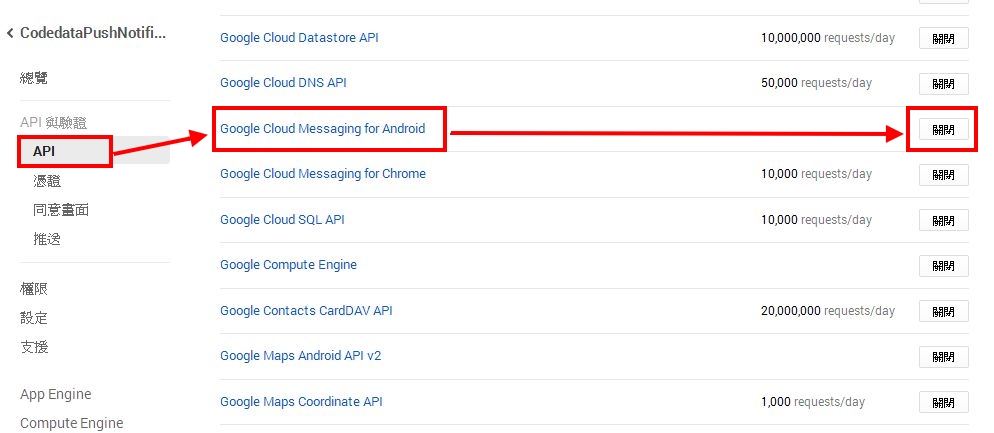 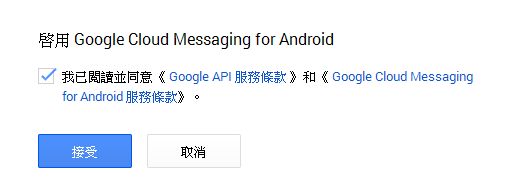
五、點選建立新的金鑰 
六、點選伺服器金鑰 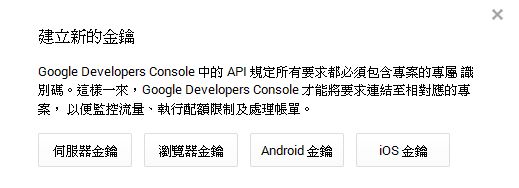
七、如果沒有特別允許使用IP可以略過後按建立就行了 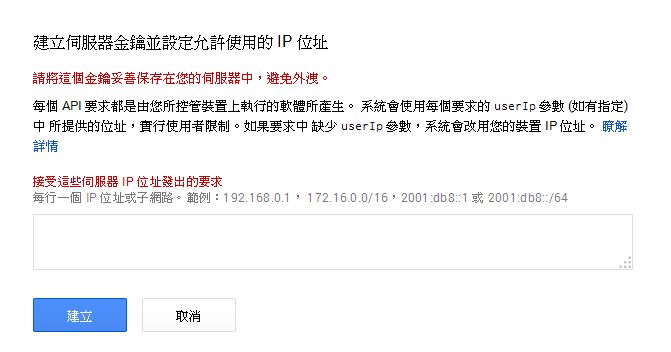
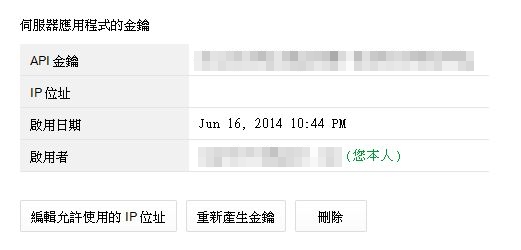
八、一樣要記得API金鑰
 kinvey申請 在行動裝置的開發領域目前有個BaaS(後端即服務:Backend as a Service)的技術概念。BaaS是指為行動裝置開發者提供整合雲端的基礎服務,像是資料/文件的儲存或是帳號管理、訊息推送、社群網路整合等….
而在Delphi XE6中支援二個熱門的服務為Kinvey及Parse,在這邊我們以Kinvey做為例子。
1.進入Kinvey網站(http://www.kinvey.com/)按下Sign Up註冊
 2.註冊帳號只要電子郵件跟密碼就行了 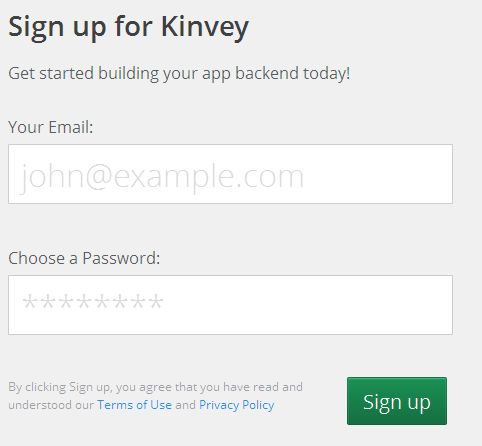
3.點選Individual 個人帳戶的Get Started即可 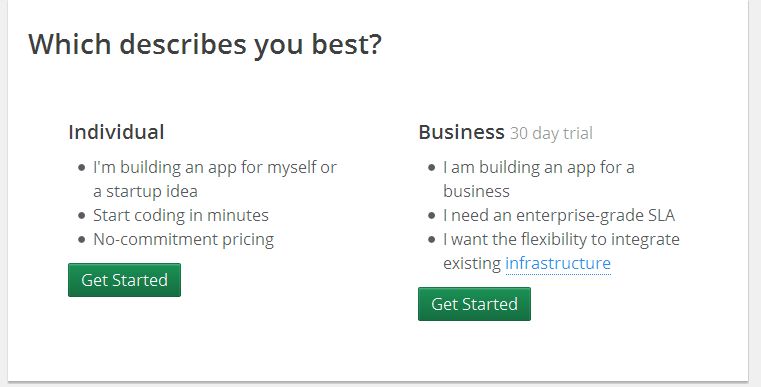
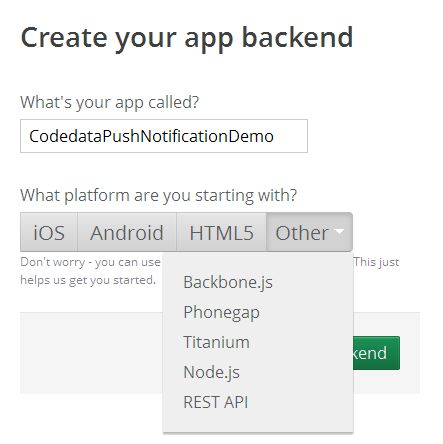
4.接著建立一個新的專案,平台的話選擇Other(其他)的REST API即可
5.建立完成後,右下角的API Keys要記下來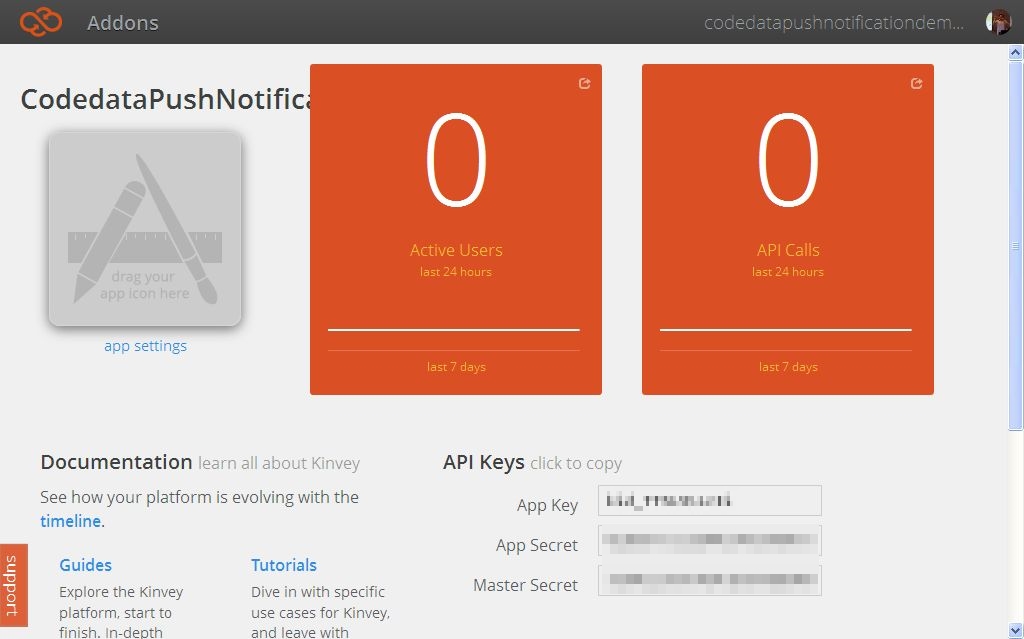 6.接著我們要建立可以存取服務的使用者,點選上面的Addons,在Core內有Users點入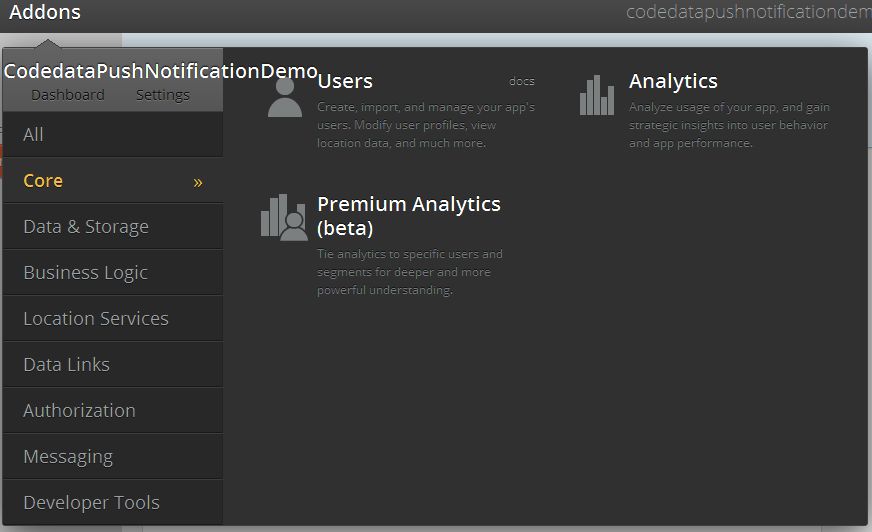 7.接著點選Add User新增使用者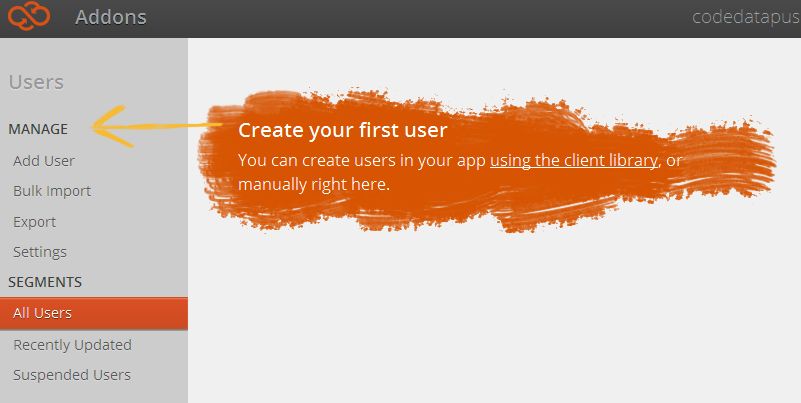 8.只要輸入帳號密碼就可以,我們建立一個test使用者 9. 建立完成後可以看見使用者列表 
10.接著建立待會使用的 Push Notification,一樣在Addons的目錄下有一個Messaging,裡面有一個Push 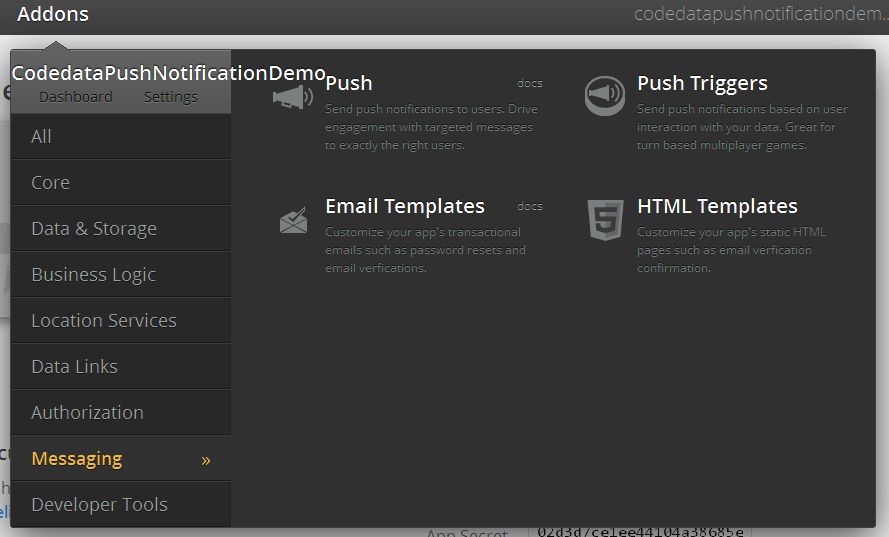
11.接著我們將剛才在Google控制台的專案編號填入Project ID、API金鑰填入API Key,接著按下Save GCM Configuration。右上角會由inactive轉為active。這樣就完成了相關的申請跟設定,不過先別關掉它。等等會再使用到!   程式開發 1.我們延續剛才的通知範例,在畫面加上ListView元件,將Align設為Bottom 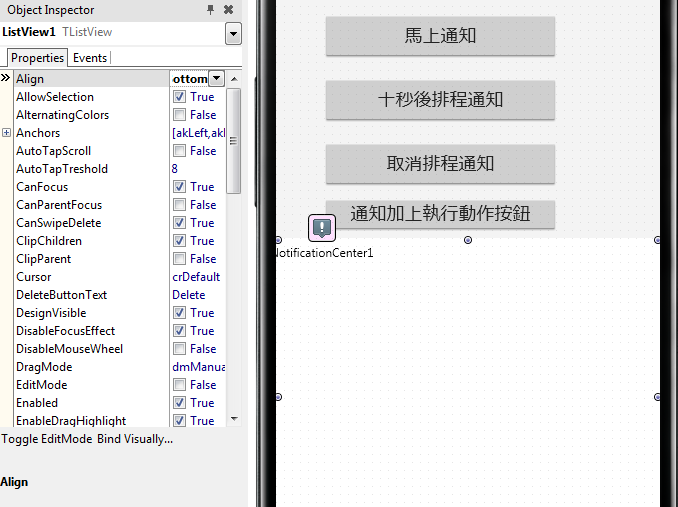
2.接著在畫面上放上二個元件,一個是TKinveyProvider以及TPushEvents 
3.PushEvents1中的AutoActivate、AutoRegisterDevice設為True以及Provider指定KinveyProvider1 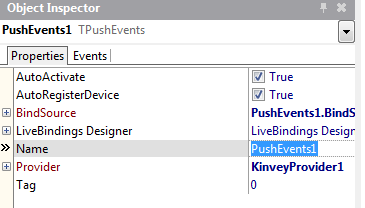
4.設定 OnPushReceived事件,在裡面的程式寫上 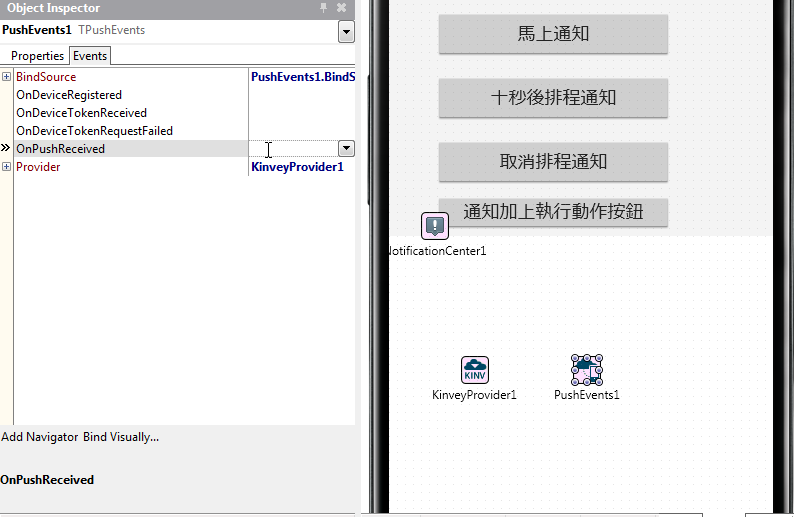
procedure TForm1.PushEvents1PushReceived(Sender: TObject;
  const AData: TPushData);
begin
  ListView1.Items.Add.Text := AData.Message;
end;
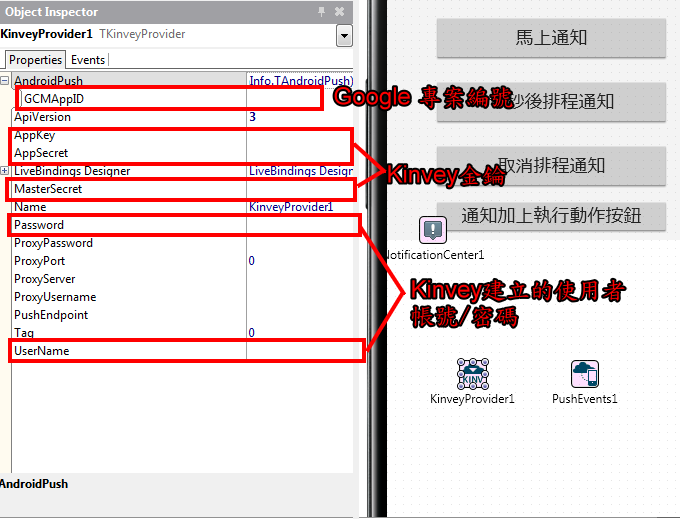
5.接著在KinveyProvider1設定相關參數
 6.最後開啟專案目錄下的AndroidManifest.template.xml(這個檔案是Delphi編譯過程中產生AndroidManifest.xml的範本檔。 在幾個位置加入設定
.<%uses-permisson%>後面加上 <!-- GCM connects to Google Services. -->
<uses-permission android:name="android.permission.INTERNET" />
<!-- GCM requires a Google account. -->
<uses-permission android:name="android.permission.GET_ACCOUNTS" />
<!-- Keeps the processor from sleeping when a message is received. -->
<uses-permission android:name="android.permission.WAKE_LOCK" />
<!--
Creates a custom permission so only this app can receive its messages.
NOTE: the permission *must* be called PACKAGE.permission.C2D_MESSAGE,
where PACKAGE is the application's package name.
-->
<permission android:name="%package%.permission.C2D_MESSAGE"
android:protectionLevel="signature" />
<uses-permission android:name="%package%.permission.C2D_MESSAGE" />
<!-- This app has permission to register and receive data message. -->
<uses-permission
android:name="com.google.android.c2dm.permission.RECEIVE" />
.</intent-filter></activity> 後面加上 <receiver
android:name="com.embarcadero.gcm.notifications.GCMNotification" android:exported="true"
android:permission="com.google.android.c2dm.permission.SEND" >
<intent-filter>
<action android:name="com.google.android.c2dm.intent.RECEIVE" />
<category android:name="%package%" />
</intent-filter>
</receiver>
接著就可以執行程式了!
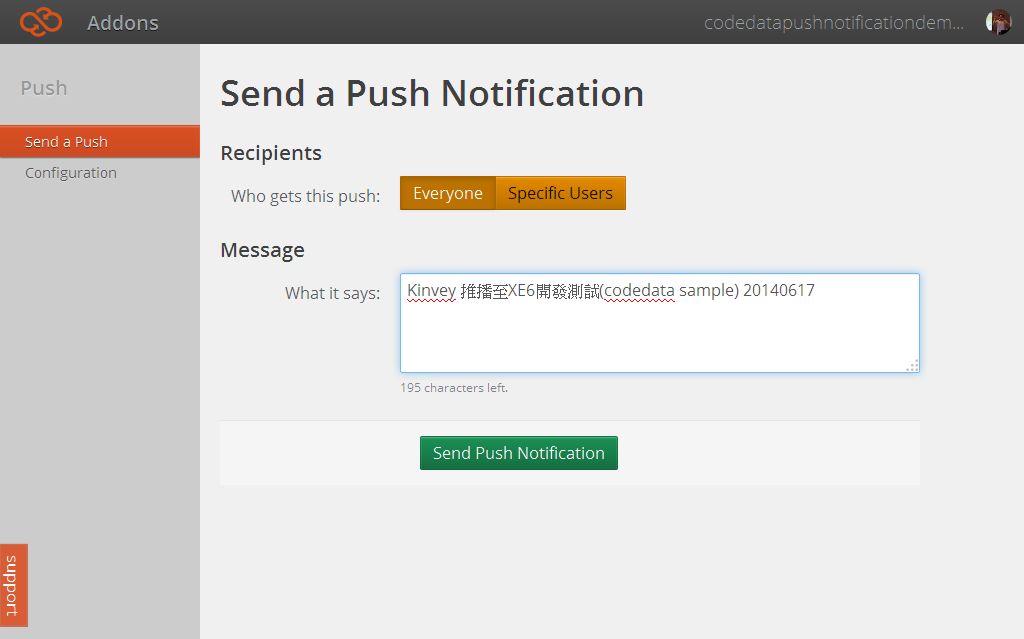
程式執行後,我們回到Kinvey網站,輸入要推播的訊息後按 Send Push Notification
 可以看到程式的Listview會出現推播的訊息。 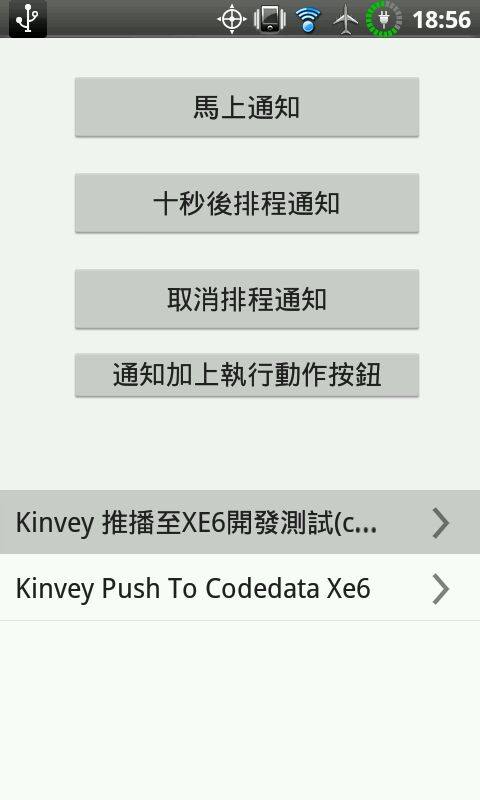
最後附上原始碼 https://github.com/superlevin/xe6notification 後續 >> Delphi APP 開發入門(八)SQLite資料庫 | 


 779
779

 被折叠的 条评论
为什么被折叠?
被折叠的 条评论
为什么被折叠?
 到【灌水乐园】发言


