


“用户配置文件”是User Profile这个词的直接翻译,其实没有文件的意思,默认存储在数据库中,不用自己管理文件。
Profile是针对每个帐户的数据存储,比如一个电子商务网站的用户购物车数据。
在ASP.NET 1.x版本时,我们可以利用Session、Cookie等方法来存储用户的状态信息。然而Session对象是具有生存期的,一旦生存期结束,该对象保留的值就会失效。Cookie将用户信息保存在客户端,它具有一定的安全隐患,一些重要的信息不能存储在Cookie中。一旦客户端禁止使用Cookie,则该功能就将失去应用的作用。
profile使用provider模式来存储信息,默认情况下,user profile的内容会保存在SQL Server Express数据库中,该数据库位于网站的App_Data目录。然而,在本文的后半部分,你将了解如何使用其他数据提供者(data provider)来存储信息,如完整版的SQL Server中的一个数据库或者一个Oracle数据库。
与Session不同,Profile是强类型的,Session对象仅仅是一个项集合而已,而profile对象则有强类型属性。
使用强类型是有它的道理的。例如,使用强类型,你就可以在Microsoft Visual Web Developer中使用智能感知技术,当你键入Profile和一个点的时候,智能感知会弹出你已经定义过的profile属性列表。
一、定义User Profile
你既可以在machine.config中,也可以在web.config中定义一个user profile,由于你不能在应用程序的二级目录中创建一个包含文件profile节的web.config文件,这意味着你将无法在一个应用程序中定义两个以上的profile。
在列表1的web.config中,列举了一个简单的profile定义的实例,该profile有三个属性,FirstName, LastName和PageVisits。
列表1在Web.config中定义一个User Profile
<system.web>
<authentication mode="Forms" />
<anonymousIdentification enabled="true" />
<profile>
<properties>
<add name="FirstName" defaultValue="??" allowAnonymous="true" />
<add name="LastName" defaultValue="??" allowAnonymous="true" />
<add name="PageVisits" type="Int32" allowAnonymous="true"/>
</properties>
</profile>
</system.web>
由于该profile需要同时被匿名用户和已认证用户使用,因此我们在web.config文件中增加包含一个< anonymousIdentification>元素,有了这个元素,系统就会自动为匿名用户生成唯一的ID。仔细看的话我们会发现,每一个 profile属性都有一个allowAnonymous特性,该特性表明这个profile属性是否允许被匿名用户使用。
默认的profile属性类型是System.String类型。列表1中,由于没有为FirstName和LastName这两个profile属性增加type特性,那么系统默认它们是string类型,而PageVisits属性则指定了type特性为Int32,因此该profile属性可用于表示一个整型值。
最后,注意FirstName和LastName属性都有defaultValue特性。你可以为简单的数据类型设置defaultValue特性,但你不能为复杂类型设置defaultValue特性。
当你定义好一个profile之后,系统会自动在下一次页面被调用时,生成一个与该profile相对应的类。这个类会被保存在"Temporary ASP.NET Files Directory"目录(该目录也用于存放用于动态生成页面的类)。你可以使用HttpContext的Profile属性(Property)调用该类。
当你定义好一个profile后,你可以使用如下方法为profile属性赋值。
[C#]
Profile.FirstName = "Bill";
列表 2. Simple.aspx (C#)
<%@ Page Language="C#" %>
<script runat="server">
void Page_Load() {
Profile.PageVisits ++;
}
void UpdateProfile(Object s, EventArgs e) {
Profile.FirstName = txtFirstName.Text;
Profile.LastName = txtLastName.Text;
}
</script>
<html>
<head>
<title>Simple</title>
</head>
<body>
<form id="form1" runat="server">
<b>Name:</b> <%= Profile.FirstName %> <%= Profile.LastName %>
<br />
<b>Page Visits:</b> <%= Profile.PageVisits %>
<hr />
<b>First Name:</b>
<asp:TextBox ID="txtFirstName" Runat="Server" />
<br />
<b>Last Name:</b>
<asp:TextBox ID="txtLastName" Runat="Server" />
<br />
<asp:Button ID="Button1"
Text="Update Profile"
OnClick="UpdateProfile"
Runat="server" />
</form>
</body>
</html>
任何在web.config中定义的profile属性都会在Profile对象中呈现。
列表2演示了你该如何使用profile来持久化保存用户信息。这个页显示了FirstName,LastName, PageVisits三个属性的值,同时它包含了一个能够用于修改这三个属性的表单(form)。在Page_Load中更新PageVisits的值,这意味着每一次刷新页面,PageVisits的值都会改变。

图1 使用简单的profile
如果你多次访问列表2中的页面,你会注意到PageVisits在不断增大。如果你关闭的浏览器,并在一周之后调用该页面,PageVisits属性仍然会保留原值。从这一点可以看出Profile为每个用户自动保存一个副本。
二、使用Profile组
尽管你仅可以为一个应用程序定义一个profile,但如果你需要让几个profile属性一起工作,把它们放在组中,会让你觉得它们更易管理。
例如,在列表3中,有一个带有两个组的profile,这两个组分别是Address和Preferences
<system.web>
<anonymousIdentification enabled="true" />
<profile>
<properties>
<group name="Address">
<add name="Street" allowAnonymous="true" />
<add name="City" allowAnonymous="true" />
</group>
<group name="Preferences">
<add name="ReceiveNewsletter" type="Boolean" defaultValue="false" allowAnonymous="true" />
</group>
</properties>
</profile>
</system.web>
当你用组来定义profile时,你应该使用组名来设置或读取profile属性。例如,在列表3中,你可以使用以下一些句子来完成三个profile属性的赋值。
Profile.Address.City = "Modesto";
Profile.Address.Street = "111 King Arthur Ln";
Profile.Preferences.ReceiveNewsletter = false;
一个profile的定义只能包含一层组,换句话说,你不能把其他的组放在一个profile组的下面一层。
该示例使用了Northwind数据库,使用SQL 2005 Server EXPRESS版本的,注意数据库里有没有这个数据库,如果没有,参见
ASP.NET经典源代码下载地址及数据库配置方法一文的相关内容。
到目前为止,我们已经介绍了声明包含简单类型(如string或整型)属性的profile,其实你也可以在profile中声明复杂属性。
举个例子,假设你现在需要在profile中存储一个购物篮,如果这样做的话,你就可以在每次访问网站时获得自己的购物篮。
列表4 声明了一个包含profile,这个profile包含一个名为ShoppingCart的属性,而该属性的type特性是一个叫ShoppingCart的类(我们接下来会创建该类),该类名是有效的。
我们还会注意到,该声明中包含一个serializeAs特性,该特性可以帮助ShoppingCart使用二进制序列化器(binary serializer)进行持久化,而不是使用xml序列化器。
列表4 Web.config
<system.web>
<anonymousIdentification enabled="true" />
<profile>
<properties>
<add name="ShoppingCart" type="ShoppingCart" serializeAs="Binary" allowAnonymous="true" />
</properties>
</profile>
</system.web>
列表5 中有一个简单购物篮的实现代码,该购物篮拥有添加和删除项(item)的方法(method),同时它还拥有两个属性(property),一个是用于获得该购物篮中的所有项的,一个是用于表示所有商品的总价的。
列表5 ShoppingCart.cs (c#)
using System;
using System.Collections;
[Serializable]
public class ShoppingCart
{
public Hashtable _CartItems = new Hashtable();
// Return all the items from the Shopping Cart
public ICollection CartItems
{
get { return _CartItems.Values; }
}
// The sum total of the prices
public decimal Total
{
get
{
decimal sum = 0;
foreach (CartItem item in _CartItems.Values)
sum += item.Price * item.Quantity;
return sum;
}
}
// Add a new item to the shopping cart
public void AddItem(int ID, string Name, decimal Price)
{
CartItem item = (CartItem)_CartItems[ID];
if (item == null)
_CartItems.Add(ID, new CartItem(ID, Name, Price));
else
{
item.Quantity++;
_CartItems[ID] = item;
}
}
// Remove an item from the shopping cart
public void RemoveItem(int ID)
{
CartItem item = (CartItem)_CartItems[ID];
if (item == null)
return;
item.Quantity--;
if (item.Quantity == 0)
_CartItems.Remove(ID);
else
_CartItems[ID] = item;
}
}
[Serializable]
public class CartItem
{
private int _ID;
private string _Name;
private decimal _Price;
private int _Quantity = 1;
public int ID
{
get { return _ID; }
}
public string Name
{
get { return _Name; }
}
public decimal Price
{
get { return _Price; }
}
public int Quantity
{
get { return _Quantity; }
set { _Quantity = value; }
}
public CartItem(int ID, string Name, decimal Price)
{
_ID = ID;
_Name = Name;
_Price = Price;
}
}
如果你把列表5中的代码添加到应用程序的App_Code目录中,购物篮会自动被编译。
在列表5中有一点值得注意,那就是ShoppingCart和CartItem类都加上了可序列化的特性,这一点对于他们能否被序列化十分重要,只有这样才能保存在Profile对象中。
最后,列表6的页面显示了可以被添加到购物篮中的产品。购物篮是通过BindShoppingCart方法从Profile对象中载入,该方法把购物篮中的对象绑定到一个GridView对象上,这些对象可以通过ShoppingCart类的CartItems属性获得。

图2 在profile中存储购物篮
AddCartItem方法用于在购物篮中添加一个产品,该方法中包含了检测Profile是否存在ShoppingCart的代码。对于Profile中存储的对象,你必须自己实例化这些对象,他们不会自动实例化。
RemoveCartItem方法用于从购物篮中移除一个产品,该方法只是简单地通过调用Profile中的ShoppingCart对象的RemoveItem方法。
列表 6. Products.aspx (C#)
<%@ Page Language="C#" %>
<%@ Import Namespace="System.Globalization" %>
<script runat="server">
void Page_Load() {
if (!IsPostBack)
BindShoppingCart();
}
void BindShoppingCart()
{
if (Profile.ShoppingCart != null)
{
CartGrid.DataSource = Profile.ShoppingCart.CartItems;
CartGrid.DataBind();
lblTotal.Text = Profile.ShoppingCart.Total.ToString("c");
}
}
void AddCartItem(Object s, EventArgs e)
{
GridViewRow row = ProductGrid.SelectedRow;
int ID = (int)ProductGrid.SelectedDataKey.Value;
String Name = row.Cells[1].Text;
decimal Price = Decimal.Parse(row.Cells[2].Text,
NumberStyles.Currency);
if (Profile.ShoppingCart == null)
Profile.ShoppingCart = new ShoppingCart();
Profile.ShoppingCart.AddItem(ID, Name, Price);
BindShoppingCart();
}
void RemoveCartItem(Object s, EventArgs e)
{
int ID = (int)CartGrid.SelectedDataKey.Value;
Profile.ShoppingCart.RemoveItem(ID);
BindShoppingCart();
}
</script>
<html>
<head>
<title>Products</title>
</head>
<body>
<form id="form1" runat="server">
<table width="100%">
<tr>
<td valign="top">
<h2>Products</h2>
<asp:GridView
ID="ProductGrid"
DataSourceID="ProductSource"
DataKeyNames="ProductID"
AutoGenerateColumns="false"
OnSelectedIndexChanged="AddCartItem"
ShowHeader="false"
CellPadding="5"
Runat="Server">
<Columns>
<asp:ButtonField CommandName="select" Text="Buy" />
<asp:BoundField DataField="ProductName" />
<asp:BoundField DataField="UnitPrice" DataFormatString="{0:c}" />
</Columns>
</asp:GridView>
<asp:SqlDataSource
ID="ProductSource"
ConnectionString="Server=.\SQLEXPRESS;Database=Northwind;Trusted_Connection=true;"
SelectCommand="SELECT ProductID,ProductName,UnitPrice FROM Products"
Runat="Server" />
</td>
<td valign="top">
<h2>Shopping Cart</h2>
<asp:GridView
ID="CartGrid"
AutoGenerateColumns="false"
DataKeyNames="ID"
OnSelectedIndexChanged="RemoveCartItem"
CellPadding="5"
Width="300"
Runat="Server">
<Columns>
<asp:ButtonField
CommandName="select"
Text="Remove" />
<asp:BoundField
DataField="Name"
HeaderText="Name" />
<asp:BoundField
DataField="Price"
HeaderText="Price"
DataFormatString="{0:c}" />
<asp:BoundField
DataField="Quantity"
HeaderText="Quantity" />
</Columns>
</asp:GridView>
<b>Total:</b>
<asp:Label ID="lblTotal" Runat="Server" />
</td>
</tr>
</table>
</form>
</body>
</html>
四、继承一个profile
你也可以通过从一个已经存在的profile类中继承一个profile来完成对profile的定义,这种特性能够帮助你在多个应用程序中使用相同的profile。
例如,列表7中列出了一个拥有多个用户属性的类,该类是从ProfileBase类继承而来的(你可以在System.Web.Profile中找到)
在列表8中的Web.config包含一个从UserInfo类继承而来的profile,通过该声明,新的profile可以获得UserInfo类的所有属性
列表 7. UserInfo (C#)
using System;
using System.Web.Profile;

public class UserInfo : ProfileBase
{
    private string _FirstName;
    private string _LastName;

    public string FirstName
    {
        get { return _FirstName; }
        set { _FirstName = value; }
    }
    public string LastName
    {
        get { return _LastName; }
        set { _LastName = value; }
    }
}
using System;
using System.Web.Profile;
public class UserInfo : ProfileBase
{
private string _FirstName;
private string _LastName;
public string FirstName
{
get { return _FirstName; }
set { _FirstName = value; }
}
public string LastName
{
get { return _LastName; }
set { _LastName = value; }
}
}
Code highlighting produced by Actipro CodeHighlighter (freeware)
http://www.CodeHighlighter.com/
--> 列表 8. Web.Config
< configuration >
< system .web >
< anonymousIdentification enabled ="true" />
< profile inherits ="UserInfo" />
</ system.web >
</ configuration >
五、迁移匿名Profile设置
Profile对象既可用于匿名用户也可以用于已认证用户。然而,当用户从匿名用户状态转换为已认证用户状态时,Profile对象能够以一种令人难以理解的方式完成任务。
当匿名用户使用Profile对象时,用户profile是与一个随机生成的号码相关联的,该号码是根据每个用户唯一生成的,它保存在浏览器的cookie中,无论何时该用户返回应用程序,该用户的Profile设置会被自动加载。
如果匿名用户通过认证的话,所有与该用户相关的profile就会丢失,同时系统会生成一个新的profile。这时该Profile信息将与用户名相关联,而非唯一识别号。
要想理解所有这些工作,最好的方法就是看看下面的例子。列表9中的web.config定义了一个profile,该profile只有一个FavoriteColor属性。
Code highlighting produced by Actipro CodeHighlighter (freeware)
http://www.CodeHighlighter.com/
--> 列表 9 Web.config
< configuration >
< system .web >
< authentication mode ="Forms" />
< anonymousIdentification enabled ="true" />
< profile >
< properties >
< add
name ="FavoriteColor"
allowAnonymous ="true"
defaultValue ="Red" />
</ properties >
</ profile >
</ system.web >
</ configuration >
列表10中有一个包含两个按钮的页面,分别是login和logout按钮,其中还有一个用于更新FavoriteColor属性的表单。
列表10. Anonymous.aspx (C#)
<%@ Page Language="C#" %>
<script runat="server">
void Login(Object s, EventArgs e)
{
FormsAuthentication.SetAuthCookie("Bill", false);
Response.Redirect(Request.Path);
}
void Logout(Object s, EventArgs e)
{
FormsAuthentication.SignOut();
Response.Redirect(Request.Path);
}
void UpdateProfile(Object s, EventArgs e)
{
Profile.FavoriteColor = txtFavoriteColor.Text;
}
void Page_PreRender()
{
lblUsername.Text = Profile.UserName;
lblFavoriteColor.Text = Profile.FavoriteColor;
}
</script>
<html>
<head>
<title>Anonymous</title>
</head>
<body>
<form id="form1" runat="server">
<asp:Button
Text="Login"
OnClick="Login"
Runat="Server" />
<asp:Button ID="Button1"
Text="Logout"
OnClick="Logout"
Runat="Server" />
<hr />
<asp:TextBox
id="txtFavoriteColor"
Runat="Server" />
<asp:Button
Text="Update Profile"
OnClick="UpdateProfile"
Runat="Server" />
<hr />
<b>Username:</b>
<asp:Label
id="lblUsername"
Runat="Server" />
<br />
<b>Favorite Color:</b>
<asp:Label
id="lblFavoriteColor"
Runat="Server" />
</form>
</body>
</html>
当你打开第一个页面时,UserName的值是一个随机生成的唯一识别号(见图3)。当你按下Login按钮后,你就完成了身份认证,它是通过用户票据(User Bill)完成的。

图3 使用匿名和认证profile
列表10的页面中包含一个用于更新FavoriteColor的表单,要注意的是,在你登录登出的时候,会分别生成两个不同的profile。例如当你先登录,后登出的话,那么系统会生成一个随机的唯一识别号。
在很多情况下,你需要把匿名profile迁移到认证profile状态,如果你需要迁移profile属性值的话,你可以利用 ProfileModule类的MigrateAnonymous事件完成该任务,该事件只能在Global.asax文件中进行处理。列表11中的 Global.asax演示了你如何才能实现FavoriteColor属性的迁移。
列表 11. Global.asax (C#)
<%@ Application Language="C#" %>
<script runat="server">
void Profile_MigrateAnonymous(Object s,
ProfileMigrateEventArgs e)
{
ProfileCommon anonProfile =
Profile.GetProfile(e.AnonymousId);
Profile.FavoriteColor = anonProfile.FavoriteColor;
}
</script>
通过Profile类的GetProfile()方法你可以获得匿名profile,该方法接收一个唯一识别号,并且返回与唯一识别号对应的profile。ProfileMigrateEventArgs对象包含一个匿名识别号。
六、配置Profile Provider
默认情况下,profile被保存在sqlserver 2005 express数据库,它位于App_Data目录中,这或许在你开发一些普通的asp.net应用程序时是没有问题的,但很有可能,你需要把你的应用程序的profile保存在另一个数据库中,比如一个完整版的SqlServer 2005的实例中,而该数据库又位于你局域网的某个位置。
Profile使用Provider模式,通过修改web.config或machine.config的设置来告诉系统把信息存储在哪里。
ASP.NET本身配了一个profile provider,叫SqlProfileProvider。如果你感到困惑,你可以通过继承ProfileProvider基类来创建一个自己的 provider。例如,你可以创建一个基于Oracle数据库或MySql数据库的Provider。在这里,我们将只讨论最简单的方法,即通过SqlServer数据库来保存profile信息。
要使用Microsoft SQL Server存储profile信息,必须完成两个步骤。首先,你必须安装SQL Server数据库,然后你必须重新设置配置文件。
ASP.NET 2.0框架提供了一个用于配置SQL Server来存储Profile信息的工具,该工具叫做aspnet_regsql,它位于Windows\Microsoft.NET\ Framework\[.NET版本号]。执行该工具后,你会看到图4中的ASP.NET SQL Server安装向导。
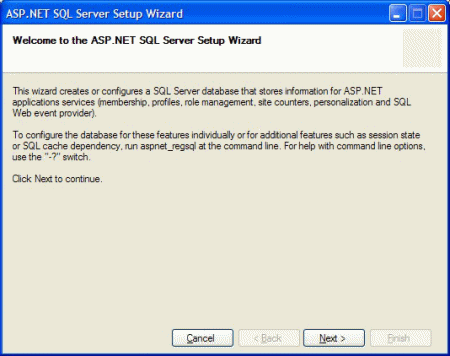
图4 使用ASP.NET SQL Server安装程序
SQL Server安装向导会指导你完成必要的步骤,完成这些步骤后,向导会自动创建用于存储profile信息的存储过程和表结构。
在你完成SQL Server数据库的配置后,你需要修改web.config或machine.config中的数据库连接设置来指向服务器上的SQL Server数据库,本例中该数据库的实例名为MyServer,列表12列出了该配置文件。
Code highlighting produced by Actipro CodeHighlighter (freeware)
http://www.CodeHighlighter.com/
--> 列表 12. Web.Config
< configuration >
< connectionStrings >
< add
name ="myConnectionString"
connectionString =
"Server=MyServer;Trusted_Connection=true;database=MyDatabase" />
</ connectionStrings >
< system .web >
< anonymousIdentification enabled ="true" />
< profile defaultProvider ="MyProfileProvider" >
< providers >
< add
name ="MyProfileProvider"
type ="System.Web.Profile.SqlProfileProvider"
connectionStringName ="myConnectionString" />
</ providers >
< properties >
< add
name ="FirstName"
allowAnonymous ="true" />
< add
name ="LastName"
allowAnonymous ="true" />
</ properties >
</ profile >
</ system.web >
</ configuration >
在列表12中的profile配置中,包含了一个defaultProvider特性,这个特性指向一个叫MyProfileProvider的 profile provider,而这个provider定义是在profile标记的<providers>节中完成的。 MyProfileProvider则使用一个叫MyConnectionString的连接字符串完成数据库连接,并保存profile信息到数据库中。MyConnectionString可以在位于web.config开头的<connectionStrings>节中找到。
管理profile并生成profile报告
Profile会对象自动保存用户profile信息,这既是好事业是坏事。说它是好事,是因为你不需要写存储信息的所有逻辑代码,说它是坏事,是因为这样可能造成一大堆无用的信息被保存在数据库中。
幸运的是,ASP.NET 2.0框架包含一个叫做ProfileManager的类,你可以使用它来管理profile信息。它包含了相当多的方法使你能够有效地管理profile并且生成profile报表,下面列出了一些该类的重要方法:
- DeleteInactiveProfiles. 删除一个特定日期之前的所有profile
- DeleteProfile. 删除特定用户的profile
- DeleteProfiles. 删除一个profile集合
- FindInactiveProfilesByUserName. 返回一个ProfileInfo对象的集合,该集合表示的profile是匹配一个某个名字,并且是从某个特定日期开始一直未被使用
- FindProfilesByUserName. 返回一个ProfileInfo对象集合,该集合与某个用户名相关联
- GetAllInactiveProfiles. 返回一个ProfileInfo对象集合,该集合表示的profile是从某个特定日期开始一直未被使用的profile
- GetAllProfiles. 返回一个ProfileInfo对象集合,该集合表示所有的profile
- GetNumberOfInactiveProfiles. 返回从某个特定日期开始一直未被使用的profile的数量
- GetNumberOfProfiles. 返回profile总数
这些方法中,虽然所有的方法都返回一个ProfileInfo对象集合,但没有一个返回一个真正的profile。ProfileInfo对象包含以下profile属性
- IsAnonymous. 表示该profile是否为匿名profile
- LastActivityDate. 最后一次profile被访问的时间和日期
- LastUpdatedDate. 最后一次profile被升级的时间和日期
- Size. 表示profile的大小,这是在profile provider存储profile信息时记录的
- UserName. 与profile关联的用户名
ProfileManager有几个方法提供了额外的参数用于支持分页。例如,GetAllProfiles方法的一个重载版本就提供了专门用于设置页面索引、页面大小、总共的记录数的参数,这些参数在需要分页的页面中十分有用。
ProfileManager既可以在asp.net页面下使用,也可以在其它程序中使用。例如,你可能需要做一个控制台程序用于每天清除长时间未使用的 profile。列表14的控制台程序会删除七天未使用的profile,你可以使用Windows计划任务(Windows Scheduled Tasks)来安排该程序的执行时间。
列表 14. DeleteInactiveProfiles (C#)
using System;
using System.Web.Profile;
public class DeleteInactiveProfiles
{
public static void Main()
{
int deleted = 0;
deleted =
ProfileManager.DeleteInactiveProfiles(
ProfileAuthenticationOption.All,
DateTime.Now.AddDays(-7));
Console.WriteLine("Deleted " +
deleted.ToString() + " profiles" );
}
}
你可以通过一下的命令行指令对列表14进行编译
[C#]
C:\WINDOWS\Microsoft.NET\Framework\v2.0.40607\csc
DeleteInactiveProfiles.cs
你还可以使用ProfileManager类生成profile信息报表。例如,如果你打算生成一个用户调查的报表,你可以把用户调查保存在profile中,这样就可以轻易的使用ProfileManager生成你需要的报表。
列表15中的web.config中有三个属性:SurveyCompleted、FavoriteLanguage 和 FavoriteEnvironment
Code highlighting produced by Actipro CodeHighlighter (freeware)
http://www.CodeHighlighter.com/
--> Listing 15. Web.Config
< configuration xmlns ="http://schemas.microsoft.com/.NetConfiguration/v2.0" >
< system .web >
< anonymousIdentification enabled ="true" />
< profile >
< properties >
< add
name ="SurveyCompleted"
type ="Boolean"
allowAnonymous ="true" />
< add
name ="FavoriteLanguage"
allowAnonymous ="true" />
< add
name ="FavoriteEnvironment"
allowAnonymous ="true" />
</ properties >
</ profile >
</ system.web >
</ configuration >
列表16中的页面演示了一个简单的用户调查。该页面包含两个Panel控件,第一个控件中有两个调查问题,当用户完成调查后,第一个控件会自动隐藏,而第二个会显示出来,第二个Panel有一段表示感谢的文字。
Code highlighting produced by Actipro CodeHighlighter (freeware)
http://www.CodeHighlighter.com/
--> 列表 16. Survey.aspx (C#)
<% @ Page Language = " C# " %>
< script runat ="server" >
void SaveSurvey(Object s, EventArgs e)
{
Profile.FavoriteLanguage = rdlLanguage.SelectedItem.Text;
Profile.FavoriteEnvironment = rdlEnvironment.SelectedItem.Text;
Profile.SurveyCompleted = true ;
}
void Page_PreRender()
{
if (Profile.SurveyCompleted)
{
pnlSurvey.Visible = false ;
pnlSurveyCompleted.Visible = true ;
}
else
{
pnlSurvey.Visible = true ;
pnlSurveyCompleted.Visible = false ;
}
}
</ script >
< html >
< head >
< title > Survey </ title >
</ head >
< body >
< form id ="form1" runat ="server" >
< asp:Panel ID ="pnlSurvey" Runat ="Server" >
What is your favorite programming language?
< br />
< asp:RadioButtonList
id ="rdlLanguage"
runat ="Server" >
< asp:ListItem Text ="VB.NET" Selected ="True" />
< asp:ListItem Text ="C#" />
< asp:ListItem Text ="J#" />
</ asp:RadioButtonList >
< p > </ p >
What is your favorite development environment?
< br />
< asp:RadioButtonList
id ="rdlEnvironment"
runat ="Server" >
< asp:ListItem Text ="VS.NET" Selected ="True" />
< asp:ListItem Text ="Web Matrix" />
< asp:ListItem Text ="Notepad" />
</ asp:RadioButtonList >
< p > </ p >
< asp:Button ID ="Button1"
Text ="Submit Survey"
Onclick ="SaveSurvey"
Runat ="Server" />
</ asp:Panel >
< asp:Panel ID ="pnlSurveyCompleted" Runat ="Server" >
Thank you for completing the survey!
</ asp:Panel >
</ form >
</ body >
</ html >
列表17中显示调查的结果,该页面中有一个显示ProfileInfo对象集合的GridView控件,该ProfileInfo对象集合是由 ProfileManager的GetAllProfiles方法获得的。当你点击GridView中的任意一行的Select链接时,你将会看到对这个问题的调查结果,该调查结果是由Profile类的GetProfile方法获得的。

图5 显示调查结果
Code highlighting produced by Actipro CodeHighlighter (freeware)
http://www.CodeHighlighter.com/
--> 列表 17. SurveyResults.aspx (C#)
<% @ Page Language = " C# " %>
< script runat ="server" >
void Page_Load()
{
ResultsGrid.DataSource =
ProfileManager.GetAllProfiles(ProfileAuthenticationOption.All);
ResultsGrid.DataBind();
}
void DisplayProfileDetails(Object s, EventArgs e)
{
ProfileCommon SelectedProfile =
Profile.GetProfile(ResultsGrid.SelectedValue.ToString());
lblLanguage.Text = SelectedProfile.FavoriteLanguage;
lblEnvironment.Text = SelectedProfile.FavoriteEnvironment;
}
</ script >
< html >
< head >
< title > Survey Results </ title >
</ head >
< body >
< form id ="form1" runat ="server" >
< h2 > Survey Results </ h2 >
< asp:GridView
id ="ResultsGrid"
DataKeyNames ="UserName"
AutoGenerateSelectButton ="true"
OnSelectedIndexChanged ="DisplayProfileDetails"
SelectedRowStyle-BackColor ="LightYellow"
Runat ="Server" />
< p > </ p >
< h2 > Survey Details </ h2 >
< b > Favorite Language: </ b >
< asp:Label
id ="lblLanguage"
Runat ="Server" />
< br />
< b > Favorite Environment: </ b >
< asp:Label
id ="lblEnvironment"
Runat ="Server" />
</ form >
</ body >
</ html >
总结
当建立Web应用程序时,我依旧花费了大量的时间和精力用于做一些大伤脑筋的事情。其中的一个任务就是写一些用于从数据库存储和获得用户信息的代码。虽然 Profile对象引入的都是asp.net 1.0中可以实现的功能,但是这个新特性帮助我们从乏味的编码工作中解脱出来,这样也能让我们在写Web应用程序的过程中,把更多的精力放在我们更感兴趣的事情上。
相关书籍
- ASP.NET 2.0 初探 (A First Look at ASP.NET V. 2.0)
- ASP.NET 2.0 测试版预览(ASP.NET 2.0 Beta Preview)
- Microsoft ASP.NET 2.0开发指南(Introducing Microsoft ASP.NET 2.0)
- ASP.NET技术内幕 (ASP.NET Unleashed)
参考文献:
tonyqus.使用ASP.NET 2.0 Profile存储用户信息[翻译] Level 200.http://www.cnblogs.com/tonyqus/archive/2005/12/18/userprofilev2.html


 138
138

 被折叠的 条评论
为什么被折叠?
被折叠的 条评论
为什么被折叠?
 到【灌水乐园】发言


