原文链接地址:http://www.2cto.com/kf/201107/97283.html
一 介绍
其实本人对GDI+不能算是专家,只是在几个小项目中应用了一些而已, 算是入门了. 刚好最近有点时间, 把自己掌握的东东做个总结.
如果你以前用过GDI, 那么恭喜你,因为你转到GDI+易如反掌. 如果你没用过GDI,那么也恭喜你, 因为你可以直接学GDI+,不用经历学习GDI的那种痛苦. 因为GDI+相对于GDI,更加抽象,更加上层, 隐藏了更多底层的东西, 整体架构更加清晰明了.
GDI+通过c++ class的形式对外引出接口, 程序员直接调用这些接口来完成相应的功能. 共有40个相关的类, 50个枚举常量和6个结构体. 它的局限性是只能运行在windows XP和windows server2003的系统上.
简单说几个GDI+与GDI不同的地方.
1 GDI+很重要一个改进就是增了对多种图像格式的支持.它目前支持下面几中格式的图像:
BMP、Graphics Interchange Format (GIF)、JPEG、Exif、PNG、TIFF、ICON、WMF、EMF
2 DC(设备环境内容)的概念变得模糊,基本对程序员是透明了.
用GDI的人都知道, 不懂DC可不行, 这个DC保存着显示设备的属性和功能信息, 每当你想要drawing时, 你得先获取DC的句柄, 然后把这个句柄作为参数传给GDI的API, 另外还要考虑关于”选到设备(selectObjec),释放设备”等繁琐的操作.
GDI+对方面的处理简单明了很多,它有一个Graphics类,一个Graphics的对象就类似于DC的角色, 而且它跟pen,brush等的关系也变得独立, 不用再”选来选去”, 在GDI+里,像pen,brush这些东西都是独立的对象,用的时候只需把它们的实例作为参数传给Graphics的接口就可以了(在下面的示例中会看到).
3 增加了对渐变颜色效果的支持.
原来在GDI里做渐变效果, 那叫一复杂呀. 下面的示例中会具体说说GDI+里的渐变.
二 应用
前期准备
使用GDI+, 首先要包含相关的头文件, 只有一个,如下:
#include <gdiplus.h>
还需要用到一个lib, 就是Gdiplus.lib, 你可以在源文件中通过
#pragma comment (lib,"Gdiplus.lib")
为了不使GDI+专用的相关类,常量,结构体与其它应用混淆,GDI+有自己的命名空间, 叫Gdiplus, 当你要用到GDI+的相关API时,就要用到下面的语句:
using namespace Gdiplus;
最后, GDI+有个应用开关, GdiplusStartup和GdiplusShutdown, 一个开,一个关, 使用GDI+任何功能前,先调用GdiplusStartup,程序结束时,调用GdiplusShutdown关闭. 比如在基于mfc的对话框应用中, 我一般这样做, 假设我的工程为MyGDIPlusTest, 首先在MyGDIPlusTest.cpp的InitInstance函数中打开GDI+,如下:
…..
CWinApp::InitInstance();
GdiplusStartup(&m_gdiPlusToken, &m_gdiPlusStartupInput, NULL);
…..
GdiplusShutdown(m_gdiPlusToken);//程序退出时关闭
return CWinApp::ExitInstance();
两个函数的参数,自己去查吧 ,不说了.
示例
1 先看一个msdn中的示例
#include <stdafx.h>
#include <windows.h>
#include <objidl.h>
#include <gdiplus.h>
using namespace Gdiplus;
#pragma comment (lib,"Gdiplus.lib")

VOID OnPaint(HDC hdc)
{
    Graphics graphics(hdc);
    Pen      pen(Color(255, 0, 0, 255));
    graphics.DrawLine(&pen, 0, 0, 200, 100);
}

LRESULT CALLBACK WndProc(HWND, UINT, WPARAM, LPARAM);

INT WINAPI WinMain(HINSTANCE hInstance, HINSTANCE, PSTR, INT iCmdShow)
{
    HWND                hWnd;
    MSG                 msg;
    WNDCLASS            wndClass;
    GdiplusStartupInput gdiplusStartupInput;
    ULONG_PTR           gdiplusToken;

    // Initialize GDI+.
    GdiplusStartup(&gdiplusToken, &gdiplusStartupInput, NULL);

    wndClass.style          = CS_HREDRAW | CS_VREDRAW;
    wndClass.lpfnWndProc    = WndProc;
    wndClass.cbClsExtra     = 0;
    wndClass.cbWndExtra     = 0;
    wndClass.hInstance      = hInstance;
    wndClass.hIcon          = LoadIcon(NULL, IDI_APPLICATION);
    wndClass.hCursor        = LoadCursor(NULL, IDC_ARROW);
    wndClass.hbrBackground  = (HBRUSH)GetStockObject(WHITE_BRUSH);
    wndClass.lpszMenuName   = NULL;
    wndClass.lpszClassName  = TEXT("GettingStarted");

    RegisterClass(&wndClass);

    hWnd = CreateWindow(
        TEXT("GettingStarted"),   // window class name
        TEXT("Getting Started"),  // window caption
        WS_OVERLAPPEDWINDOW,      // window style
        CW_USEDEFAULT,            // initial x position
        CW_USEDEFAULT,            // initial y position
        CW_USEDEFAULT,            // initial x size
        CW_USEDEFAULT,            // initial y size
        NULL,                     // parent window handle
        NULL,                     // window menu handle
        hInstance,                // program instance handle
        NULL);                    // creation parameters

    ShowWindow(hWnd, iCmdShow);
    UpdateWindow(hWnd);

    while(GetMessage(&msg, NULL, 0, 0))
    {
        TranslateMessage(&msg);
        DispatchMessage(&msg);
    }

    GdiplusShutdown(gdiplusToken);
    return msg.wParam;
}  // WinMain

LRESULT CALLBACK WndProc(HWND hWnd, UINT message,
                         WPARAM wParam, LPARAM lParam)
{
    HDC          hdc;
    PAINTSTRUCT  ps;

    switch(message)
    {
    case WM_PAINT:
        hdc = BeginPaint(hWnd, &ps);
        OnPaint(hdc);
        EndPaint(hWnd, &ps);
        return 0;
    case WM_DESTROY:
        PostQuitMessage(0);
        return 0;
    default:
        return DefWindowProc(hWnd, message, wParam, lParam);
    }
} // WndProc
VOID OnPaint(HDC hdc)
{
    Graphics    graphics(hdc);
    SolidBrush  brush(Color(255, 0, 0, 255));
    FontFamily  fontFamily(L"Times New Roman");
    Font        font(&fontFamily, 24, FontStyleRegular, UnitPixel);
    PointF      pointF(10.0f, 20.0f);

    graphics.DrawString(L"Hello World!", -1, &font, pointF, &brush);
}
2 自己写的一个显示图片的简单示例
基于mfc的对话框应用,点一下按钮,显示一张图片. 只显示关键代码
void CGDI_Plus_TestDlg::OnBnClickedButtonPen()
{
    // TODO: Add your control notification handler code here
    HDC hdc = this->GetDC()->m_hDC;
    Graphics graphics(hdc);
    Image image(L"c:\\image\\ip.jpg");
    graphics.DrawImage(&image, 200, 200);
}
有以下几点要说明,
第一点, Image只支持通过路径和流的形式提供实例初始化,不支持资源句柄, 如果要用资源句柄的形式,可以先把资源数据读到流里,这里不说了.
第二点, 关于DrawImage,有很多重载函数, 提供了几乎你能想到的所有功能,我这里用了下面这个重载
void DrawImage (
    Image^ image,
    int x,
    int y
)
3 渐变效果
前面说了,GDI+支持渐变, 分为两种, linear gradient和path gradient, 这里讨论第一种.
linear gradient又分为
Horizontal Linear Gradients,
Customizing Linear Gradients,
Diagonal Linear Gradients
三种. 这些比较好理解. 下面的代码示例来自msdn,我做了一些修改.
void CGDI_Plus_TestDlg::OnBnClickedButtonPen()
{
    // TODO: Add your control notification handler code here
    HDC hdc = this->GetDC()->m_hDC;
    Graphics graphics(hdc);
    LinearGradientBrush linearBrush(Point(0, 10), Point(200, 10),
        Color(255,255,0,0),Color(255,0,0,255));

    Pen pen(&linearBrush, 4);
    graphics.DrawLine(&pen, 100,100, 200, 100);
    graphics.FillEllipse(&linearBrush, 100, 150, 200, 100);
    graphics.FillRectangle(&linearBrush, 100, 255, 500, 30);
}
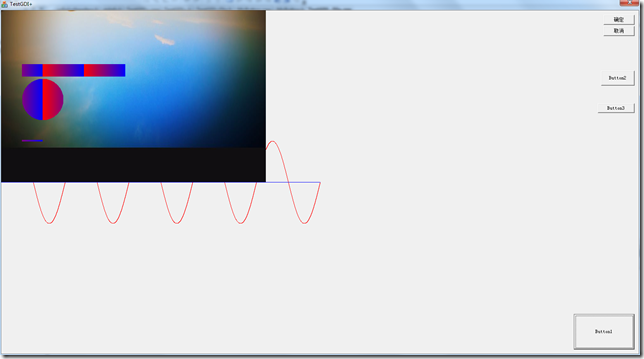
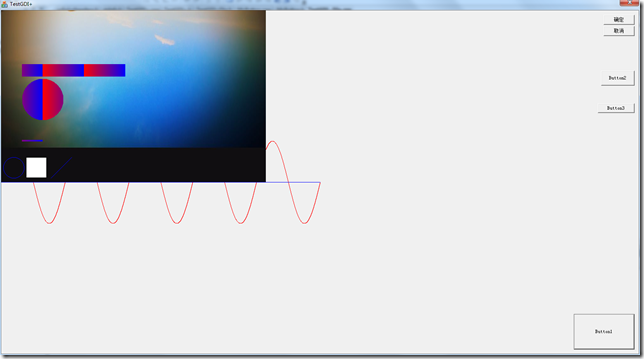
程序运行的效果如下图:
附: GDI+与GDI混合编程
GDI+提供了一种机制, 可以和GDI混合使用, 主要是利用Graphics中的ReleaseHDC和GetHDC, 下面的代码示例来自msdn:
VOID Example_GetReleaseHDC(Graphics* g)
{
   Pen pen(Color(255, 0, 0, 255));
   g->DrawEllipse(&pen, 10, 10, 100, 50);  // GDI+

   HDC hdc = g->GetHDC();

      // Make GDI calls, but don't call any methods
      // on g until after the call to ReleaseHDC.
      Rectangle(hdc, 120, 10, 220, 60);  // GDI
   g->ReleaseHDC(hdc);

   // Ok to call methods on g again.
   g->DrawLine(&pen, 240, 10, 340, 60);
}


 被折叠的 条评论
为什么被折叠?


