SIP UserAgent常用的SIP协议栈有pjsip/bell-sip/sofia-sip/libeXosip/libre等
https://github.com/staskobzar/sip_stacks_examples
更方便的是用js来开发网络终端,nodejs开发网络程序非常方便,收集了两个比较好用的
先梳理一下pjsip的应用,sip client一般都处于背靠背的网络环境,需要服务器转接,很多情况还需要网络穿透。

1、pjsip编译
sudo apt-get install libasound2-dev
Linux音频驱动分为alsa和oss,oss是比较旧的驱动,pjsip支持这两种音频驱动,默认是oss,如果目标系统内核使用的是alsa驱动,运行例子程序的时候会出现以下问题。
alsa_dev.c ! ca_thread_func: error reading data! 解决方法 修改config_site.h文件 在pjproject\pjlib\include\pj目录下
增加 #define PJMEDIA_AUDIO_DEV_HAS_ALSA 1
./configure
make dep
make
make instal
编译完就可以直接运行pjsua-x86_64-unknown-linux-gnu测试了
2、pjsip移植
1) 移植 alsa-lib-1.1.7.tar.bz2
export ARCH=arm
export CROSS_COMPILE=arm-linux-gnueabihf
tar xjvf alsa-lib-1.1.7.tar.bz2
cd alsa-lib-1.1.7/
./configure --host=arm-linux-gnueabihf CC=arm-linux-gnueabihf-gcc --prefix=/home/dong/alsa-lib-1.1.7/_install
make
make install
2) 移植 alsa-utils-1.1.7.tar.bz2
./configure --host=arm-linux-gnueabihf --prefix=/home/dong/alsa-utils-1.1.7/_install CFLAGS=-I/home/dong/alsa-lib-1.1.7/_install/include LDFLAGS=-L/home/dong/alsa-lib-1.1.7/_install/lib --disable-alsamixer --disable-xmlto
make
sudo make install
3) pjsip交叉编译
./configure --prefix=/home/dong/pjproject-2.8/_install --host=arm-linux-gnueabihf CC=/usr/local/gcc-linaro-arm-linux-gnueabihf/bin/arm-linux-gnueabihf-gcc --disable-libwebrtc CFLAGS=-I/home/dong/alsa-lib-1.1.7/_install/include LDFLAGS=-L/home/dong/alsa-lib-1.1.7/_install/lib
make dep
make
make install
下面这些不用管,alsa是同事编译的,gcc也不同,添加了amr转码,作个记录,环境变了容易冲突
1) 移植 alsa-lib-1.1.7.tar.bz2
export ARCH=arm
export CROSS_COMPILE=arm-linux-gnueabihf
tar xjvf alsa-lib-1.1.7.tar.bz2
cd alsa-lib-1.1.7/
./configure --host=arm-linux-gnueabihf CC=/usr/local/arm/gcc-4.9.4-arm-buildroot-linux-gnueabihf/bin/arm-linux-gnueabihf-gcc --prefix=/home/dong/alsa-lib-1.1.7/_install
make
make install
2) 移植 alsa-utils-1.1.7.tar.bz2
./configure --host=arm-linux-gnueabihf CC=/usr/local/arm/gcc-4.9.4-arm-buildroot-linux-gnueabihf/bin/arm-linux-gnueabihf-gcc --prefix=/home/dong/alsa-utils-1.1.7/_install CFLAGS=-I/home/dong/alsa-lib-1.1.7/_install/include LDFLAGS=-L/home/dong/alsa-lib-1.1.7/_install/lib --disable-alsamixer --disable-xmlto
make
sudo make install
3) pjsip交叉编译
./configure --prefix=/home/dong/pjproject-2.8/_install --host=arm-linux-gnueabihf CC=/usr/local/gcc-linaro-arm-linux-gnueabihf/bin/arm-linux-gnueabihf-gcc --disable-libwebrtc CFLAGS=-I/home/dong/alsa-lib-1.1.7/_install/include LDFLAGS=-L/home/dong/alsa-lib-1.1.7/_install/lib
make dep
make
make install
4) opencore-amr交叉编译
./configure --prefix=$(pwd)/_install --host=arm-linux-gnueabihf CC=/usr/local/arm/gcc-4.9.4-arm-buildroot-linux-gnueabihf/bin/arm-linux-gnueabihf-gcc
make
make install
5) pjproject交叉编译
./configure --prefix=/home/dong/pjproject-2.8/_install --host=arm-linux-gnueabihf CC=/usr/local/arm/gcc-4.9.4-arm-buildroot-linux-gnueabihf/bin/arm-linux-gnueabihf-gcc --disable-libwebrtc CFLAGS=-I/home/dong/alsa/include LDFLAGS=-L/home/dong/alsa/lib --with-opencore-amr=$(pwd)/third_party/opencore-amr-0.1.3/_install
make dep
make
make install
4) 应用配置
将移植好的alsa-lib-1.1.7_install.tar.gz和alsa-utils-1.1.7_install.tar.gz都解压到/usr/local/qbox10/下
export PATH=$PATH:/usr/local/qbox10/alsa-1.1.7/bin
export LD_LIBRARY_PATH=/usr/local/qbox10/alsa-1.1.7/lib:$LD_LIBRARY_PATH
export ALSA_CONFIG_PATH=/usr/local/qbox10/alsa-1.1.7/share/alsa/alsa.conf
因为编译alsa时路径写死了/home/dong/alsa-lib-1.1.7/_install/
所以录音播音也需要这个路径存放配置文件
mkdir /home/dong
mkdir /home/dong/alsa-lib-1.1.7
mkdir /home/dong/alsa-lib-1.1.7/_install
cp -r /usr/local/qbox10/alsa-1.1.7/share /home/dong/alsa-lib-1.1.7/_install/
5) 录音播音测试
arecord -D "plughw:0,0" -f S16_LE -r 16000 -d 5 -t wav file.wav
aplay file.wav
arecord -d 10 -f cd -r 8000 -c 2 -t wav test.wav
arecord -D "plughw:0,0" -f U16_LE -r 16000 -d 5 -t wav file.wav
arecord -d 10 -t raw -f S16_LE test.pcm
aplay -t raw -c 1 -f S16_LE -r 8000 test.pcm
arecord -d 10 -t raw -f U16_LE test.pcm
aplay -t raw -c 1 -f U16_LE -r 8000 test.pcm
arecord -d 10 -t raw -f U8 test.pcm
aplay -t raw -c 1 -f U8 -r 8000 test.pcm
aplay -t raw -r 8000 test.g711
arecord -D "plughw:0,0" -f U16_LE -r 16000 -d 5 -t wav file.wav
arecord -f S16_LE | aplay -f S16_LE
3、pjsua应用实例
pjsua Manual Page
https://www.pjsip.org/pjsua.htm
1) register --- make call
./pjsua-x86_64-unknown-linux-gnu --config-file paul.cfg
m
sip:alice@120.78.180.208:5060
2) peer to peer
./pjsua-x86_64-unknown-linux-gnu --null-audio
./pjsua-x86_64-unknown-linux-gnu sip:120.78.180.208 --null-audio
3) register cli
>>> +a
Your SIP URL: (empty to cancel):sip:100@120.78.180.208:5060
URL of the registrar: (empty to cancel):sip:120.78.180.208:5060
Auth Realm: (empty to cancel): *
Auth Username: (empty to cancel): 100
Auth Password: (empty to cancel): 100
sip:104@120.78.180.208
4) alice.cfg
# This is a comment in the config file.
--id sip:alice@xx.xxx.xx.236:5060
--registrar sip:xx.xxx.xx.236:5060
--realm *
--username alice
--password secret
启动程序,自动应答
./pjsua-arm-unknown-linux-gnueabihf --config-file alice.cfg --auto-answer 200
指定“紧凑模式”(去掉SIP协议的一些非必须的字段),采样率和编码优先级,我在cortex-a5上以默认参数启动,会出现pb和ca线程不同步underrun!
./pjsua-arm-unknown-linux-gnueabihf --config-file alice.cfg --use-compact-form --clock-rate=8000 --add-codec=pcmu --auto-answer 200
其他配置参考官网应用手册https://www.pjsip.org/pjsua.htm
5) 临时建群,多方通话
查看pjsua应用手册https://www.pjsip.org/pjsua.htm
的Call Commands和Conference Commands
| M | Make multiple calls | Make multiple calls to the same destination. |
| cl | Conference List | List all the ports registered to the conference bridge, and show the interconnection among these ports. |
| cc | Conference Connect | Create a unidirectional connection between two ports. For example, if you have a WAV player connected at slot #1 and a call connected at slot #2, you can stream WAV file to the call by specifying this command: cc 1 2. |
cl查看已拨号的通道, 0是拨号的主叫号码本身,1和2分别是ringback和ring,3和4是被叫号码
M
2
sip:101@xx.xxx.xx.236:5060
sip:101@xx.xxx.xx.236:5060
cc 3 4
cc 4 3

6) freepbx语音会议

配置好freepbx语音会议后,直接拨号会议号,然后输入密码进入会议室
./pjsua-x86_64-unknown-linux-gnu --config-file 106.cfg --use-compact-form --clock-rate=8000 --add-codec=pcmu --auto-answer 200
也可以自动登陆会议室,auto-conf是自动登陆会议室
./pjsua-x86_64-unknown-linux-gnu --config-file 106.cfg --use-compact-form --clock-rate=8000 --add-codec=pcmu --auto-answer 200 --auto-conf sip:2018@xx.xxx.xx.236:5060
PC/android/ios也是一样的操作


4、 py_pjsua应用实例
https://trac.pjsip.org/repos/wiki/Py_PJSUA
python实例在pjsip-apps/src/python/samples/
5、Python_SIP编译安装
1) ./configure CFLAGS='-O2 -fPIC' --enable-shared
https://trac.pjsip.org/repos/wiki/Python_SIP/Build_Install
2) pjsua2安装
sudo apt-get install -y software-properties-common # To make add-apt-repository work
sudo add-apt-repository ppa:dennis.guse/sip-tools
sudo apt-get update
sudo apt-get install python-pjsua
sudo apt-get install python-pjsua2
To check if everything went well:
python
import pjsua
https://stackoverflow.com/questions/20195542/python-how-to-get-the-import-pjsua-giving-no-module-named-pjsua
3)Building PJSUA2 and SWIG
The PJSUA2 C++ library will be built by default by PJSIP build system. Standard C++ library is required. If you intend to use Python SWIG module (see below), you need to configure PJSIP with --enable-shared option, i.e.:
./configure --enable-shared make dep & make sudo make install
https://www.pjsip.org/docs/book-latest/html/intro_pjsua2.html#building-python-and-java-swig-modules

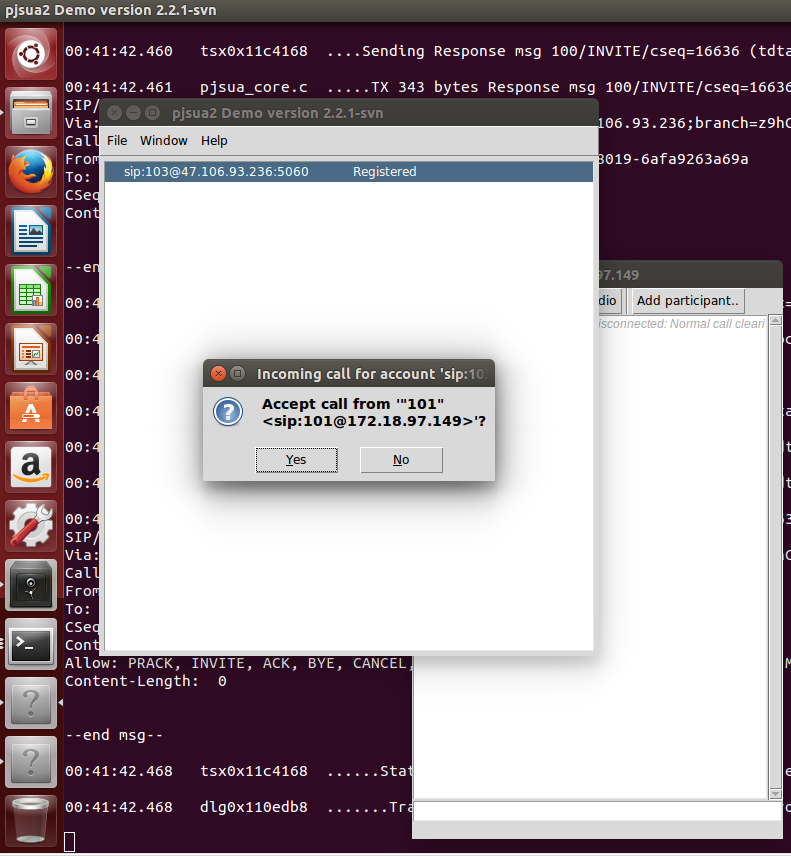
装好pjsua2就可以启动pygui测试了拨号了,这个例子带图形界面,ui用的Tkinter,另外一个带gui的例子是vidgui,ui用的qt


6、Using OpenCORE AMR NB and WB Codecs
https://trac.pjsip.org/repos/wiki/Using-OpenCORE-AMR-NB-WB-Codec
#opencore-amr 和 vo-amrwbenc
./configure --prefix=$(pwd)/_install --host=arm-linux-gnueabihf CC=/usr/local/arm/gcc-4.9.4-arm-buildroot-linux-gnueabihf/bin/arm-linux-gnueabihf-gcc
make
make install
装好之后将两个库的_install目录合并,合并到opencore-amr-0.1.3/_install
#pjproject
./configure --prefix=/home/dong/pjproject-2.8/_install --host=arm-linux-gnueabihf CC=/usr/local/arm/gcc-4.9.4-arm-buildroot-linux-gnueabihf/bin/arm-linux-gnueabihf-gcc --disable-libwebrtc CFLAGS=-I/home/dong/alsa/include LDFLAGS=-L/home/dong/alsa/lib --with-opencore-amr=$(pwd)/third_party/opencore-amr-0.1.3/_install
make dep
make
make install
ln -s libopencore-amrnb.so.0.0.3 libopencore-amrnb.so.0
ln -s libopencore-amrwb.so.0.0.3 libopencore-amrwb.so.0
ln -s libvo-amrwbenc.so.0.0.4 libvo-amrwbenc.so.0
7、Ubuntu 16.04 下编译pjsip,支持视频通话
https://blog.csdn.net/wywf4/article/details/82260582
https://blog.csdn.net/SUKHOI27SMK/article/details/18667465
https://github.com/sxcong/pjsipvideo_demo
end


 343
343


 被折叠的 条评论
为什么被折叠?


