


1.建立web 项目,导入SpringMVC 相关支持jar 包
commons-logging-1.2.jar下载地址:https://commons.apache.org/proper/commons-logging/download_logging.cgi

2.配置web.xml(重点)
关键的步骤:配置核心控制器:Servlet
 1   <!-- 配置SpringMVC核心控制器 -->
 2   <servlet>
 3       <servlet-name>DispatcherServlet</servlet-name>
 4       <servlet-class>org.springframework.web.servlet.DispatcherServlet</servlet-class>
 5   </servlet>
 6
 7   <servlet-mapping>
 8       <servlet-name>DispatcherServlet</servlet-name>
 9       <url-pattern>*.action</url-pattern>
10   </servlet-mapping>
3.编写spring-mvc.xml
建议放在classpath
下面有一个mvc 的名称空间:
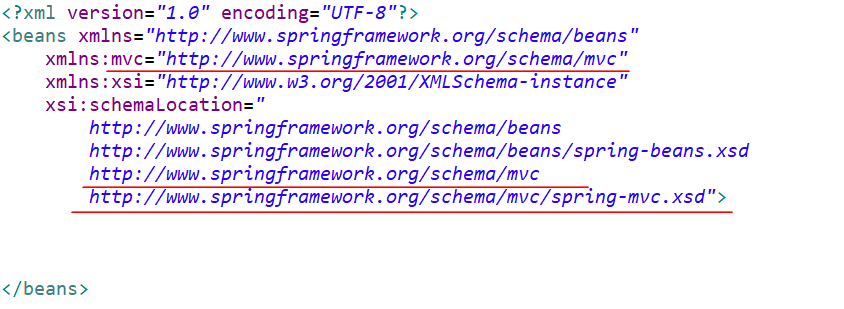
SpringMVC的完整配置:
 1 <?xml version="1.0" encoding="UTF-8"?>
 2 <beans xmlns="http://www.springframework.org/schema/beans"
 3     xmlns:xsi="http://www.w3.org/2001/XMLSchema-instance"
 4     xmlns:context="http://www.springframework.org/schema/context"
 5     xmlns:mvc="http://www.springframework.org/schema/mvc"
 6     xsi:schemaLocation="http://www.springframework.org/schema/beans
 7                         http://www.springframework.org/schema/beans/spring-beans-4.3.xsd
 8                         http://www.springframework.org/schema/context
 9                         http://www.springframework.org/schema/context/spring-context-4.3.xsd
10                         http://www.springframework.org/schema/mvc
11                         http://www.springframework.org/schema/mvc/spring-mvc-4.3.xsd">
12
13     <!-- 扫描Spring注解 -->
14     <context:component-scan base-package="cn.sm1234.controller"></context:component-scan>
15
16 </beans>
修改web.xml
 1   <!-- 配置SpringMVC核心控制器 -->
 2   <servlet>
 3       <servlet-name>DispatcherServlet</servlet-name>
 4       <servlet-class>org.springframework.web.servlet.DispatcherServlet</servlet-class>
 5   <!-- 参数,用于加载spring-mvc.xml -->
 6       <init-param>
 7           <param-name>contextConfigLocation</param-name>
 8           <param-value>classpath:spring-mvc.xml</param-value>
 9       </init-param>
10   </servlet>
11
12   <servlet-mapping>
13       <servlet-name>DispatcherServlet</servlet-name>
14       <url-pattern>*.action</url-pattern>
15   </servlet-mapping>
4.编写Controller 类测试
 1 package cn.sm1234.controller;
 2
 3 import org.springframework.stereotype.Controller;
 4 import org.springframework.web.bind.annotation.RequestMapping;
 5 import org.springframework.web.servlet.ModelAndView;
 6
 7 @Controller
 8 public class HelloController {
 9
10     @RequestMapping("/hello")
11     public ModelAndView hello(){
12         System.out.println("执行 HelloController的 hello方法");
13         //把数据保存到 ModelAndView(相当于保存 request域对象)
14         ModelAndView mv = new ModelAndView();
15         mv.addObject("name", "Spring MVC");
16         //返回物理路径
17         mv.setViewName("/WEB-INF/jsp/success.jsp");
18         return mv;
19     }
20 }
5.编写页面
 1 <%@ page language="java" contentType="text/html; charset=UTF-8"
 2     pageEncoding="UTF-8"%>
 3 <%
 4     String path = request.getContextPath() + "/";
 5     String basePath = request.getScheme() + "://" + request.getServerName() + ":" + request.getServerPort() + path;
 6 %>
 7 <!DOCTYPE html>
 8 <html>
 9 <head>
10 <base href="<%=basePath%>" />
11 <meta http-equiv="Content-Type" content="text/html; charset=UTF-8">
12 <title>第一个SpringMVC程序</title>
13 </head>
14 <body>
15 第一个SpringMVC程序
16 <hr>
17 ${name }
18 </body>
19 </html>
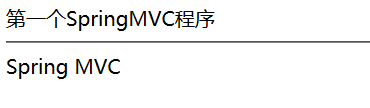
6.访问测试
访问路径:http://localhost:8080/ch01.spring-mvc/hello.action
结果:
浏览器:
控制台:
![]()


 595
595


 被折叠的 条评论
为什么被折叠?
被折叠的 条评论
为什么被折叠?
 到【灌水乐园】发言


