


1、使用RadioButton实现下方导航栏
上方图片,下面文字;点击切换图片;
首先布局xml文件:
<RadioGroup
            android:id="@+id/radioGroup1"
            android:layout_margin="5dp"
            android:orientation="horizontal"
            android:layout_width="match_parent"
            android:layout_height="wrap_content">
            <RadioButton
                android:id="@+id/radio1"
                android:button="@null"
                android:drawableTop="@drawable/navbar1"
                android:gravity="center"
                android:layout_weight="1.0"
                android:layout_width="wrap_content"
                android:layout_height="wrap_content"
                android:textSize="14dp"
                android:text="微信"/>
            <RadioButton
                android:id="@+id/radio2"
                android:textSize="14dp"
                android:textColor="@drawable/color"
                android:button="@null"
                android:drawableTop="@drawable/navbar2"
                android:gravity="center"
                android:layout_weight="1.0"
                android:layout_width="wrap_content"
                android:layout_height="wrap_content"
                android:text="通讯录"/>
            <RadioButton
                android:id="@+id/radio3"
                android:textSize="14dp"
                android:textColor="@drawable/color"
                android:button="@null"
                android:drawableTop="@drawable/navbar3"
                android:gravity="center"
                android:layout_weight="1.0"
                android:layout_width="wrap_content"
                android:layout_height="wrap_content"
                android:text="发现"/>
            <RadioButton
                android:id="@+id/radio4"
                android:textSize="14dp"
                android:textColor="@drawable/color"
                android:button="@null"
                android:drawableTop="@drawable/navbar4"
                android:gravity="center"
                android:layout_weight="1.0"
                android:layout_width="wrap_content"
                android:layout_height="wrap_content"
                android:text="我的"/>
        </RadioGroup>
然后,如何点击按钮 更换背景图片:
在drawable里面创建xml文件
<selector xmlns:android="http://schemas.android.com/apk/res/android">
    <!--图片切换-->
      <item android:drawable="@mipmap/char2" android:state_checked="true"/>
      <item android:drawable="@mipmap/char1" android:state_checked="false"/>
</selector>
在设置背景图片的时候,不指定到一张图片,而是指定到一个xml文件
android:drawableTop="@drawable/navbar1"
设置文字颜色改变可以用这个方法,也可以使用事件监听:(代码中,为了测试,第一个按钮为事件监听,其他为使用XML)
        /*使用监听器把第一个字体的颜色改变*/
        radio1.setOnCheckedChangeListener(new CompoundButton.OnCheckedChangeListener() {
            @Override
            public void onCheckedChanged(CompoundButton buttonView, boolean isChecked) {
                if(radio1.isChecked()){
                    radio1.setTextColor(Color.parseColor("#08bf62"));
                }
                else{
                    radio1.setTextColor(Color.parseColor("#000000"));
                }
            }
        });
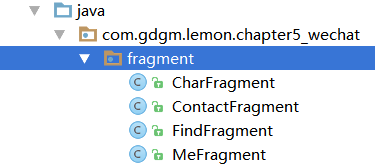
2、点击切换页面:fragment , 注1:这里为动态fragment
首先建如图fragment: 注:建立fragment时会有版本问题,以下使用老的版本import android.app.Fragment; jar包: compile 'com.android.support:support-v4:24.0.0'
注2:
在主界面XML编写:
    <FrameLayout
        android:id="@+id/frameLayout"
        android:layout_weight="1"
        android:layout_width="match_parent"
        android:layout_height="match_parent">

    </FrameLayout>
设置事件监听:
    FrameLayout frameLayout;
    CharFragment charFragment=null;
    ContactFragment contactFragment=null;
    FindFragment findFragment=null;
    MeFragment meFragment=null;
        /*Frame布局的切换监听*/
        radioGroup1.setOnCheckedChangeListener(new RadioGroup.OnCheckedChangeListener() {
            @Override
            public void onCheckedChanged(RadioGroup group, int checkedId) {
                if (checkedId ==R.id.radio1){
                    //绑定Fragment
                    if(charFragment==null){
                        charFragment=new CharFragment();
                    }
                    getFragmentManager().beginTransaction().replace(R.id.frameLayout,charFragment).commit();
                }
                if (checkedId ==R.id.radio2){
                    //绑定Fragment
                    if(contactFragment==null){
                        contactFragment=new ContactFragment();
                    }
                    getFragmentManager().beginTransaction().replace(R.id.frameLayout,contactFragment).commit();
                }
                if (checkedId ==R.id.radio3){
                    //绑定Fragment
                    if(findFragment==null){
                        findFragment=new FindFragment();
                    }
                    getFragmentManager().beginTransaction().replace(R.id.frameLayout,findFragment).commit();
                }
                if (checkedId ==R.id.radio4){
                    //绑定Fragment
                    if(meFragment==null){
                        meFragment=new MeFragment();
                    }
                    getFragmentManager().beginTransaction().replace(R.id.frameLayout,meFragment).commit();
                }
            }
        });
3、微信界面的ListVIew
在fragment的xml界面打代码:
    <ListView
        android:id="@+id/listView"
        android:background="#7ecef4"
        android:layout_width="match_parent"
        android:layout_height="match_parent">
再到fragment的java文件 重写 onViewCreated,在里面编写:
    //重写onViewCreated
    @Override
    public void onViewCreated(View view, Bundle savedInstanceState) {
        super.onViewCreated(view, savedInstanceState);
    //重写这里开始编写代码
        listView=view.findViewById(R.id.listView);
        String[] data=new String[12];
        for(int i=0;i<data.length;i++){
            data[i] = "这里是内容" + i;
        }
        //获得适配器ArrayAdapter
        ArrayAdapter<String> adapter=new ArrayAdapter<>(getActivity(),android.R.layout.simple_list_item_1,data);
        //设置适配器
        listView.setAdapter(adapter);
    }
这时有了最简单的界面,我们需要有自己的样式:
新建一个char_item.xml 文件,并编写自己的样式:
    <ImageView
        android:src="@mipmap/ic_launcher"
        android:layout_width="45dp"
        android:layout_height="45dp" />
    <LinearLayout
        android:layout_width="match_parent"
        android:orientation="vertical"
        android:layout_height="50dp">
        <TextView
            android:text="名称"
            android:gravity="left|center"
            android:layout_width="match_parent"
            android:layout_height="20dp" />
        <TextView
            android:text="内容"
            android:gravity="left|center"
            android:layout_width="match_parent"
            android:layout_height="30dp" />
    </LinearLayout>
修改适配器:
        //获得适配器ArrayAdapter
        //ArrayAdapter<String> adapter=new ArrayAdapter<>(getActivity(),android.R.layout.simple_list_item_1,data);
        ArrayAdapter<String> adapter=new ArrayAdapter<>(getActivity(),R.layout.char_item,R.id.textView_Char,data);
//第一个参数是context,第二个是布局样式,第三个是要捆绑的 TextView,第四个是数据
版本2:自定义ArrayAdapter
版本3 :SimpleAdapter :重点理解SimpleAdapter ()里面的参数
参考:http://www.cnblogs.com/loulijun/archive/2011/12/27/2303488.html
/*版本3 simpleAdapter*/
        int[] headImage=new int[]{R.drawable.char1,R.drawable.char2,
                R.drawable.contact1,R.drawable.contact2,
                R.drawable.find1,R.drawable.find2,
                R.drawable.me1,R.drawable.me2};
        List<Map<String,String>> list=new ArrayList<>();//第二个参数,为储存的数据
        for (int i = 0; i <8 ; i++) {  //填充数据
            Map<String,String> map=new HashMap<>();
            map.put("head",String.valueOf(headImage[i]));
            map.put("name","这是名字"+i);
            map.put("content","这是内容"+i);
            map.put("date","懒得给时间" );//用localdate
            list.add(map);
        }
        String[] from =new String[]{"head","name","content","date"};//map里面的key
        int[] to =new int[]{R.id.icon_Head,R.id.textView_name,R.id.textView_Char,R.id.textView_Time};//控件的id
        SimpleAdapter simpleAdapter=new SimpleAdapter(getActivity(),list,R.layout.char_item,from,to);
        listView.setAdapter(simpleAdapter);//记得设置


 2370
2370


 被折叠的 条评论
为什么被折叠?
被折叠的 条评论
为什么被折叠?
 到【灌水乐园】发言


