


前言:这几天做项目的需要学习了一下uploadify这个jquery插件如何使用的,我在网上也找了好的资料,他们发的都是旧的,是v2.x的,我从下载的是v3.2的,我自己在官网学习了一个这个插件的使用方法,官方默认的使用的是PHP语言,这里的笔记我用的是C#语言写的(参考的是网上的资料)。
Uploadify下载地址:http://www.uploadify.com这里下载的是最新版的v3.2,下载下来之后是会有很多的文件这是我下载的图:
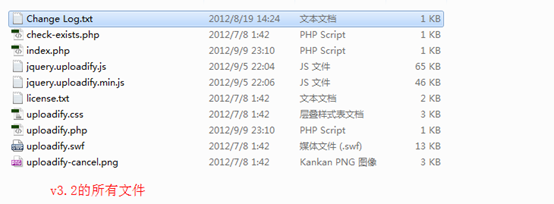
在这么多文档中我们需要的就是uplodify.css和uploadify.swf、uploadify-cancle.png、jquery-uploadify.min.js(jquery-uploadify.js中的其中一个),当然了还有就是jquery库哦!
我做的项目的目录:
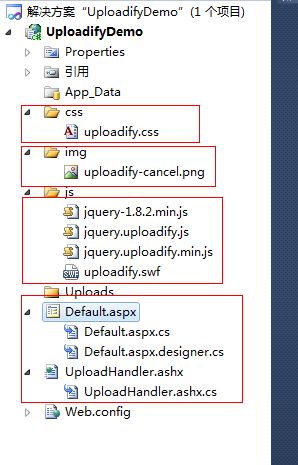
这是我建立一个Default.aspx文件的内容:
   <link href="css/uploadify.css" rel="stylesheet" type="text/css" />
    <script src="js/jquery-1.8.2.min.js" type="text/javascript"></script>
    <script src="js/jquery.uploadify.min.js" type="text/javascript"></script>
<%//引入相应的文件 %>
    <link href="css/uploadify.css" rel="stylesheet" type="text/css" />
    <script src="js/jquery-1.8.2.min.js" type="text/javascript"></script>
    <script src="js/jquery.uploadify.min.js" type="text/javascript"></script>
    <script type="text/javascript">
        $(function () {
            $('#uploadify').uploadify({
                //'debug':'false',                         //是否调试
                //'buttonClass': 'buttonSum',           //按钮的样式
                //'buttonCursor':'hand',                 //按钮的Cursor
                'fileTypeDesc': 'Web Files',             //允许文件的描述
                'fileTypeExts': '*.gif; *.jpg; *.png',  //文件的种类(必须和fileTypeDesc一起使用)
                'uploader': 'UploadHandler.ashx',    //处理的后台程序
                'swf': 'js/uploadify.swf',          //引入swf文件
                'cancelImg': 'img/uploadify-cancel.png', //退出的图片
                'auto': 'true',                          //是否自动上传
                'buttonText': '选择文件',                  //按钮的文本
                'folder': '/Uploads',                      //服务器端的路径
                'fileSizeLimit': '0',                       //上传文件的大小
                'onSelect':function(file){                  //选择完成后的回调函数
                    alert(file.name);
                },
                'onUploadComplete': function (file) {       //上传完成的回调事件
                    alert('上传成功');
                }
            });
        });
    </script>
还有有就是UploadHandler.ashx的内容
using System;
using System.Collections.Generic;
using System.Linq;
using System.Web;
using System.IO;

namespace UploadifyDemo
{
    /// <summary>
    /// UploadHandler 的摘要说明
    /// </summary>
    public class UploadHandler : IHttpHandler
    {

        public void ProcessRequest(HttpContext context)
        {
            context.Response.ContentType = "text/plain";
            context.Response.Charset = "utf-8";

            HttpPostedFile file = context.Request.Files["Filedata"];
            string uploadPath = HttpContext.Current.Server.MapPath("\\Uploads" + "\\");
            if (file != null)
            {
                if (!Directory.Exists(uploadPath))
                {
                    Directory.CreateDirectory(uploadPath);
                }
                file.SaveAs(uploadPath + file.FileName);
                //下面这句代码缺少的话,上传成功后上传队列的显示不会自动消失
                context.Response.Write("1");
            }
            else
            {
                context.Response.Write("0");
            }
        }

        public bool IsReusable
        {
            get
            {
                return false;
            }
        }
    }
}
以上就是这个例子,本人也是初学!
还有我在网上找到到几个不错的文章可以参考:http://www.abc3210.com/2012/js_09/jquery-uploadify.shtml
http://www.cnblogs.com/akingyao/archive/2012/09/04/2670794.html


 3549
3549


 被折叠的 条评论
为什么被折叠?
被折叠的 条评论
为什么被折叠?
 到【灌水乐园】发言


