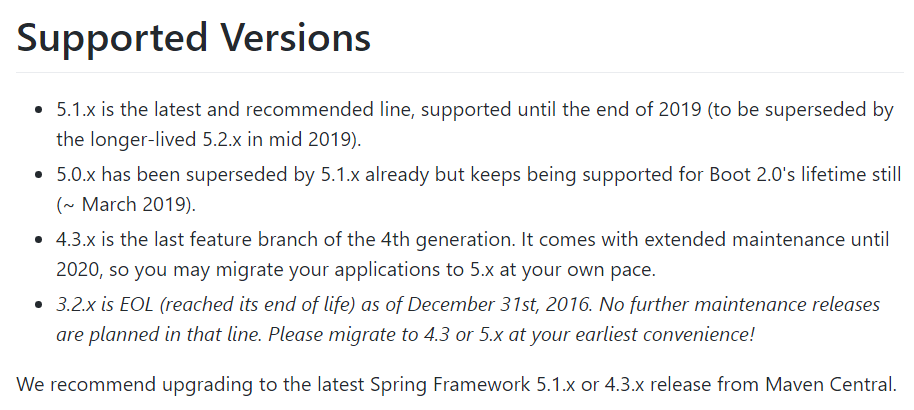
一、Spring版本
Spring的最新版本是Spring 5.x,Spring 4.x的最后版本是Spring 4.3.x,会维护到2020年(Spring的GitHub主页对此有说明)。

二、SpringMVC
SpringMVC可以说是,应用了Spring的各种特性的一个MVC项目,它的核心Servlet是DispatcherServlet。
三、配置
各种Java框架一般都需要在web.xml中进行相关配置,一般都涉及到Listener、Filter、Servlet。
3.1 web.xml中配置
在Spring 3.1版本之前,在web.xml中配置DispatcherServlet是唯一的方式(同时声明映射):
<servlet>
    <servlet-name>dispatcher</servlet-name>
    <servlet-class>
        org.springframework.web.servlet.DispatcherServlet
    </servlet-class>

    <init-param>
        <param-name>contextConfigLocation</param-name>
        <param-value>/WEB-INF/spring/dispatcher-config.xml</param-value>
    </init-param>

    <load-on-startup>1</load-on-startup>
</servlet>


<servlet-mapping>
    <servlet-name>dispatcher</servlet-name>
    <url-pattern>/</url-pattern>
</servlet-mapping>
**注释:load-on-startup is an integer value that specifies the order for multiple servlets to be loaded. So if you need to declare more than one servlet you can define in which order they will be initialized. Servlets marked with lower integers are loaded before servlets marked with higher integers.
3.2 web.xml和Java类中均可配置,即可混合配置
接下来,随着Servlet API 3.0的应用,web.xml中的配置不是必须的了,我们可以在Java类中配置DispatcherServlet:
public class MyWebAppInitializer implements WebApplicationInitializer {
    @Override
    public void onStartup(ServletContext container) {
        XmlWebApplicationContext context = new XmlWebApplicationContext();
        context.setConfigLocation("/WEB-INF/spring/dispatcher-config.xml");

        ServletRegistration.Dynamic dispatcher = container
          .addServlet("dispatcher", new DispatcherServlet(context));

        dispatcher.setLoadOnStartup(1);
        dispatcher.addMapping("/");
    }
}
这里的Java配置类取得的最终效果与3.1节中的相同。
但是我们仍然使用了一个XML文件:dispatcher-config.xml
3.3 100%的Java配置
通过对3.2节中的Java配置类进行重构,我们无需再使用XML文件来配置Dispatcher:
public class MyWebAppInitializer implements WebApplicationInitializer { @Override public void onStartup(ServletContext container) { AnnotationConfigWebApplicationContext context = new AnnotationConfigWebApplicationContext();
//context.register(AppConfig.class);context.setConfigLocation("com.example.app.config"); container.addListener(new ContextLoaderListener(context)); ServletRegistration.Dynamic dispatcher = container .addServlet("dispatcher", new DispatcherServlet(context)); dispatcher.setLoadOnStartup(1); dispatcher.addMapping("/"); } }
**注释:
The first thing we will need to do is create the application context for the servlet.
This time we will use an annotation based context so that we can use Java and annotations for configuration and remove the need for XML files like dispatcher-config.xml.
3.4 总结
Spring 3.2及其以上的版本,均可以采用以上三种方式进行配置。
官方推荐纯Java类来配置,更加简洁和灵活。但是有时候必须XML文件也是无法避免的
四、SpringBoot化繁为简
这些配置很繁琐,SpringBoot就是达到一键生成的效果!


 1140
1140


 被折叠的 条评论
为什么被折叠?


