


前言
写这个博客得原因是最近想要将自己得api单独发布给第三方使用,但是又不想被别人滥用,所以想弄一个授权服务,但是网上关于oauth2.0的资料层出不穷,看了之后完全不明白应该如果实际的去整合,现在基本成功后记录下来。
关于oauth2.0的概念以及相关的知识等可以建议参阅
理解OAuth 2.0。
准备
新建一个Spring Boot的web项目并导入一下依赖:
<dependency>
    <groupId>org.springframework.security.oauth</groupId>
    <artifactId>spring-security-oauth2</artifactId>
</dependency>
<dependency>
    <groupId>org.springframework.boot</groupId>
    <artifactId>spring-boot-starter-security</artifactId>
</dependency>
<dependency>
    <groupId>org.springframework.boot</groupId>
    <artifactId>spring-boot-starter-web</artifactId>
</dependency>
配置
配置EnableAuthorizationServer
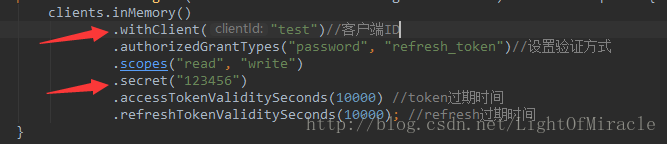
@Configuration
@EnableAuthorizationServer
public class OAuth2AuthorizationConfig extends AuthorizationServerConfigurerAdapter {


    @Autowired
    private AuthenticationManager authenticationManager;

    @Autowired
    private UserDetailsService userService;

    @Autowired
    private TokenStore tokenStore;

    @Override
    public void configure(ClientDetailsServiceConfigurer clients) throws Exception {
        clients.inMemory()
                .withClient("test")//客户端ID
                .authorizedGrantTypes("password", "refresh_token")//设置验证方式
                .scopes("read", "write")
                .secret("123456")
                .accessTokenValiditySeconds(10000) //token过期时间
                .refreshTokenValiditySeconds(10000); //refresh过期时间
    }

    @Override
    public void configure(AuthorizationServerEndpointsConfigurer endpoints) throws Exception {
        endpoints.tokenStore(tokenStore)
                .authenticationManager(authenticationManager)
                .userDetailsService(userService); //配置userService 这样每次认证的时候会去检验用户是否锁定,有效等
    }

    @Bean
    public TokenStore tokenStore() {
        //使用内存的tokenStore
        return new InMemoryTokenStore();
    }
}
UserService接口定义如下:
public interface UserService extends UserDetailsService {
    //后期在此新增UserService的业务接口
}
其中UserDetailsService只包含一个需要实现的方法,具体实现:
@Primary
@Service("userService")
public class UserServiceImpl implements UserService {

    private final static Set<User> users = new HashSet<>();

    static {
        users.add(new User(1, "test-user1", "123451"));
        users.add(new User(2, "test-user2", "123452"));
        users.add(new User(3, "test-user3", "123453"));
        users.add(new User(4, "test-user4", "123454"));
    }

    @Override
    public UserDetails loadUserByUsername(String s) throws UsernameNotFoundException {
        Optional<User> user = users.stream()
                .filter((u) -> u.getUserName().equals(s))
                .findFirst();
        if (!user.isPresent())
            throw new UsernameNotFoundException("there's no user founded!");
        else
            return UserDetailConverter.convert(user.get());
    }

    private static class UserDetailConverter {
        static UserDetails convert(User user) {
            return new MyUserDetails(user);
        }
    }
}
根据方法名很容易明白spring 的组件会调用此方法去获取到用户的信息并去验证。
这里的用户信息直接写死的,实际中可以用jdbc或者其他配置等方式。
同时loadUserByUsername方法要求返回一个UserDetails接口:
public interface UserDetails extends Serializable {
    Collection<? extends GrantedAuthority> getAuthorities();

    String getPassword();

    String getUsername();

    boolean isAccountNonExpired();

    boolean isAccountNonLocked();

    boolean isCredentialsNonExpired();

    boolean isEnabled();
}
并且spring已经有了它的一个实现:org.springframework.security.core.userdetails.User类
由于User这个名字很容易和我们项目中的实体User重名这里选择继承这个类自己实现一个UserDetails:

/**
 * 自定义UserDetails类 携带User实例
 */
public class MyUserDetails extends User {

    private com.example.oauth.pojo.User user;

    public MyUserDetails(com.example.oauth.pojo.User user) {
        super(user.getUserName(), user.getPassword(), true, true, true, true, Collections.EMPTY_SET);
        this.user = user;
    }

    public com.example.oauth.pojo.User getUser() {
        return user;
    }

    public void setUser(com.example.oauth.pojo.User user) {
        this.user = user;
    }
}
到此基本的配置就已经完成了,
测试
写一个测试的Controller:
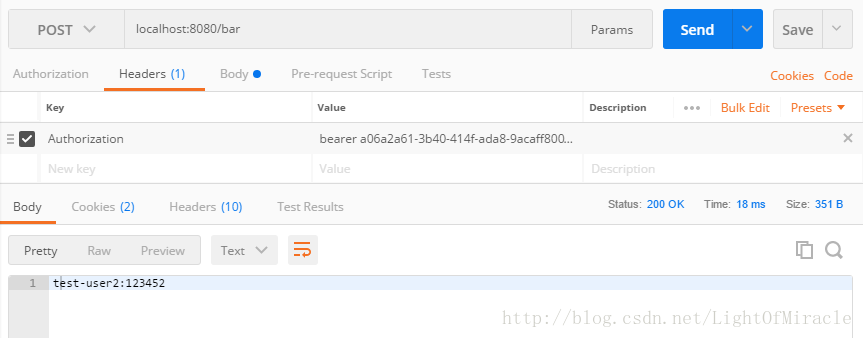
@RestController
public class UserController {

    @Autowired
    private TokenStore tokenStore;

    @PostMapping("/bar")
    public String bar(@RequestHeader("Authorization") String auth) {

        MyUserDetails userDetails = (MyUserDetails) tokenStore.readAuthentication(auth.split(" ")[1]).getPrincipal();

        User user = userDetails.getUser();

        return user.getUserName() + ":" + user.getPassword();
    }
}
启动项目:
访问:localhost:8080/bar
返回未授权
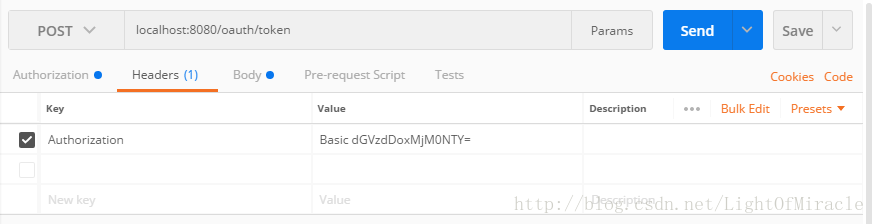
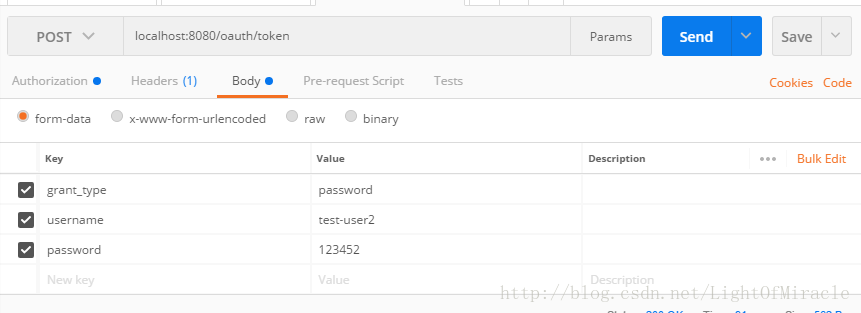
访问:localhost:8080/oauth/token获取token
这里的Authrization字段中Basic后面是配置中的clientId + ":" + secret的Base64编码结果
我这里是:test:123456的Base64编码结果
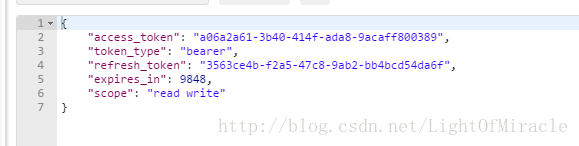
返回token信息:
使用token访问controller:
成功。


 4142
4142

 被折叠的 条评论
为什么被折叠?
被折叠的 条评论
为什么被折叠?
 到【灌水乐园】发言


