一、Canvas
在WPF中子元素的绝对定位的布局控件
- 其子元素使用Width、Height定义元素的宽度和高度
- 使用Convas.Left(Convas.Right)、Convas.Top(Convas.Bottom)定义与Convas容器的相对位置
- 如果同时存在Convas.Left和Convas.Right、Convas.Top和Convas.Bottom,则Convas.Left、Convas.Top优先生效
例如:
1: <Canvas>
2: <Button Canvas.Left="10" Canvas.Top="10" Height="23" Width="75">LT</Button>
3: <Button Canvas.Right="10" Canvas.Top="10" Height="23" Width="75">RT</Button>
4: <Button Canvas.Left="10" Canvas.Bottom="10" Height="23" Width="75">LB</Button>
5: <Button Canvas.Right="10" Canvas.Bottom="10" Height="23" Width="75">RB</Button>
6: </Canvas>
在调整窗体大小时,LT与左、上距离保持不变;RT与右、上距离保持不变;LB与左、下距离保持不变;RB与右、下距离保持不变。使用Canvas不能简单地实现Windows应用程序中Acho的功能。
二、InkCanvas
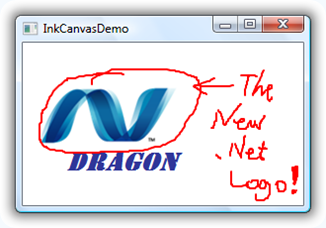
在WPF中实现允许使用墨迹的控件。如:
1: <Window x:Class="WPFLayoutDemo.InkCanvasDemo"
2: xmlns="http://schemas.microsoft.com/winfx/2006/xaml/presentation"
3: xmlns:x="http://schemas.microsoft.com/winfx/2006/xaml"
4: Title="InkCanvasDemo" Height="200" Width="300">
5: <InkCanvas>
6: <InkCanvas.DefaultDrawingAttributes>
7: <DrawingAttributes Color="Red" />
8: </InkCanvas.DefaultDrawingAttributes>
9: <Image Width="155" Height="155" InkCanvas.Left="10" InkCanvas.Top="10"
10: Source="Logo2.png"/>
11: </InkCanvas>
12: </Window>

其他的功能与Canvas相近。


 647
647

 被折叠的 条评论
为什么被折叠?


