


实验四 Android程序设计 实验报告 20162305李昱兴
一、Android Studio的安装测试
1、有关该软件
- Android Studio,是基于Itellij IDEA的一款流行的IDE。该软件包包含了Android SDK。SDK中包含了各种工具,包括一个不需要物理设备就能测试应用程序的模拟器。而Android Studio则提供了一个集成开发环境。
2、Android Studio的安装
- 程序的安装可以参考Java For Android 2nd版教材的第24章教程指导,也可以按照娄老师的博客教程去做。
- Android Studio安装教程
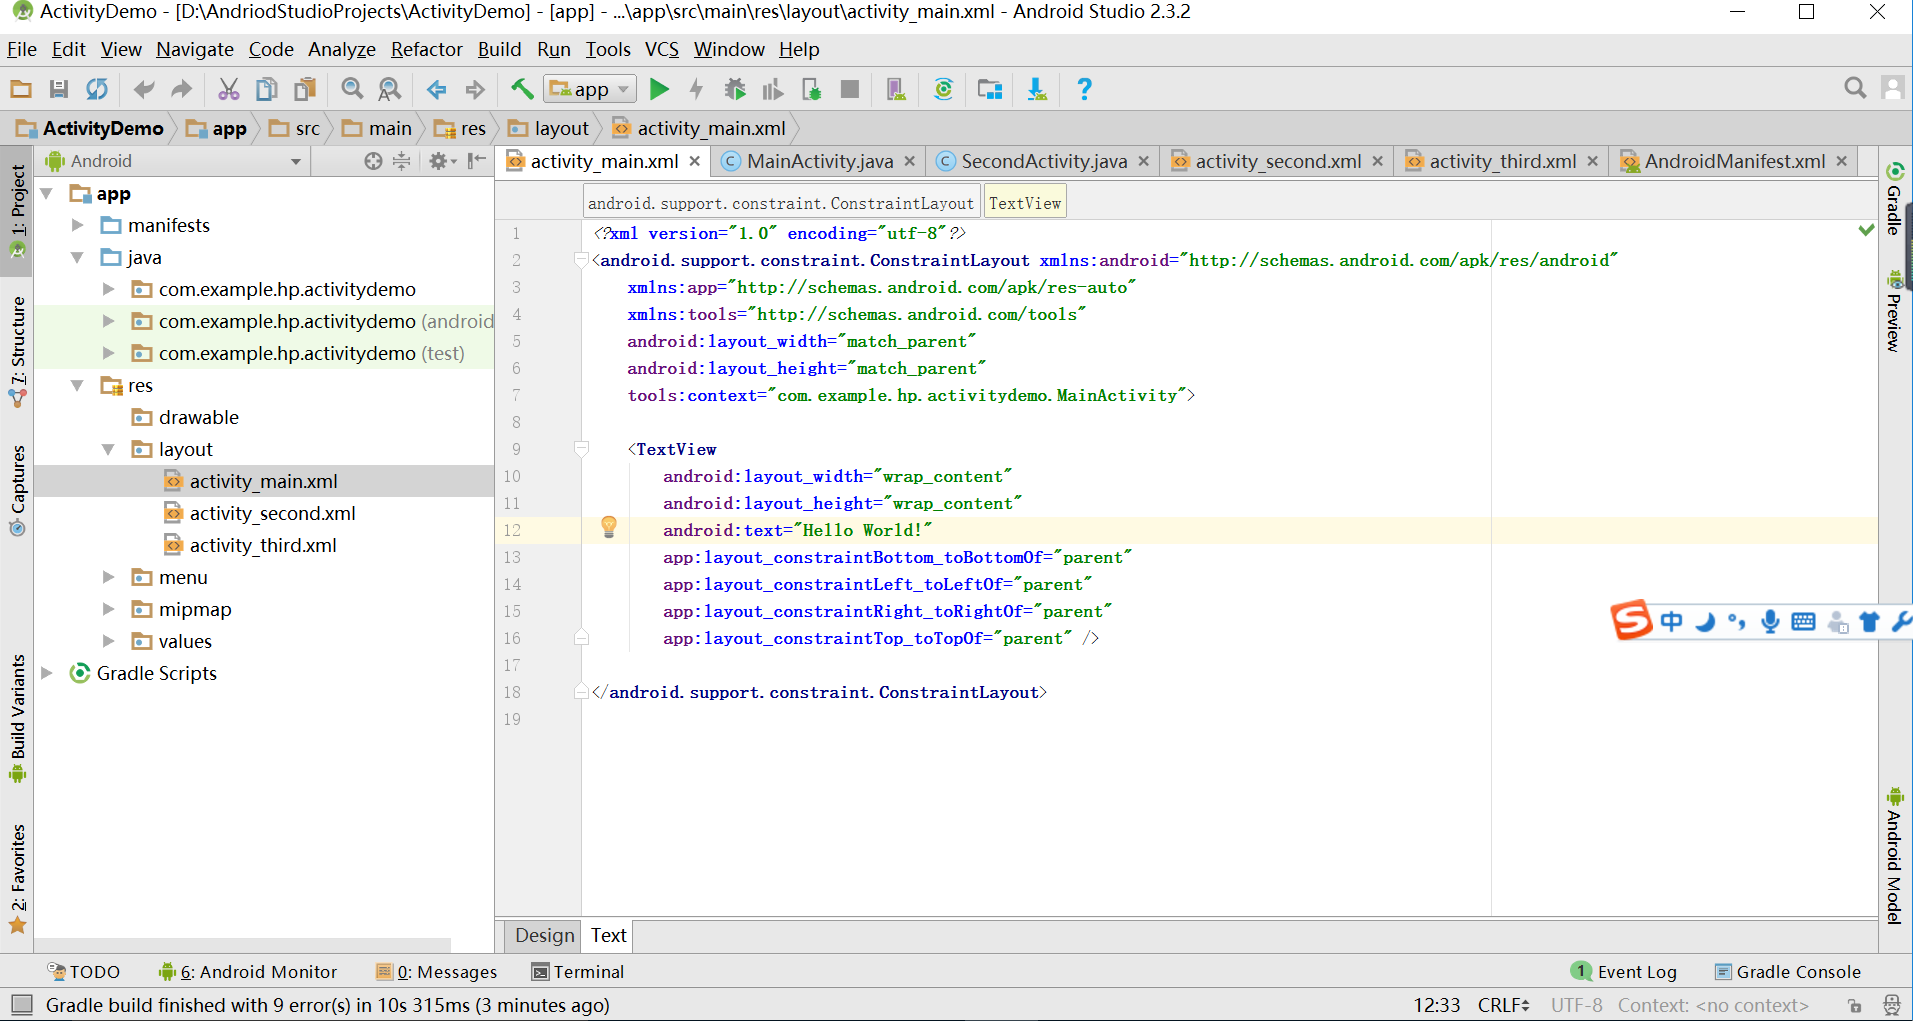
3、有关res
- 当我们建立好了一个新的项目的时候,在APP中我们会发现有一个叫res的文件夹,res是resource的简写,这个文件夹当中包含着整个app的layout文件(布局),menu文件(菜单),mipmap(图像)文件,values(资源)文件,drawable(图片状态列表资源)文件。我们可以通过修改其中的一些代码,从而实现对app界面和其显示内容的修改。
- HelloWorld显示截图


二、Activity测试
1、什么是活动
- 活动是Android.app.Activity类的一个实例。启动一个活动就意味着显示一个窗口。应用程序所创建的第一个窗口,叫作主窗口,它充当应用程序的入口点。Android应用程序可以包含多个活动,并且通过在应用程序清单文件中声明来指定主活动。
2、有关活动的一些代码
<LinearLayout xmlns:android="http://schemas.android.com/apk/res/android"
    xmlns:tools="http://schemas.android.com/tools"
    android:layout_width="match_parent"
    android:layout_height="match_parent"
    android:paddingBottom="@dimen/activity_vertical_margin"
    android:paddingLeft="@dimen/activity_horizontal_margin"
    android:paddingRight="@dimen/activity_horizontal_margin"
    android:paddingTop="@dimen/activity_vertical_margin"
    tools:context=".SecondActivity">

    <TextView
        android:id="@+id/textView1"
        android:layout_width="wrap_content"
        android:layout_height="wrap_content" />

</LinearLayout>
3、代码和活动截图

三、UI测试
1、有关UI
- UI即User Interface(用户界面)的简称。泛指用户的操作界面,包含移动APP,网页,智能穿戴设备等。UI设计主要指界面的样式,美观程度。而使用上,对软件的人机交互、操作逻辑、界面美观的整体设计则是同样重要的另一个门道。好的UI不仅是让软件变得有个性有品味,还要让软件的操作变得舒适、简单、自由,充分体现软件的定位和特点。使用UI工具所做的事情都会反应到布局当中文件当中,以XML元素的形式体现出来。要查看你生成了什么,单击UI工具底部的XML视图即可。
2、有关Toast
- Toast是一个小的弹出对话框,用于显示一条消息作为给用户的反馈。Toast并不会替代当前的活动,并且只是占据了一条消息那么大的空间。
- 如何在一个活动类中创建并显示一个Toast
Toast.makeText(this, "Downloading...", Toast.LENGTH_LONG).show();3、实验结果测试截图
(实验截图)
四、布局测试
1、有关LinearLayout
- LinearLayout是根据orientation的属性,将子视图水平地或垂直地排列的一种布局。LinearLayout是最容易使用的布局。
- 水平的LinearLayout
<LinearLayout
xmlns:android="http://schemas.android.com/apk/res/android"
xmlns:tools="http://schemas.android.com/tools"
android:orientation="horizontal"
android:layout_width="match_parent"
android:layout_height="match_parent">

<ImageButton
android:src="@android:drawable/btn_star_big_on"
android:layout_width="wrap_content"
android:layout_height="wrap_content"/>

<TextView
android:layout_width="wrap_content"
android:layout_height="wrap_content"
android:text="@string/hello_world" />

<Button
android:text="Button1"
android:layout_width="wrap_content"
android:layout_height="wrap_content"/>

</LinearLayout>
- 垂直的LinaerLayout
<LinearLayout
xmlns:android="http://schemas.android.com/apk/res/android"
    xmlns:tools="http://schemas.android.com/tools"
android:orientation="vertical"
android:layout_width="match_parent"
android:layout_height="match_parent">
<ImageButton
android:src="@android:drawable/btn_star_big_on"
android:layout_gravity="center"
android:layout_width="wrap_content"
android:layout_height="wrap_content"/>
<TextView
android:layout_gravity="center"
android:layout_width="wrap_content"
android:layout_height="wrap_content"
android:layout_marginLeft="15dp"
android:text="@string/hello_world"/>
<Button
android:text="Button1"
android:layout_gravity="center"
android:layout_width="wrap_content"
android:layout_height="wrap_content"/>
</LinearLayout>
- RelativeLayout
<RelativeLayout
xmlns:android="http://schemas.android.com/apk/res/android"
 xmlns:tools="http://schemas.android.com/tools"
android:layout_width="match_parent"
android:layout_height="match_parent"
android:paddingLeft="2dp"
android:paddingRight="2dp">
<Button

android:id="@+id/cancelButton"
android:layout_width="wrap_content"
android:layout_height="wrap_content"
android:text="Cancel" />
<Button
android:id="@+id/saveButton"
android:layout_width="wrap_content"
android:layout_height="wrap_content"
android:layout_toRightOf="@id/cancelButton"
android:text="Save" />
<ImageView

android:layout_width="150dp"
android:layout_height="150dp"
android:layout_marginTop="230dp"
android:padding="4dp"
android:layout_below="@id/cancelButton"
android:layout_centerHorizontal="true"
android:src="@android:drawable/ic_btn_speak_now" />

<LinearLayout
android:id="@+id/filter_button_container"
android:layout_width="match_parent"
android:layout_height="wrap_content"
android:layout_alignParentBottom="true"
android:gravity="center|bottom"
android:background="@android:color/white"
android:orientation="horizontal" >

<Button
android:id="@+id/filterButton"
android:layout_width="wrap_content"
android:layout_height="fill_parent"
android:text="Filter" />

<Button
android:id="@+id/shareButton"
android:layout_width="wrap_content"
android:layout_height="fill_parent"
android:text="Share" />

<Button
android:id="@+id/deleteButton"
android:layout_width="wrap_content"
android:layout_height="fill_parent"
android:text="Delete" />
</LinearLayout>

</RelativeLayout>
2、运行截图

五、监听器
1、有关监听器
- 大多数Android程序都是可交互的。通过Android框架所提供的事件驱动的编程泛型,用户可以很容易地与应用交互。要让程序响应某一个事件,需要为该事件编写一个监听器。
2、相关方法
OnClickListener  ——  onClick()
OnLongClickListner  ——   OnLongClick()
OnFocusChangeListener  ——  OnFocusChange()
OnKeyListener  ——  OnKey()
OnTouchListener  —— OnTouch()
3、实验成果截图
(实验截图)
六、代码托管
七、其他
- 本次实验,我学习到了有关Android的一些知识,了解了Android Studio这个全新的集成开发环境。通过这部分的实验学习,我明白了Java的主要用途和用法,以Java为基础的集成环境的Android Studio也随着Android的广泛应用而变得十分重要在日后的学习中也要重视这部分的学习。


 3408
3408


 被折叠的 条评论
为什么被折叠?
被折叠的 条评论
为什么被折叠?
 到【灌水乐园】发言


