


1、在控制节点安装rabbitmq、memcached组件
apt-get -y install rabbitmq-server memcached python-pymysql
# 设置openstack用户
rabbitmqctl add_user openstack password   #后一个password是密码,需要特别注意,要与后面组件访问时的密码一致
#设置openstack用户为管理者
rabbitmqctl set_user_tags openstack administrator
# 给与openstack用户相关权限
rabbitmqctl set_permissions openstack ".*" ".*" ".*"
systemctl restart rabbitmq-server
# 安装数据库
apt -y install mariadb-server
# 进行数据库的安全初始化
mysql_secure_installation
# 设置数据库root密码为root,不改变密码回答n,其余都回答为y

# 编辑数据库文件
vi /etc/msyql/mariadb.conf.d/50-server.cnf
#修改以下内容
# line 29: change
bind-address = 0.0.0.0

# line 41: uncomment and change
# default value 151 is not enough on Openstack Env
max_connections = 1000

# line 111: change
character-set-server = utf8
# collation-server = utf8mb4_general_ci

# 重启服务
systemctl restart mariadb   # 不需要设置开机自启动,默认已经是了

#编辑文件
vi /etc/memcached.conf
# 修改如下
# line 35: change
-l 0.0.0.0                   #  绑定在所有接口上

# 重启服务
systemctl restart memcached  # 不需要设置开机自启动,默认已经是了
2、在控制节点在数据库中,为keystone服务增加用户和数据库
mysql -u root -p
# 输入之前设置的数据库密码root
create database keystone; # 创建keystone数据库
grant all privileges on keystone.* to keystone@'localhost' identified by 'password'; # 赋予keystone用户对本地访问keystone数据所有表项有操作权
grant all privileges on keystone.* to keystone@'%' identified by 'password'; # 赋予keystone用户对远程访问keystone数据所有表项有操作权
flush privileges;
exit
# 安装keystone组件
apt -y install keystone python-openstackclient apache2 libapache2-mod-wsgi-py3 python-oauth2client
# 配置keystone配置文件
vi /etc/keystone/keystone.conf
[DEFAULT]
debug = True # 打开调试功能
# line 476: uncomment and specify Memcache Server
memcache_servers = 192.168.222.29:11211
# memcache_servers = controller1:11211 # 这样用主机名更规范
# line 591: change ( MariaDB connection info )
connection = mysql+pymysql://keystone:password@192.168.222.29/keystone
# connection = mysql+pymysql://keystone:password@controller1/keystone # 这样用主机名更规范
# line 2544: uncomment
provider = fernet
# 数据库同步,python的orm对象关系映射,需要初始化来生成数据库表结构
su -s /bin/bash keystone -c "keystone-manage db_sync"
# 初始化 Fernet key
keystone-manage fernet_setup --keystone-user keystone --keystone-group keystone
keystone-manage credential_setup --keystone-user keystone --keystone-group keystone
# 为keystone的访问服务
export controller1=192.168.222.29 # API组件通信IP
keystone-manage bootstrap --bootstrap-password adminpassword \
--bootstrap-admin-url http://$controller1:5000/v3/ \
--bootstrap-internal-url http://$controller1:5000/v3/ \
--bootstrap-public-url http://$controller1:5000/v3/ \
--bootstrap-region-id RegionOne
# 这里解释一下
# 运行上面的指令会有如下结果:
# 1)在endpoint表增加3个服务实体的API端点
# 2)在local_user表中创建admin用户,密码adminpassword
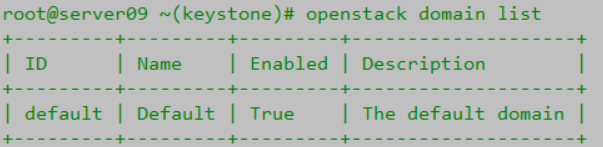
# 3)创建了admin project和default域(默认域)
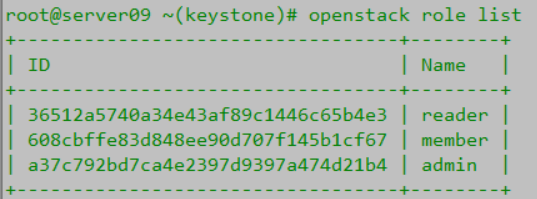
# 4)在role表创建3种角色,admin,member和reader
# openstack role list # 查看角色
# openstack domain list # 查看默认域
# openstack user list        # 查看用户
# openstack project list     # 查看项目
# 同理,可得默认的配置,图省略
3、web配置
# 编辑文件
vi /etc/apache2/apache2.conf
# 修改如下
# line 70: specify server name
ServerName controller1
# 重启服务
systemctl restart apache2            # 已经开机自启动了


 648
648


 被折叠的 条评论
为什么被折叠?
被折叠的 条评论
为什么被折叠?
 到【灌水乐园】发言


