


本文实例为大家分享了Android普通购物车制作过程,供大家参考,具体内容如下
1.最新项目新增了类似购物车功能,如下图所示:

当时刚看到此页面的时候,第一反应是利用 ListView嵌套Listview,经过一番操作最终也实现了此功能。当时也没有考虑性能问题,只考虑能写出来。后来嵌套数据,当数据量较大时,滑动Listview可以明显感觉到卡顿,这对用户来说是很难忍受的,所以才有了找到替代方案的想法,看到网上主流的是用ExpandableListView来实现此功能,所以我也用此方案来写一下。
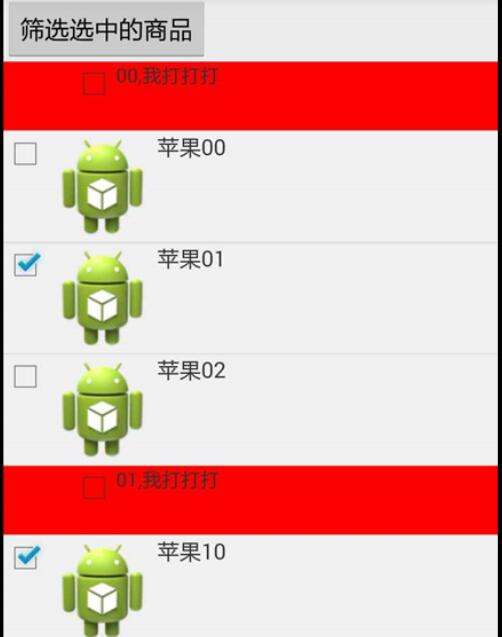
2.成型后的Demo,如下图所示:
3.思路:
1).选用ExpandableListView作为控件
2).给每个数据源添加一个选中标志,isChecked,根据ischecked,控制checkbox的状态;
ExpandableListView相关普及
#1.首先看下ExpandableListView的adapter,与普通的ListView adapter不同
public class MyExpandAdapter extends BaseExpandableListAdapter {
//红色部分的数据源
List group_head = new ArrayList();
//内层部分数据源
List> child = new ArrayList();
Context context;
LayoutInflater inflater;
public MyExpandAdapter(Context content) {
// 初始化组、子列表项
group_head = new ArrayList();
child = new ArrayList>();
inflater = LayoutInflater.from(context);
}
public MyExpandAdapter(Context context, List group_head, List> child) {
this.context = context;
// 初始化组、子列表项
this.group_head = group_head;
this.child = child;
inflater = LayoutInflater.from(context);
}
/****************************跟普通adapter一样******************************/
@Override
public int getGroupCount() {
return this.group_head.size();
}
@Override
public int getChildrenCount(int position) {
if (position < 0 || position >= this.child.size())
return 0;
return child.get(position).size();
}
@Override
public OrderDetailsEntity getGroup(int groupPosition) {
return group_head.get(groupPosition);
}
@Override
public ProductDetails getChild(int groupPosition, int childPosition) {
return child.get(groupPosition).get(childPosition);
}
@Override
public long getGroupId(int groupPosition) {
return groupPosition;
}
@Override
public long getChildId(int groupPosition, int childPosition) {
return childPosition;
}
/**************************************************************************/
@Override
public boolean hasStableIds() {
//分组和子选项是否持有稳定的ID, 就是说底层数据的改变会不会影响到它们
return true;
}
private boolean isSelectAll(OrderDetailsEntity entity) {
int count = 0;
for (ProductDetails p : entity.getProductDetails()) {
if (p.isChecked()) {
count++;
}
}
return entity.getProductDetails().size() == count;
}
/*************************与普通adapter的getView方法一样**********************/
@Override
public View getGroupView(int groupPosition, boolean isExpanded, View convertView, ViewGroup parent) {
ViewHolderGroup group;
if (convertView == null) {
convertView = inflater.inflate(R.layout.item, parent, false);
group = new ViewHolderGroup();
group.cb_all = (CheckBox) convertView.findViewById(R.id.cb_checkAll);
group.tv_name = (TextView) convertView.findViewById(R.id.tv_name);
convertView.setTag(group);
} else {
group = (ViewHolderGroup) convertView.getTag();
}
group.tv_name.setText(
group_head.get(groupPosition).getMemberId() + "," + group_head.get(groupPosition).getShopName());
group.cb_all.setChecked(isSelectAll(getGroup(groupPosition)));
return convertView;
}
@Override
public View getChildView(int groupPosition, int childPosition, boolean isLastChild, View convertView,
ViewGroup parent) {
ViewHolderChild childV;
if (convertView == null) {
convertView = inflater.inflate(R.layout.item_inner, parent, false);
childV = new ViewHolderChild();
childV.cb = (CheckBox) convertView.findViewById(R.id.cb_check);
childV.iv = (ImageView) convertView.findViewById(R.id.iv_img);
childV.name = (TextView) convertView.findViewById(R.id.name);
convertView.setTag(childV);
} else {
childV = (ViewHolderChild) convertView.getTag();
}
childV.name.setText(getChild(groupPosition, childPosition).getProductName());
childV.cb.setChecked(getChild(groupPosition, childPosition).isChecked());
return convertView;
}
/****************************************************************************/
@Override
public boolean isChildSelectable(int groupPosition, int childPosition) {
指定位置的子视图是否可选择。
// 调用Activity里的ChildSelect方法
// Toast.makeText(context, "gp="+groupPosition+",cp="+childPosition,
// Toast.LENGTH_LONG).show();
return true;
}
static class ViewHolderGroup {
CheckBox cb_all;
TextView tv_name;
}
static class ViewHolderChild {
CheckBox cb;
ImageView iv;
TextView name;
}
}
#2.ExpandableListView 展开
for (int i = 0; i < adapter.getGroupCount(); i++) {
sp_date_list.expandGroup(i);
}
3).ExpandableListView 去掉默认图标
sp_date_list.setGroupIndicator(null);
4).ExpandableListView itemClick事件处理
1. setOnChildClickListener
2. setOnGroupClickListener
3. setOnGroupCollapseListener
4. setOnGroupExpandListener
通过方法名我们就能知道各自的用途,它们分别设置单击子选项、单击分组项、分组合并、分组展开的监听器。
// 设置分组项的点击监听事件
expandableListView.setOnGroupClickListener(new ExpandableListView.OnGroupClickListener() {
@Override
public boolean onGroupClick(ExpandableListView expandableListView, View view, int i, long l) {
Toast.makeText(getApplicationContext(), groupStrings[i], Toast.LENGTH_SHORT).show();
//如果处理事件,return true,默认return false
return false;
}
// 设置子选项点击监听事件
expandableListView.setOnChildClickListener(new ExpandableListView.OnChildClickListener() {
@Override
public boolean onChildClick(ExpandableListView parent, View v, int groupPosition, int childPosition, long id) {
Toast.makeText(getApplicationContext(), childStrings[groupPosition][childPosition], Toast.LENGTHshow();
return true;
}
});
以上就是本文的全部内容,希望对大家的学习有所帮助,也希望大家多多支持脚本之家。


 7717
7717


 被折叠的 条评论
为什么被折叠?
被折叠的 条评论
为什么被折叠?
 到【灌水乐园】发言


