


架构如图

实现目的
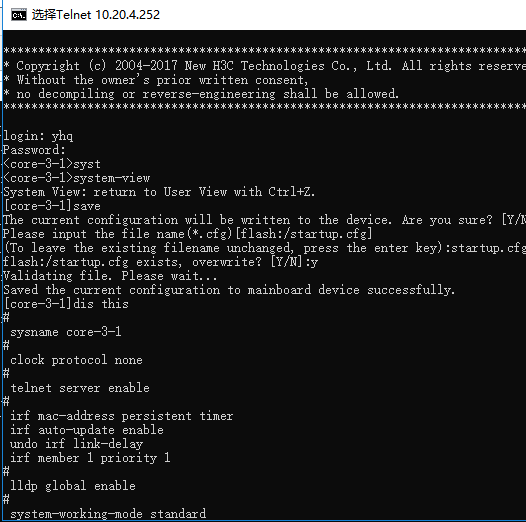
1 在pc端,用telnet访问核心交换机10.20.4.252
2 在pc端,用telnet访问二层交换机10.20.4.253
在此之前,pc_4,pc_5与交换机的配置不进行介绍
新建vlan 10 用于管理所有的交换机
##配置二层交换机的telnet管理ip
[sw-2-1]vlan 10
[sw-2-1-vlan10]int vlan 10
[sw-2-1-Vlan-interface10]ip address 10.20.4.253
[sw-2-1-Vlan-interface10]qu
[sw-2-1]telnet server enable
[sw-2-1]user-interface vty 0 4
[sw-2-1-line-vty0-4]authentication-mode scheme
[sw-2-1-line-vty0-4]qu
[sw-2-1]local-user yhq
[sw-2-1-luser-manage-yhq]password simple 123
[sw-2-1-luser-manage-yhq]service-type telnet
[sw-2-1-luser-manage-yhq]authorization-attribute user-role level-15
##core核心交换机此步骤相同
##telnet 核心交换机//二层交换机
<core-3-1>system-view
System View: return to User View with Ctrl+Z.
[core-3-1]vlan 10
[core-3-1-vlan10]int vlan 10
[core-3-1-Vlan-interface10]dis this
#
interface Vlan-interface10
 ip address 10.20.4.252 255.255.252.0
#
return
[core-3-1-Vlan-interface10]qu
[core-3-1]user-interface vty 0 4
[core-3-1-line-vty0-4]authentication-mode scheme
[core-3-1-line-vty0-4]qu
[core-3-1]local-user yhq
New local user added.
[core-3-1-luser-manage-yhq]password simple 123
[core-3-1-luser-manage-yhq]service-type telnet
[core-3-1-luser-manage-yhq]authorization-attribute user-role level-15
[core-3-1-luser-manage-yhq]qu
[core-3-1]telnet server enable
##核心交换机的端口1修改为路由模式,并配置ip和静态路由
<core-3-1>system-view
System View: return to User View with Ctrl+Z.
[core-3-1]int g1/0/1
[core-3-1-GigabitEthernet1/0/1]dis this
#
interface GigabitEthernet1/0/1
 port link-mode bridge
 port link-type trunk
 port trunk permit vlan 1 200 300
 combo enable fiber
[core-3-1-GigabitEthernet1/0/1]port link-mode route  //配置为路由模式
[core-3-1-GigabitEthernet1/0/1]ip address 1.1.1.1 30
[core-3-1-GigabitEthernet1/0/1]qu
[core-3-1]ip route-static 0.0.0.0 0 1.1.1.2  // 添加路由表,下一条地址为1.1.1.2
[core-3-1]tracert 10.18.4.2          //跟踪
traceroute to 10.18.4.2 (10.18.4.2), 30 hops at most, 40 bytes each packet, press CTRL_C t
[core-3-1]display ip routing-table   //查看路由表
Destinations : 21       Routes : 21
Destination/Mask   Proto   Pre Cost        NextHop         Interface
0.0.0.0/0          Static  60  0           1.1.1.2         GE1/0/1
0.0.0.0/32         Direct  0   0           127.0.0.1       InLoop0
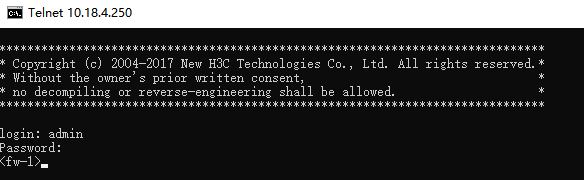
##fw的端口g1/0/1 配置ip,端口模式为route
<fw-1>system-view
System View: return to User View with Ctrl+Z.
[fw-1]int g1/0/1
[fw-1-GigabitEthernet1/0/1]dis this
#
interface GigabitEthernet1/0/1
 port link-mode route
 combo enable copper
 ip address 1.1.1.2 255.255.255.252
#
return
[fw-1]int g1/0/0 //端口g1/0/0配置
[fw-1-GigabitEthernet1/0/0]dis this
#
interface GigabitEthernet1/0/0
 port link-mode route
 combo enable copper
 ip address 10.18.4.250 255.255.252.0
 nat outbound 2001 address-group 1 no-pat description 1
#
return
在pc的cmd窗口添加路由
C:\Users\Administrator>ping 10.20.4.252
正在 Ping 10.20.4.252 具有 32 字节的数据:
请求超时。
请求超时。
C:\Users\Administrator>route print
C:\Users\Administrator>route add 10.20.4.0 mask 255.255.252.0 10.18.4.250
 操作完成!
C:\Users\Administrator>ping 10.20.4.252
正在 Ping 10.20.4.252 具有 32 字节的数据:
来自 10.20.4.252 的回复: 字节=32 时间<1ms TTL=254
来自 10.20.4.252 的回复: 字节=32 时间<1ms TTL=254
##二层sw-2-1添加路由
[sw-2-1]ip route-static 0.0.0.0 0.0.0.0 1.1.1.2
[sw-2-1]ip route-static 0.0.0.0 0.0.0.0 10.20.4.252
由于之前防火墙已经开启了web端口,这里telnet就很容易了
在pc的cmd窗口进行telnet 10.20.4.252
在pc的cmd窗口进行telnet 10.20.4.253

最后3个设备的配置文件
fw


[fw-1]dis current-configuration
#
 version 7.1.064, Alpha 7164
#
 sysname fw-1
#
context Admin id 1
#
 telnet server enable
#
 irf mac-address persistent timer
 irf auto-update enable
 undo irf link-delay
 irf member 1 priority 1
#
nat address-group 1 name 1
 address 10.18.4.250 10.18.4.250
#
 xbar load-single
 password-recovery enable
 lpu-type f-series
#
vlan 1
#
object-group ip address y11
 security-zone Untrust
 0 network subnet 10.19.4.0 255.255.252.0
#
object-group ip address y22
 security-zone Trust
 0 network subnet 10.18.4.0 255.255.252.0
#
interface NULL0
#
interface GigabitEthernet1/0/0
 port link-mode route
 combo enable copper
 ip address 10.18.4.250 255.255.252.0
 nat outbound 2001 address-group 1 no-pat description 1
#
interface GigabitEthernet1/0/1
 port link-mode route
 combo enable copper
 ip address 1.1.1.2 255.255.255.252
#
interface GigabitEthernet1/0/2
 port link-mode route
 combo enable copper
#
interface GigabitEthernet1/0/3
 port link-mode route
 combo enable copper
#
interface GigabitEthernet1/0/4
 port link-mode route
 combo enable copper
#
interface GigabitEthernet1/0/5
 port link-mode route
 combo enable copper
#
interface GigabitEthernet1/0/6
 port link-mode route
 combo enable copper
#
interface GigabitEthernet1/0/7
 port link-mode route
 combo enable copper
#
interface GigabitEthernet1/0/8
 port link-mode route
 combo enable copper
#
interface GigabitEthernet1/0/9
 port link-mode route
 combo enable copper
#
interface GigabitEthernet1/0/10
 最低0.47元/天 解锁文章


 1477
1477


 被折叠的 条评论
为什么被折叠?
被折叠的 条评论
为什么被折叠?
 到【灌水乐园】发言


