


Back in April Oliver wrote an excellent article entitled “Making Your Own iPhone Frameworks”, in which he explained how to do what many developers still proclaim as impossible: how to create custom frameworks that you can use in your iPhone apps! I would recommend that you read Oliver’s article first, especially if you’re wondering what a framework is… or, possibly, why you should consider making your own frameworks. I wont talk about that here  .
.
To build frameworks Oliver wrote a simple shell script that first creates a typical framework bundle, and then copies resources into the appropriate directories. In this followup article, I’ll show you how to create the framework bundle entirely within Xcode, without any scripts, plugins, product-, or package-types. While this has a few advantages, I’m not claiming that my approach is in any way perfect, and there may be problems that I haven’t encountered yet. As always, this is a work in progress, so if you have any suggestions, please feel free to leave your comments below.
Enough talking. Lets get started –
The process is remarkably simple once you recognize that a framework is just a bundle like any other (whether we’re talking about Mac OS X or the iPhone OS). And since Xcode already knows how to work with bundles, all we need to do configure one properly.
Step 1. Open Xcode and Create a new “Cocoa Touch Static Library” project, and delete the existing target.
Step 2. Add a new “Loadable Bundle” target from the Cocoa section by clicking “Projects > New Target…”.
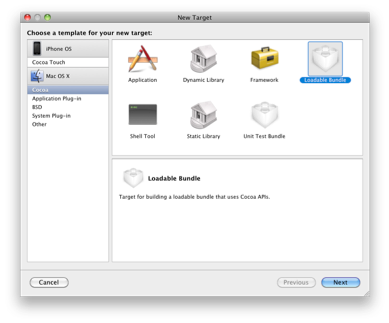
The "Loadable Bundle" target template.
At this point you may be tempted to add a “Framework” target from the Cocoa section instead. Don’t. The iPhone SDK doesn’t support framework products, and it’s more than happy to tell you that if you ever try to build one. Our “Loadable Bundle” target just creates a generic (cfbundle ) bundle product, which is supported.
Step 3. Now comes the fun part: reconfiguring this bundle to produce a framework that Xcode can link against!
Bring up the “Build Settings” window for this new target selecting it and clicking “File > Get Info”.
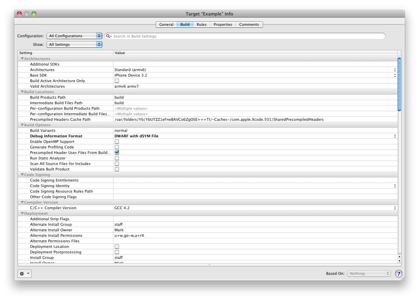
The "Build Settings" window for "Loadable Bundles" target.
Now we’re going to change a few build settings.
- Change the “Wrapper Extension” to “framework”.
- Change “Mach-O Type” to “Relocatable Object File”.
- Turn “Dead Code Stripping” off.
- Turn “Link With Standard Libraries” off.
- Remove all references to “AppKit” and “Foundation”.
Step 4. Change the bundles type from “BNDL” to “FMWK” in the frameworks Info.plist file. You can do this in the “Properties” section of the targets “Info” window (a bit right of the “Build Settings” section.)
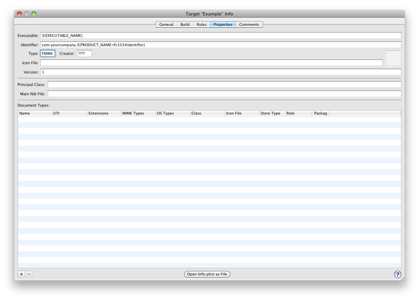
The "Properties" window for the "Loadable Bundle" target.
Note: the Info.plist file isn’t required for linking in Xcode. In fact, if you check out Apples frameworks you’ll notice that they don’t actually contain the Info.plist file at all. If you’re creating a framework with a lot of resources however, it’s nice to have Info.plist setup for you, so I just leave it in.
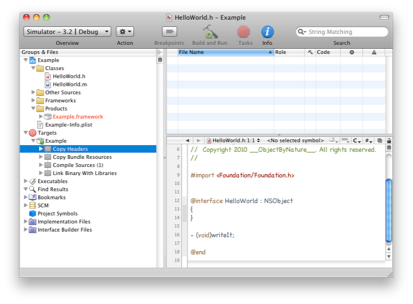
Step 5. Add some code to the project if you haven’t already. I’ve added a HelloWorld class to the example.
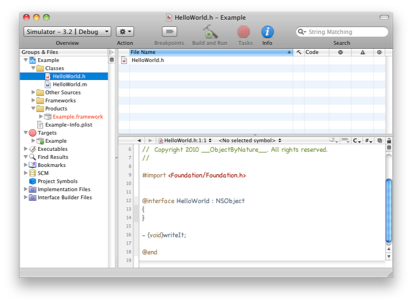
The newly added "HelloWorld" class.
Step 6. Add a new “Copy Headers” build phase with “Project > New Build Phase > New Copy Headers Build Phase”. This build phase is responsible for putting public and private headers into the right directory.
The newly added "Copy Headers" build phase.
Step 7. Add your headers to the to the “Copy Headers” build phase and set their role appropriately. The easiest way that I’ve found to do this is to right click “Copy Headers” and hit “Set Role > Public”. This will make all of the headers public, copying them to the framework bundles “Headers” folder.
Note: you can also set the role of headers individually if that floats your boat .
Step 8. Add your source files to the “Compile Sources” build phase. These will be compiled to create a relocatable object file, which is then linked against automagically by Xcode.
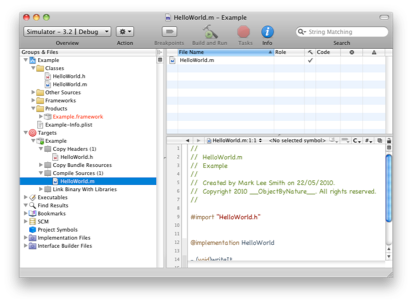
The target with header files and source files added.
Tangent: I haven’t had any problems with this approach yet, nor do I expect to, but if this does prove to be a problem you can just build a the “Static Library” in Xcode and add it to the frameworks “Copy Bundle Resources” build phase. This would also be useful when building a universal framework, as Oliver described in “Universal Static Libraries”.
Step 9. Build the framework bundle.
Step 10. Enjoy your new framework!
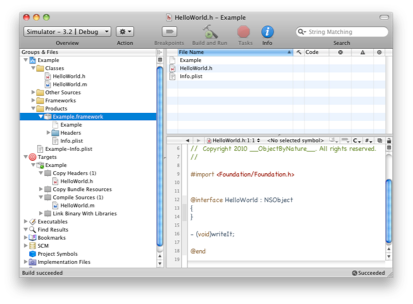
The finished framework, built and ready to go!
Now for some conclusions.
That’s really all there is to it, although it doesn’t have to end here. You can use this technique to build almost any kind of custom bundles from within Xcode! Personally I’ve used this approach to build plug-in bundles for a number of projects, and found it to be very convenient. Certainly much more convenient than building the bundles by hand!


 被折叠的 条评论
为什么被折叠?
被折叠的 条评论
为什么被折叠?
 到【灌水乐园】发言


