


1、在如图demo文件夹下可以编写自己的后端代码。

我们编写hello的接口代码如下:
 1 @RestController
 2 @RequestMapping("/hello")
 3 @Slf4j//日志打印
 4 public class HelloController {
 5     @GetMapping("/hello")
 6     public Result<String> hello(){
 7         Result<String> result = new Result<>();
 8         result.success("interface data hello");
 9         return result;
10     }
11 }
2、打开webstorm寻找如下图目录编写前端代码,视图加载的根目录在views目录,原项目本身测试建立了jeecg目录,我们在jeecg下新建视图文件

新建hello.vue如下:
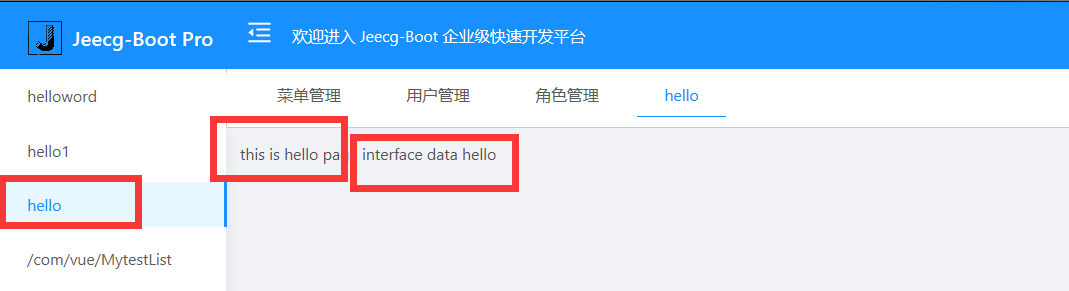
 1 <template>
 2
 3
 4
 5     <div>
 6       this is hello page<!--页面信息-->
 7       {{msg}}<!--绑定从后端拿到的信息-->
 8     </div>
 9 </template>
10
11 <script>
12   import {getAction} from '../../api/manage'
13
14   export default {
15     name: 'hello',
16     data(){
17       return {
18         msg:""
19       }
20     },
21     methods:{
22       hello(){
23         var url = "/hello/hello"
24         getAction(url).then((res)=>{
25           console.log(res);
26             if(res.success){
27               this.msg = res.message;//  获取网络数据
28             }
29         })
30       }
31     },
32     created() {
33      this.hello();// 生命周期执行
34     }
35
36   }
37 </script>
38
39 <style scoped>
40
41 </style>
3、查看配置文件可以看到前端项目里配置有后端地址

4、启动项目进行配置,进入菜单管理新增菜单
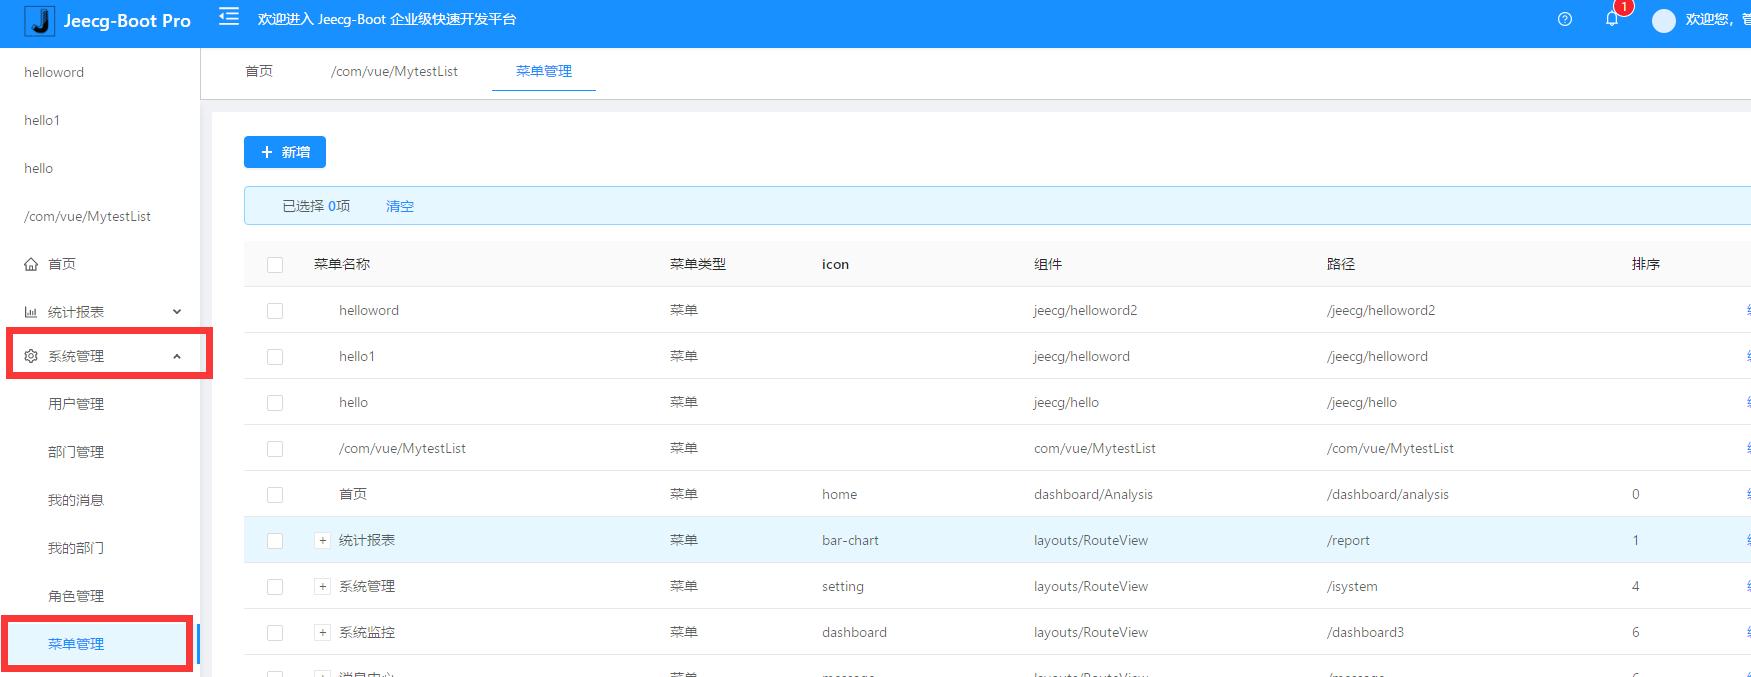
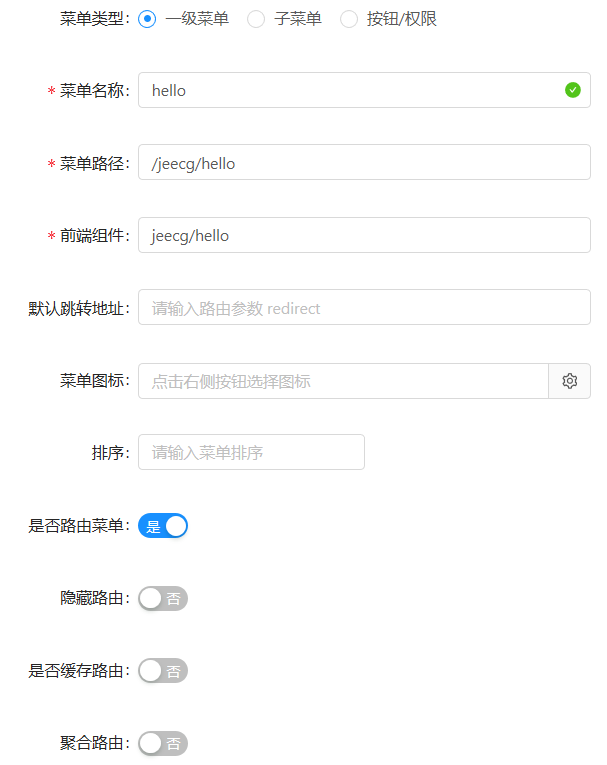
菜单新增配置项目如下:
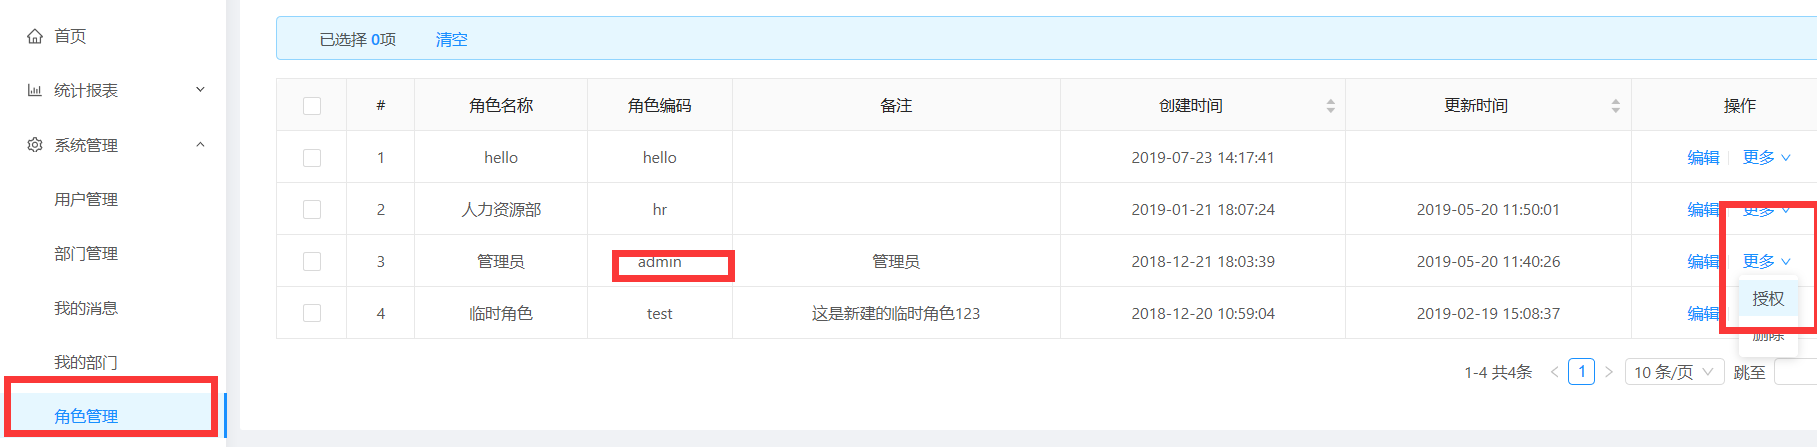
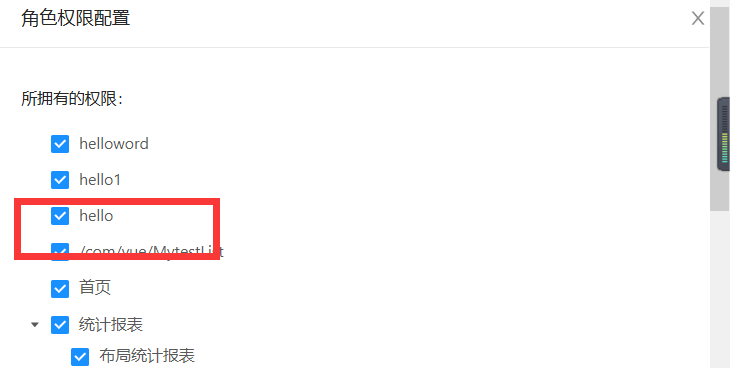
5、配置admin拥有访问hello菜单的权限,进入角色管理进行授权
授权图如下:
6、刷新页面,出现hello菜单 ,点击查看


 被折叠的 条评论
为什么被折叠?
被折叠的 条评论
为什么被折叠?
 到【灌水乐园】发言


