


要想实现Flash的播放支持,需要借助Flash自身的ActiveX控件.
而WPF作为一种展现层的技术,不能自身插入COM组件,必需借助Windows Form引入ActiveX控件.
比较标准的实现方法,可以参考以下链接:
http://blogs.msdn.com/b/jijia/archive/2007/06/07/wpf-flash-activex.aspx
而本文则是介绍通过借助
System.Windows.Forms下的WebBrowser实现.
但无论是那一种方法,本质上都是通过在WPF程序中引用Windows Form窗体,再在其内引入ActiveX控件.
实现对Flash的播放
首先,引入可在WPF上承载 Windows 窗体控件的元素:WindowsFormsHost,及添加对 Windows 窗体的引用.
具体的实现过程:项目引用--添加引用--选择 "WindowsFormsIntegration" 及 "System.Windows.Forms" --添加
在WPF页面分别添加这两者的引用:
1
xmlns:host
=
"
clr-namespace:System.Windows.Forms.Integration;assembly=WindowsFormsIntegration
"
2 xmlns:forms = " clr-namespace:System.Windows.Forms;assembly=System.Windows.Forms "
2 xmlns:forms = " clr-namespace:System.Windows.Forms;assembly=System.Windows.Forms "
XAML中的所有实现代码:

 View Code
<
Window x:Class
=
"
Capture.MainWindow
"
xmlns = " http://schemas.microsoft.com/winfx/2006/xaml/presentation "
xmlns:x = " http://schemas.microsoft.com/winfx/2006/xaml "
xmlns:host = " clr-namespace:System.Windows.Forms.Integration;assembly=WindowsFormsIntegration "
xmlns:forms = " clr-namespace:System.Windows.Forms;assembly=System.Windows.Forms "
Title = " File Capture " Height = " 600 " Width = " 800 "
Unloaded = " Window_Unloaded "
>
< Grid >
< Grid.ColumnDefinitions >
< ColumnDefinition Width = " * " ></ ColumnDefinition >
< ColumnDefinition Width = " 150 " ></ ColumnDefinition >
</ Grid.ColumnDefinitions >
< host:WindowsFormsHost x:Name = " host " >
< forms:WebBrowser x:Name = " browser " ></ forms:WebBrowser >
</ host:WindowsFormsHost >
< Grid Background = " Gray " Grid.Column = " 1 " >
< UniformGrid Rows = " 5 " VerticalAlignment = " Top " >
< Button x:Name = " btnOpen " Width = " 100 " Height = " 30 " Click = " btnOpen_Click " Margin = " 0,10 " > Open File </ Button >
< Button x:Name = " btnCapture " Width = " 100 " Height = " 30 " Click = " btnCapture_Click " Margin = " 0,10 " > Start Capture </ Button >
< Button x:Name = " btnStop " Width = " 100 " Height = " 30 " Click = " btnStop_Click " Margin = " 0,10 " > Stop Capture </ Button >
< CheckBox x:Name = " cboxLoop " IsChecked = " True " HorizontalAlignment = " Left " VerticalAlignment = " Center " Margin = " 25,10,0,10 " > Loop Capture </ CheckBox >
</ UniformGrid >
</ Grid >
</ Grid >
</ Window >
当需要把一选中的Flash文件(.swf 文件)添加进WebBrowser 中播放:
browser.Navigate(currentPath);
实现对Flash的截图
实现对Flash的截图,只要使用WebBrowser的基类WebBrowserBase里面的DrawToBitmap方法.
参数Bitmap为所绘制的位图(需初始化位图的大小),Rectangle为截取WebBrowser内容的区域(大小)
1
public
void
DrawToBitmap(
2 Bitmap bitmap,
3 Rectangle targetBounds
4 )
2 Bitmap bitmap,
3 Rectangle targetBounds
4 )
具体的实现代码:
1
private
void
Capture()
2 {
3 string fileName = System.IO.Path.GetFileNameWithoutExtension(currentPath);
4 string capturePath = string .Format( " {0}\\Capture\\{1} " , System.Environment.CurrentDirectory, fileName);
5
6 if ( ! Directory.Exists(capturePath))
7 {
8 Directory.CreateDirectory(capturePath);
9 }
10
11 Bitmap myBitmap = new Bitmap(( int )host.ActualWidth, ( int )host.ActualHeight);
12 System.Drawing.Rectangle DrawRect = new System.Drawing.Rectangle( 0 , 0 , ( int )host.ActualWidth, ( int )host.ActualHeight);
13 browser.DrawToBitmap(myBitmap, DrawRect);
14
15 string timeNow = DateTime.Now.ToString( " yyyyMMddHHmmssfff " );
16
17 myBitmap.Save( string .Format( " {0}\\{1}_{2}.png " , capturePath, fileName, timeNow));
18 }
界面效果:
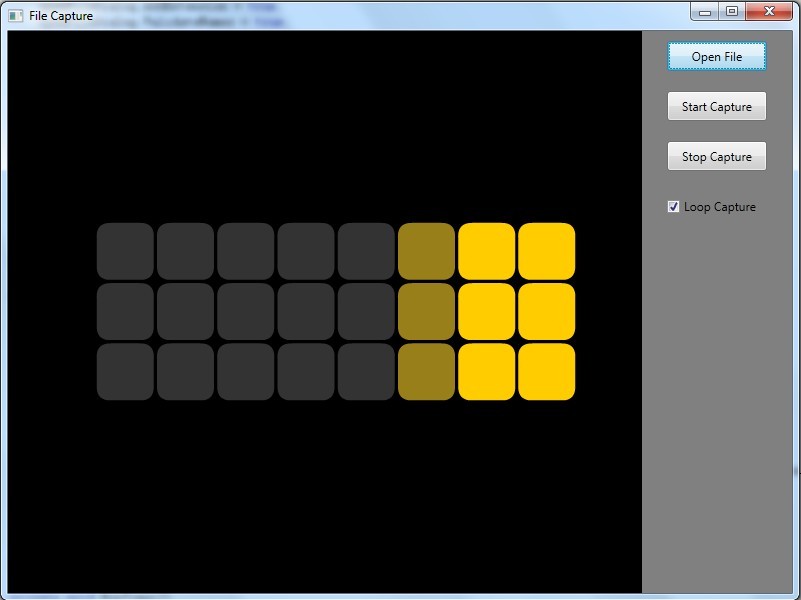
如上图所示,本实例实现了对Flash的循环截图,时间间隔为1秒.本部分比较简单,
通过使用System.Windows.Threading下的
DispatcherTimer即可实现.具体可参考本文最后的附件代码.
实例代码下载:


 430
430

 被折叠的 条评论
为什么被折叠?
被折叠的 条评论
为什么被折叠?
 到【灌水乐园】发言


