


java代码:


package com.example.httptest;

import java.io.BufferedReader;
import java.io.IOException;
import java.io.InputStream;
import java.io.InputStreamReader;
import java.net.HttpURLConnection;
import java.net.MalformedURLException;
import java.net.URL;

import android.os.Bundle;
import android.view.View;
import android.view.View.OnClickListener;
import android.widget.Button;
import android.widget.TextView;
import android.widget.Toast;
import android.app.Activity;

public class MainActivity extends Activity {

    Button requestBtn;
    TextView requestResult;

    @Override
    protected void onCreate(Bundle savedInstanceState) {
        super.onCreate(savedInstanceState);
        setContentView(R.layout.activity_main);

        requestResult = (TextView) findViewById(R.id.request_result);
        requestBtn = (Button) findViewById(R.id.request_btn);
        //点击事件
        requestBtn.setOnClickListener(new OnClickListener(){
            @Override
            public void onClick(View arg0) {
                sendRequestWithHttpURLConnection();
                //Toast.makeText(MainActivity.this, "点击事件...", Toast.LENGTH_SHORT).show();
            }
        });
    }

    public void sendRequestWithHttpURLConnection(){
        //注意:网络请求不能在主线程中进行,另外,也不能在子线程中对UI组件进行操作
        new Thread(new Runnable(){
            @Override
            public void run() {
                //Android发送HTTP请求步骤
                HttpURLConnection conn = null;
                BufferedReader reader = null;
                try {
                    //1,创建一个子线程,实例化一个HttpURLConnection实例,通过URL对象获得
                    URL url = new URL("http://www.baidu.com");
                    conn = (HttpURLConnection) url.openConnection();

                    /*
                     * 2,然后设置HTTP请求方式
                     *     通常有GET和POST请求,GET请求常用于从服务器获取数据,POST请求常用于向服务器提交数据
                     */
                    conn.setRequestMethod("GET");//好像默认就是GET请求

                    //3,再然后,我们可以进行一些自由的设置,比如设置连接超时,读取超时的毫秒数等
                    conn.setConnectTimeout(5000);
                    conn.setReadTimeout(5000);

                    //4,这步完成后,基本可以开始接收从服务器返回的输入流了
                    InputStream in = conn.getInputStream();

                    //5,对获取的数据流进行相关的操作,我这里是直接把它显示在TextView上
                    reader = new BufferedReader(new InputStreamReader(in));
                    StringBuilder response = new StringBuilder();
                    String line;
                    while((line = reader.readLine()) != null){
                        response.append(line);
                    }
                    //调用显示响应结果方法
                    showResponse(response.toString());

                } catch (MalformedURLException e) {
                    e.printStackTrace();
                } catch (IOException e) {
                    e.printStackTrace();
                }finally{
                    //6,最后,调用disconnection()将HTTP连接关闭
                    if(reader != null){
                        try {
                            reader.close();
                        } catch (IOException e) {
                            e.printStackTrace();
                        }
                    }
                    if(conn != null)
                        conn.disconnect();
                }
            }
        }).start();
    }


    //显示响应结果
    public void showResponse(final String response){
        runOnUiThread(new Runnable(){//runOnUiThread()方法用于将线程切换至主线程,前面已经说过,UI组件不能在子线程中操作
            @Override
            public void run() {
                requestResult.setText(response);
                Toast.makeText(MainActivity.this, "修改TXT...", Toast.LENGTH_SHORT).show();
            }
        });
    }
}
xml布局文件代码:
<RelativeLayout xmlns:android="http://schemas.android.com/apk/res/android"
    xmlns:tools="http://schemas.android.com/tools"
    android:layout_width="match_parent"
    android:layout_height="match_parent"
    tools:context=".MainActivity" >

    <Button
        android:id="@+id/request_btn"
        android:layout_height="wrap_content"
        android:layout_width="wrap_content"
        android:text="请求网页数据" />

    <ScrollView
        android:layout_width="match_parent"
        android:layout_height="match_parent"
        android:layout_alignParentLeft="true"
        android:layout_below="@+id/request_btn"
        android:background="#cccccc" >

        <TextView
            android:id="@+id/request_result"
            android:layout_width="wrap_content"
            android:layout_height="wrap_content"
            android:hint="请求结果" />
    </ScrollView>

</RelativeLayout>
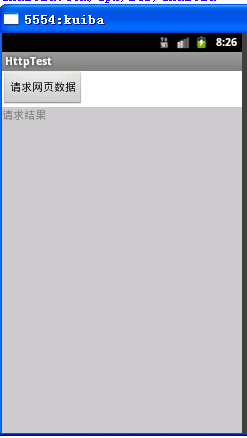
点击前:
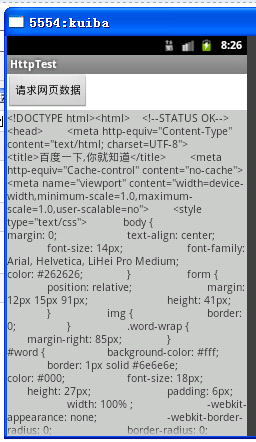
点击后:
注意:一定记得请求访问网络权限:<uses-permission android:name="android.permission.INTERNET"/>


 5390
5390


 被折叠的 条评论
为什么被折叠?
被折叠的 条评论
为什么被折叠?
 到【灌水乐园】发言


