android下拉列表控件_Word小技巧:怎么用Microsoft Word制作下拉列表选项?

65c404498c12b9a682162072fab1dd70.png

使用Microsoft Word制作下拉列表选项操作流程:

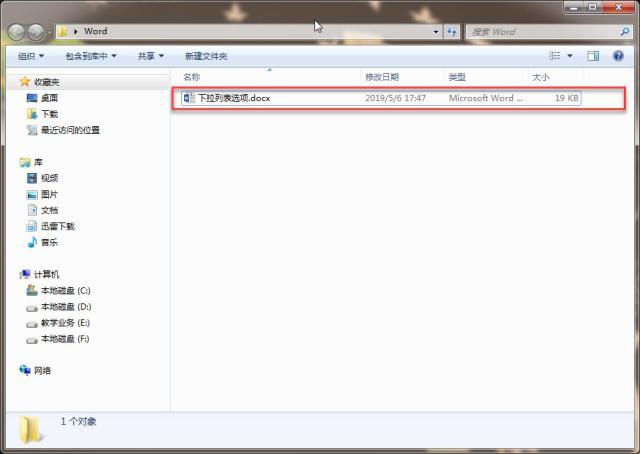
第一步:左键双击打开【下拉列表选项.docx】Microsoft Word 文档。

ce2385853b82c7e11d802c095a88370d.png

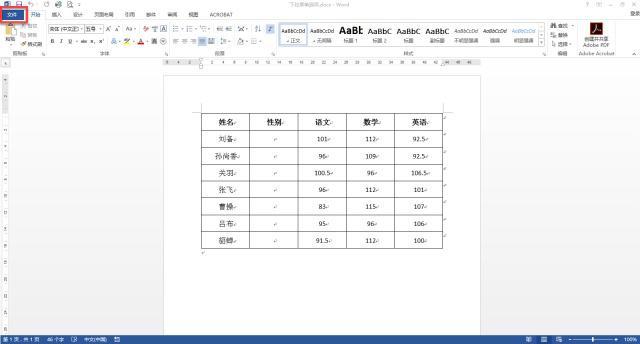
第二步:左键单击菜单栏中的【文件】选项卡。
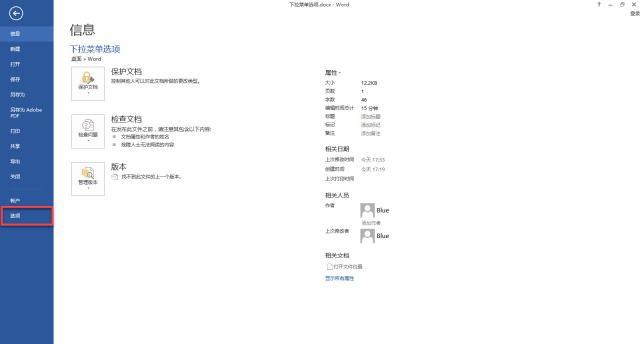
ea276385d05bf6c974aa48c50fe8c328.png

第三步:左键单击左侧【选项】。

d633aeec0211525cd7dbbb3ac23fad4d.png

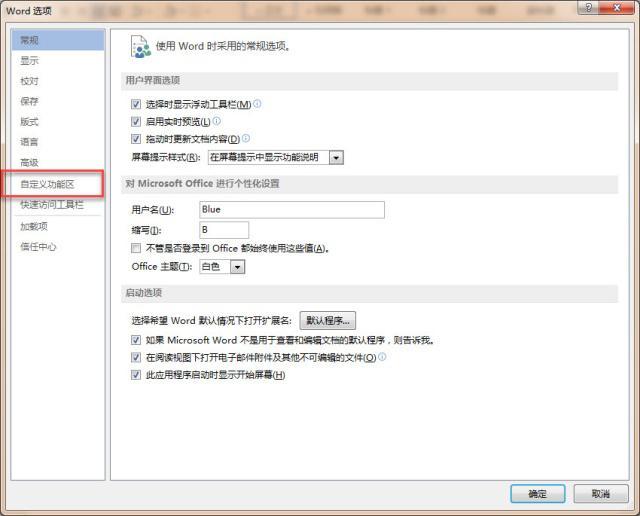
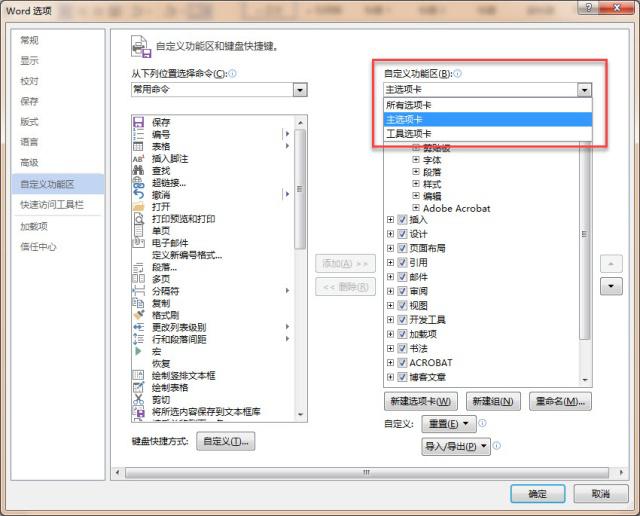
第四步:左键单击【Word选项】对话框中的【自定义功能区】。

36d9732c56770b57a50976876a45cedc.png

第五步:左键单击【自定义功能区(B)】中的下拉列表选项,左键单击选中【主选项卡】。

4ebba3241d7fe9cc7d8cd416915a76b9.png

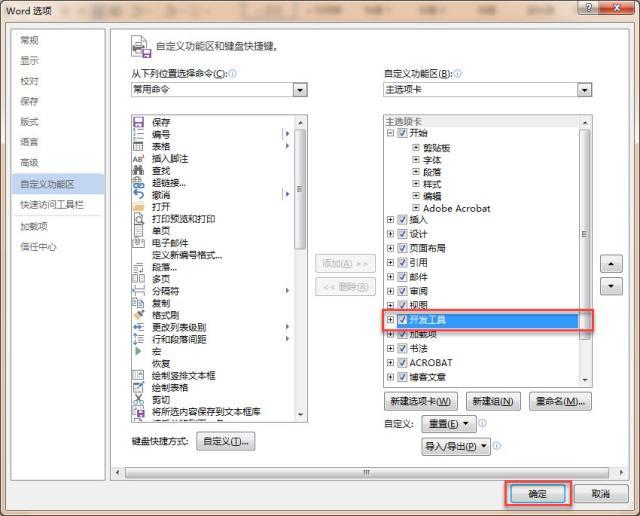
第六步:左键单击【自定义功能区(B)】→【主选项卡】中的【开发工具】,使其前面的方格打上对勾,左键单击【确定】按钮。

d85747de81c90a41118a8e88b0e93bbf.png

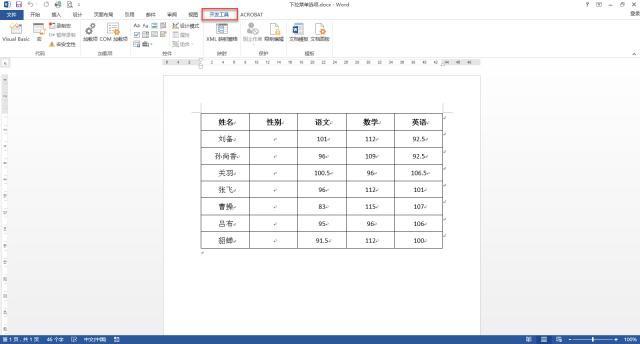
第七步:左键单击菜单栏中的【开发工具】选项卡。

c8476fe08ef40666a6d35c5b2fd42a04.png

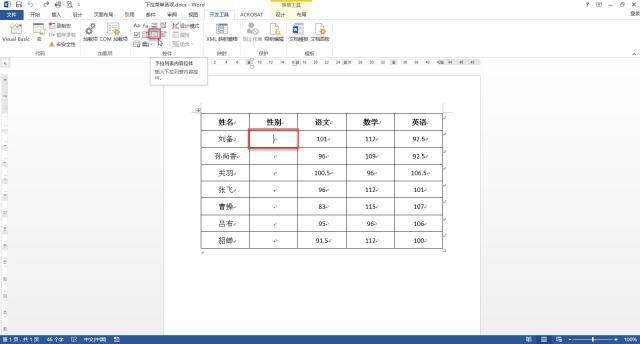
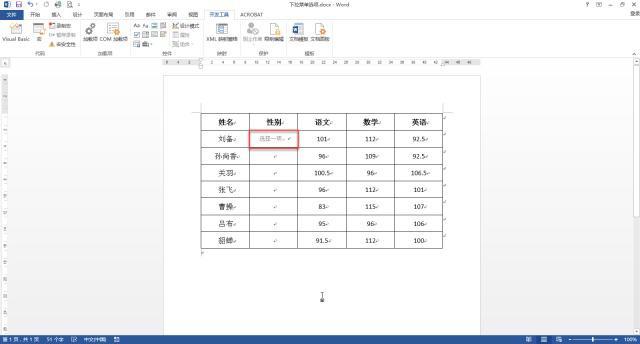
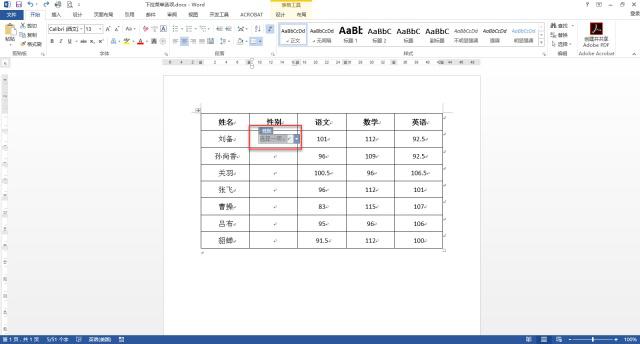
第八步:左键单击将光标放在需要插入【下拉列表选项】的表格中,然后左键单击【控件】功能区中的【下拉列表内容控件】。

2cfe17093ee80cd8c9a530b45ea04369.png

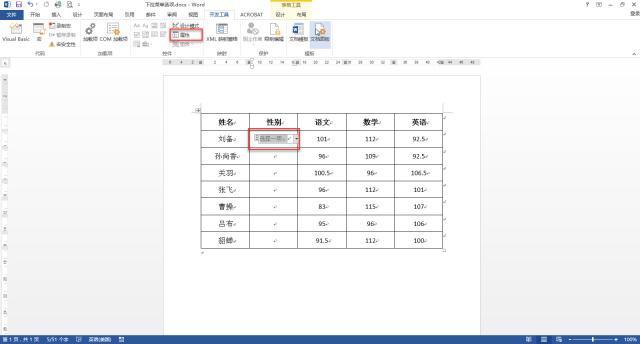
第九步:左键单击选中插入的【下拉列表内容控件】。

4819110107a43579dd636efd84a9bbbe.png

第十步:左键单击【控件】功能区中的【属性】。

1daeda4a3e6554900a10d96560b59933.png

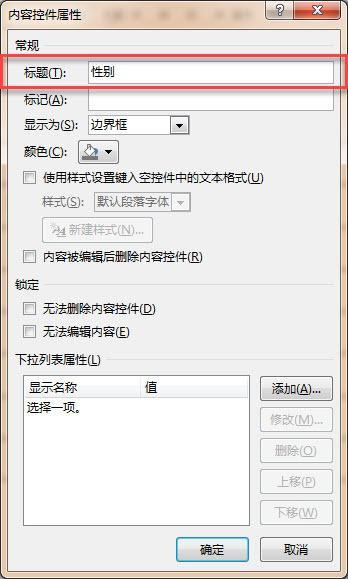
第十一步:在【内容控件属性】对话框中的常规属性中,键入【标题(T)】内容。

1d7bd0275e48be64863cea285f84d347.png

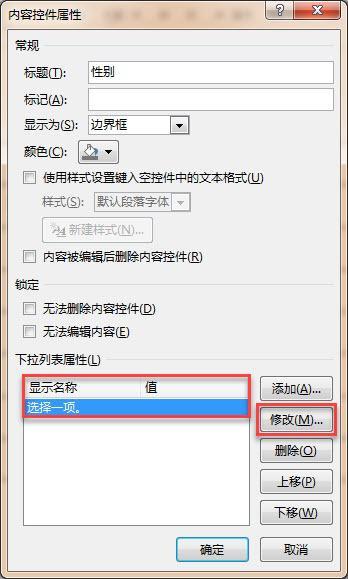
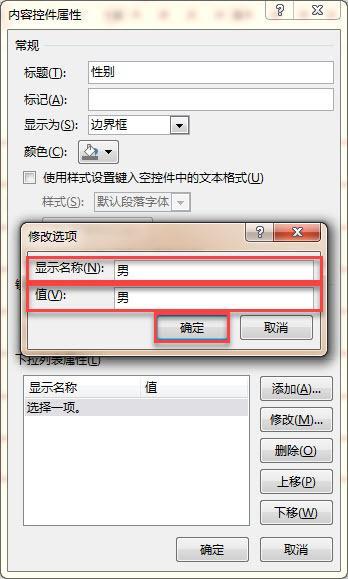
第十二步:左键单击选中【下拉列表属性(L)】中的【选择一项】,左键单击【修改(M)】按钮。

5505da7b570da10287021d88b4f9bcab.png

第十三步:在【修改选项】对话框中,键入【显示名称(N)】和【值(V)】的内容。
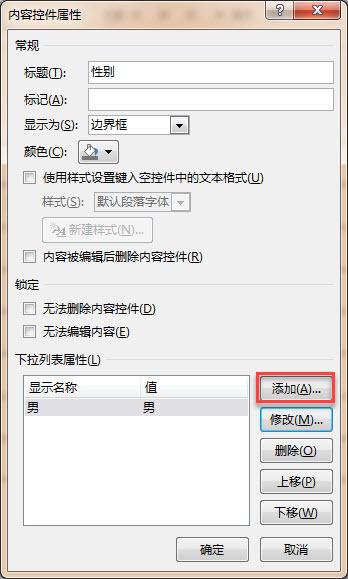
d418d9edd1eab7aace0d6a0749f9ece3.png

第十四步:左键单击【添加(A)】按钮。

99816e70f079c4a6f6fb0c04194febb9.png

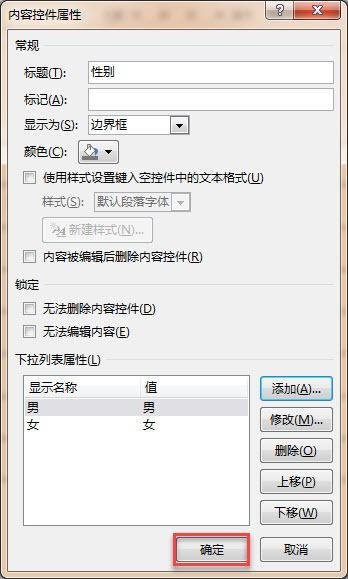
第十五步:在【修改选项】对话框中,键入【显示名称(N)】和【值(V)】的内容。

c6ab6723123fc12ef4e8546bdadfee75.png

第十六步:左键单击【确定】按钮。

bc45bcfebe9846bfa05f9ae0942afc24.png

第十七步:左键单击选中插入的【下拉列表内容控件】,同时按下键盘上的【Ctrl + C】进行复制。

62d16a8cc36cf60fe9482a6f7b03fe3f.png

第十八步:左键单击将光标放在需要粘贴的位置,同时按下键盘上的【Ctrl + V】进行粘贴。

9bee732f0ab00210d1d08610735d99ed.png

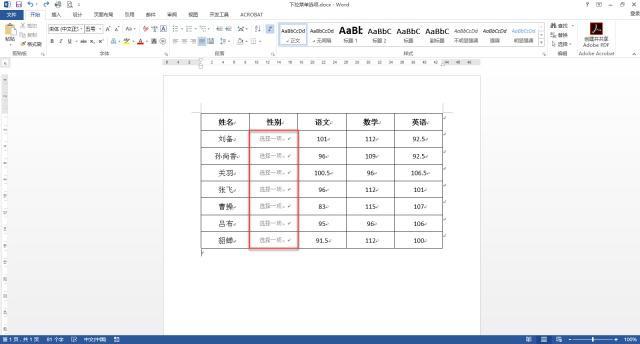
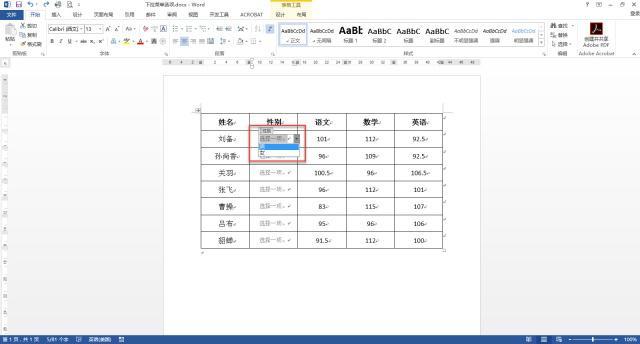
第十九步:左键单击插入的【下拉列表内容控件】后的下拉小箭头即可进行选择。

4a24ed6402c3830121988521dbd18f5c.png

如果喜欢,请点击关注,有更多计算机小技巧等着您。

如有疑问或建议,请在下方留言,谢谢您的参与。

  • 0
    点赞
  • 0
    收藏
    觉得还不错? 一键收藏
  • 0
    评论
下面是Android Studio失物招领模块Xml文件的实现代码,请修改代码实现下拉以及图片上传功 <TextView android:id="@+id/shiwuzhaolingzi" android:layout_width="match_parent" android:layout_height="wrap_content" android:text="请选择是失物还是招领" /> <Spinner android:id="@+id/spinner_lost_found" android:layout_width="match_parent" android:layout_height="wrap_content" android:entries="@array/lost_found_array" /> <TextView android:id="@+id/text_item_name" android:layout_width="match_parent" android:layout_height="wrap_content" android:text="物品名称" /> <EditText android:id="@+id/edit_item_name" android:layout_width="match_parent" android:layout_height="wrap_content" android:inputType="text" /> <TextView android:id="@+id/text_item_desc" android:layout_width="match_parent" android:layout_height="wrap_content" android:text="物品描述" /> <EditText android:id="@+id/edit_item_desc" android:layout_width="match_parent" android:layout_height="wrap_content" android:inputType="text" /> <TextView android:id="@+id/text_item_time" android:layout_width="match_parent" android:layout_height="wrap_content" android:text="时间" /> <EditText android:id="@+id/edit_item_time" android:layout_width="match_parent" android:layout_height="wrap_content" android:inputType="text" /> <TextView android:id="@+id/text_item_location" android:layout_width="match_parent" android:layout_height="wrap_content" android:text="地点" /> <EditText android:id="@+id/edit_item_location" android:layout_width="match_parent" android:layout_height="wrap_content" android:inputType="text" /> <Button android:id="@+id/button_upload_image" android:layout_width="match_parent" android:layout_height="wrap_content" android:text="上传图片" /> <TextView android:id="@+id/text_image_path" android:layout_width="match_parent" android:layout_height="wrap_content" android:text="图片路径:" /> <Button android:id="@+id/button_submit" android:layout_width="match_parent" android:layout_height="wrap_content" android:text="提交" /> </LinearLayout>
05-17
以下是修改后的代码实现下拉和图片上传功能: <TextView android:id="@+id/shiwuzhaolingzi" android:layout_width="match_parent" android:layout_height="wrap_content" android:text="请选择是失物还是招领" /> <Spinner android:id="@+id/spinner_lost_found" android:layout_width="match_parent" android:layout_height="wrap_content" android:entries="@array/lost_found_array" /> <TextView android:id="@+id/text_item_name" android:layout_width="match_parent" android:layout_height="wrap_content" android:text="物品名称" /> <EditText android:id="@+id/edit_item_name" android:layout_width="match_parent" android:layout_height="wrap_content" android:inputType="text" /> <TextView android:id="@+id/text_item_desc" android:layout_width="match_parent" android:layout_height="wrap_content" android:text="物品描述" /> <EditText android:id="@+id/edit_item_desc" android:layout_width="match_parent" android:layout_height="wrap_content" android:inputType="text" /> <TextView android:id="@+id/text_item_time" android:layout_width="match_parent" android:layout_height="wrap_content" android:text="时间" /> <EditText android:id="@+id/edit_item_time" android:layout_width="match_parent" android:layout_height="wrap_content" android:inputType="text" /> <TextView android:id="@+id/text_item_location" android:layout_width="match_parent" android:layout_height="wrap_content" android:text="地点" /> <EditText android:id="@+id/edit_item_location" android:layout_width="match_parent" android:layout_height="wrap_content" android:inputType="text" /> <Button android:id="@+id/button_upload_image" android:layout_width="match_parent" android:layout_height="wrap_content" android:text="上传图片" android:onClick="onUploadImageClick" /> <TextView android:id="@+id/text_image_path" android:layout_width="match_parent" android:layout_height="wrap_content" android:text="图片路径:" /> <Button android:id="@+id/button_submit" android:layout_width="match_parent" android:layout_height="wrap_content" android:text="提交" android:onClick="onSubmitClick" /> <!-- 添加下拉框选项数组 --> <string-array name="lost_found_array"> <item>失物</item> <item>招领</item> </string-array> <!-- 添加文件选择器 --> <com.github.dhaval2404.imagepicker.ImagePicker android:id="@+id/imagePicker" android:layout_width="wrap_content" android:layout_height="wrap_content" /> 修改后的Java代码: public class MainActivity extends AppCompatActivity { private Spinner mSpinnerLostFound; private EditText mEditItemName; private EditText mEditItemDesc; private EditText mEditItemTime; private EditText mEditItemLocation; private TextView mTextImagePath; private Button mButtonUploadImage; private Button mButtonSubmit; private ImagePicker mImagePicker; @Override protected void onCreate(Bundle savedInstanceState) { super.onCreate(savedInstanceState); setContentView(R.layout.activity_main); // 初始化控件 mSpinnerLostFound = findViewById(R.id.spinner_lost_found); mEditItemName = findViewById(R.id.edit_item_name); mEditItemDesc = findViewById(R.id.edit_item_desc); mEditItemTime = findViewById(R.id.edit_item_time); mEditItemLocation = findViewById(R.id.edit_item_location); mTextImagePath = findViewById(R.id.text_image_path); mButtonUploadImage = findViewById(R.id.button_upload_image); mButtonSubmit = findViewById(R.id.button_submit); mImagePicker = new ImagePicker(this); // 创建文件选择器 // 设置上传图片按钮点击事件 mButtonUploadImage.setOnClickListener(new View.OnClickListener() { @Override public void onClick(View v) { mImagePicker.choosePicture(true /* allow camera */); } }); // 设置提交按钮点击事件 mButtonSubmit.setOnClickListener(new View.OnClickListener() { @Override public void onClick(View v) { // TODO: 实现数据提交逻辑 } }); } // 在Activity中添加以下两个方法以便与文件选择器交互 @Override protected void onActivityResult(int requestCode, int resultCode, @Nullable Intent data) { super.onActivityResult(requestCode, resultCode, data); mImagePicker.handleActivityResult(requestCode, resultCode, data); } public void onUploadImageClick(View view) { // 显示文件选择器 mImagePicker.choosePicture(true /* allow camera */); } }

“相关推荐”对你有帮助么?

  • 非常没帮助
  • 没帮助
  • 一般
  • 有帮助
  • 非常有帮助
提交
评论
添加红包

请填写红包祝福语或标题

红包个数最小为10个

红包金额最低5元

当前余额3.43前往充值 >
需支付:10.00
成就一亿技术人!
领取后你会自动成为博主和红包主的粉丝 规则
hope_wisdom
发出的红包
实付
使用余额支付
点击重新获取
扫码支付
钱包余额 0

抵扣说明:

1.余额是钱包充值的虚拟货币,按照1:1的比例进行支付金额的抵扣。
2.余额无法直接购买下载,可以购买VIP、付费专栏及课程。

余额充值