


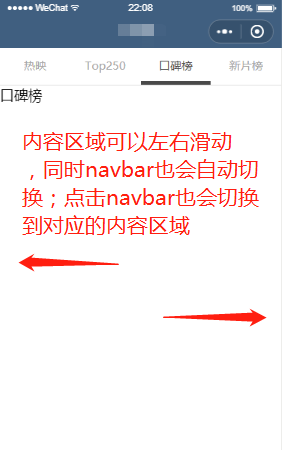
一、效果图
二、涉及到组件
1.view组件
2.swiper组件
三、原理
整体来讲是比较简单的,顶部的navbar是使用flex进行布局的;下面的内容区域则是使用到swiper组件,使用方式比较简单,可以查看微信小程序的文档。
四、代码
wxml:
 1 <view class="movie-container">
 2   <!-- 导航栏 -->
 3   <view class="navbar">
 4     <block wx:for="{{navbarTitle}}" wx:key="index">
 5       <view class="navbar-item {{navbarActiveIndex === index ? 'navbar-item-active' : ''}}" data-navbar-index="{{index}}" catchtap="onNavBarTap">
 6         <text>{{item}}</text>
 7       </view>
 8     </block>
 9   </view>
10   <view class="movie-content-wrapper">
11     <swiper current="{{navbarActiveIndex}}" bindanimationfinish="onBindAnimationFinish">
12       <swiper-item wx:for="{{navbarTitle}}" wx:key="index">
13         <scroll-view scroll-y="{{true}}">
14           {{item}}
15         </scroll-view>
16       </swiper-item>
17     </swiper>
18   </view>
19 </view>
wxss:
 1 .movie-container{
 2   display: flex;
 3   flex-direction: column;
 4 }
 5 .navbar{
 6   display: flex;
 7   position: absolute;
 8   left: 0;
 9   top: 0;
10   z-index: 500;
11   width: 100%;
12   height: 50px;
13   flex-direction: row;
14   text-align: center;
15   color: #A8A8A8;
16   font-size: 15px;
17   box-sizing: border-box;
18   background-color: #FFF;
19   border-bottom: 1rpx solid #DFDFDF;
20 }
21 .navbar-item{
22   flex: 1;
23   padding: 26rpx 0px;
24 }
25 .navbar-item-active{
26   transition: all 0.3s;
27   border-bottom: 10rpx solid #494949;
28   color: #494949;
29 }
30
31 .movie-content-wrapper{
32   padding-top: 50px;
33 }
js:
 1 Page({
 2
 3   /**
 4    * 页面的初始数据
 5    */
 6   data: {
 7     navbarActiveIndex: 0,
 8     navbarTitle: [
 9       "热映",
10       "Top250",
11       "口碑榜",
12       "新片榜"
13     ]
14   },
15
16   /**
17    * 点击导航栏
18    */
19   onNavBarTap: function (event) {
20     // 获取点击的navbar的index
21     let navbarTapIndex = event.currentTarget.dataset.navbarIndex
22     // 设置data属性中的navbarActiveIndex为当前点击的navbar
23     this.setData({
24       navbarActiveIndex: navbarTapIndex
25     })
26   },
27
28   /**
29    *
30    */
31   onBindAnimationFinish: function ({detail}) {
32     // 设置data属性中的navbarActiveIndex为当前点击的navbar
33     this.setData({
34       navbarActiveIndex: detail.current
35     })
36   }
37 })
代码比较简单,记录学习一下。


 5116
5116


 被折叠的 条评论
为什么被折叠?
被折叠的 条评论
为什么被折叠?
 到【灌水乐园】发言


