


主机环境:
[root@test ~]# uname -a
Linux test 3.10.0-693.el7.x86_64 #1 SMP Thu Jul 6 19:56:57 EDT 2017 x86_64 x86_64 x86_64 GNU/Linux
[root@test ~]# cat /etc/redhat-release
Red Hat Enterprise Linux Server release 7.4 (Maipo)
[root@test ~]# ifconfig
ens33: flags=4163 mtu 1500
inet 192.168.139.132 netmask 255.255.255.0 broadcast 192.168.139.255
ether 00:0c:29:ca:b7:70 txqueuelen 1000 (Ethernet)
RX packets 356 bytes 41989 (41.0 KiB)
RX errors 0 dropped 0 overruns 0 frame 0
TX packets 224 bytes 41057 (40.0 KiB)
TX errors 0 dropped 0 overruns 0 carrier 0 collisions 0
Zabbix版本:3.4.9
apache版本:2.4.6
主机防火墙和selinux关闭
Zabbix yum安装参考:https://www.tracymc.cn/archives/614,编译安装可参考https://www.tracymc.cn/archives/218.
apache安装参考:https://www.tracymc.cn/archives/646
前提:
apache需要开启mod_status模块
具体步骤:
1.修改配置
[root@test ~]# httpd -v
Server version: Apache/2.4.6 (CentOS)
Server built: Oct 19 2017 20:39:16
[root@test modules]# ll /etc/httpd/modules/|grep mod_status //http默认安装路径为/etc/httpd/
-rwxr-xr-x 1 root root 23464 10月 20 2017 mod_status.so //说明mod_status模块已经加载
新增httpd-info.conf配置,内容如下:
[root@test conf]# cat /etc/httpd/conf.d/httpd-info.conf
SetHandler server-status
Order allow,deny
Allow from localhost //只允许本机访问
ExtendedStatus On
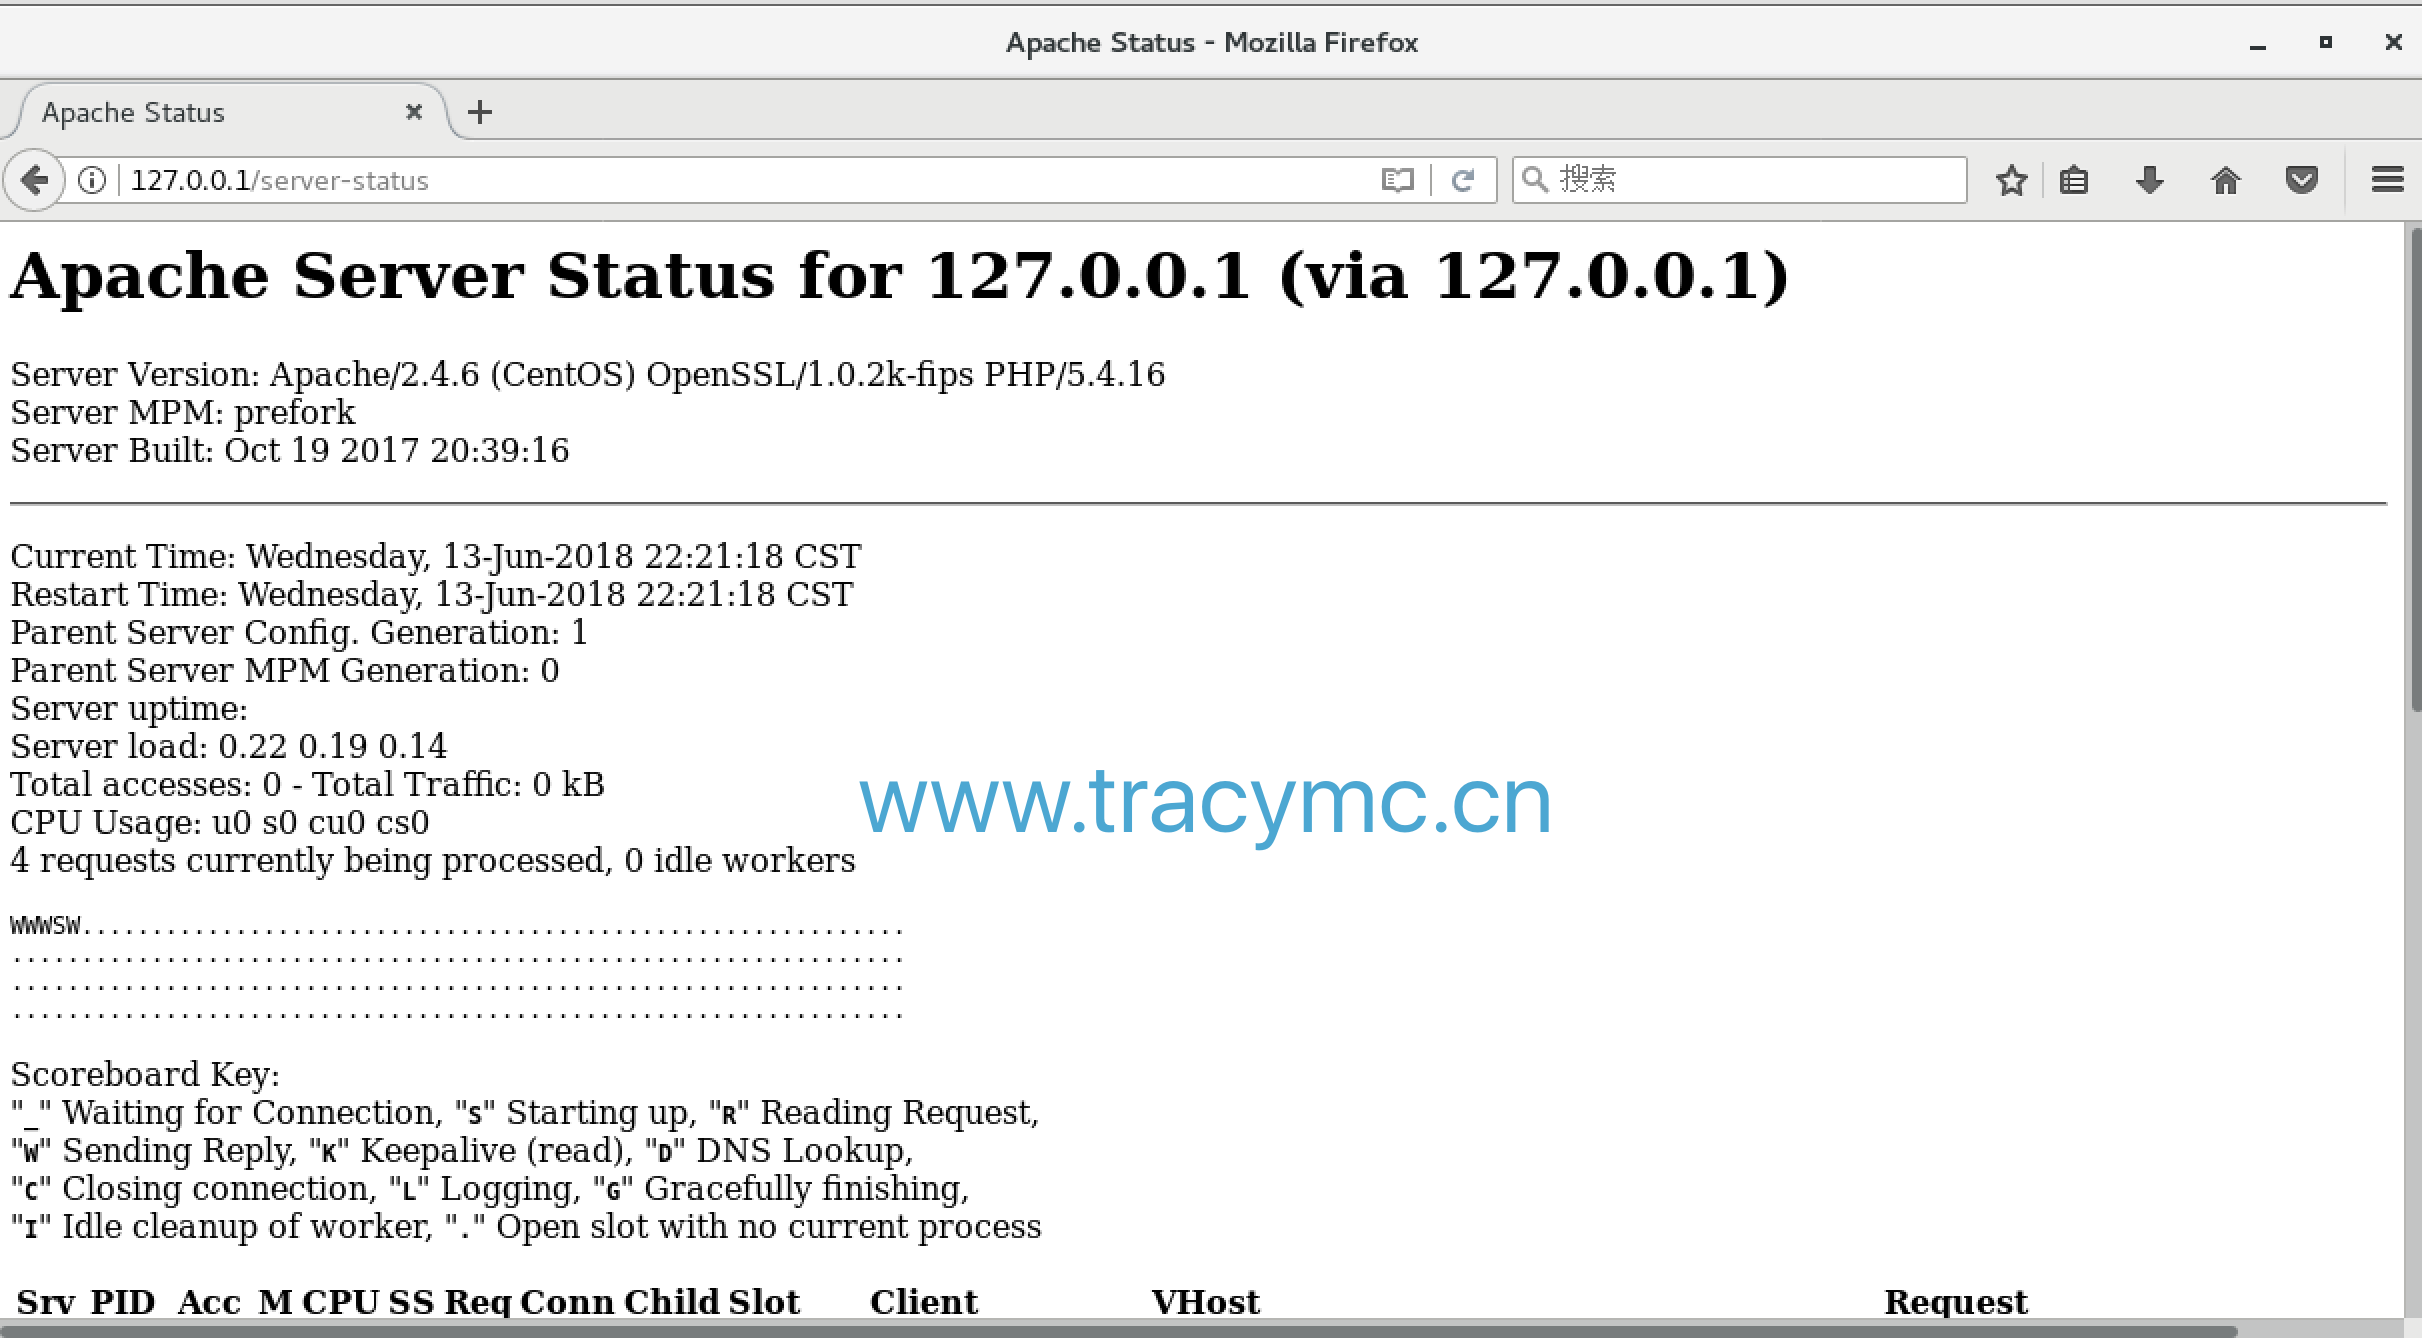
主机浏览器打开http://127.0.0.1/server-status验证apache配置修改是否生效,如下:
2.下载模板
[root@test home]# wget https://github.com/lorf/zapache/archive/master.zip
[root@test home]# unzip master.zip
[root@test home]# cd zapache-master/
[root@test zapache-master]# ll
总用量 124
-rw-r--r-- 1 root root 676 4月 22 2016 httpd-server-status.conf.sample //用于配置server-status的模板,上面已经配置过
-rw-r--r-- 1 root root 1780 4月 22 2016 README.md
-rw-r--r-- 1 root root 224 4月 22 2016 userparameter_zapache.conf.sample //zabbix的userparameter模板
-rwxr-xr-x 1 root root 6110 4月 22 2016 zapache //监控脚本
-rw-r--r-- 1 root root 52258 4月 22 2016 zapache-template-active.xml //模板
-rw-r--r-- 1 root root 52024 4月 22 2016 zapache-template.xml //模板
[root@test zapache-master]# cp zapache /etc/zabbix/scripts/ //将脚本复制到脚本执行目录
[root@test ~]# cat /etc/zabbix/zabbix_agentd.conf |grep conf|grep -v '#' //yum安装zabbix的话agent默认配置文件为/etc/zabbix/zabbix_agentd.conf
Include=/etc/zabbix/zabbix_agentd.d/*.conf //你懂的,包含/etc/zabbix/zabbix_agentd.d下面的配置
[root@test zapache-master]# cp userparameter_zapache.conf.sample /etc/zabbix/zabbix_agentd.d/
[root@test zabbix_agentd.d]# ll
总用量 12
-rwxrwxrwx 1 root root 26 2月 20 2017 libzbxpgsql.conf
-rwxrwxrwx 1 root root 1531 5月 9 18:03 userparameter_mysql.conf
-rw-r--r-- 1 root root 224 6月 13 22:29 userparameter_zapache.conf.sample
[root@test zabbix_agentd.d]# mv userparameter_zapache.conf.sample userparameter_zapache.conf
将userparameter_zapache.conf脚本路径修改为自己本地的路径,修改后的内容如下:
[root@test zabbix_agentd.d]# cat userparameter_zapache.conf
#
# This is a sample zabbix_agentd config file.
# Put it to /etc/zabbix_agentd.conf.d or otherwise integrate into agent config.
# Edit to your needs.
#
UserParameter=zapache[*],/etc/zabbix/scripts/zapache \$1 //与上面的脚本执行目录一致
[root@test zabbix_agentd.d]# chmod 755 userparameter_zapache.conf //设置权限
[root@test zabbix_agentd.d]# systemctl restart zabbix-agent //重启agent服务
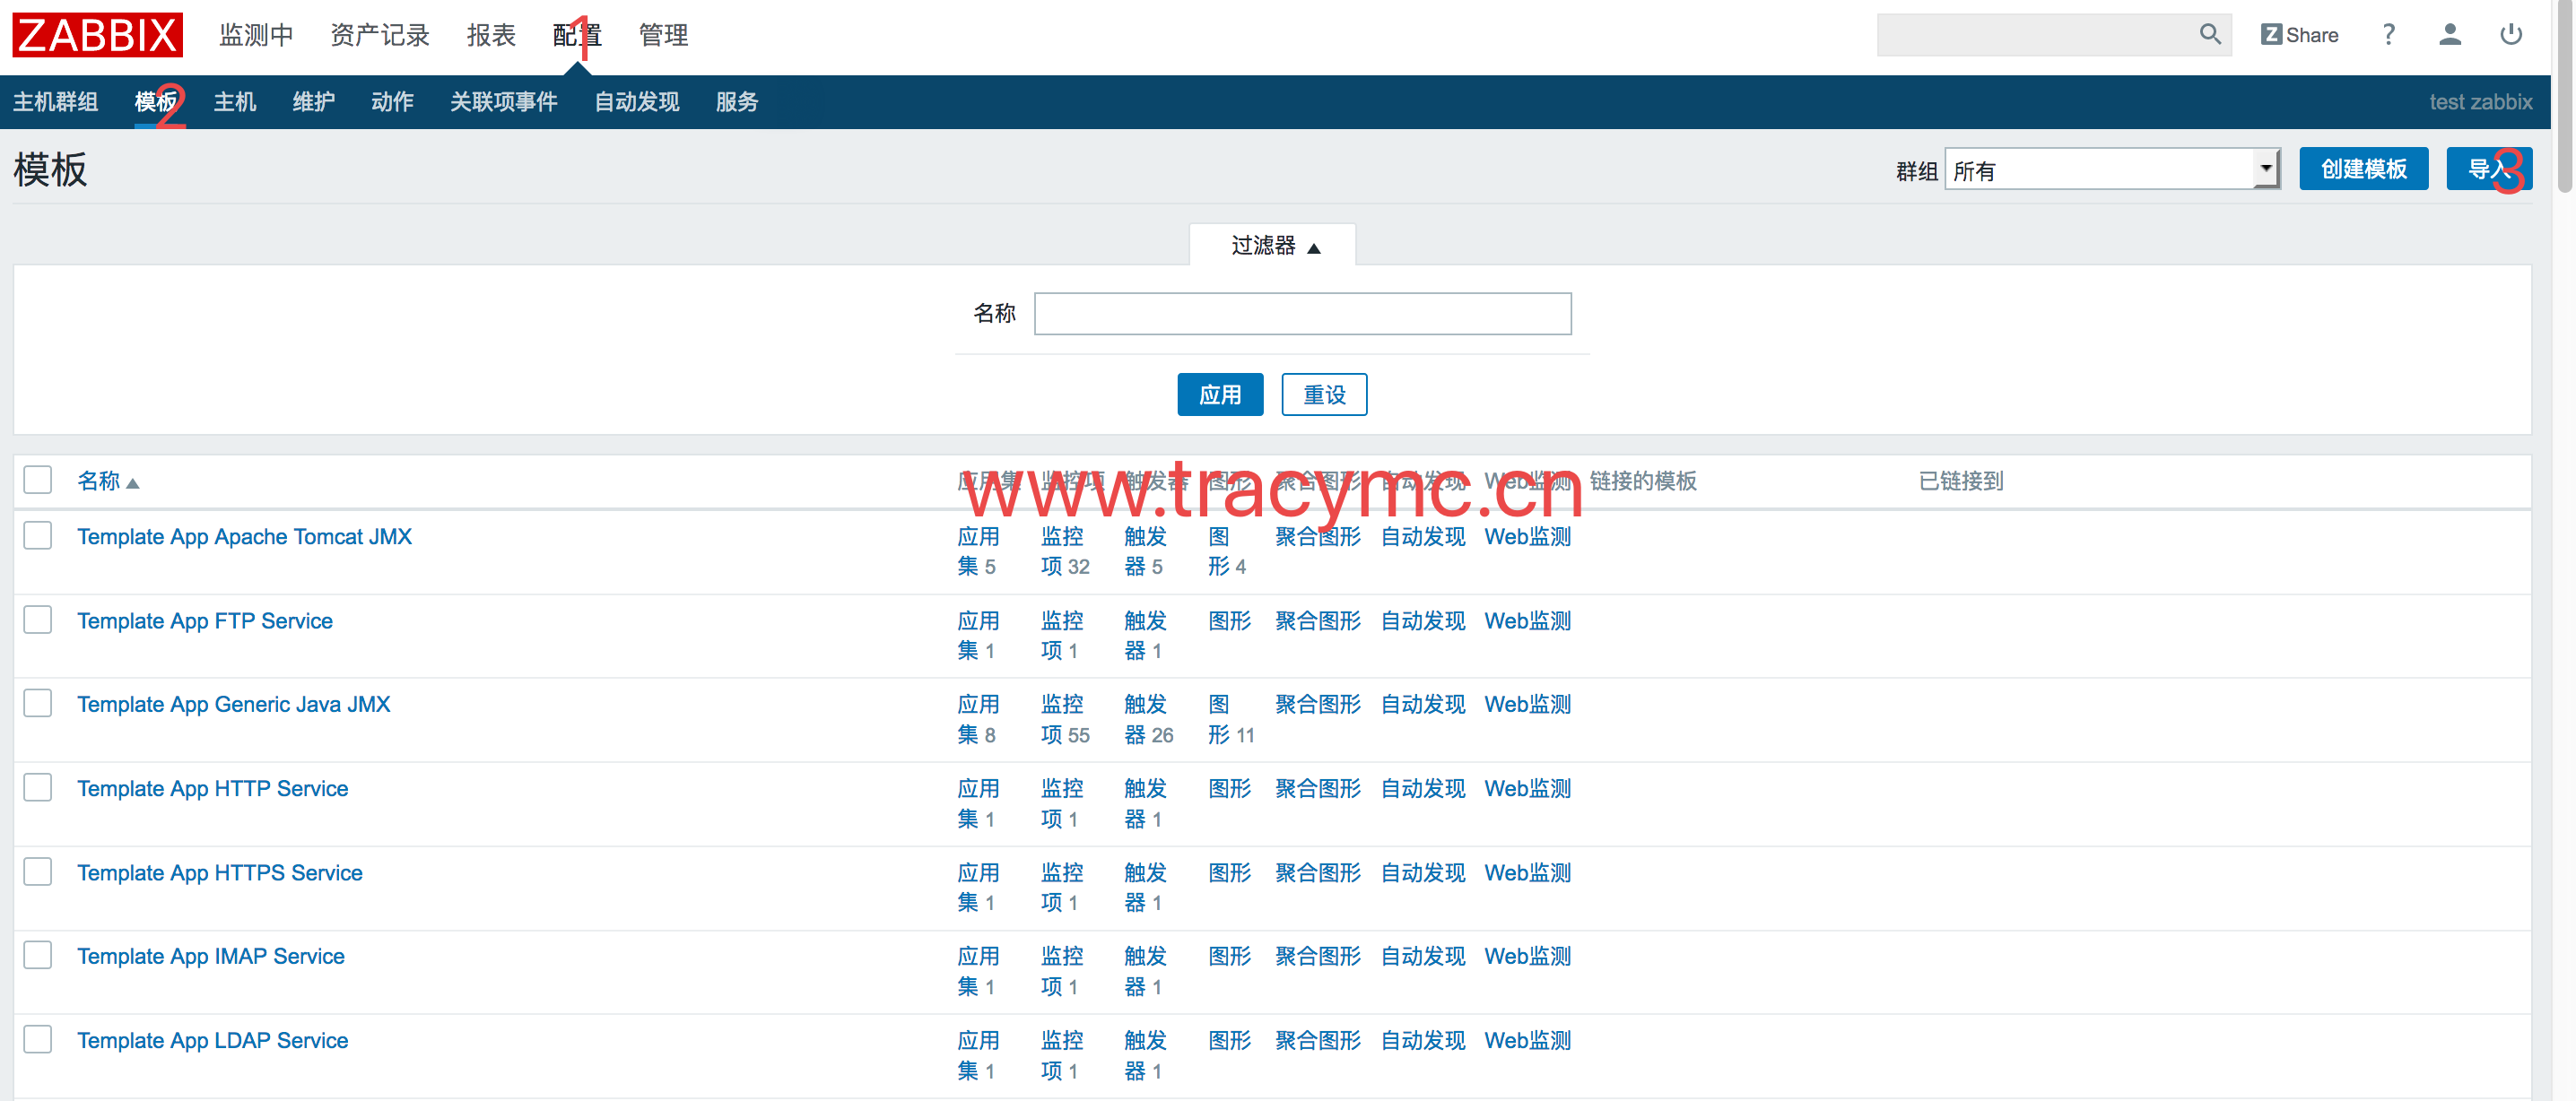
3.导入模板
先将模板存到本地,再导入到zabbix-server中.
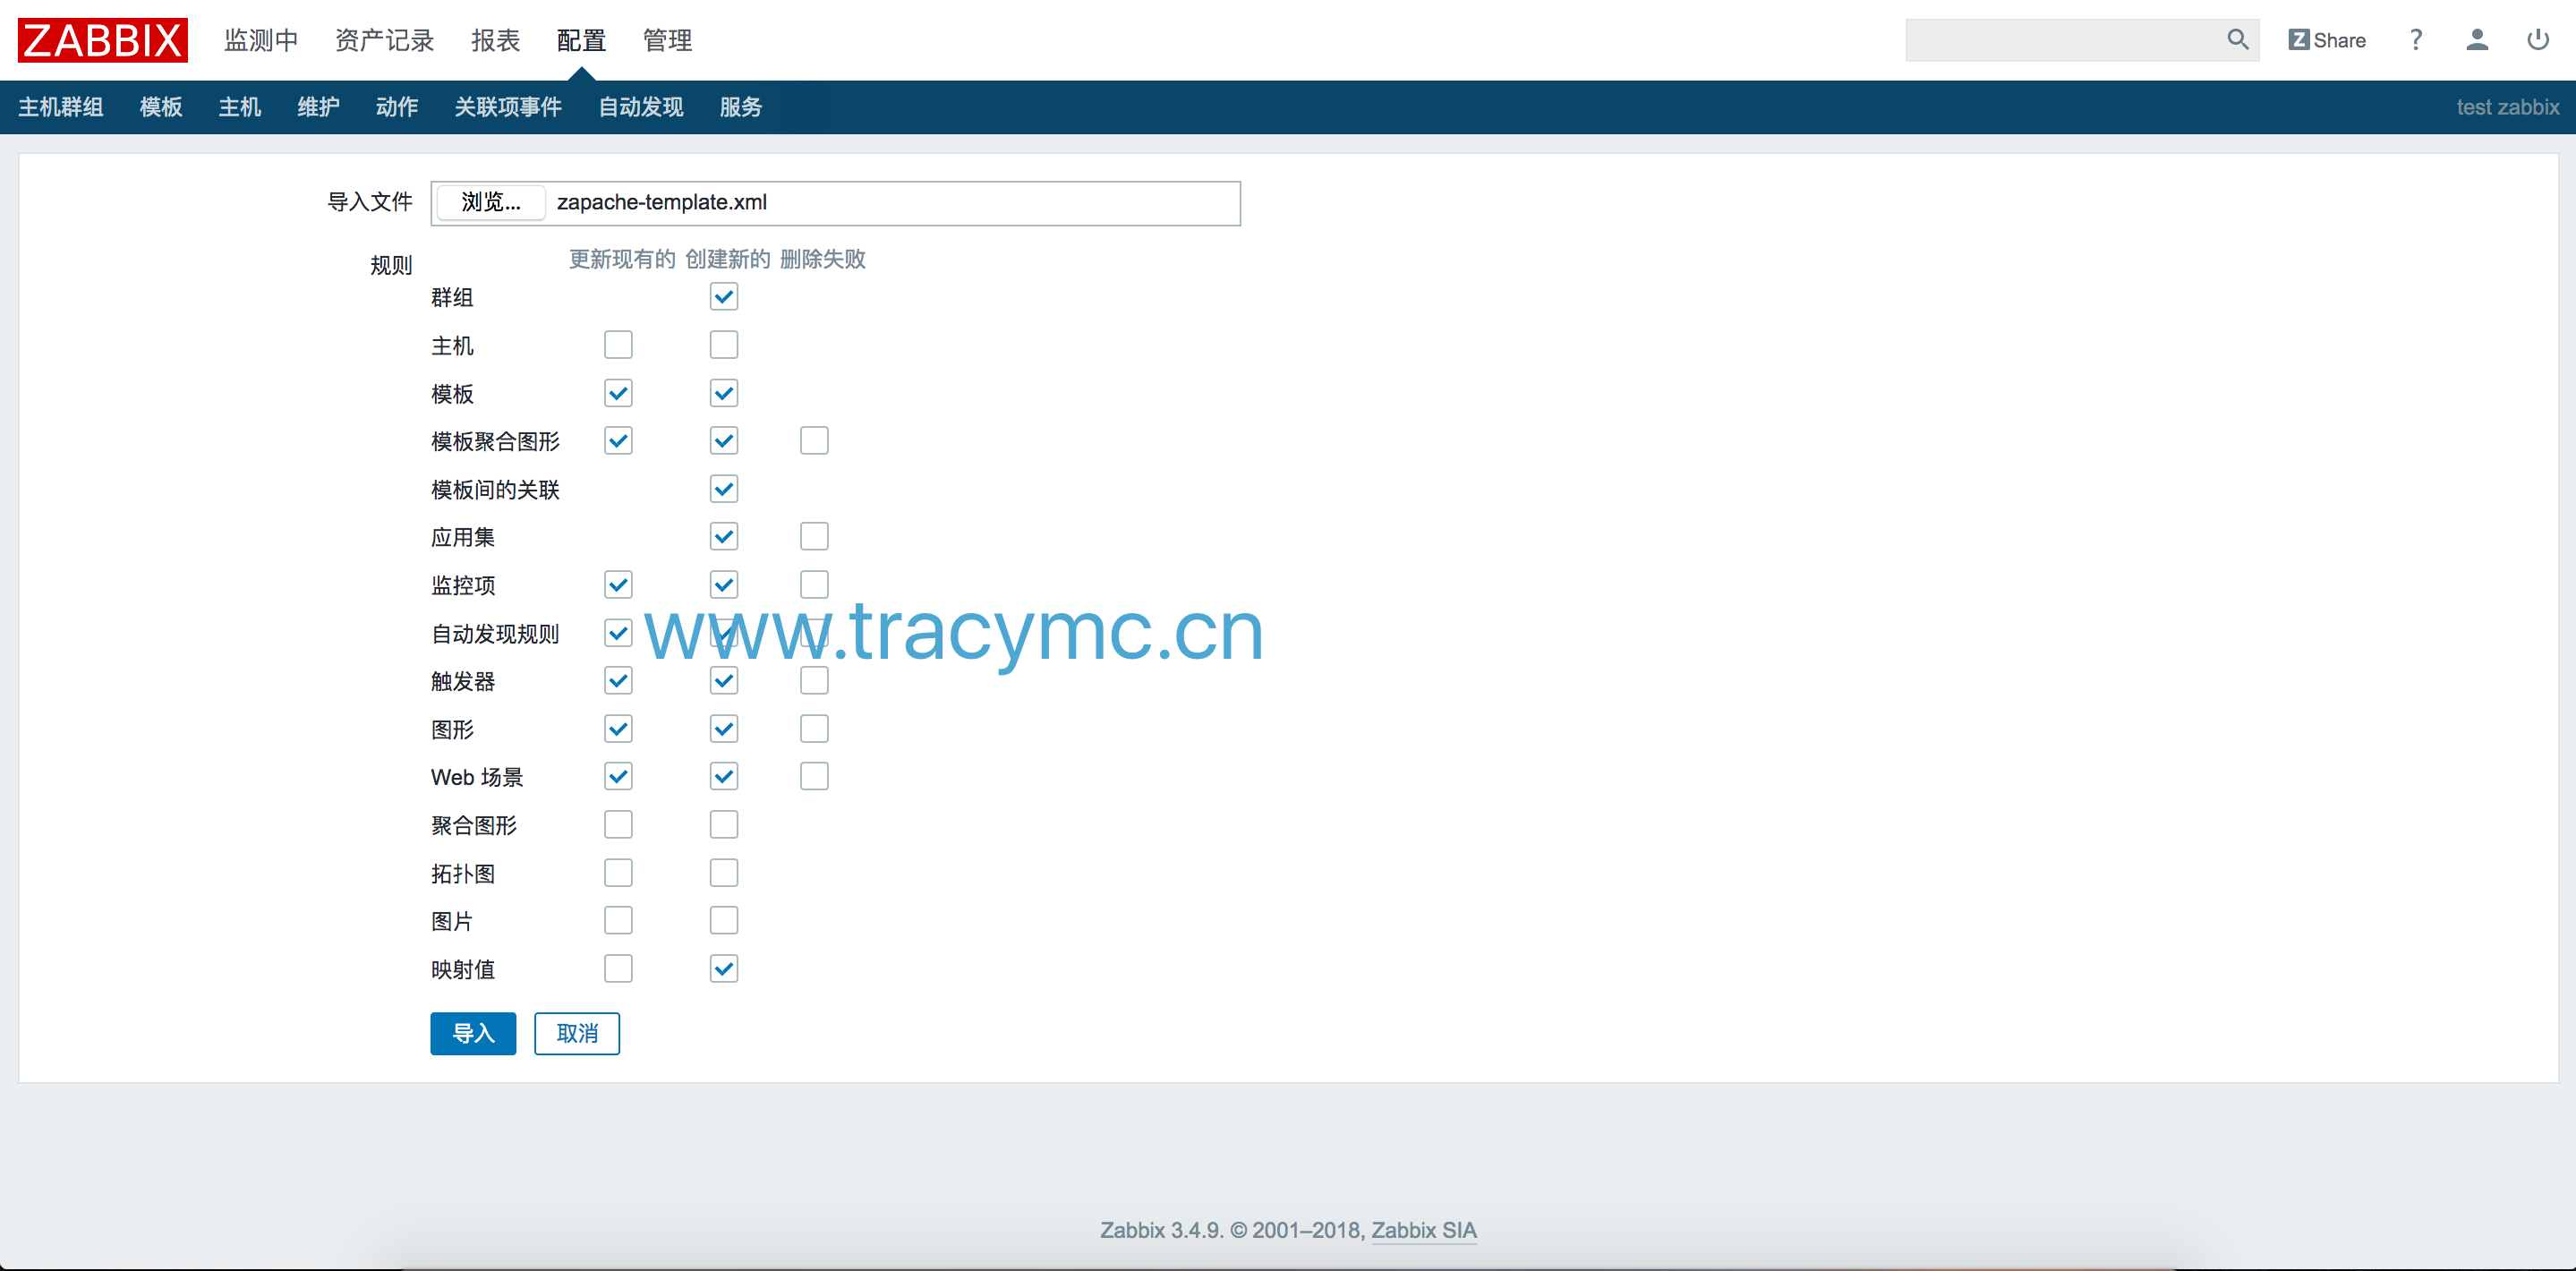
导入下载模板,如下:
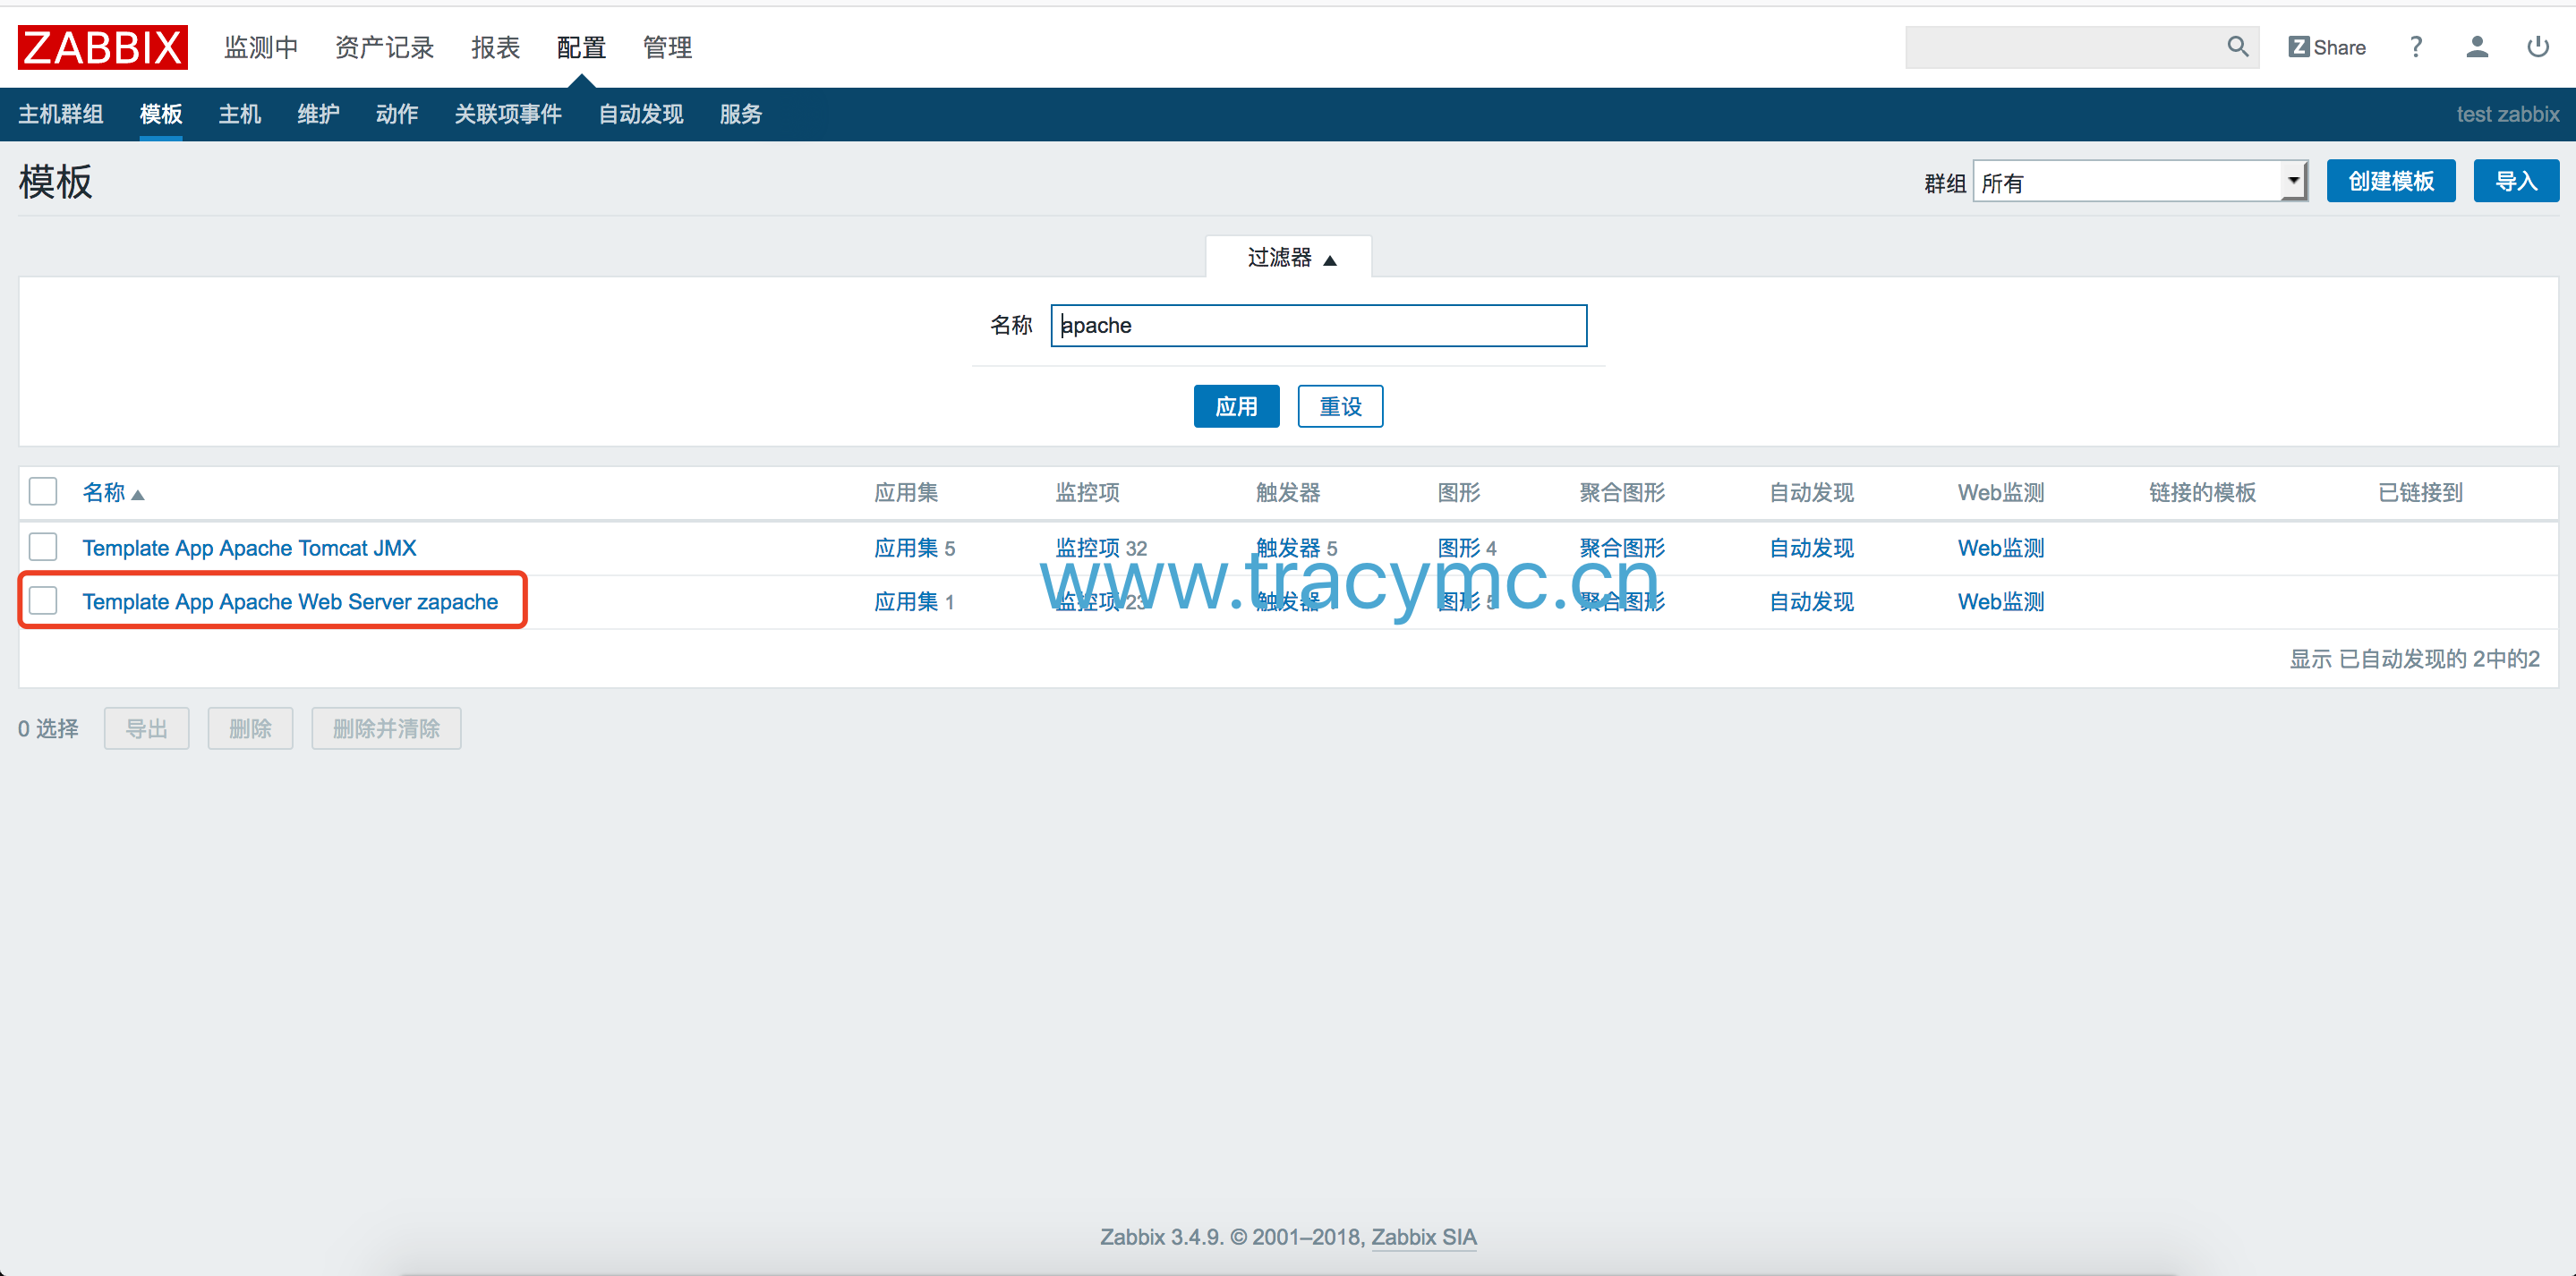
 导入成功后可以在配置-模板查看已导入的模板,如下:
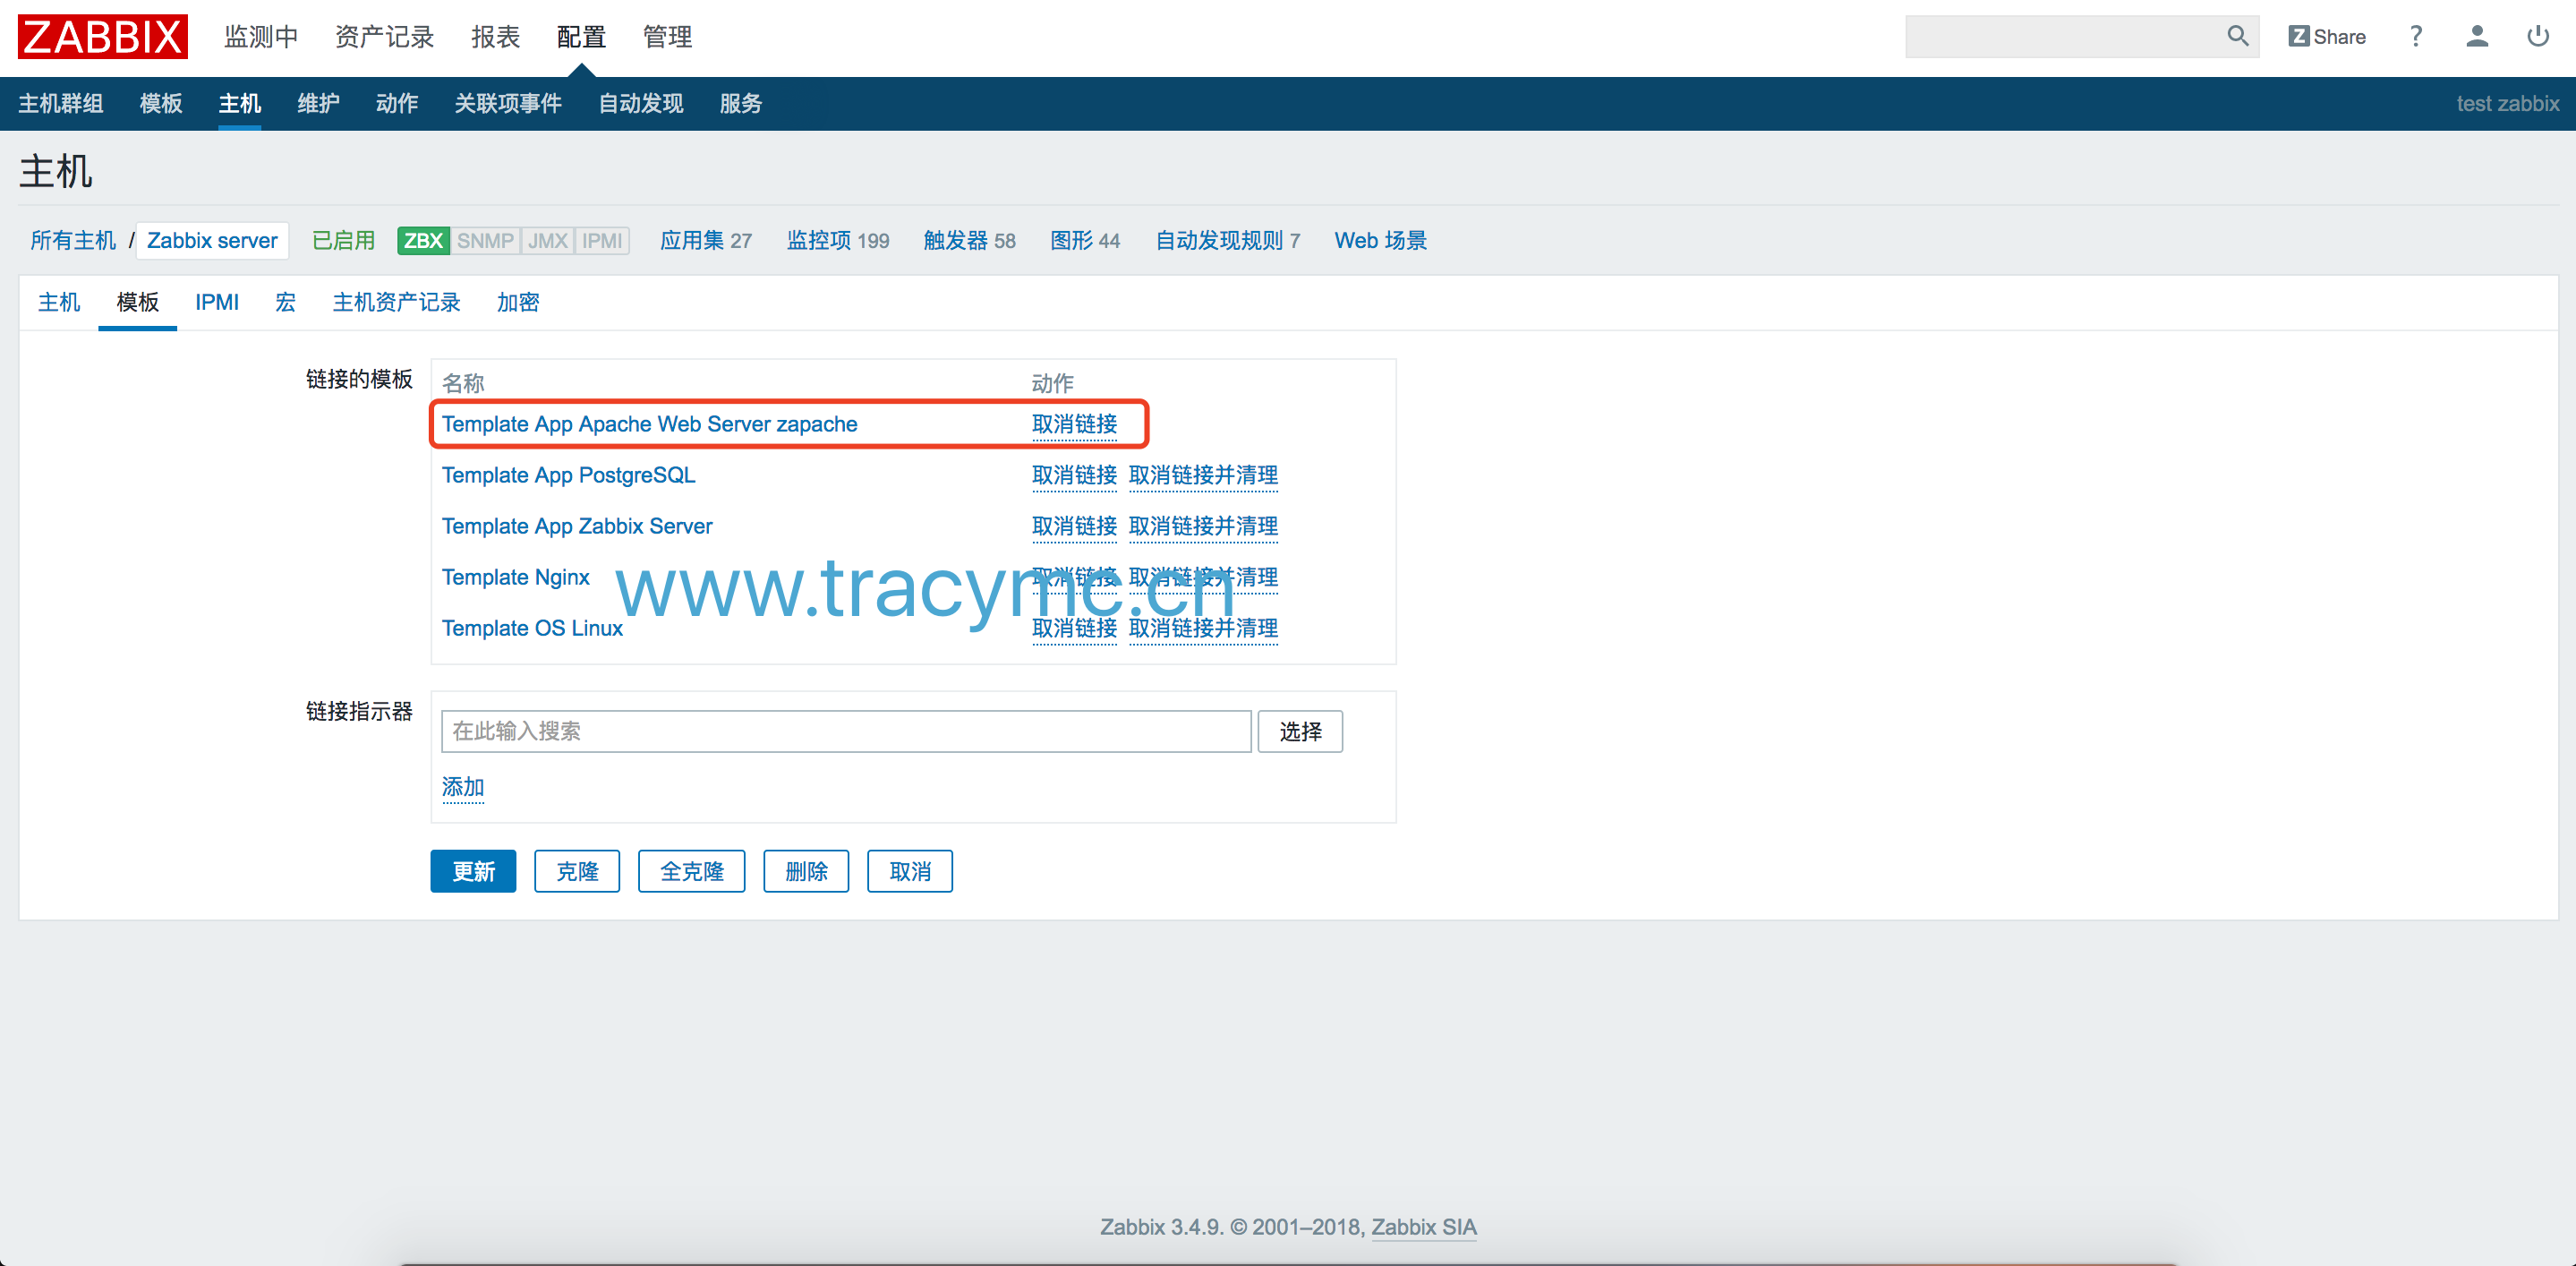
4.关联模板
添加模板:
配置-主机点击相关主机进去配置模板,如下:
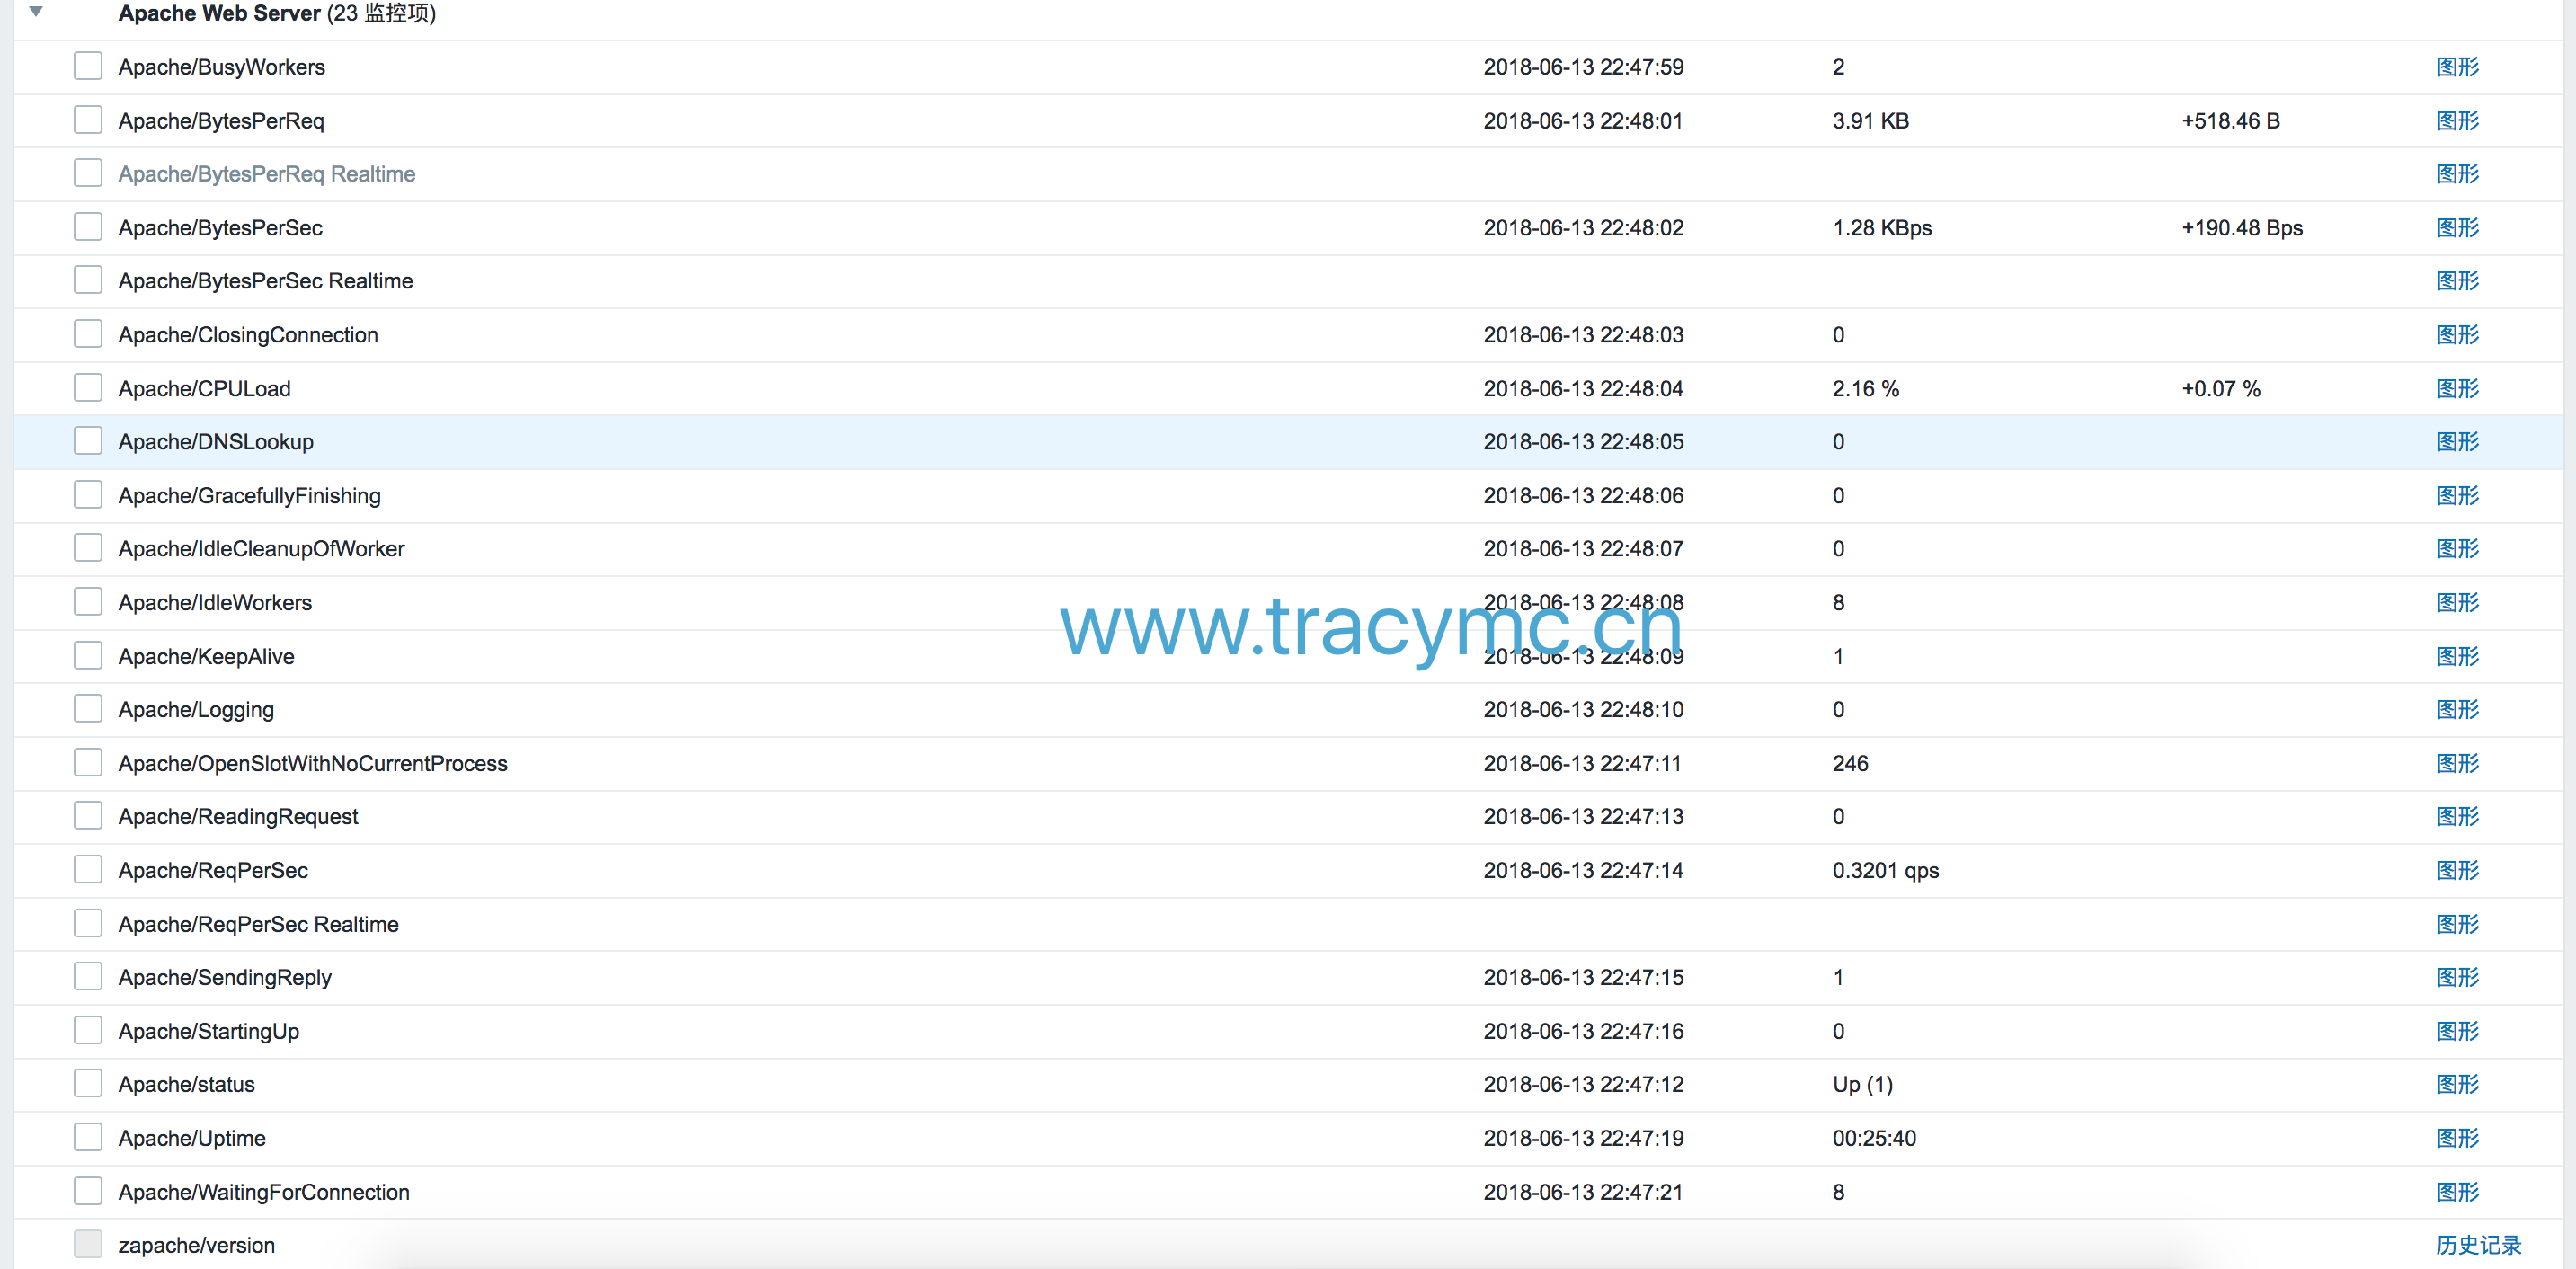
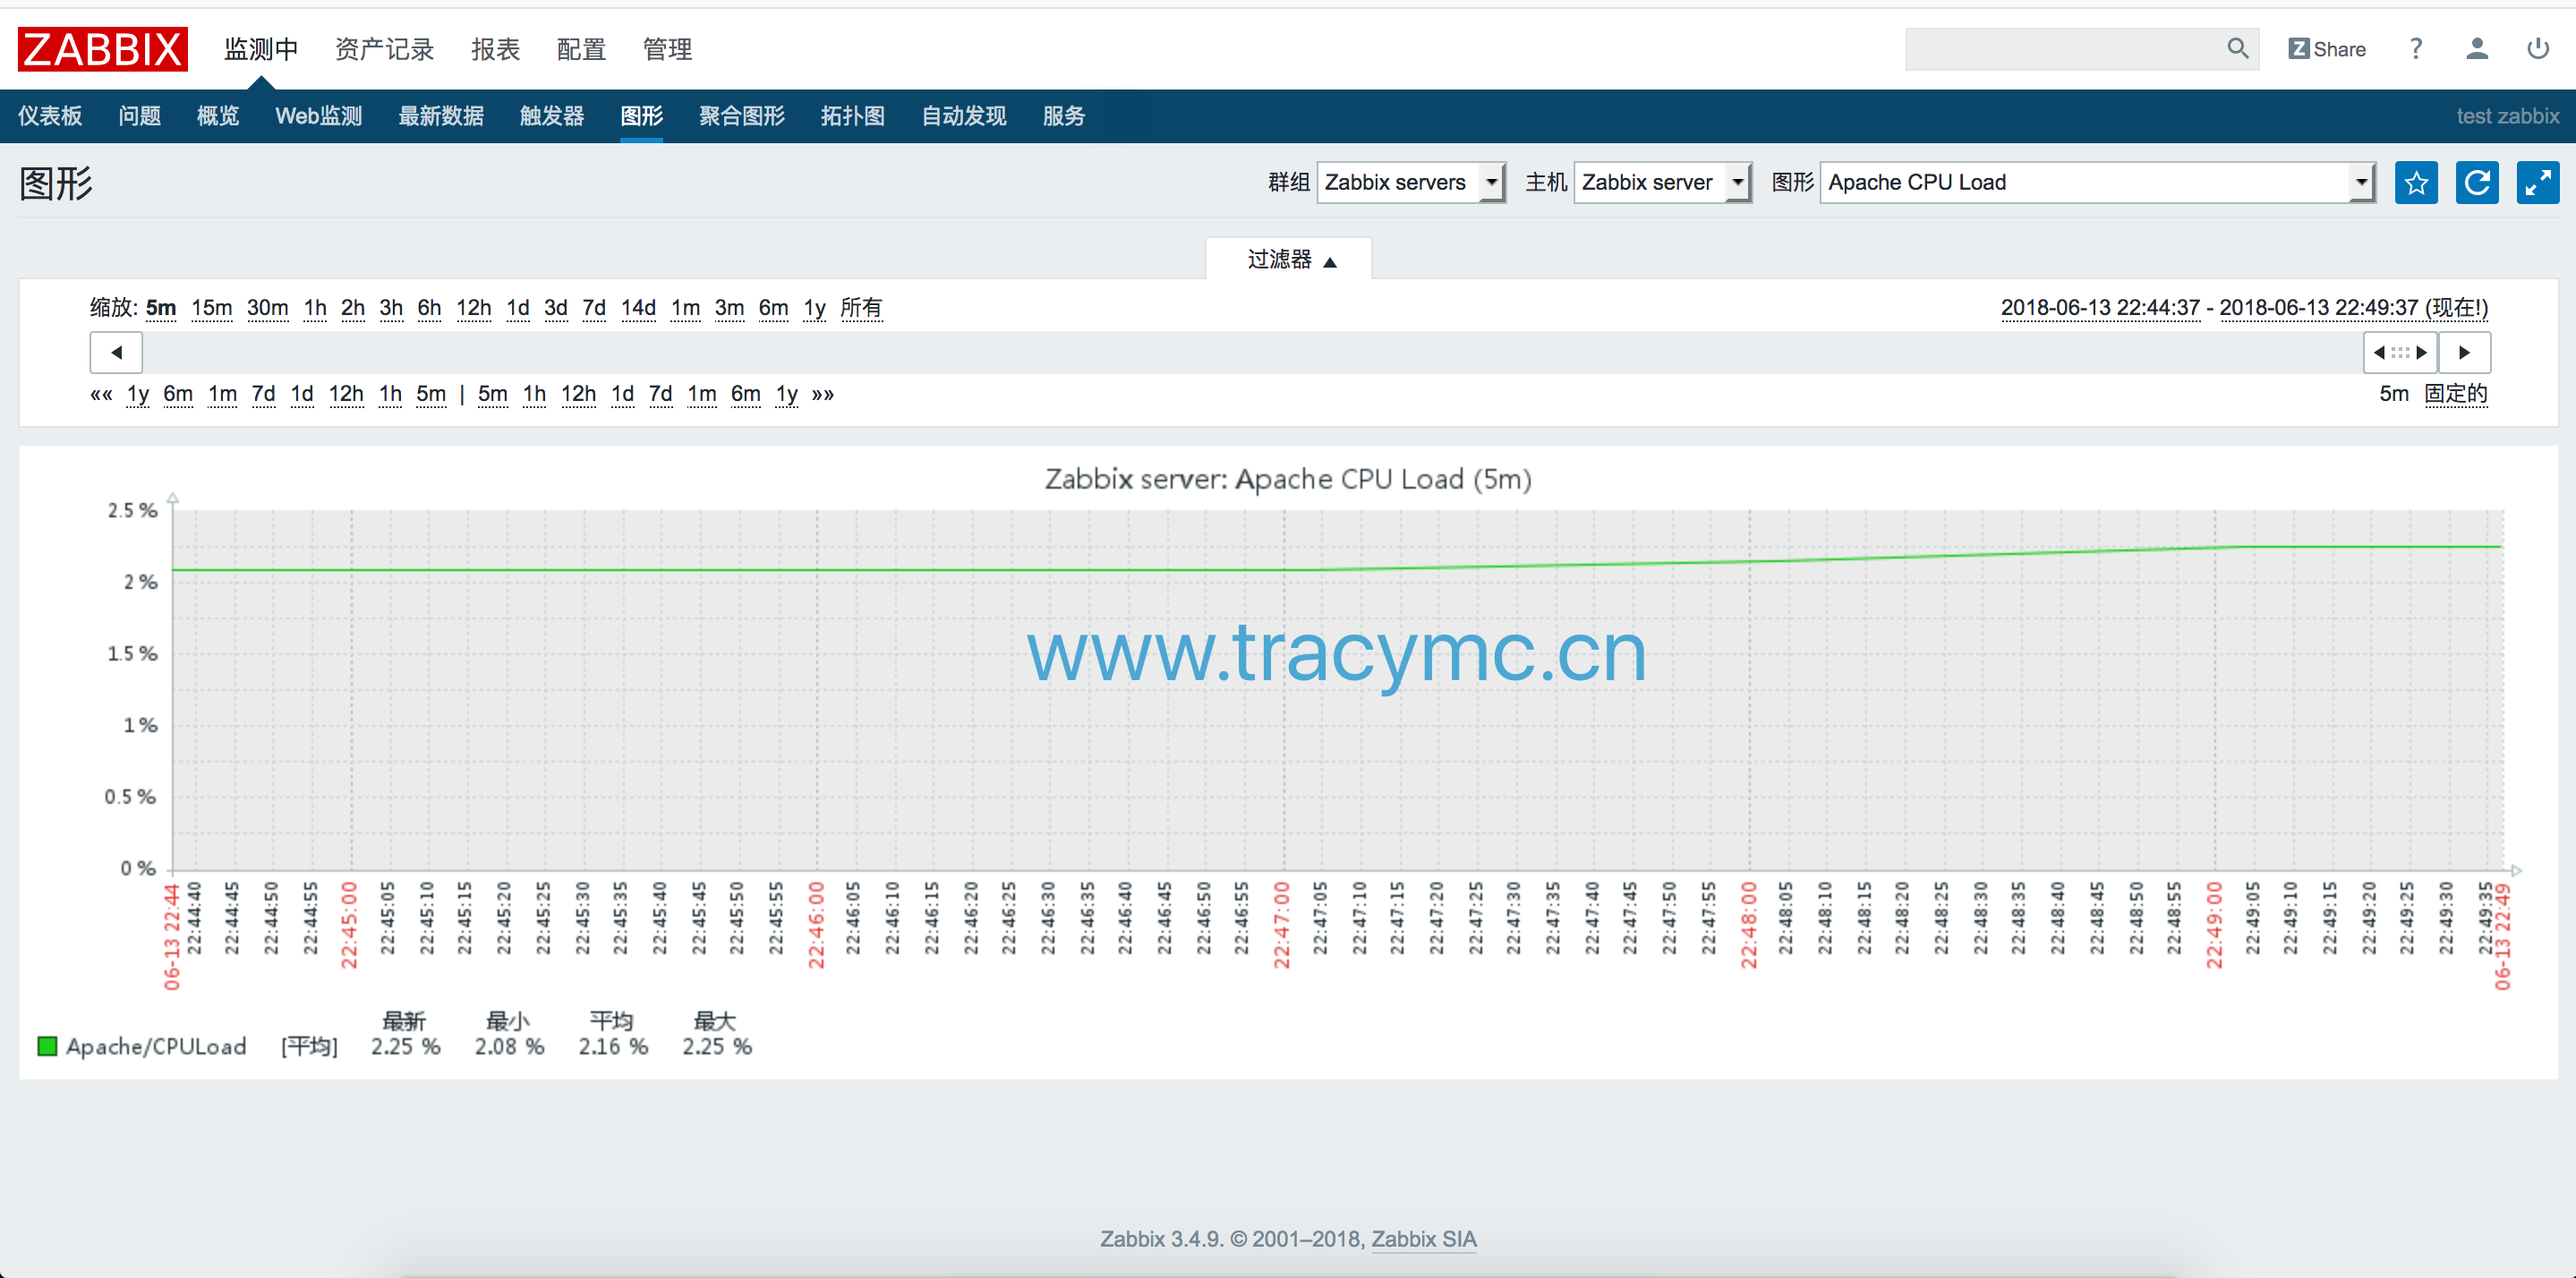
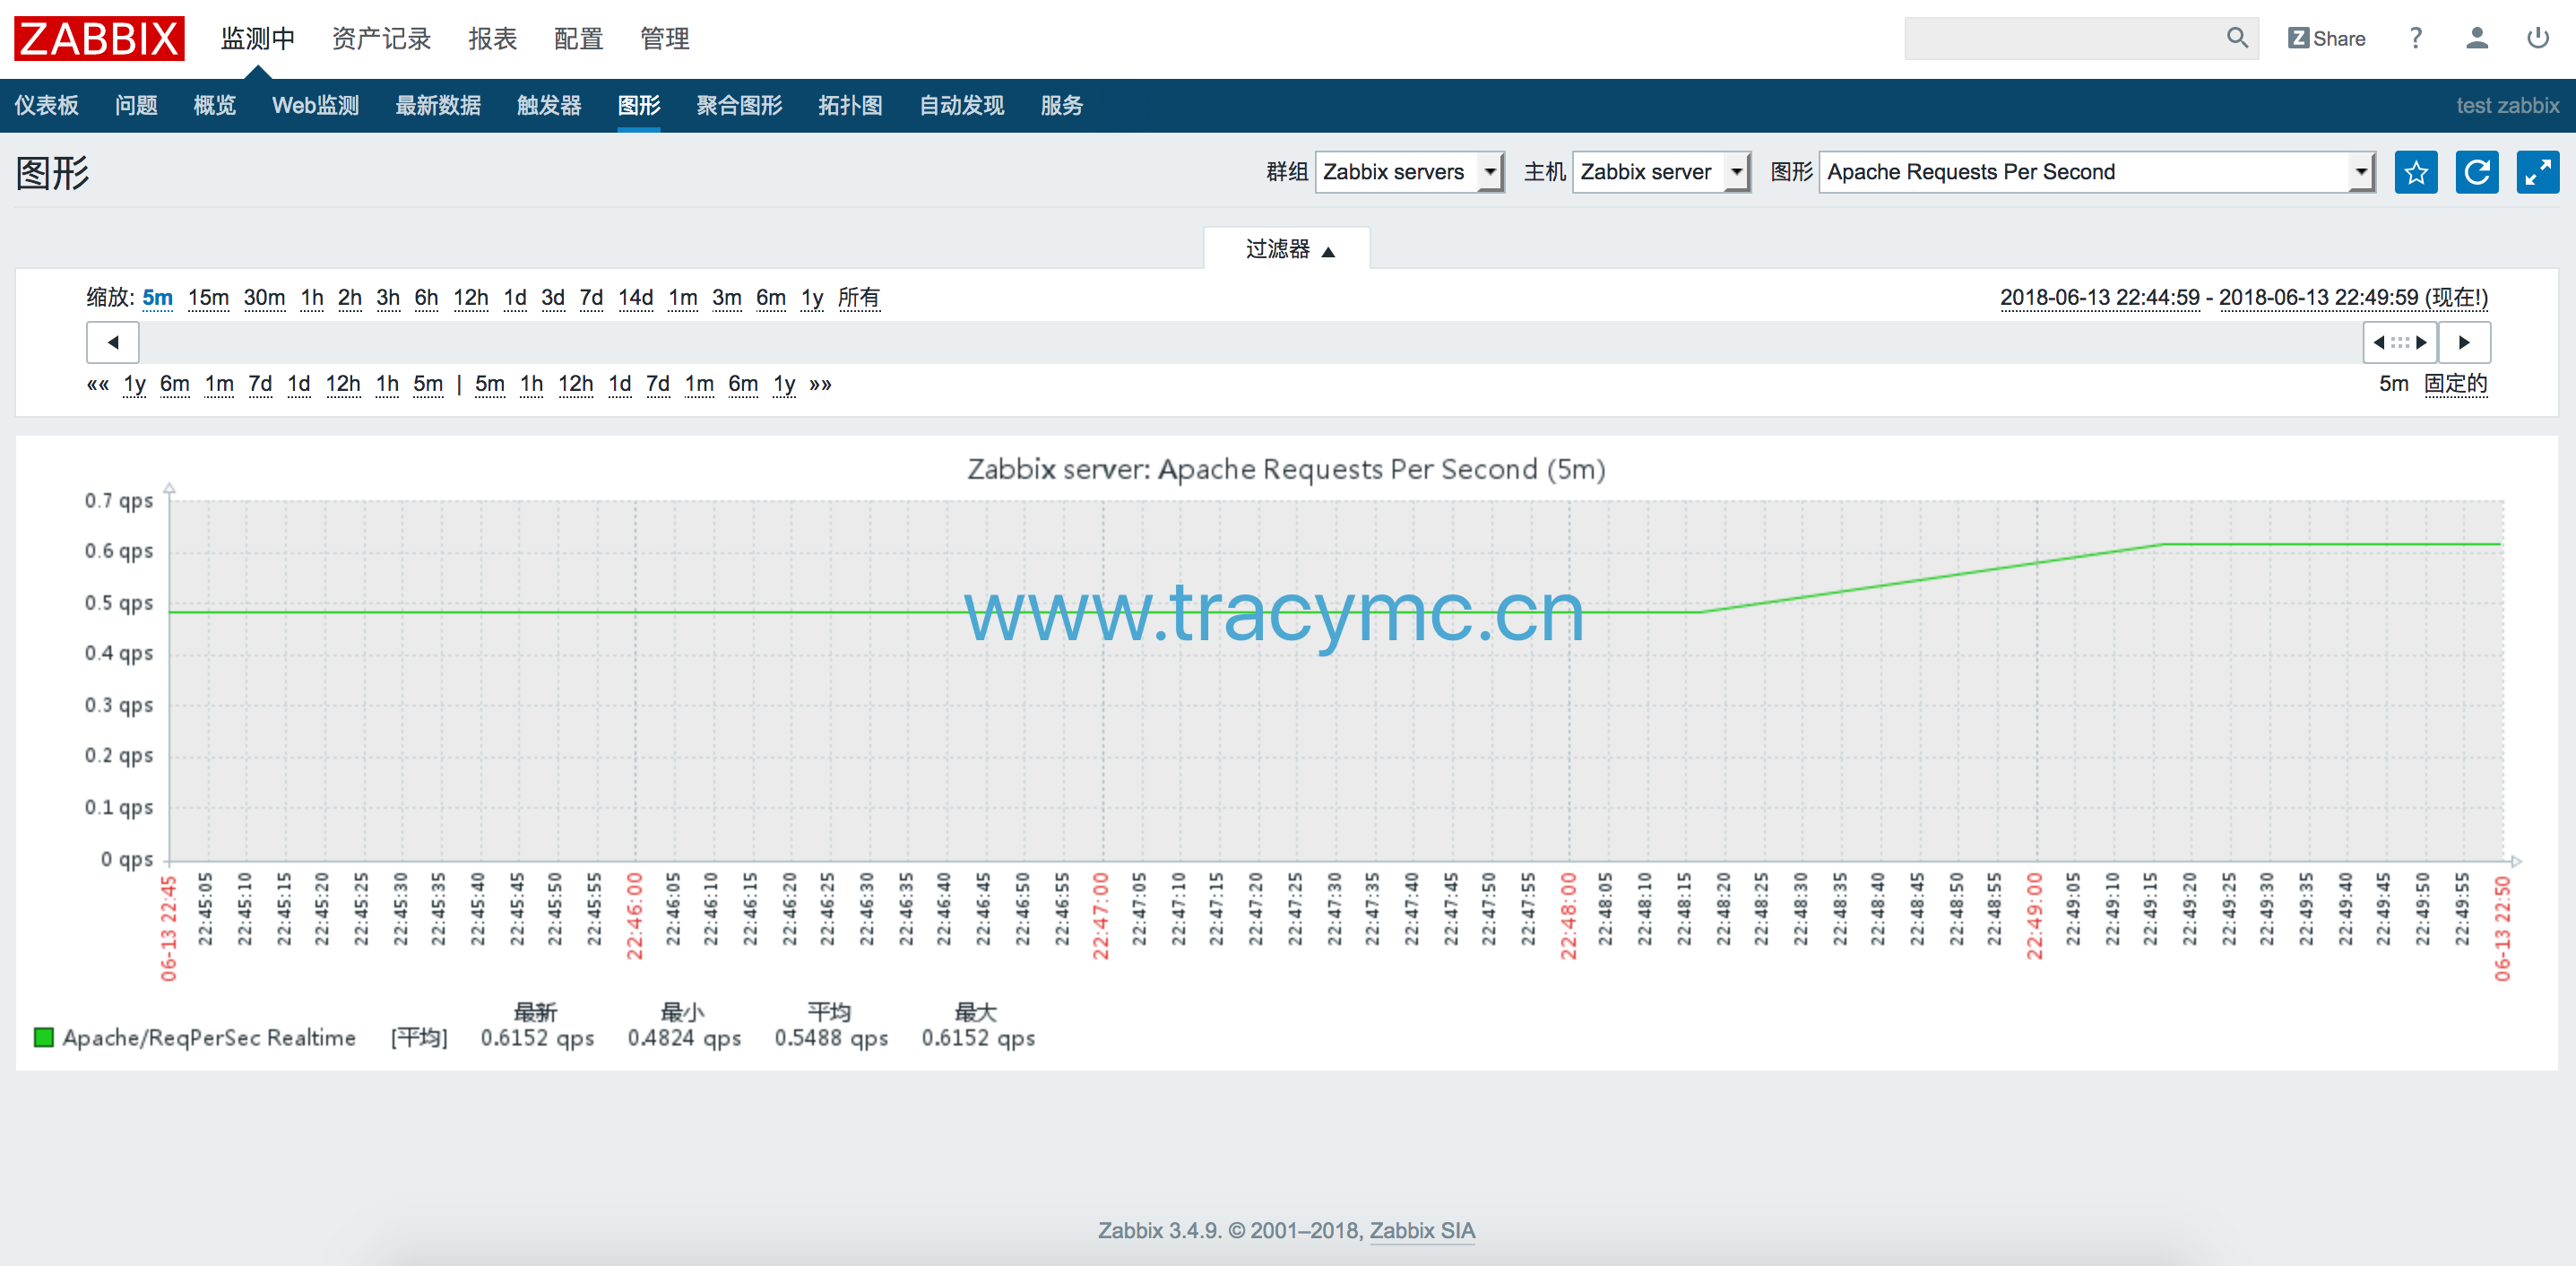
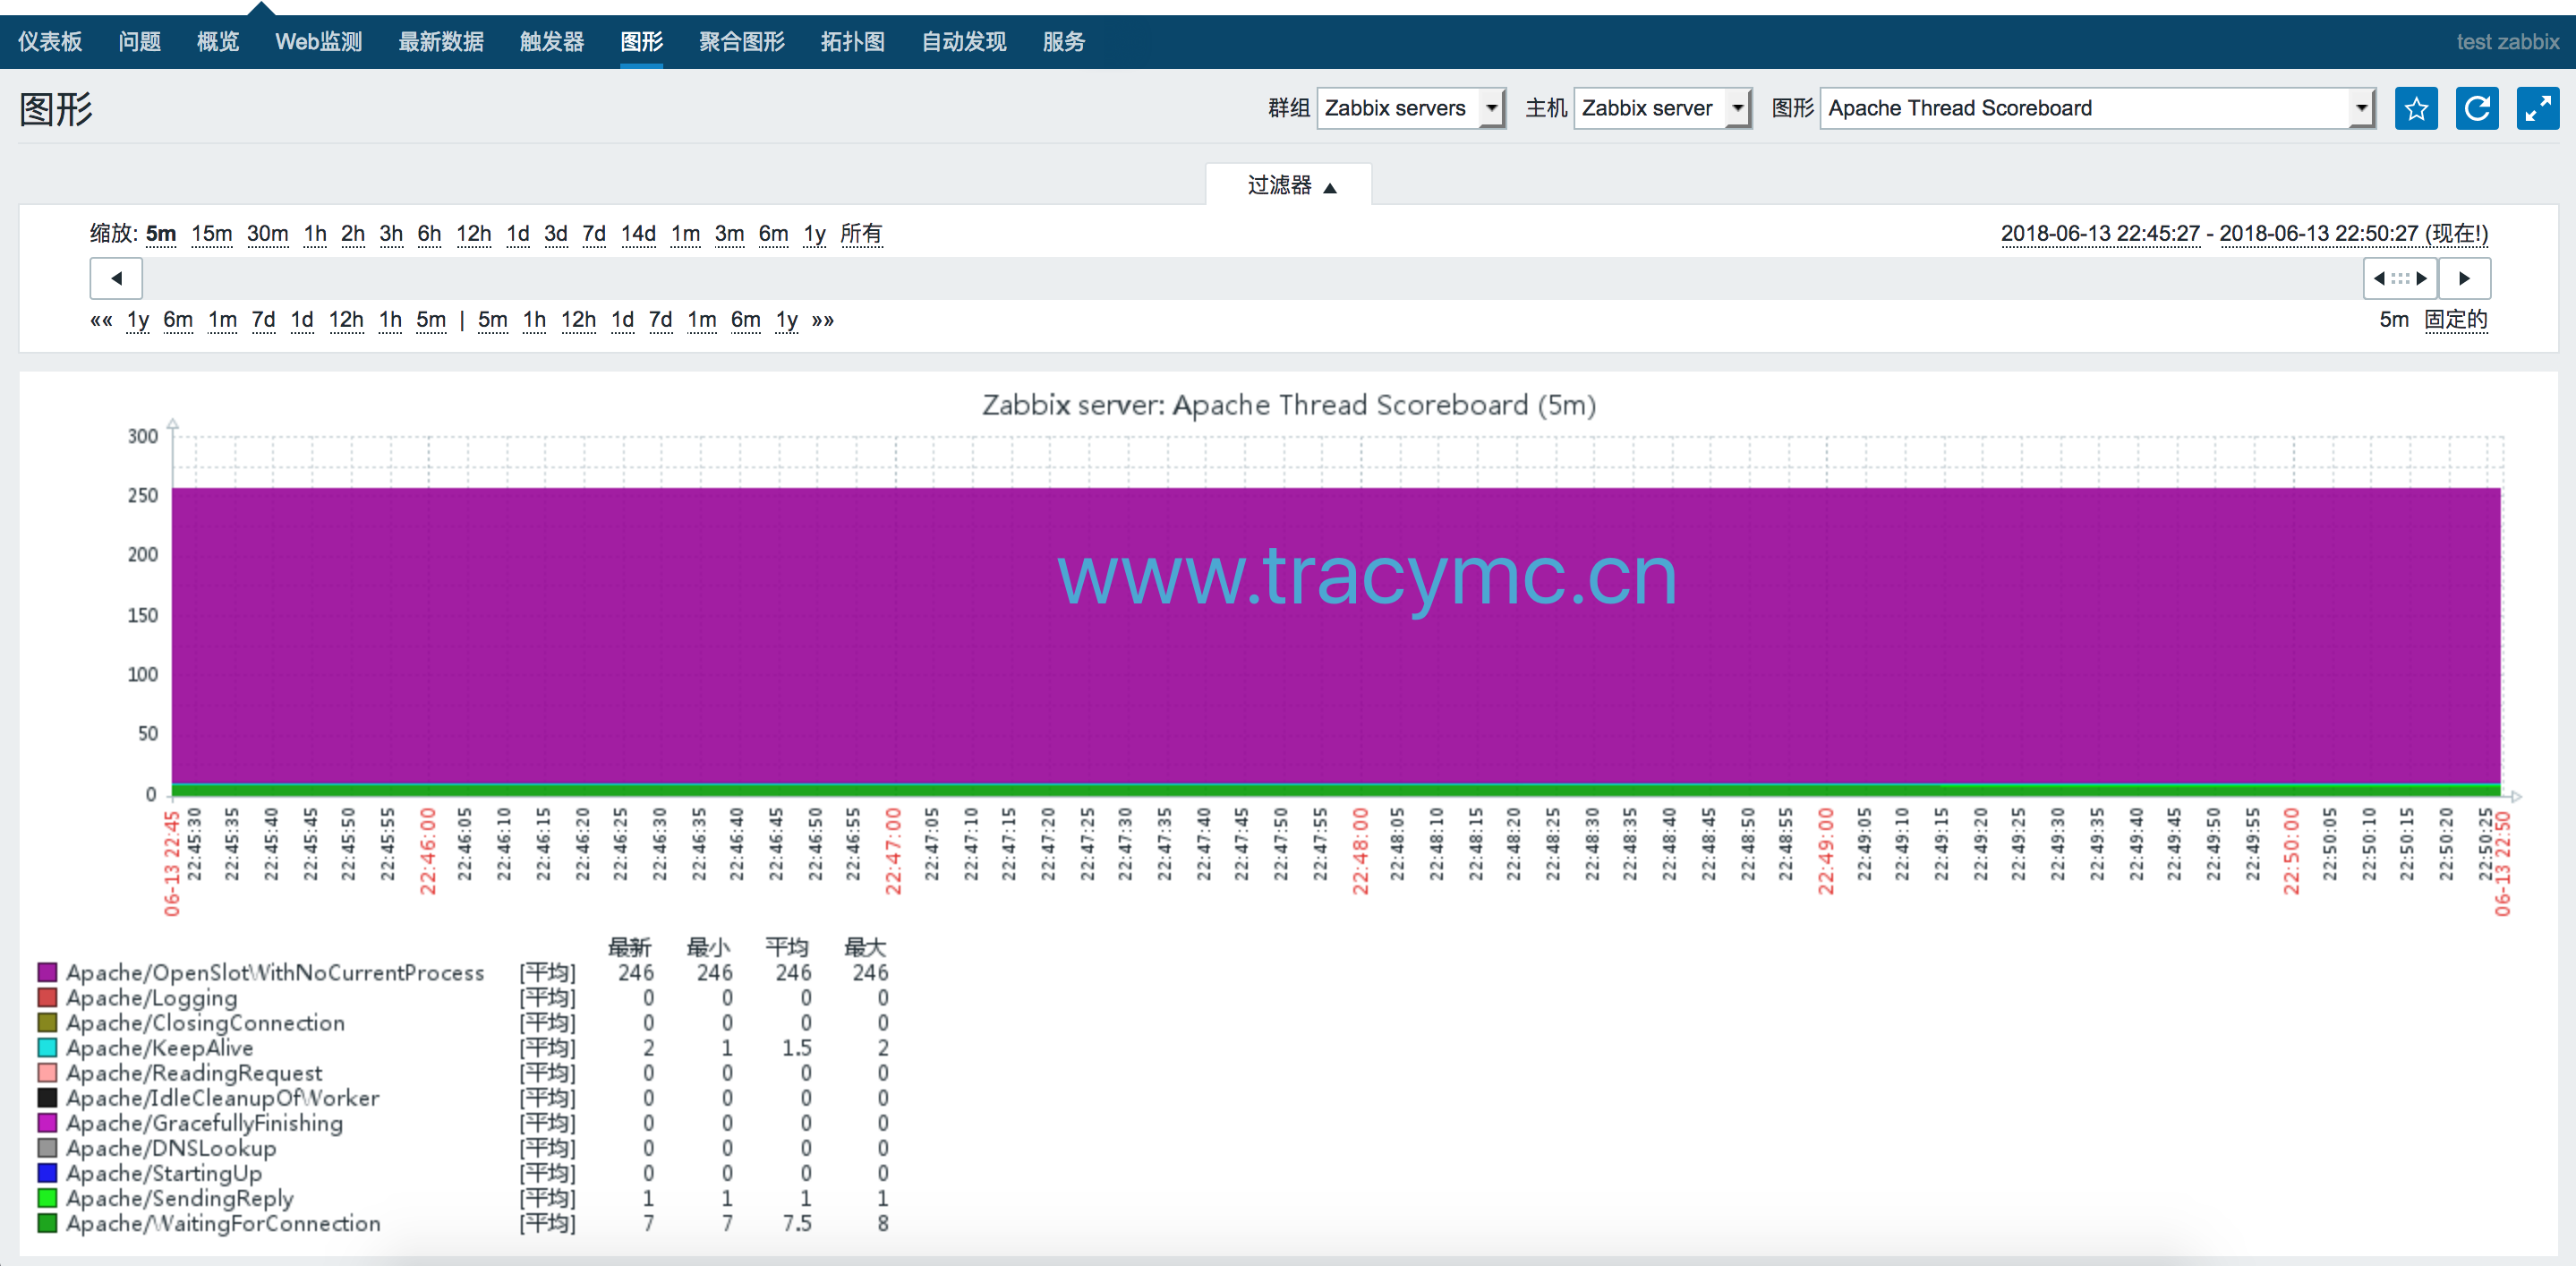
5.zabbix web验证是否有数据
关联模板后,稍等一会,查看web页面是否有数据.
部分截图如下:


 418
418


 被折叠的 条评论
为什么被折叠?
被折叠的 条评论
为什么被折叠?
 到【灌水乐园】发言


