


团队开发中,文档尤为重要。文档的存大,大幅的降低了团队间的无效沟通时间,使得每位成员即可以按自己的计划开始工作,又可以快速的获取到其它队员的支持。
优秀的程序员从善于读文档开始,优秀的工程师从善于写文档开始。
在前后台的开发中,接口是使前后台进行关联的关键一环,接口是否合理,清晰直接影响到团队开发的效率和团队间配置的心情(程序员往往都是自恋的坏脾气)。而是否能够提供随时更新的阅读性强的文档,则是前后台开发中的重要一环。
本文由0开始,记录一次在实际项目中使用Spring REST Docs + travis + github自动生成API接口的实际操作过程。
本文环境:
java:1.8 + maven:3.3 + spring-boot:2.0.3
读文档
我们一直坚信,官方的原文文档肯定是最好的。第一步,我们来到了spring rest docs的官方文档,并参考其做以下操作:
加入依赖
找到pom.xml加入以下依赖。IDEA会自动为我们导入依赖的包,其它的IDE,可能需要手动导入。
org.springframework.restdocs
spring-restdocs-mockmvc
2.0.1.RELEASE
test
org.asciidoctor
asciidoctor-maven-plugin
1.5.3
generate-docs
prepare-package
process-asciidoc
html
book
org.springframework.restdocs
spring-restdocs-asciidoctor
2.0.1.RELEASE
注意: dependency需要加入到dependencies中。如果你的pom.xml有了build-> plugins,则只需要复制plugin的部分到plugins 中。
以下代码的作用如下:
Add a dependency on spring-restdocs-mockmvc in the test scope.
Add the Asciidoctor plugin.
Using prepare-package allows the documentation to be included in the package.
4.Add spring-restdocs-asciidoctor as a dependency of the Asciidoctor plugin. This will automatically configure the snippets attribute for use in your .adoc files to point to target/generated-snippets. It will also allow you to use the operation block macro.
胡乱翻译如下:
为测试域(只在测试时使用)添加了一个依赖。
添加了一个插件。
为了插件正常工作,设置了一个属性。
为Asciidoctor添加了spring-restdocs-asciidoctor依赖。作用也是让我们正常使用这个插件。
可能会遇到的小坑:
粘贴上述代码时,位置错了。此时,需要按前面给的注意检查,是否出现了嵌套错误。
提示spring-restdocs-asciidoctor:2.0.1.RELEASE未找到,这是由于我们本机的maven库的索引太旧引起来。查看官网我们得知,这个包的引入时间是Apr 4, 2018。此时,需要我们重新下载maven的目录。即update maven indices
在进行测试时生成相应的文档
我们在测试控制器时,会使用MockMVC来进行模拟数据的发送,这个模拟数据正好成为了我们需要展现在API接口部分的样例。
这样做的好处很明显:
如果逻辑发生变化,我们必然需要在C层中进行重新测试。重新测试时,就自动对文档进行了更新。
我们不需要再去维护另一份单独的API文档了(比如在WORD中)。
自动生成的文档,格式非常的规范,从而避免了人为维护文档出现的格式不统一、不规范、忘掉或是故意漏掉一些元素的情况。
配置测试
比如,我现在有个测试的控制器是: DanWeiControllerTest(历史原因,请忽略命名)。为了可以统一地对所有的控制器测试进行自动文档的设置,我们在这再新建一个抽像类ControllerTest,并使用DanWeiControllerTest来继续ControllerTest。
ControllerTest
package com.mengyunzhi.check_apply_online.controller;
import org.junit.Before;
import org.junit.Rule;
import org.junit.runner.RunWith;
import org.springframework.beans.factory.annotation.Autowired;
import org.springframework.boot.test.autoconfigure.web.servlet.AutoConfigureMockMvc;
import org.springframework.boot.test.context.SpringBootTest;
import org.springframework.restdocs.JUnitRestDocumentation;
import org.springframework.restdocs.mockmvc.MockMvcRestDocumentation;
import org.springframework.restdocs.mockmvc.MockMvcRestDocumentationConfigurer;
import org.springframework.test.context.junit4.SpringRunner;
import org.springframework.test.web.servlet.MockMvc;
import org.springframework.test.web.servlet.MockMvcBuilder;
import org.springframework.test.web.servlet.setup.MockMvcBuilders;
import org.springframework.web.context.WebApplicationContext;
import javax.transaction.Transactional;
/**
* 单元测试基类
* @author panjie
* www.mengyunzhi.com 河北工业大学梦云智开发团队
*/
@SpringBootTest
@RunWith(SpringRunner.class)
@Transactional
@AutoConfigureMockMvc
public abstract class ControllerTest {
protected MockMvc mockMvc;
@Autowired
protected WebApplicationContext context;
@Rule
public JUnitRestDocumentation restDocumentation = new JUnitRestDocumentation();
@Before
public void setUp() {
this.mockMvc = MockMvcBuilders.webAppContextSetup(this.context)
.apply(MockMvcRestDocumentation.documentationConfiguration(this.restDocumentation))
.build();
}
}
DanWeiControllerTest进行继承(未加入自动文档)
package com.mengyunzhi.check_apply_online.controller;
import org.junit.Test;
import org.springframework.http.MediaType;
import org.springframework.test.web.servlet.request.MockMvcRequestBuilders;
import org.springframework.test.web.servlet.result.MockMvcResultMatchers;
/**
* 单位
* @author panjie
* www.mengyunzhi.com 河北工业大学梦云智开发团队
*/
public class DanWeiControllerTest extends ControllerTest{
@Test
public void registerTest() throws Exception {
String url = "/DanWei/register";
this.mockMvc.perform(MockMvcRequestBuilders
.post(url)
.contentType(MediaType.APPLICATION_JSON_UTF8)
.content("{}"))
.andExpect(MockMvcResultMatchers.status().isOk());
}
}
自动生成文档
加入自动生成文档代码后:
package com.mengyunzhi.check_apply_online.controller;
import org.junit.Test;
import org.springframework.http.MediaType;
import org.springframework.restdocs.mockmvc.MockMvcRestDocumentation;
import org.springframework.test.web.servlet.request.MockMvcRequestBuilders;
import org.springframework.test.web.servlet.result.MockMvcResultMatchers;
/**
* 单位测试
* @author panjie
* www.mengyunzhi.com 河北工业大学梦云智开发团队
*/
public class DanWeiControllerTest extends ControllerTest{
@Test
public void registerTest() throws Exception {
String url = "/DanWei/register";
this.mockMvc.perform(MockMvcRequestBuilders
.post(url)
.contentType(MediaType.APPLICATION_JSON_UTF8)
.content("{}"))
.andExpect(MockMvcResultMatchers.status().isOk())
.andDo(MockMvcRestDocumentation.document("DanWei_register"));
}
}
此时,我们执行本单元测试时,将在target/generated-snippets中生成如下6个以.adoc结尾的文件:
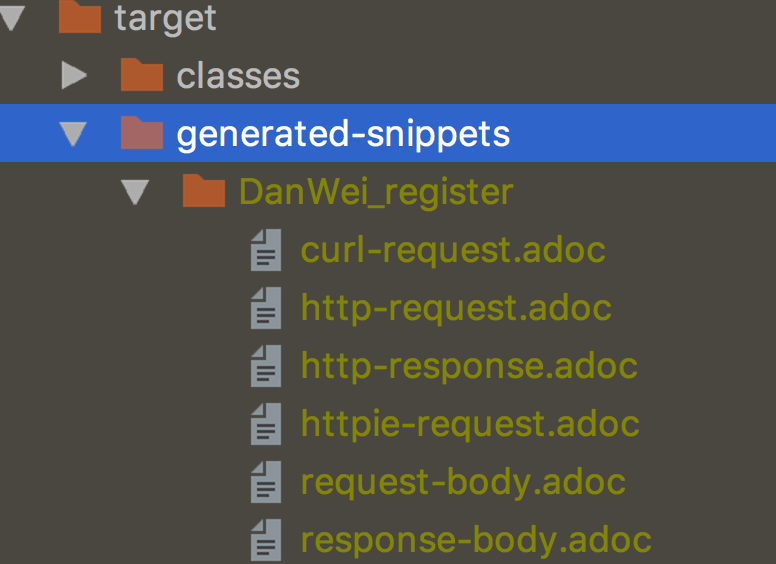
这6个文件中,记录了不同请求方法的请求/返回信息。
拼接文件
我们的单元测试请求越多,生成这样的文件夹也就越多,下面,我们共同将这些文件进行格式化,并拼接到一个html文件中。
在src/main/asciidoc/创建一个任意名称的.adoc文件,比如,我们index.adoc。然后,使用.adoc的include语法,将上图中生成的几个测试代码片段包含进来。
src/main/asciidoc/index.adoc
include::{snippets}/DanWei_register/http-request.adoc[]
include::{snippets}/DanWei_register/request-body.adoc[]
include::{snippets}/DanWei_register/http-response.adoc[]
include::{snippets}/DanWei_register/response-body.adoc[]
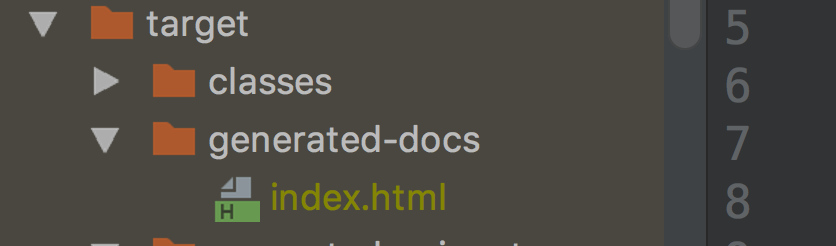
生成HTML
当我们进行package时,就会在target文件夹中生成generated-docs/index.html,点击即可查看生成的文档信息。
mvn package
查看html如下:
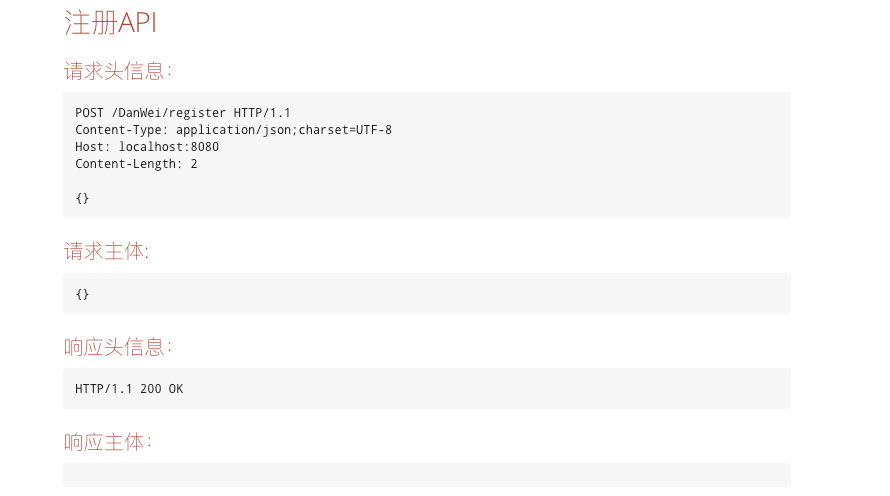
至此,我们便成功的使用spring rest docs生成了html的API接口文档。除了基本的功能以外,我们还可以对传入的字段添加说明等。具体的细节,如果有需求,可以查看Spring的官方文档。
总结
我们按照Spring的官方文档进行了相应的配置;接着在单位测试时,加入了指定生成文档的目录代码,并成功的生成测试的代码片段;然后使用AsciiDoc语法,在index.adoc文件中,对测试代码片段进行了拼接;最后,使用mvn package在进行项目打包的同时,生成了我们想的html文件。
不足
但我们仍然感觉这并不够智能化,我们在生成代码片段后,还需要手动的加入对代码版本的引入;虽然有了代码片段,但对片段中的请求json数据的解释并不轻松(要参考官方文档),最主要的是,在C层,我们进行接收时,要么是一般的参数,要么是后台的实体。我们更希望能够对参数和实体进行更改时,测试的说明也能够同时更改。
那么如何能够自动的实现代码片段的合并,并且按照参数和实体信息自动生成与后台代码高度吻合的API说明呢?
我们将在下节中,给出阐述。


 695
695


 被折叠的 条评论
为什么被折叠?
被折叠的 条评论
为什么被折叠?
 到【灌水乐园】发言


